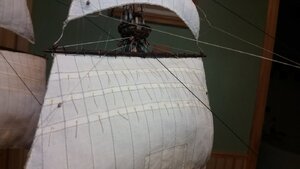
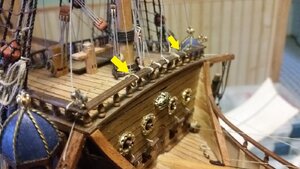
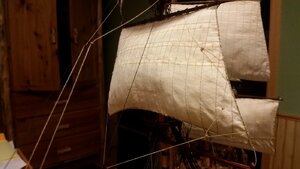
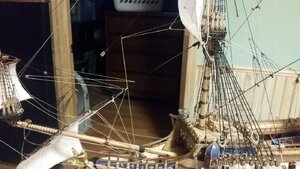
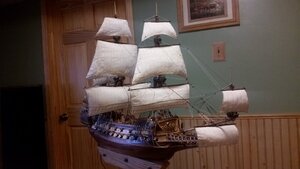
La Couronne Corel/scratch 1:100 First build [COMPLETED BUILD]

Hello everyone! I was surfing Craig's List today and found a half completed OLD Panart San Felipe for sale. I got it for $5.00 USD! Unfortunately the former owner is deceased, (that's stone dead for all you in Rio Linda, CA). I only had to drive 8 miles to pick up the model Lucky me. I made repairs to damage like a punctured an badly water stained deck and broken railings. Three decoration castings and all but one of the cannon trucks are missing, but the rest of the kit appears to be there. Too bad San Felipe was a fictional vessel. This vessel is too late in features for 1690. Was Panart confusing it with the Real Felipe of 1732? The hull is straight and planked well, but there are dagger planks where there should be drop planks. Much of the kit is plywood, not good hardwood. The wood is very dry and most of the brass fittings are tarnished brown. It must have been purchased many decades ago. The instructions were typed on a mechanical typewriter and copied. Included was an English translation of the Italian instructions that Frank Mastino wrote for Model Shipyard back in 1983. I wonder how the builder got that? The first two cannon decks have false cannon barrels (YUCK!). I can't go back and install cannon trucks at this stage without ripping off planking, and I'm not that devoted to this vessel for that. Rumor has it that Panart (Mantua) made changes to this kit to make it easier to get the positions of the cannon ports correct. On this model, cutting them will be a lengthy, slow and careful affair. This ship will sit on the shelf until after La Couronne and HMS Sovereign of the Seas are done.
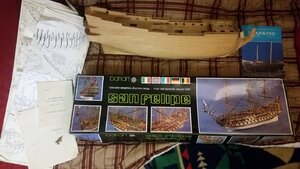
1 San Felipe Kit as Purchased Used.jpg
 
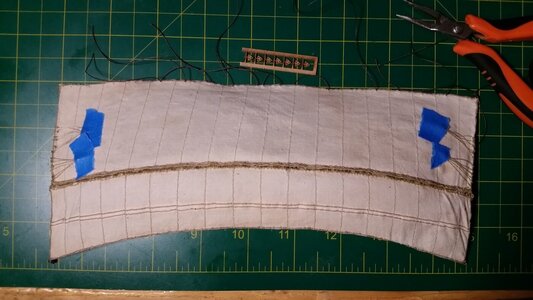
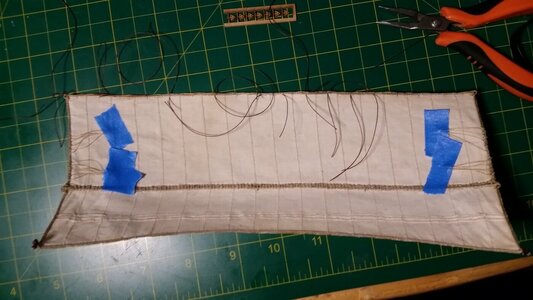
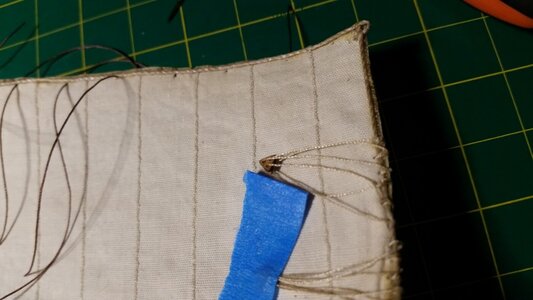
Reef points were added to fore topsail. One reef point is placed in the center of each sail panel. Very thin thread was used since the ship is small in scale, otherwise the reef points would appear as thick as the sheet lines. The idea was to make them appear in scale when viewed at a distance. A overhand knot was only used on the rear side of the sail, since a second knot, as used on full size reef points on the front side, it not necessary and would not be visible anyhow. Masking tape is used to hold the reef points pointed down as a small dab of watered down PVA is applied only to the point where the line passes through the sail. This is done on the rear side first, where the knots are, and then on the front side. A heat gun is used to speed drying and set the thread in position. After the tape is removed from both sides, the reef points are trimmed to even length. Variations in how they hang make them appear lifelike, and the glue droplets ensure they don't stick out away from the sail.

1173 Begin Installing Reef Points on Fore Topsail.jpg

1174 Tape Holds Reef Points Down While Applied Spots of Glue Drie.jpg

1175 Rear Side Reef Points Cut to Length.jpg

1176 Repeat on Front With Glue Applied Only to Where Reef Passes Thru Sail.jpg

1177 All Reef Points on Fore Topsail Done (Front).jpg

1178 All Reef Points on Fore Topsail Done (Rear).jpg
 
I had to make a correction to the fore topgallant sheets. I mistakenly ran the sheets through blocks on the topsail yards located close to centerline, then down toward the deck. The topgallant sheet lines double as topsail yard lift lines, and re-routed through pennant blocks attached to the underside of the topmast top, then down toward the deck and their belaying pins. The picture below shows the starboard line in the corrected place. Since the lines were too short once re-routed, a length of line was spliced into the existing line by splitting the fibers, meshing them into the split fibers of the extension line, and applying dilute PVA glue. The splice is then rolled it your fingers until all the loose fibers are reintegrated into the line, and the line is twisted a bit to make the grafting complete. It's too hard to actually make long splices in 0.25mm thread when it's already attached to the model and you have 10 cm of loose end to work with. The end result is hard to spot the splice on.

1179 Corrected Topgallant Sheet (Topsail Lift) Line to Pass Thru Pennant.jpg
 
Last edited:
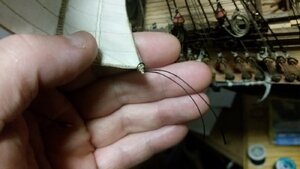
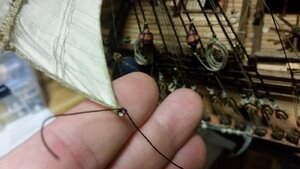
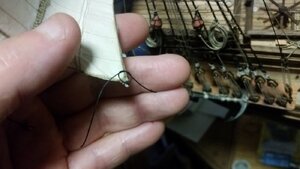
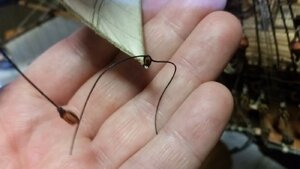
Pictures below show the method I use to attach blocks to the clews on sails for the clewlines. The loops for the clews are rather small, and small 2.5mm blocks are used instead of the oversized 4mm blocks provided by Corel. Work on the fore topsail rigging progressed a lot today. The clewline, sheets and fore topsail braces were rigged.

1) Pass a loop of thread through the sail clew.
1180 How to Tie Blocks to Sail Clews - Step 1 Insert Loop of Line Thru Clew.jpg

2) Take the loop of the thread and flip it over the bitter ends and cinch tight. The loop of the clew should extend out enough so that you still can tie the sheet line on later.
1181 Step 2 - Pass Loop Ove Ends of Line.jpg

3) Make and overhand knot with the ends of the thread as shown below, and then cinch it, not too firmly.
1182 Step 3 - Make one overhand Knot and Cinch.jpg

4) Make a second overhand loop, but this time leave it open to accept the block.
1183 Step 4 - Make Second Overhand Knot to Form a Loop.jpg

5) Insert the block with the end pointed toward the clew and tighten the overhand loop.
1184 Step 5 - Insert Block in Loop.jpg

6) Note how you can still pass a needle through the loop. You can still tie the sheet line to the clew later. Apply a small amount of CA glue to the top of the block, and to the bottom of the block at the clew so the block won't fall and trim the ends of the thread off.
1185 Step 6  - Apply Glue and Trim Line Ends.jpg

Sheets and clewlines for the fore topsail are belayed to four locations on the forward rail of the forecastle near centerline.
1186 Topsail Clew Lines and Sheets Belayed to Center of Forecastle Rail.jpg

1187 Rig Fore Topsail Clews, Sheets, and Braces.jpg

1188 Front of Topsail.jpg
 
Very good work on the rigging and sails - looking very good.
I just saw also your attempts on the first flag - this is very difficult to produce a flag blowing in the wind - to make it realistic
The waves in the flag are no moving usually not parallel, due to the own weight of the canvas.
You are from USA, so I was choosing your flag

the effect is much bigger, as longer the flag is / was (sorry, did not find a US-flag ;) )


usually you have a wave in the canvas following the green line
flag-3130435_960_720.jpg

I am writing this, because you mentioned, that you want to try better results with practice...
 
Very good work on the rigging and sails - looking very good.
I just saw also your attempts on the first flag - this is very difficult to produce a flag blowing in the wind - to make it realistic
The waves in the flag are no moving usually not parallel, due to the own weight of the canvas.
You are from USA, so I was choosing your flag

the effect is much bigger, as longer the flag is / was (sorry, did not find a US-flag ;) )


usually you have a wave in the canvas following the green line
View attachment 181002

I am writing this, because you mentioned, that you want to try better results with practice...
Thanks Uwek! I will adjust the flag to look more like these pictures.
 
Because of lack of documentation available, we know very little about the use of martnets or leechlines on topsails until after 1650. For the 1630's one might find leechlines, martnets, or neither. About 1677, a French ship was documented as attaching its leechline blocks to the fore stay collar, so that it what I did. I places the leechlines in the front side of the topsail only. I borrowed a feature found on leechlines on the course sails, when leechlines are used. A scratch built sheave in a block of wood is attached to the front side of year yard, about 2/5 of the way out form centerline. The leechlines pass through these sheaves before passing through the blocks tied to the stay collar under the top before passing down toward the deck , through the lower top, and belayed to the front rail of the forecastle. For the fore course sail below, martnets on both sides of the sail, front and back, will be used.

1189 Leechlines on Fore Topsail.jpg1190 Fore Topsail Leechlines Belayed to Rail.jpg
 
Last edited:
I haven't thought this all the way through yet, Kurt, but I wonder if it would be easier to do the running lines for the yards before doing the shrouds and ratlines. They do get in the way when trying to tie off the lines on the belaying pins. Maybe on my net ship I'll give that a try.
Rigging continues. All the lines for the fore topgallant sail except the bowlines were rigged today. The steps are shown below for clarity.

Tie the fore topgallant lift lines to the belaying pins symmetrically port and starboard on the forecastle rail.
View attachment 179763

Run each fore topgallant lift line up through the tops on each side of the crosstree, then through two blocks, and tie off on the flagstaff. The topgallant lift lines are done.
View attachment 179764

In preparation of rigging the bowlines for the sails on the foremast, four blocks were tied to the bowsprit just in front of the foremast stay line.
View attachment 179765

Rig the topgallant sheet lines, starting with tying the lines with coils to the aft rail of the forecastle, port and starboard symmetrically.
Port side:View attachment 179766

Stbd Side:
View attachment 179767

Pass each sheet line up through the tops and crosstrees, then through two blocks on the topsail yardarm, and let the ends hang for now.
View attachment 179787

Tie the port fore topgallant clew line, with coils already made on the end, to the rail just behind the cathead.
View attachment 179769

Do the same for the starboard fore topgallant clew line.
View attachment 179770

Pass the fore topgallant clew lines up through the tops and crosstrees to the blocks on the fore topgallant yardarm.
View attachment 179788
Now the fore topgallant sheets and clews are hanging loosely above, ready to attach to the sail.
View attachment 179772

Attach the fore topgallant sail to the topgallant yardarm with gaskets in the form of robands. The gaskets are loops of line tied at the top with a square knot after passing around the yardarm twice and through the sail once. Roband gaskets are only one method of attaching a sail to the yard, and are correct for this period. The connect the sheet and clue lines to the sail.
View attachment 179773

Tie the fore topgallant brace lines to the rail, port and starboard, and run them through double sets of single blocks that are attached to the main mast stays. The lines then pass through the pennants attached at each end of the yardarm and tied off to the main topgallant stay line. The braces were adjusted to turn the yardarm to starboard since this ship is being rigged with sails deployed for a port side broad reach.
View attachment 179774

The fore topgallant braces are now complete.
View attachment 179775

Here's how the ship is looking thus far. Rigging of the fore topgallant bowlines is next, then work begins on the running rigging for the fore topsail.
View attachment 179776
shaking my head over those t'gallant lifts. seems to be a strange combination of working lifts with standing lifts- having to untie at the pole to work them ? what were they thinking in those days ?
 
I am truly amazed at the amount of detail you and others on this forum are doing. As we said in the sixties “it blows my mind “. That’s why I enjoy this site so much.
agreed Jay- im nowhere near that skill lvl yet- especially at that scale- im having a hard time at 1/48
 
shaking my head over those t'gallant lifts. seems to be a strange combination of working lifts with standing lifts- having to untie at the pole to work them ? what were they thinking in those days ?
Actually they are worked from the bottom. To make it easier to rig the model, I tie the low end of the line to the belaying point first because that is where the rigging is the most crowded and difficult to work with the tools. Tying the top end after routing the line through the tops and blocks is very easy. You can adjust the line tension where your fingers can reach.
 
agreed Jay- im nowhere near that skill lvl yet- especially at that scale- im having a hard time at 1/48
Wait until you see the martnets. They are made of thread so fine you'd think it was spider silk. One of the beautiful features of 17th century complex rigging is the frequent use of crow's feet to spread the tension across a stay or martnets which are spread like a spider web along the leech of each lower sail. The overall effect is artistic. Later ships became simpler, more efficient, and utilitarian, owing to advances in ship design and introduction of steel cable to replace hemp stays.
 
Last edited:
Actually they are worked from the bottom. To make it easier to rig the model, I tie the low end of the line to the belaying point first because that is where the rigging is the most crowded and difficult to work with the tools. Tying the top end after routing the line through the tops and blocks is very easy. You can adjust the line tension where your fingers can reach.
thanks !!! like i said i was really scratching my head - keep up the great model work !!
 
Did you already order your casing to protect you wonderful workQuestion-Mark
A large chest of long, wide, and shallow drawers was sold to me for $150.00 by one of the fellows at the Science Museum of Minnesota. It has a large plexiglass box on top big enough to hold La Couronne. The chest used to contain fossils. The drawers are also lidded with plexiglass. A fossil head of a huge hadrosaur (duck billed dinosaur) was on top, covered with the box. I wish I could have gotten the hadrosaur with the deal! The plexiglass box will be used, but the drawer chest underneath is contemporary modern, stained in country oak (orangish) and does not match the style I am looking for. The box could be used for hand tool storage. It will be replaced with a proper high table with Queen Anne style leg once I get around to building it.

I'm not going to blow it up with firecrackers just yet... :)
 
Last edited:
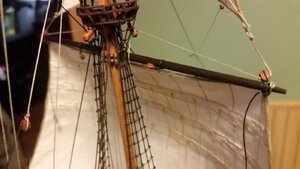
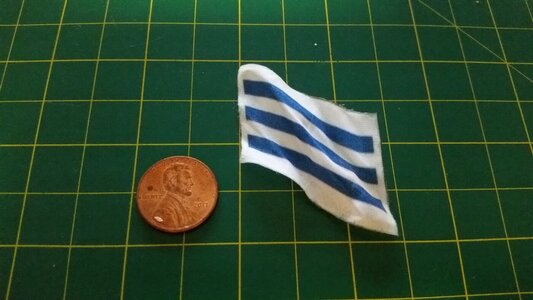
Rigging of the fore lower sail martnets has progressed. The lanyards will be tied to their belaying locations and run up through blocks and terminate at the 3mm triangular deadeyes for the martnets on both sides of the sail, front and back. The martnets are formed with very thin thread, each tied to the leech of the sail, around the bolt rope. I did not bother with making cringles to tie the martnets or bowlines to my sails, since they would appear overly large at this small scale. The loops formed by tying the lines directly around the boltropes and through the sail seem to convey enough detail. Also, I tried reshaping and re-starching one of the flags to get a more realistic shape. How did I do, Uwe? ;)

1194 Start Rigging Foresail Martnets (Front).jpg

1195 Start Rigging Foresail Martnets (Rear).jpg

1196 Foresail Martnet.jpg

1197 Reshaped and Restartched Flag.jpg
 
Last edited:
Back
Top