Wonderful example! Now I need to research what it looked like on the Connie.Yes, those lines are reef points. They act as grab handles which sailors use to haul up and furl the sails. All sails which should have reef points will get them. I'm still working on getting boltropes and bonnet lacings done. Reef points add a lot of detail to a sail. You can see that the reefing bands for topsails have already been added to those sails. When reef points are added on and which sail they are used depends on the time period and country. La Couronne will have early 17th century (c. 1636) style sails, so the location and number of reef bands will be different than those found on a typical British 1750's vessel like HMS Victory. I've seen a few different interpretations of what the sails on La Couronne looked like and used other models and book information to help decide what features to use.
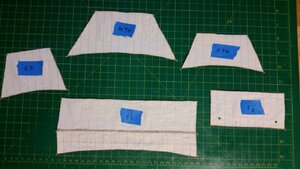
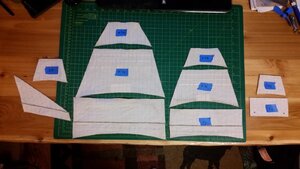
I decided that the sail plan below fits the research information best. The mainsails have a row of reef points below the bonnet lacing and the topsails have three rows of reef points in the top half of each sail. The spritsail has no reef points since they would typically be used on galleons later than La Couronne. The topgallants would not have any reef points, nor would the crojack sail or the lateen. The courses and the lateen would not typically have reef bands because they had bonnets. The number of row of reefs on the courses and topsails can vary. Now that I look at the it looks like I put the reefing band on the wrong side of the sails. They should be on the front side, not the rear side like with the top lining.Oh well. I'll get it right on the next ship model.
View attachment 176642
Scratch Build of La Couronne by Karl Faendrich in Germany
View attachment 176645
View attachment 176649
View attachment 176650
View attachment 176651
View attachment 176652
Italian scratch build of La Couronne
View attachment 176646
View attachment 176647
View attachment 176648
-

Win a Free Custom Engraved Brass Coin!!!
As a way to introduce our brass coins to the community, we will raffle off a free coin during the month of August. Follow link ABOVE for instructions for entering.
-

PRE-ORDER SHIPS IN SCALE TODAY!
The beloved Ships in Scale Magazine is back and charting a new course for 2026!
Discover new skills, new techniques, and new inspirations in every issue.
NOTE THAT OUR FIRST ISSUE WILL BE JAN/FEB 2026
You are using an out of date browser. It may not display this or other websites correctly.
You should upgrade or use an alternative browser.
You should upgrade or use an alternative browser.
La Couronne Corel/scratch 1:100 First build [COMPLETED BUILD]
- Thread starter DARIVS ARCHITECTVS
- Start date
- Watchers 54
All the rest of the sails had their boltropes attached with PVA. and the clews and cringles in the upper corners were formed. I'm contemplating staining the sails with more diluted pine tar to make them a shade darker. Besides kerosene, I wonder what liquid I could use to dilute the pine tar that would not stink up the house like the kerosene did? Sails completed are main topgallant, fore topgallant, crojack, fore course, and spritsail.

Super job, Darius. I’m impressed! Have you seen the new posts by Cirvan about a water technique to billow the sails? The guy also shortened the bolt ropes. Cirvan is talking about translating it for us.All the rest of the sails had their boltropes attached with PVA. and the clews and cringles in the upper corners were formed. I'm contemplating staining the sails with more diluted pine tar to make them a shade darker. Besides kerosene, I wonder what liquid I could use to dilute the pine tar that would not stink up the house like the kerosene did? Sails completed are main topgallant, fore topgallant, crojack, fore course, and spritsail.
View attachment 177301
Oops. I meant Cirdan.Super job, Darius. I’m impressed! Have you seen the new posts by Cirvan about a water technique to billow the sails? The guy also shortened the bolt ropes. Cirvan is talking about translating it for us.
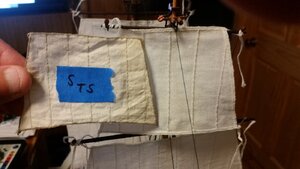
I haven't seen Cirdan's sail billowing technique yet. Looking forward to it! I mixed some pine tar with xylene and stained the sails again. Mixing pine tar with denatured alcohol didn't work because pine tar won't dissolve in it. Xylene dried fast, and the sails are just half a shade darker, since I was cautious against over-darkening them. I'll stop at this point. They look dirty enough. La Couronne only saw eight years in service, so her sails couldn't have gotten that stained and dirty. See the comparison of the stained fore topgallant with the unstained store bought sail. The difference is apparent there. Next is to find forms to stretch the sails over after wetting them with starch. If anyone wants to throw me a few dollars or Reichsmarks for the unused sail set, let me know. You can see the quality of the stitching from the photo below, so you know what you're getting. Otherwise, they'll go in the parts bin.


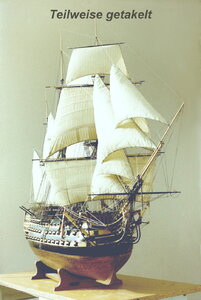
You can find his ship by searching for hms Victory by Manfred burket in SoS. He’s an old timer who spent 40 years on his Victory. I think you’ll like the pix of his sails. I’ve looked at the German forum and found it very informative. Hartmut (Cirdan) is sharing Manfred’s work with us. He will translate the process and hopefully share the pictures of the process with us as time permits. I just thought you might be interested in how another skilled craftsman approached making the sails billow. But I’ve found your build log fascinating and your descriptions very detailed. Thank you so much for sharing. It’s helped me understand so many things about sail making that i never would have guessed on my own. You rock!I haven't seen Cirdan's sail billowing technique yet. Looking forward to it! I mixed some pine tar with xylene and stained the sails again. Mixing pine tar with denatured alcohol didn't work because pine tar won't dissolve in it. Xylene dried fast, and the sails are just half a shade darker, since I was cautious against over-darkening them. I'll stop at this point. They look dirty enough. La Couronne only saw eight years in service, so her sails couldn't have gotten that stained and dirty. See the comparison of the stained fore topgallant with the unstained store bought sail. The difference is apparent there. Next is to find forms to stretch the sails over after wetting them with starch. If anyone wants to throw me a few dollars or Reichsmarks for the unused sail set, let me know. You can see the quality of the stitching from the photo below, so you know what you're getting. Otherwise, they'll go in the parts bin.
View attachment 177306View attachment 177307
Thank you, VFordyce! I'm glad my blog has been as much of a benefit to you as other build logs here and elsewhere have been to me. Imagine working on one ship for 40 years! Amazing.You can find his ship by searching for hms Victory by Manfred burket in SoS. He’s an old timer who spent 40 years on his Victory. I think you’ll like the pix of his sails. I’ve looked at the German forum and found it very informative. Hartmut (Cirdan) is sharing Manfred’s work with us. He will translate the process and hopefully share the pictures of the process with us as time permits. I just thought you might be interested in how another skilled craftsman approached making the sails billow. But I’ve found your build log fascinating and your descriptions very detailed. Thank you so much for sharing. It’s helped me understand so many things about sail making that i never would have guessed on my own. You rock!
Last edited:
My wife will not let me get close to her sewing machine so I'll have to do some careful timing to raise the matter to get the task at hand done. Maybe if I work it right she will "teach me" but at 79 memory is short and I'll likely have to ask her again how to do some of the setup of the machine. "-) PT-2Thanks for sharing this. I was wondering how I (the Admiral) was going to do this.
Maybe she’ll do it for you if you cut them out and draw the lines on them. It’s fairly quick for her. I think the Admiral really doesn’t want me messing with her machine. I did that once. We have a new machine.My wife will not let me get close to her sewing machine so I'll have to do some careful timing to raise the matter to get the task at hand done. Maybe if I work it right she will "teach me" but at 79 memory is short and I'll likely have to ask her again how to do some of the setup of the machine. "-) PT-2
My mission/task at hand is simply hemming and sewing some tubes on thee sides of a PVC frame that I can use as a backdrop for model photos. it is about 3.5 feet square with bottom supporting legs and a front bottom extension of the fabric for under the models. Simple but hard to see lines except for pins that I have set to follow. Tailors chalk would be great but we don't have any so I'll have to get a piece to guide the sewing lines. White sails being smaller and more efficient in drawing light pencil lines are a reverse from quite large fabric handling to small precision. That will come up soon enough. PT-2Maybe she’ll do it for you if you cut them out and draw the lines on them. It’s fairly quick for her. I think the Admiral really doesn’t want me messing with her machine. I did that once. We have a new machine.
I just bought a trifold for science fair as a backdrop. Didn’t take much room and i could fold it and throw it behind a bookcase when i wasn’t using it.My mission/task at hand is simply hemming and sewing some tubes on thee sides of a PVC frame that I can use as a backdrop for model photos. it is about 3.5 feet square with bottom supporting legs and a front bottom extension of the fabric for under the models. Simple but hard to see lines except for pins that I have set to follow. Tailors chalk would be great but we don't have any so I'll have to get a piece to guide the sewing lines. White sails being smaller and more efficient in drawing light pencil lines are a reverse from quite large fabric handling to small precision. That will come up soon enough. PT-2
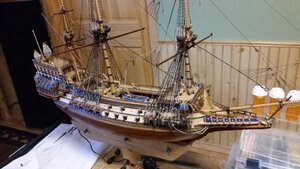
The store-bought sails were removed from the yards, and the it was decided that the ships sails will be set at a port side broad reach. That way, the all sails can be displayed fully set, including the sprit topsail, which is normally used only for turning, as if the ship were in a light, steady wind. That angle also allows for unfurling and displaying lateen sail which will assist in moving the ship forward.
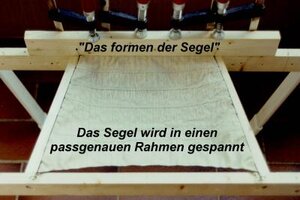
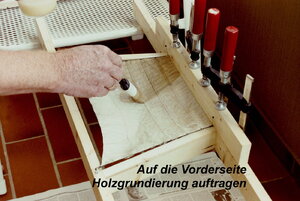
Now that the sails are made, except for adding reef points and some cringles, it's time to starch and stretch them to a billowed out shape. A sail stretching jig was made by making a frame of wood. At the top, two pieces of wood clamp the head of the sail, so when stretched, the head won't get any wider and not fit properly on the yardarm. The fore course sail was wetted with Spray-n-Bond fabric stiffener after the head was clamped into place and held using two C-clamps. Two bags of sand were placed on the sail, since it was two wide for one. The shape of the sail looks promising. Now the sail will be allowed to dry overnight. We'll see how it turns out in the morning. Hopefully the 3% spandex in the sail cloth will not pull it back too far to the original flat shape.
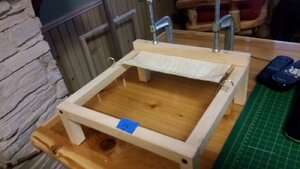
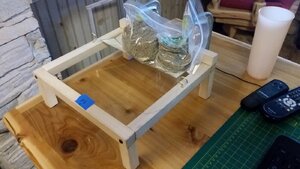
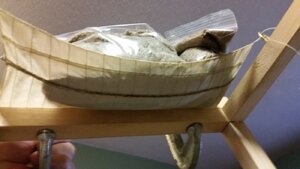
Now that the sails are made, except for adding reef points and some cringles, it's time to starch and stretch them to a billowed out shape. A sail stretching jig was made by making a frame of wood. At the top, two pieces of wood clamp the head of the sail, so when stretched, the head won't get any wider and not fit properly on the yardarm. The fore course sail was wetted with Spray-n-Bond fabric stiffener after the head was clamped into place and held using two C-clamps. Two bags of sand were placed on the sail, since it was two wide for one. The shape of the sail looks promising. Now the sail will be allowed to dry overnight. We'll see how it turns out in the morning. Hopefully the 3% spandex in the sail cloth will not pull it back too far to the original flat shape.


Anxiously awaiting the results!
The sail dried faster with hot air applied from a distance with a heat gun. The cloth is now as stiff as parchment. The fore course sail was test fitted with only two loops of thread holding it the yard at the corner cringles. The shape came out better than expected, and even has diagonal stress creases at the bottom corners like a real sail. With bowlines, it will be held away from the mast a bit and look like the wind is suspending the sail. A plan to rig the lifts, leechlines with martnets, sheets and clew lines for each sail needs to be thought out. It is probable best to rig the upper sails first, starting with the topgallants, since the lower sails will block access to the rails and belaying points.
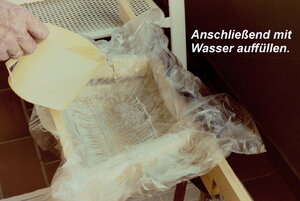
VFordyce, your sail stretching rack is better shaped for the topsails, whereas mine is going to be used on all the sails, hence it is rectangular. The water is a good idea, but I'm using sand so I don't risk a leak or have a spill.
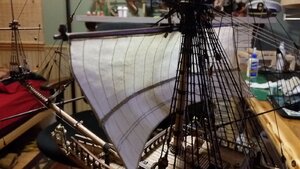
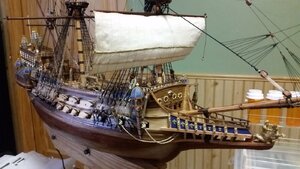
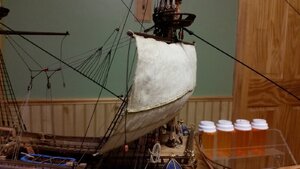
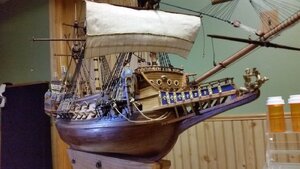
VFordyce, your sail stretching rack is better shaped for the topsails, whereas mine is going to be used on all the sails, hence it is rectangular. The water is a good idea, but I'm using sand so I don't risk a leak or have a spill.


Last edited:
Looking fantastic!The sail dried faster with hot air applied from a distance with a heat gun. The cloth is now as stiff as parchment. The fore course sail was test fitted with only two loops of thread holding it the yard at the corner cringles. The shape came out better than expected, and even has diagonal stress creases at the bottom corners like a real sail. With bowlines, it will be held away from the mast a bit and look like the wind is suspending the sail. A plan to rig the lifts, leechlines with martnets, sheets and clew lines for each sail needs to be thought out. It is probable best to rig the upper sails first, starting with the topgallants, since the lower sails will block access to the rails and belaying points.
View attachment 178451
View attachment 178452
View attachment 178453
View attachment 178454
How are you planning to attach the jibs (I think that’s what you call the triangular sails up front.)


