Thanks John! The forum members helped a lot by their examples. Books are great references but build logs help you learn very quickly.Kurt,
Glad that I found your log here. I had gone through the 100s of images from your link that you posted on my log. Really detailed and very well researched work. Gongrats indeed.
Regards,
-

Win a Free Custom Engraved Brass Coin!!!
As a way to introduce our brass coins to the community, we will raffle off a free coin during the month of August. Follow link ABOVE for instructions for entering.
-

PRE-ORDER SHIPS IN SCALE TODAY!
The beloved Ships in Scale Magazine is back and charting a new course for 2026!
Discover new skills, new techniques, and new inspirations in every issue.
NOTE THAT OUR FIRST ISSUE WILL BE JAN/FEB 2026
You are using an out of date browser. It may not display this or other websites correctly.
You should upgrade or use an alternative browser.
You should upgrade or use an alternative browser.
La Couronne Corel/scratch 1:100 First build [COMPLETED BUILD]
- Thread starter DARIVS ARCHITECTVS
- Start date
- Watchers 54
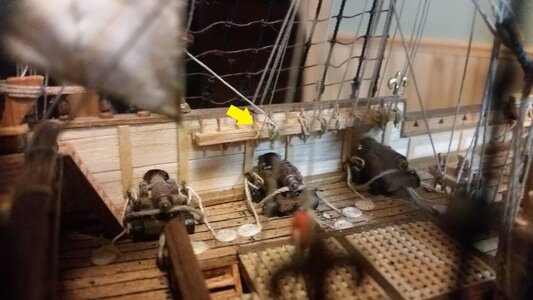
The leech lines for the main course were started. Starting at the belaying pins on the waist bulwarks, fourth pins from rear end of the pin rail, thin thread is run up through two sets of blocks on each side of the top. The first is on the after side of the top, and the second is on the forward. Both block are attached to eyelets on the crosstrees. It was a real pain getting an Archimedes drill in that tangle of rigging to make holes to accept the 0.3mm eyelets and 2mm blocks. Luckily, nothing got ripped apart. Things will be planned better on the second ship model. The leech lines were let hang forward of the main course yardarm until the sail is bent to the yard. More work on the sail itself was made. The upper set of bowline bridals were attached to the main course sail, above the bonnet. All the bowline bridals are ready, and the leechline martnet bridals with deadeyes and shoe blocks are next.
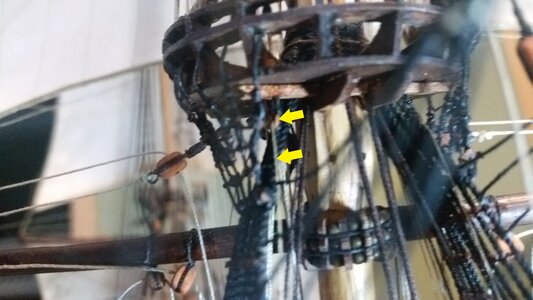
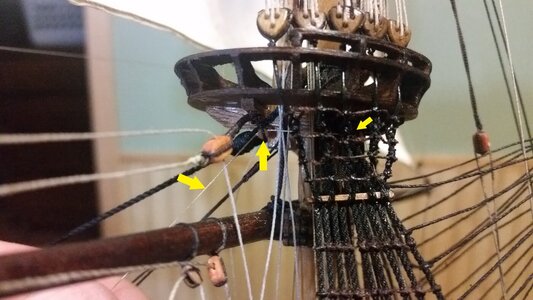
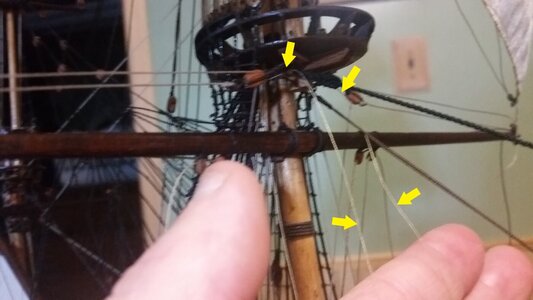
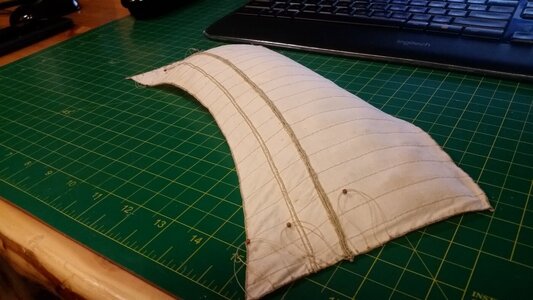


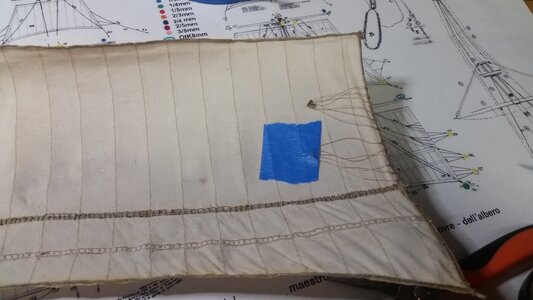
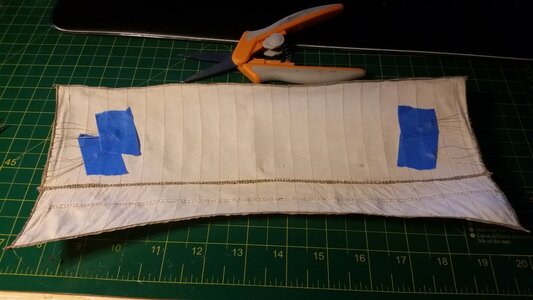
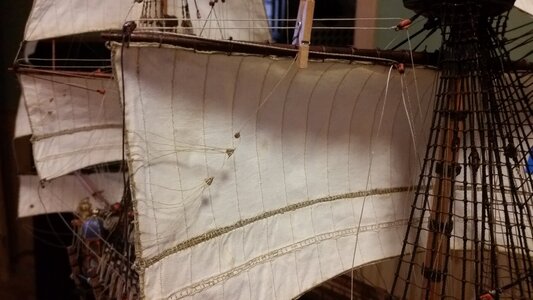
The leech lines with bridals and martnets were completed. This is very delicate work, using 3mm deadeyes and 2mm blocks with very thin thread. On the rear side of the sail, the martnets which were made earlier were connected by a bridal, and the 2mm block for that bridal had its fall run through a shoe block laying on the top of the yardarm. The line then runs over the front of the sail and ends with a single bridal on the leech of the sail. At the other end of the shoe block, the leech line that comes from the blocks hung from the bottom of the top is passed through the shoe block sheave and back to to the top, where it is ties to the same eyelet that the lift pendant hangs from, which my interpretation and as good as play as any to secure the end of the line. No historical source tells us where the line was secured. The arrangement of the martnets I chose is different than that which is rigged on most models, because it can draw the sail leech in and up much farther, which is necessary for the leech line to be functional.
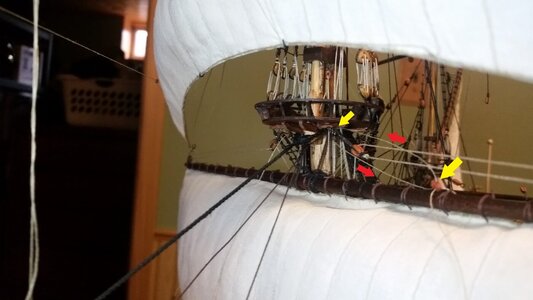
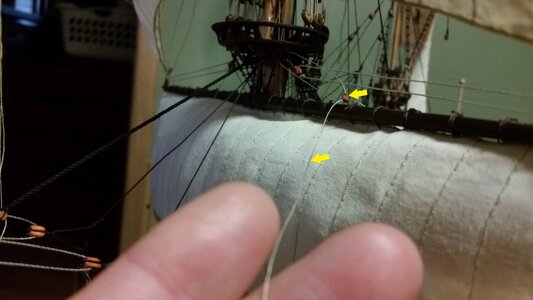
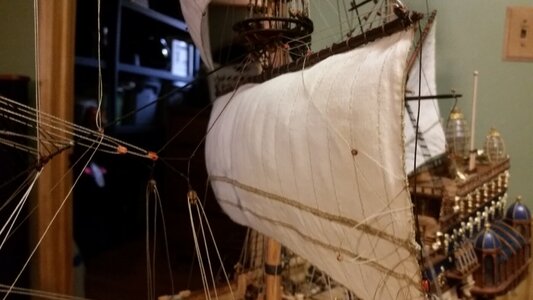
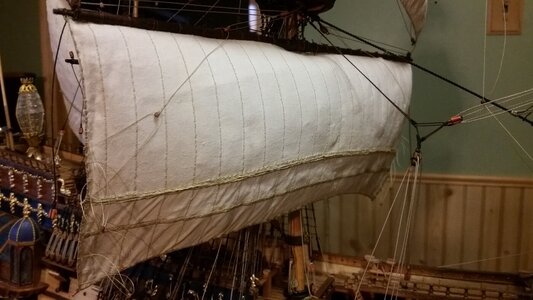
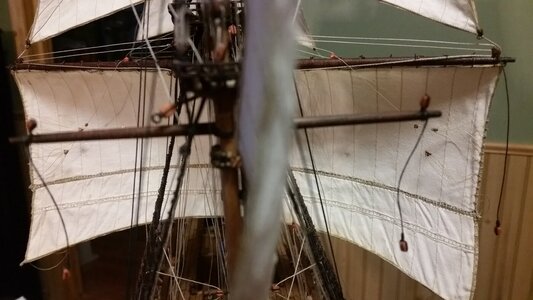


Insane attention to detail, Kurt! And at this scale? Marvelous work!The leech lines with bridals and martnets were completed. This is very delicate work, using 3mm deadeyes and 2mm blocks with very thin thread. On the rear side of the sail, the martnets which were made earlier were connected by a bridal, and the 2mm block for that bridal had its fall run through a shoe block laying on the top of the yardarm. The line then runs over the front of the sail and ends with a single bridal on the leech of the sail. At the other end of the shoe block, the leech line that comes from the blocks hung from the bottom of the top is passed through the shoe block sheave and back to to the top, where it is ties to the same eyelet that the lift pendant hangs from, which my interpretation and as good as play as any to secure the end of the line. No historical source tells us where the line was secured. The arrangement of the martnets I chose is different than that which is rigged on most models, because it can draw the sail leech in and up much farther, which is necessary for the leech line to be functional.
View attachment 188719
View attachment 188720
View attachment 188721
View attachment 188722
View attachment 188723
View attachment 188724
Thanks Dockattner. Orthodonist, eh? THAT'S why your teeth look so darned perfect...Insane attention to detail, Kurt! And at this scale? Marvelous work!
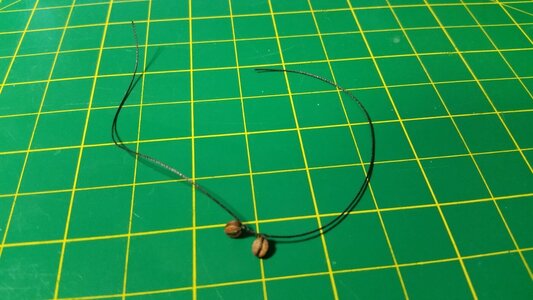
More work on the main course sail was done tonight. A set of blocks was attached to the foot of the foremast. The main course bowlines were tied to belaying pins on the fiferail behind the foremast, run through these blocks and tied to the bridal blocks. The bowlines for the bonnet and drabbler below those were tied to the aft rail on the forecastle, run through double blocks attached to the main stay, and tied to their respective bridals as well. The bowlines are a little slack at the moment, and will be under tension when the main course sheet lines are installed later, after work on the mizzen mast sails is complete. Next are the clew lines and tack lines for the main course sail.
Blocks for main course bowlines, tied to the foremast
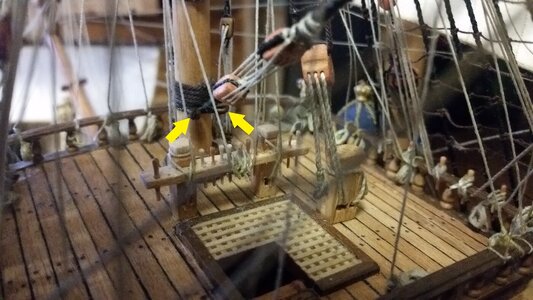
Double blocks for the bonnet and drabbler bowlines, tied to the main stay
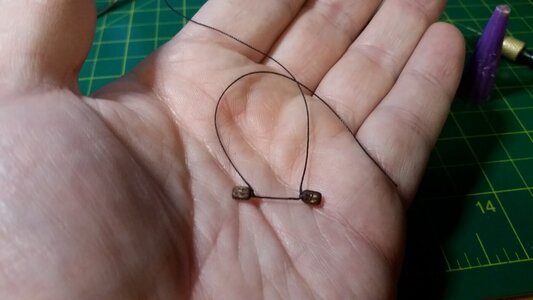
Main course bowlines belayed to fiferail, bonnet and drabbler bowlines belayed to after forecastle rail
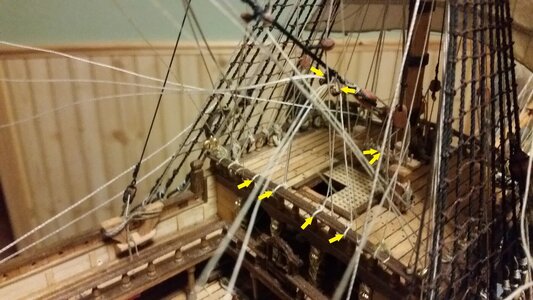
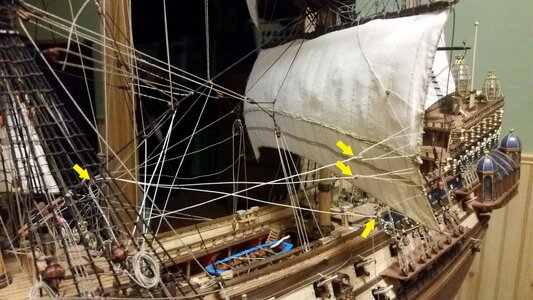
Bowlines complete
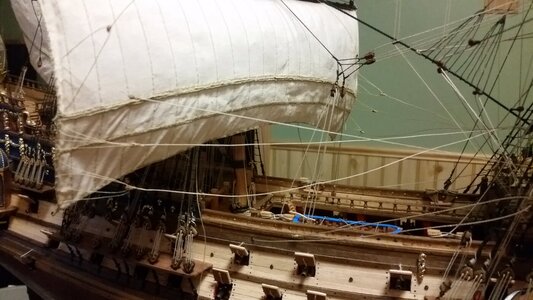
Progress so far...
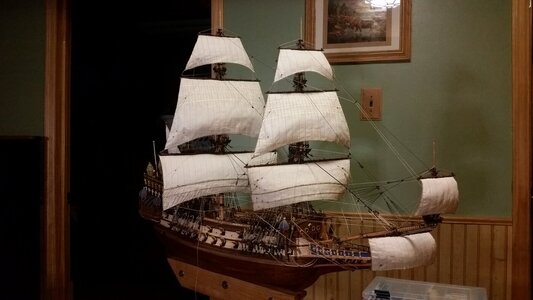
Magnificent detail Kurt! Beware of lazy spiders trying to claim your ship as their personal web.Thanks Dockattner. Orthodonist, eh? THAT'S why your teeth look so darned perfect...
More work on the main course sail was done tonight. A set of blocks was attached to the foot of the foremast. The main course bowlines were tied to belaying pins on the fiferail behind the foremast, run through these blocks and tied to the bridal blocks. The bowlines for the bonnet and drabbler below those were tied to the aft rail on the forecastle, run through double blocks attached to the main stay, and tied to their respective bridals as well. The bowlines are a little slack at the moment, and will be under tension when the main course sheet lines are installed later, after work on the mizzen mast sails is complete. Next are the clew lines and tack lines for the main course sail.
Blocks for main course bowlines, tied to the foremast
View attachment 188784
View attachment 188785
Double blocks for the bonnet and drabbler bowlines, tied to the main stay
View attachment 188786
Main course bowlines belayed to fiferail, bonnet and drabbler bowlines belayed to after forecastle rail
View attachment 188787
View attachment 188788
Bowlines complete
View attachment 188789
Progress so far...
View attachment 188790
Thanks Dan. I think I can see light at the end of this tunnel...Magnificent detail Kurt! Beware of lazy spiders trying to claim your ship as their personal web.
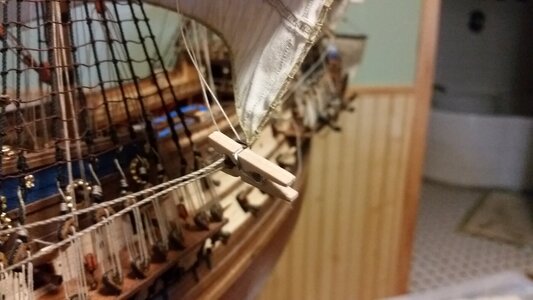
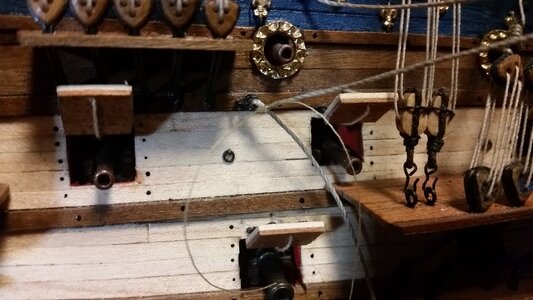
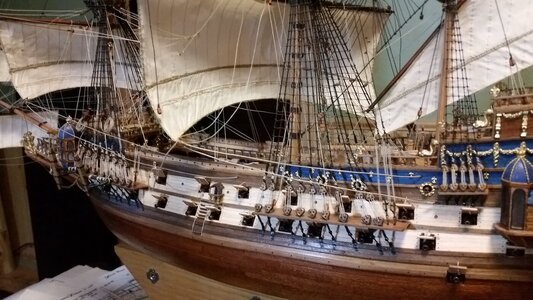
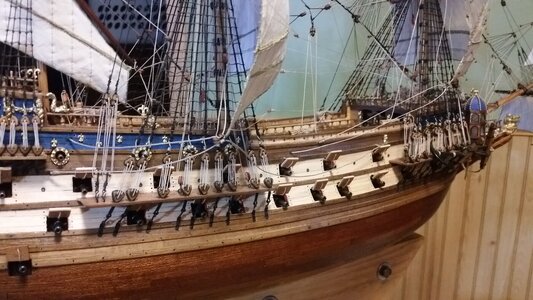
Rigging almost complete on the main course sail. Clew lines sheet lines, and tack lines were rigged. The main course braces were rigged, but left loose at the ring and eyelet near the stern so they can be lowered while working on the mizzen mast sails. Most of the Corel provided blocks were stained darker so that orange stain won't contrast the nicer Falkonet and Model Shipways blocks. Small blackened brass rings were glued to the sides of the hull where the lines pass through the bulwarks before being ties to the kevels. Lines that pass through blocks tend not to bend sharply around the sheaves in the blocks due to stiffness. Glue was used to stiffen the line and a clothes pin used to fold the line in a sharper bend. The lines tend to hang on a more natural catenary curve. This was done in several areas to make the overall appearance of the ship's lines look natural. It is more difficult with a smaller model than on a larger one, where line stiffness is less of a problem. Where the sheets are tied to rings and eyes on the hull, the end of line is secured with a throat and round seize.


- Joined
- Aug 16, 2019
- Messages
- 870
- Points
- 343

A real beauty Kurt
For a kit produce in 1976 you are doing a splendid work on it I really love your work
For a kit produce in 1976 you are doing a splendid work on it I really love your work
It's THAT old?A real beauty Kurt
For a kit produce in 1976 you are doing a splendid work on it I really love your work
- Joined
- Aug 16, 2019
- Messages
- 870
- Points
- 343

it is the date on my drawingIt's THAT old?
- Joined
- Apr 20, 2020
- Messages
- 313
- Points
- 278

Thank you Kurt @DARIVS ARCHITECTVS for your very detailed and informative thread. I continue to be amazed by your attention to detail. Even more amazed at how you are able to describe your steps in a precise manner. This is a treasure trove of information, especially for those of us who are far less experienced. Even though at times I don't understand some of the terminology, it forces me to look up the meaning and purpose of certain nautical terms, which adds to my knowledge inventory. Watching your thread with great interest and gratitude.
Reggie
Reggie
I'm glad the build log is being helpful to you. Less experience? This is my first ship. My craftsmanship comes from other hobbies and interests. It helps being a focused person who can have patience for detail. I encourage that as much as I can for others so they can make fantastic works of art in model ships. If there is a term you do not understand, PLEASE ASK. Marine terminology is often confusing. Reading books on rigging helped me learn most of the terms, but I still struggle telling the difference between a fall and a lanyard, a tie and a halyard, and it took me a while to figure out what a "purchase" was. (It's a block and tackle). You pick up the terms slowly by comparing drawings of specific lines to their text descriptions while researching how that line should be rigged on your model. The best way to learn it is by rigging your first model while going back to reading your best book on rigging many, many times until the language sticks in your head. I have to warn everyone one more time that how La Couronne is rigged is typical of the early 17th century, Dutch/French style. There are MANY changes in 18th century ships, and in English ships in particular, so don't copy the rigging arrangement from my build log for any line without reaching for a reference book for the rigging of your type of ship in the proper time period and nationality. There were many simplifications and improvements made in the 150 years that followed the great ships of the 1620's and 1630's. Research each line as you go, and never fully trust kit instructions.Thank you Kurt @DARIVS ARCHITECTVS for your very detailed and informative thread. I continue to be amazed by your attention to detail. Even more amazed at how you are able to describe your steps in a precise manner. This is a treasure trove of information, especially for those of us who are far less experienced. Even though at times I don't understand some of the terminology, it forces me to look up the meaning and purpose of certain nautical terms, which adds to my knowledge inventory. Watching your thread with great interest and gratitude.
Reggie
Last edited:
She is looking great Kurt.
Dank U Maarten!She is looking great Kurt.
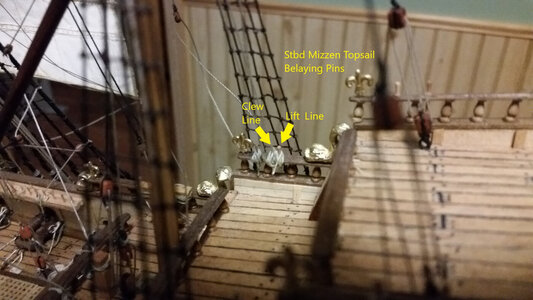
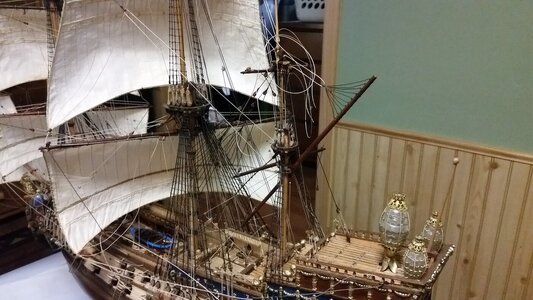
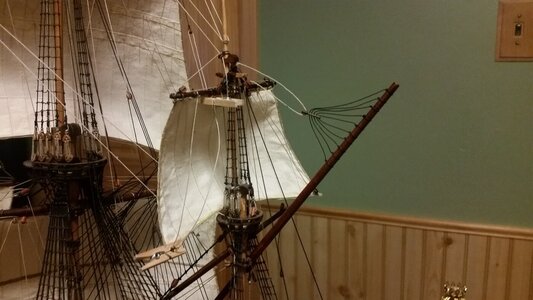
The rigging of the mizzen topsail began. The topsail lift lines and clew lines were started at their belaying pins and were run up through the top. The lifts were run through their blocks and tied off at the flagstaff above the topsail masthead while the clews were left loose until the sail was bent to the yard. The sail was then bent to the yard, attached by gaskets like the other sails. The clew lines were then finished off after blocks were tied to the sail clews. To get the stiff line to hang naturally, a bit of PVA glue is applied to the each side of the clew line blocks and the line pinched into the glue and held with small clothespins. When the glue is dry, the clothespins will be removed and the line formed into a natural shape with my fingers. The line now makes sharp bends as it passes through the blocks.


Last edited:
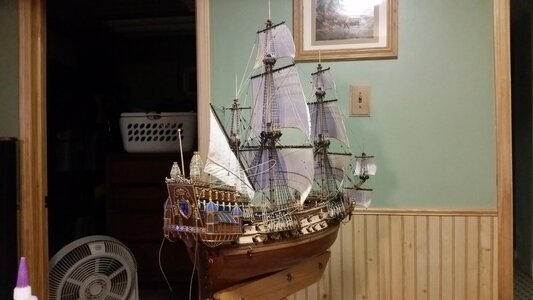
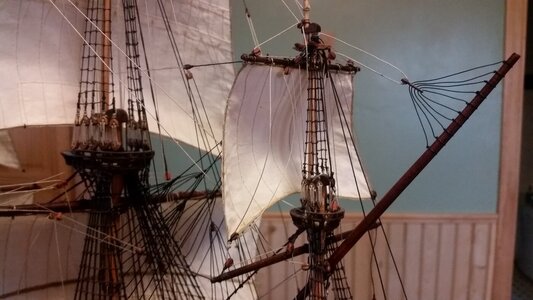
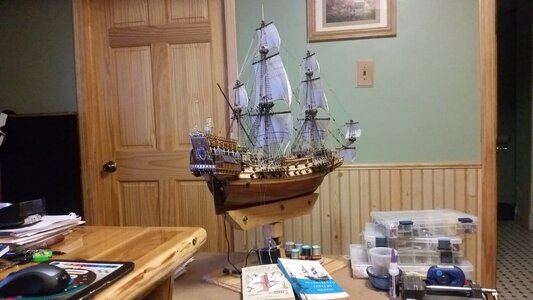
A little more progress. The mizzen topsail sheets were rigged. Temporary braces were rigged using the mizzen topsail and crojack brace pendants to hold the yards in the desired angle while other lines are rigged. The lateen sail rigging is next, starting with the preparing the mizzen martnets and brails on the lateen sail leech and foot. Meanwhile, work on the table and plexiglas box for displaying the model is under way in the shop in my pole barn. It's being constructed from a combination of new and used wood, four table legs donated from a friend, and a plexiglas box that was purchased from a science museum. The box is about 4" too short in height for the model, so it was extended at the bottom with 5" wide wood molding. I'm not skilled at staining and finishing wood, so I just stained the wood and applied shellac which some more stain was added to. The table parts have to be colored to match the donated legs, which are lacquered in a wine color (maroon-brown).


Last edited:
I built this kit about 25 years ago. You have done a wonderful job.
.
.
Thanks Brian! Would you please post some nice pictures of your model of La Couronne? Everybody likes ship porn...
The martnets were added to the lateen sail on the leech side, and on the foot, the bridles for the brails were attached. Lines from the martnets will go through a double block attached to the mizzen masthead, then down to the rail in front of the mizzen mast. The brail lines will run through single blocks attached to the lateen yard arm and then to rails port and starboard for belaying. Both leech lines and their martnets and brail lines function to furl the lateen sails and its bonnet.
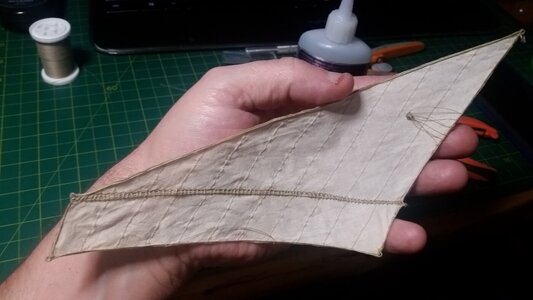
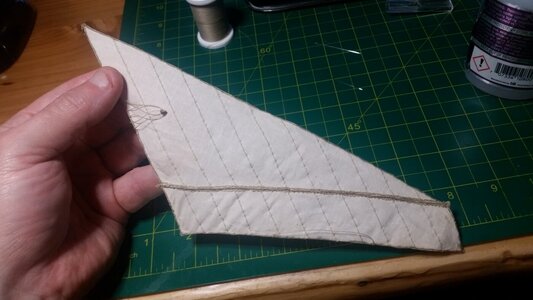
The martnets were added to the lateen sail on the leech side, and on the foot, the bridles for the brails were attached. Lines from the martnets will go through a double block attached to the mizzen masthead, then down to the rail in front of the mizzen mast. The brail lines will run through single blocks attached to the lateen yard arm and then to rails port and starboard for belaying. Both leech lines and their martnets and brail lines function to furl the lateen sails and its bonnet.


