-

Win a Free Custom Engraved Brass Coin!!!
As a way to introduce our brass coins to the community, we will raffle off a free coin during the month of August. Follow link ABOVE for instructions for entering.
-

PRE-ORDER SHIPS IN SCALE TODAY!
The beloved Ships in Scale Magazine is back and charting a new course for 2026!
Discover new skills, new techniques, and new inspirations in every issue.
NOTE THAT OUR FIRST ISSUE WILL BE JAN/FEB 2026
You are using an out of date browser. It may not display this or other websites correctly.
You should upgrade or use an alternative browser.
You should upgrade or use an alternative browser.
La Couronne Corel/scratch 1:100 First build [COMPLETED BUILD]
- Thread starter DARIVS ARCHITECTVS
- Start date
- Watchers 54
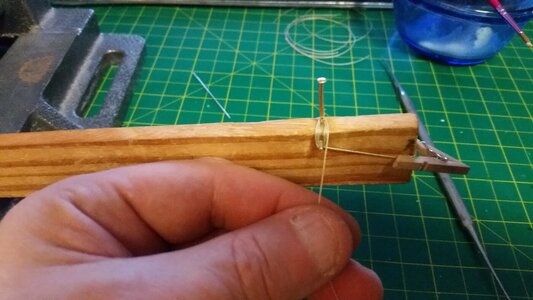
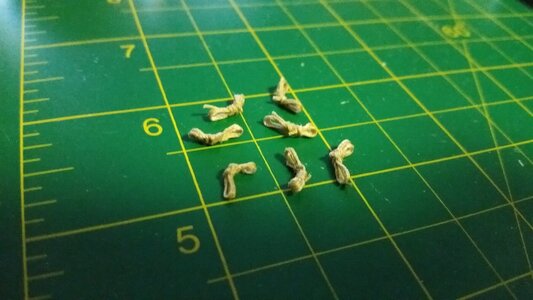
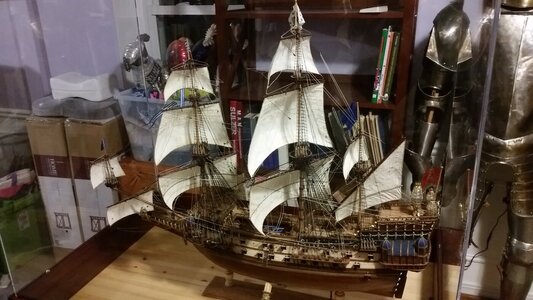
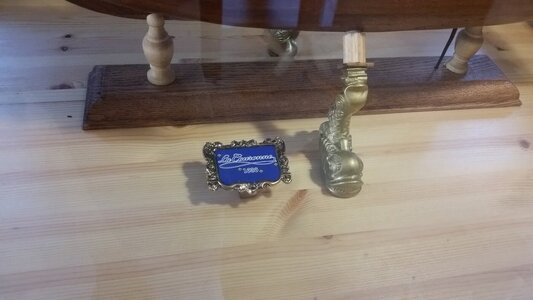
The rope hanks were hung on the belaying pins, the ship supports were completed and installed on the display table, and the Plexiglas was placed over the model. I have some 1:100 sailor figures that could be added. A vinyl decal of a compass rose will be added to the table surface for decoration, and I still need a nameplate.
However, the ship is finished!
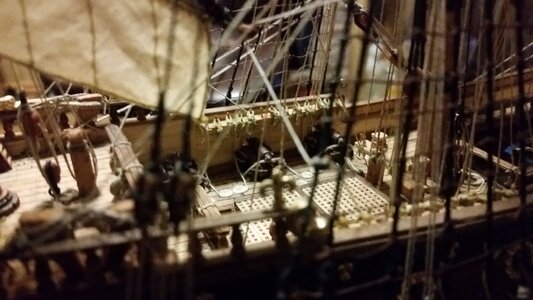
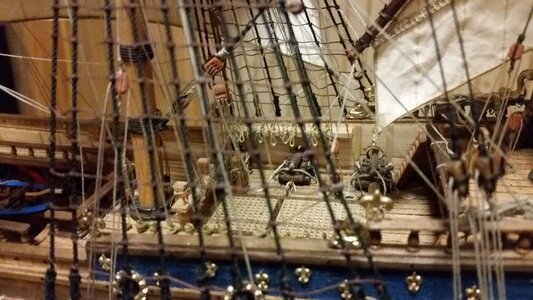
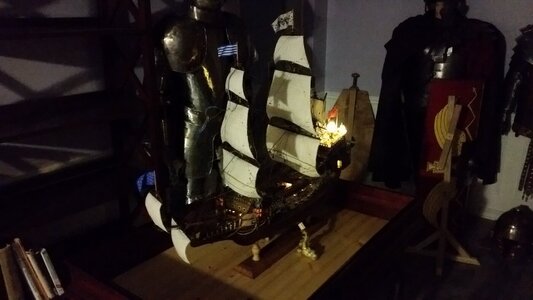
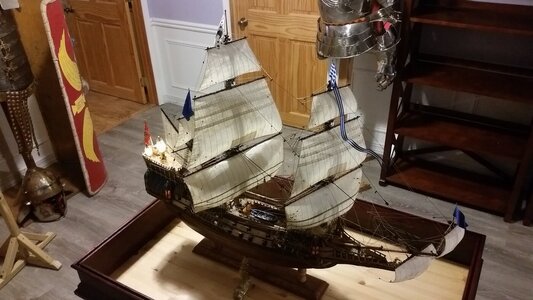
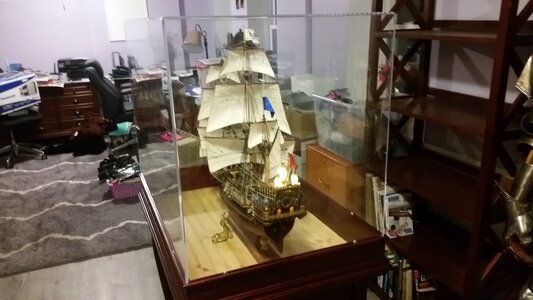
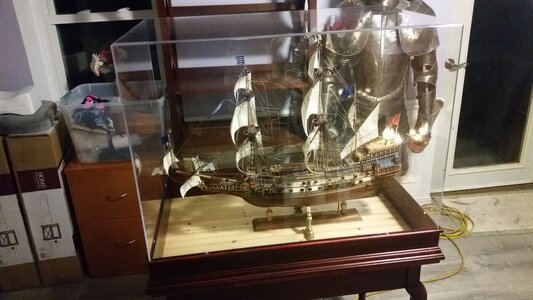
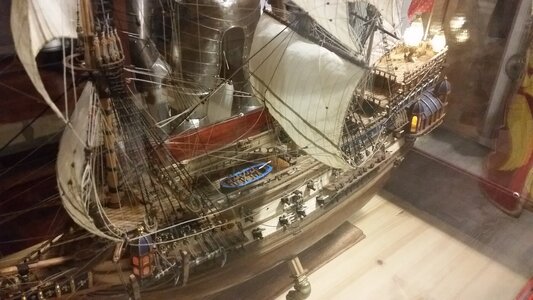
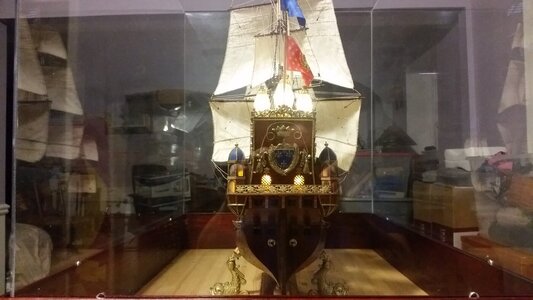
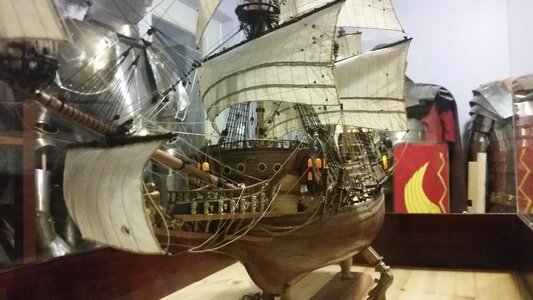
However, the ship is finished!


Bravo, Kurt! I suspect it is only the people on this forum who understand and appreciate what you have accomplished. Hours and hours and hours of work - and it shows up in your finished piece. While I only joined your journey on the tail end (and I'm only beginning my own) I am an admirer and a fan! Thanks for the inspiration to stay the course and finish the race.The rope hanks were hung on the belaying pins, the ship supports were completed and installed on the display table, and the Plexiglas was placed over the model. I have some 1:100 sailor figures that could be added. A vinyl decal of a compass rose will be added to the table surface for decoration, and I still need a nameplate.
However, the ship is finished!
View attachment 192791
View attachment 192792
View attachment 192793
View attachment 192794
View attachment 192795
View attachment 192796
View attachment 192797
View attachment 192798
View attachment 192799
Beautiful model,, congratulations on a fine build
Thanks Dockattner! I'm starting at the back of the line again with HMS Sovereign of the Seas, and I have to race to catch up to you! It should be much easier to rig than La Couronne, being a larger model. I'll be following your Wasa build with equal enthusiasm.Bravo, Kurt! I suspect it is only the people on this forum who understand and appreciate what you have accomplished. Hours and hours and hours of work - and it shows up in your finished piece. While I only joined your journey on the tail end (and I'm only beginning my own) I am an admirer and a fan! Thanks for the inspiration to stay the course and finish the race.
Thanks Don! I started on 3/21/18, and finished 11/14/20, and the total cost of books, materials and tools, not including the display case, is $3,124.65 USD. Wow. It really added up.Beautiful model,, congratulations on a fine build
On to the next one!
Looks super nice - well done!!! - will use your technique for flags 
The trick was looking at videos Uwe posted and copying the shapes.Looks super nice - well done!!! - will use your technique for flags
- Joined
- Aug 16, 2019
- Messages
- 870
- Points
- 343

I am just lost for word
I do not know how to compliment you
Really superb work

I do not know how to compliment you

Really superb work

Thanks Charles!I am just lost for word
I do not know how to compliment you
Really superb work
Well, a lot of lessons were learned. Many minor mistakes were made in building La Couronne. Here is a list of the ones that come to mind. They might help another builder.
1) The violin blocks are not installed upside down on the cargo lifting pendant tackles on the fore mast and main mast, port and starboard.
2) I forgot to install the decks and cannon carriages for the escape guns on the stern. Had to use some clever means of lowering the deck pieces with glue on them into the ship's stern from the top on the end of a stick. So, this mistake was corrected through cleverness.
3) Sail reinforcement bands for the reef points go on the rear side of the sails, not the front surface.
4) Tying running rigging lines first to belaying pin racks on the bulwarks behind the shrouds, letting the lines hang off the side of the hull, and wasting countless yards of line cutting them to the proper length when you're ready to rig them up in the masts is a better way than trying to belay lines onto easily broken pins using rigging tools through the holes in the shrouds. And, it's a LOT faster. I did La Couronne's rigging 100% the HARD WAY, one line at a time. Start at the bottom when running lines!
5) CA glue doesn't allow wood to stain. Get the staining of all wood done BEFORE assembly. Blotches of unstained, light colored wood on the tops had to be painted over to hide them.
6) Many blocks (all Corel ones) were stained after rigging. Some of the standing rigging was stained black with leather dye after rigging. I'll make sure to use the correct color line and blocks from the same sources next time. Model Expo "beautiful blocks" and Falkonet blocks should replace crappy Italian kit blocks.
7) the decks should be sanded smooth, or better yet scraped smooth with a razor blade scraper, before making trenails with a pen or pencil and varnishing. You can feel the planks edges on the decks on La Couronne. Using a pencil instead of an ink pen for the trenails on the deck planks would make them a lot more subtle and realistic, because they stand out too much.
8) Using a Sharpy pen to blacken the edges on all sides of the deck blanks makes pitch sealing lines betwen planks far too dark and noticeable at 1:100 scale. Use graphite pencil next time to make deck lines subtle, and only darken one edge of each plank. That's all that is necessary to make plank seams stand out.
9) Change the sewing stitch method for bonnet and drabbler lacing to a simpler, less bulky stitch, so it appears to scale better.
10) Use CA glue on rigging more sparingly. It stains line and sails and turns lines into concrete. Use PVA instead unless you need quick drying of the glue.
11) Make custom sized kevels, and don't use the monster oversized kevel parts provided in this kit. The kevels extend far above the gunwale, which is really ridiculous.
12) Don't use CA glue anywhere near the clear plastic used for windows because the fumes fog them permanently. "Cockpit cement" used for plastic models is a good alternative.
13) The robands which tie the sails to the yards must be inboard of the brace lines where the brace lines are tied to the yardarm ends. Many of my sails came out too wide, and some of the robands lie outboard of the brace lines.
14) Never insert your shears or scissors into the tangled web of rigging with them open, or lines will mistakenly get sliced. I mistakenly sliced 5 lines, including a backstay which was hard to rig again. God help you if you slice a shroud line after ratlining! That's really difficult to splice.
15) The breech rope loops on all the cannon cascabels are upside down. I learned later that there were some cases in which rigging them that way was correct.
16) I forgot to add knee brackets for supporting the channels and a fishing davit on the forecastle deck for helping raise and secure the anchors. These were added near the end of this build log.
17) After more careful study of the charcoal drawing of La Couronne from the 1620's, It became apparent that the stern castle did not have an open balcony across the stern. Instead, the stern appears to be been fully enclosed along the rear, and the balcony may have been windowed or open with vertical supports (such as found on Soleil Royal) in the style of other baroque men of war.
18) The bottom of the ship should be dirty white from the "white stuff" used to coat hulls during this period of history. I left the hull as stained mahogany as builder's choice because the wood looked too pretty to paint over.
These were some of the things that plagued me on this first ship build. Every craftsman knows every single flaw in what they create, so making this list was easy. People who look at your work may pick out one or two flaws, but you know ALL of yours. That's the nature of it. The upside is that every project you do gets a lot better than the last one, especially if you are a fast learner. The best way to avoid the mistakes is to do your homework. Read, research, gather information, and make informed decisions in every step of the build.
Last edited:
- Joined
- Aug 16, 2019
- Messages
- 870
- Points
- 343

For many years in the front of my hobby store a build model of the Couronne was in evidence. Was looking at it every time I was going there the perfect thing that make you dream. Well friend your build make me dreaming beautiful just beautiful congratulation for a successful build.


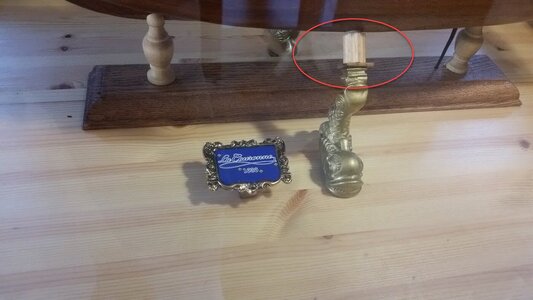
Actually it it permanent. Any ideas to replace it? I could paint it gold. If I take the entire fish away. the ship will capsize.Hello Kurt, If you don't mind obviously, I hope the wooden piece (circled red) is only temporary and already removed for final display!It is distracted from the beautiful and gorgeous model view, IMHO.
View attachment 194812
Last edited:
Well... I guess, the only way out - is to redo the stand itself. The right stand post is 'falling'. Take the model on a temporary foam. If you still want to use the existing stand, add a wooden cross-section in the middle where wish will stand while touching the hull with the tail.Actually it it permanent. Any ideas to replace it? I could paint it gold. If I take the entire fish away. the ship will capsize.
Here is some stand idea from my friend Alexandr @Kortes
“La Jacinthe” Schooner France -1:42 scale [COMPLETED BUILD]
Gretetings, dear KNUT. Before cutting the material was saturated with the PVA solution, the technology used is the same as for the sails.
shipsofscale.com
That center stand already came with the Corel kit. I guess I was getting too fancy with the fish?Well... I guess, the only way out - is to redo the stand itself. The right stand post is 'falling'. Take the model on a temporary foam. If you still want to use the existing stand, add a wooden cross-section in the middle where wish will stand while touching the hull with the tail.
Here is some stand idea from my friend Alexandr @Kortes
“La Jacinthe” Schooner France -1:42 scale [COMPLETED BUILD]
Gretetings, dear KNUT. Before cutting the material was saturated with the PVA solution, the technology used is the same as for the sails.shipsofscale.com
If you like those fish(es) then a wider base board would be needed (or, as Jim is suggesting, a cross) so the fish would reach the bottom of the hull without that intermittent timber piece. Or, if you want to keep the baseboard as it is, scrap the fish and give the hull the necessary side support with two timber arches, which sit on the baseboard and support the hull at about the points where the timber pieces are at the moment. I use this method with all of my ships, as far as I can remember it is originally a Corel solution.
János
János
Actually, nothing is too fancy when it comes to your personal taste. The fish is the perfect match for the build, but the tale of the fish should hold the hull. You have to move the fish closer and slightly up. This is why you need cross timbers, so it will hold the fish.


