La Couronne Corel/scratch 1:100 First build [COMPLETED BUILD]

Okay, I FINALLY got a decent camera, and was poking buttons on it like an idiot until I go these shots. The camera is a new (used) Nikon D3200, a great camera for beginners (me).

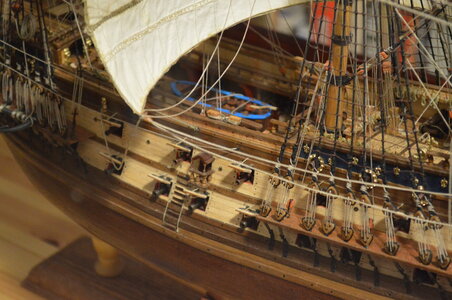
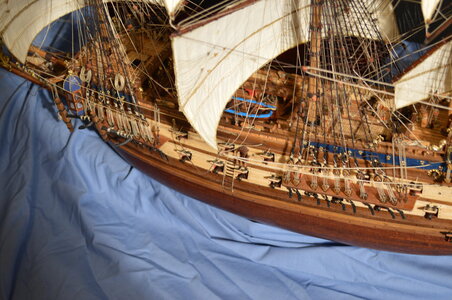
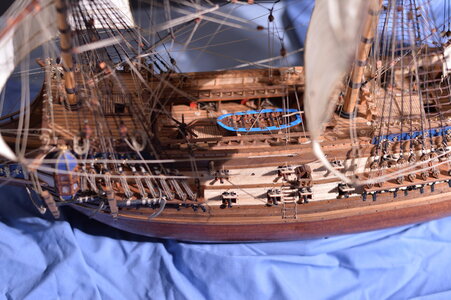
Details.JPG

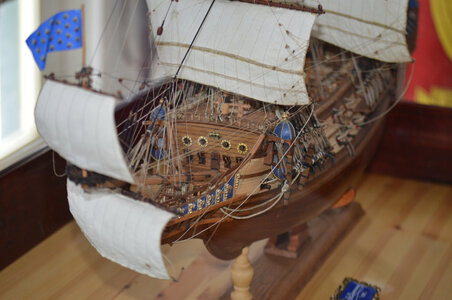
Front Close.JPG

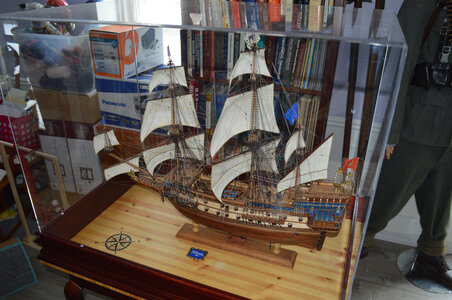
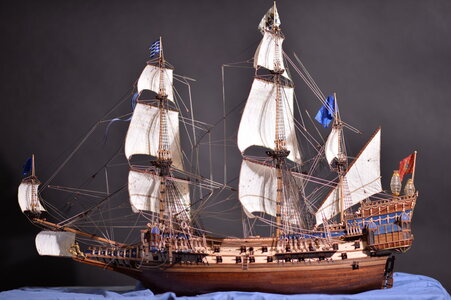
Front.JPG

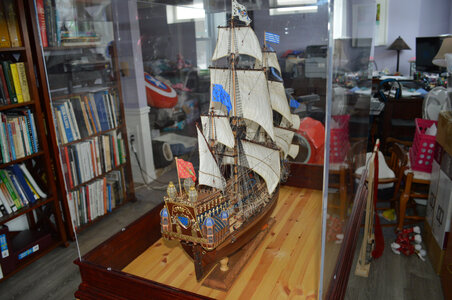
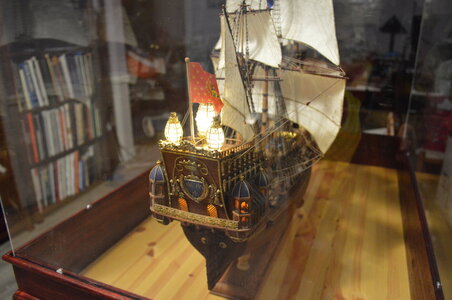
Stern.JPG

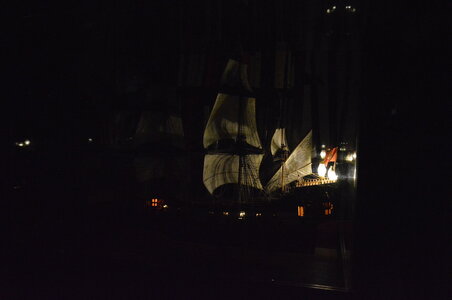
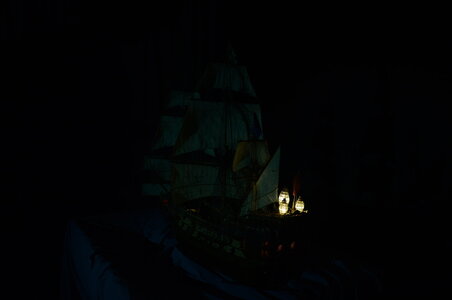
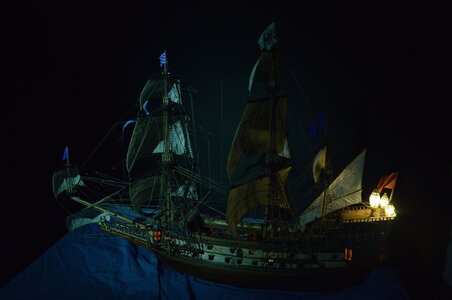
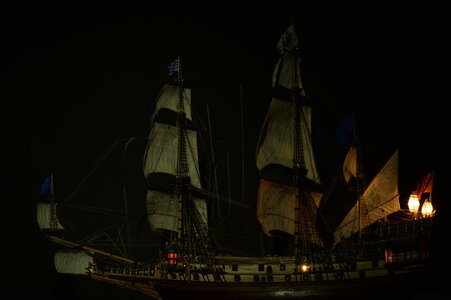
This night shot took some experimentation. I still can't reduce the brightness of the stern lanterns to their true brightness without losing the rest of the image to the dark. You should be able to clearly see the ribs in the stern lanterns in the night shot. Any ideas? Maybe I need a polarization filter.
Lights at Night.JPG

Stern Lights.JPG

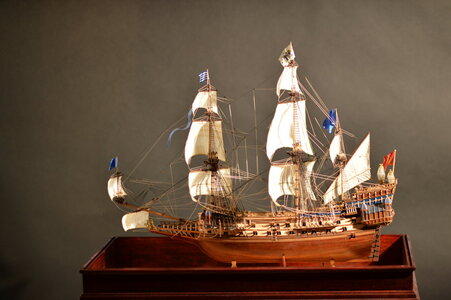
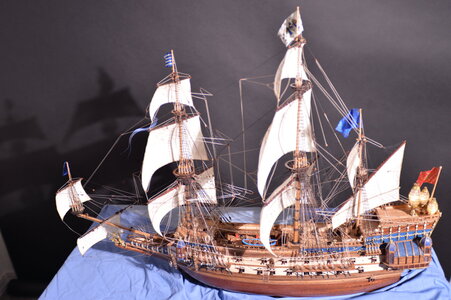
Tadaaaa! Nice pictures at last. Now to get the model in front of a decent backdrop with proper lighting, then take even better pictures.
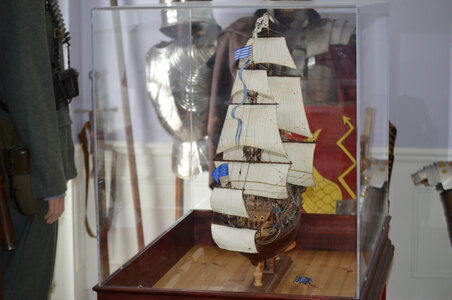
Side in Day.JPG
 
Hi Darivs,
A very nice model. Regarding the photography there is a section on this site dealing with photographing the model. Maybe you will find some answers to your questions there. Concerning exposures with only the ships lighting: firstly, I would light up the background slightly, reflecting against a light coloured wall with soft lighting to dampen down the effects of the ships lighting, making sure that some of the ship is illuminated, as the camera's focusing will be on the brightest part of the Image, that is on the lights. You could also use a flash bouncing the light off the ceiling above the ship. Turn the ISO setting in the camera to 100 and use a tripod. Don't use spot metering. You will have to experiment with the metering settings. Outdoor photogrsphy in the evening is similar and one of the things some photographers forget or overlook is the fact that photography at night is best achieved in most cases just after sunset when the sky has a cobalt colour. Maybe you could take the ship outdoors and photograph it when the sun is really low with a warm glow or just after. The lights of the ship would still be seen in rhe image.
Thats my tuppence worth and best of luck.
Trevor
PS. Just a comment, but would it be possible to photograph the ship where there is much less background distraction?
 
PS. Just a comment, but would it be possible to photograph the ship where there is much less background distraction?
All the clutter from the books and objects in the background makes for poor photography, so a friend and I are going to rig a backdrop of sky blue or perhaps black cloth and get proper lights with umbrellas and maybe a light reflector also. I am just beginning to learn how to use this camera, and a friend with an older vintage Nikon has more experience, so we are going to play around with things until we get it right. The ship may be moved outside so diffuse sunlight coming down though the canopy of oak trees overhead will provide a better starting point for lighting. This will have to wait until winter is over, of course. Lots more to learn!
 
My friend Erik and I tried some amateur photography, and proved to ourselves after 60 photos that we are indeed amateurs. He used a Nikon DF and I had a Nikon D3200. We both made a few shots that actually came out decent. Our setup materials only included one photography light off to the right, a bedsheet taped to the wall on the left, a couple old blue and sea-green bedsheets laid under the model, and a large roll of black construction paper for the background. Some shots were by hand, most using a tripod. Our settings were all over the place. Like I said: amateur. Here are the results.

Nikon DF close-up
D3200 Close-up.JPG

Nikon D3200 close-up
DF Close-up.JPG

Nikon DF shots
DF Shot Hand Held.JPG

DF shot.JPG

DF3200 night shots
D3200 Night Shot.JPG

An LED flashlight was held at a distance to simulate moonlight
D3200 Moonlilght Shot Using an LED Flashlight.JPG

DF Night Waterline Shot.JPG

DF Top Down Shot.JPG
 
Last edited:
Bonjour,
Un grand bravo pour cette réalisation de ce très beau modèle " la Couronne " et de voir grâce à vos photos la progression de ce modèle ! et votre vitrine est aussi très bien.

Hello,
A big congratulations for this realization of this very beautiful model "La Couronne" and to see thanks to your photos the progress of this model! and your showcase is also very good.
 
Last edited by a moderator:
Bonjour,
Un grand bravo pour cette réalisation de ce très beau modèle " la Couronne " et de voir grâce à vos photos la progression de ce modèle ! et votre vitrine est aussi très bien.

Hello,
A big congratulations for this realization of this very beautiful model "La Couronne" and to see thanks to your photos the progress of this model! and your showcase is also very good.
Merci et bienvenue sur notre forum.
 
I forgot to install a fish davit on La Couronne, so let's make one!

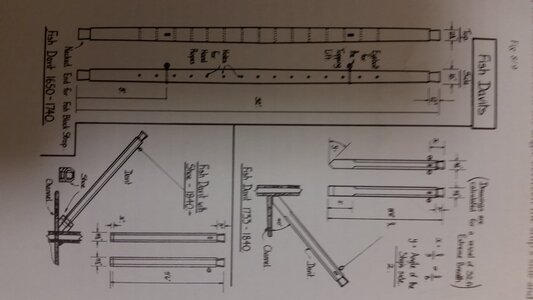
Here is the general plan, taken from James Lee's The Masting and Rigging of English Ships of War - 1625-1860.
1394 Plan for Making Fishing Davit.jpg

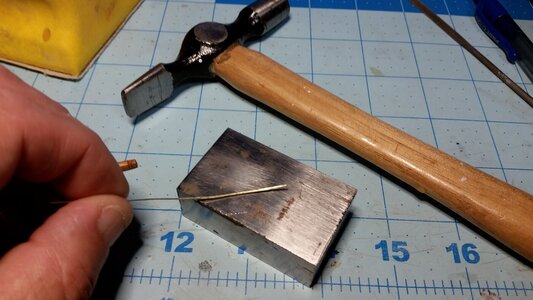
Take some 24g brass wire and hammer it flat.
1395 Hammer 24g Brass Wire Flat.jpg

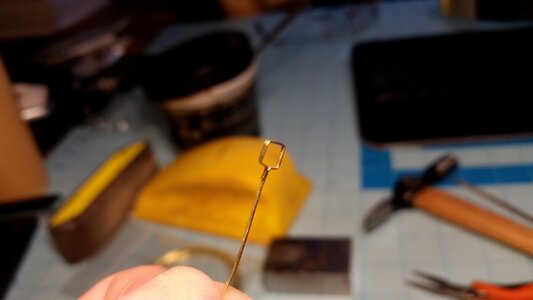
Form the spanshackle. The fish davit slides through this. It is later mounted on the forecastle deck.
1396 Form Spanshackle.jpg

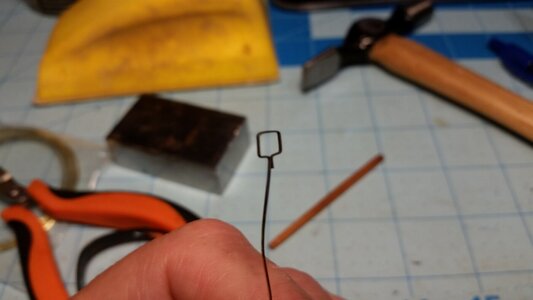
Blacken the brass.
1397 Blacken Brass Spanshackle.jpg

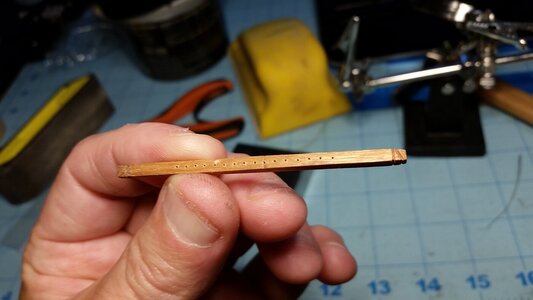
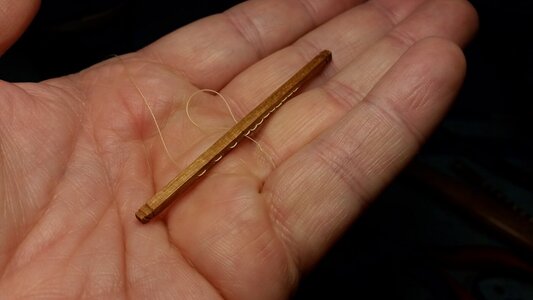
Taking a 4x4mm walnut stick, taper it at both ends by sanding, cut the notches for the fishing tackle at both ends with the sharp edge of a needle file, and use a micro drill in your Dremel or other rotary tool to drill the holes for the rope handles.
1398 Craft Fishing Davit from Walnut.jpg

Harden the end of the some 0.13mm thread with CA glue, and use it it like a needle to sew the rope handles through the holes.
1399 Sew Rope Handles Though Davit.jpg

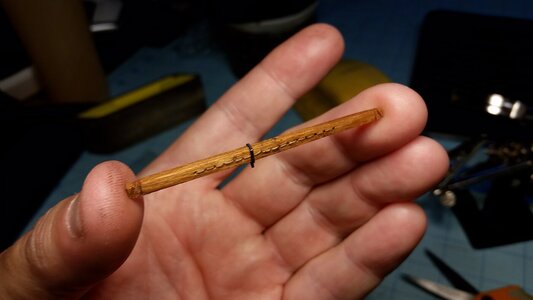
Stain with Walnut Danish Oil, place the spanshackle over the davit, and there you go. One fish davit.
1400 Stain with Danish Oil and Fit Spanshackle.jpg

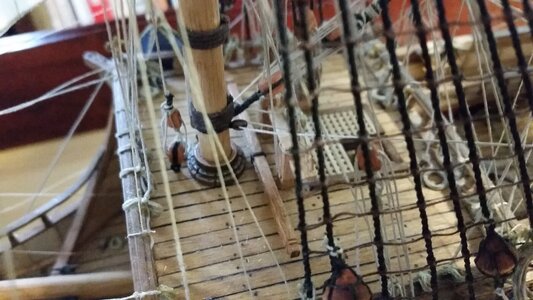
The fish davit is installed on the forecastle behind the foremast. The hardest part was getting it in place through that web of rigging.
1401 Fishing Davit Installed on Forecastle Deck.jpg
 
Last edited:
31 pages and all I can say "simply outstanding detail and workmanship" I especially enjoyed/loved your coverage of sail making. Admittedly was confused and had no idea what the technical terms used, were, or meant. Redface ----- Anyway, well done and awesome stuff Mr Darius.
 
31 pages and all I can say "simply outstanding detail and workmanship" I especially enjoyed/loved your coverage of sail making. Admittedly was confused and had no idea what the technical terms used, were, or meant. ----- Anyway, well done and awesome stuff Mr Darius.Redface
If you have ANY questions as to the terms, ASK me! As a beginner to this hobby, the lexicon is just part of the steep learning curve, and you have to learn the terms one at a time from blogs and books. That takes a long time, so please ask.
 
If you have ANY questions as to the terms, ASK me! As a beginner to this hobby, the lexicon is just part of the steep learning curve, and you have to learn the terms one at a time from blogs and books. That takes a long time, so please ask.
Thank you. Good advice and point taken. I have actually, and finally figured out, and remembered, "Port" and "Starboard", "Standing" and "Working" rigging. It's my start I guess. Again cheers to you thanks for the recommendation(s).
 
More sail work. The challenges for making sails for 1:100 ship are different than making sails for larger models, which most people prefer. Corel is the only company that makes most of their models in this scale, and the details which are sacrificed from larger models have to be carefully selected or you will throw out things that would have made the model look more extravagant. On the other side, if you add details which appear on larger models, you cannot make them tiny enough to fit in scale. They appear grossly oversized. Things like hull trenails and iron tails, blocks, lines, and sail stitching are tempting to include on a small model when you are aware they should be on a ship, but at the scale of 1:100, some must be left out so that the appearance of the model at 1 meter will approximate the appearance of the real ship at 100 meters.

After careful consideration of how to make the bonnets and lace them, it was decided that the bonnet lacing would be simulated by a simple 3mm running stitch above the 0.5mm foot stitch of the main course, fore course, and lateen sails. 100% poly general purpose thread, #8060 "ecru" was used, and it is a shade darker than the tabling stitch thread on the periphery. The running stitch simulating the bonnet lacing was carefully and slowly machine sewn. The running stitch will appear equally on the rear side, when it shouldn't, but that is something I'll have to live with using this method. It would have been nice to have two running stitches atop one another to simulate the lacing loops, but I cannot run two stitches over one another accurately at the scale, it would over-complicate the appearance as well. At present, the bonnets and sails are still part of the same piece of cloth, but after staining, the parts will be cut into separate pieces so that the bolt ropes for bonnet and sail may be hand sewn onto their entire periphery.

View attachment 174207View attachment 174208View attachment 174209
Question; have you or did you use "tearaway Stabiliser" during your Sail sewing process?
 
Question; have you or did you use "tearaway Stabiliser" during your Sail sewing process?
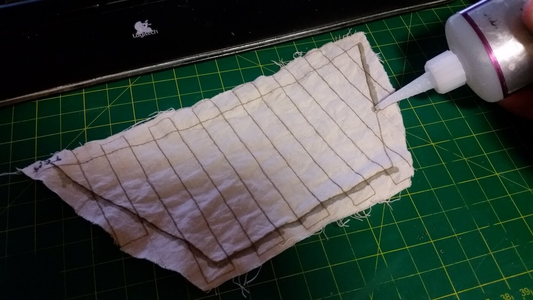
I think you are asking if I used anything to prevent the raw edge of the fabric from fraying. Before cutting the fabric, CA glue was carefully applied outside the seam that runs along the outside edges of the sail. This locked the fibers of the cloth together and prevents the edges from unravelling. You don't want the CA to get onto any part of the sail inside the brown seam shown below, because it stains the sail and darkens it. Once dry, use a scissors to cut the sail just outside the brown seam at the edges. You can see how unraveled the fabric edges are after staining and washing the sails. The CA glue prevents that.

1657824239885.png
 
I think you are asking if I used anything to prevent the raw edge of the fabric from fraying. Before cutting the fabric, CA glue was carefully applied outside the seam that runs along the outside edges of the sail. This locked the fibers of the cloth together and prevents the edges from unravelling. You don't want the CA to get onto any part of the sail inside the brown seam shown below, because it stains the sail and darkens it. Once dry, use a scissors to cut the sail just outside the brown seam at the edges. You can see how unraveled the fabric edges are after staining and washing the sails. The CA glue prevents that.

View attachment 318596
Hi, I followed your sail commentary very closely, indeed several times. (Brilliant work I must restate) So I do understand what you have written in this reply. “Tearaway Stabiliser” is a cotton type backing used for tapestry/embroidery to stiffen material and is pulled away once the work has been completed. The reason I asked is in watching Olha’s video for the umpteenth time ‘Sewing sails for ship models in scale ½”-1ft – (part 1)
.
From 6min43sec she uses something which at 7min21sec is torn off. I presume she has or is using Tearaway Stabiliser at some point in her sail making. Hence my question to you.

So far prior and during your sail making submission I purchased and made up 3 x sets of sails using, Pure cotton Lawn, Stretch Sateen and Muslin. My preferences remain undecided between Lawn and Sateen. Muslin is too thin and soft to manage so I discarded it. Initially the sewing was a little ‘wonky donkey’ but improved during progress. The main issue encountered was sewing the Leech(s). The material kept pulling in and made it difficult to sew straight on these edges. This is why I started to explore methods to avoid this happening and came across ‘Tearaway.

What I did manage to complete became a disaster when dying with tea and or coffee. Tea was too orange, coffee better drunk than used as a dye. Bituminous stain (furniture Ind) no longer available here and the smallest Stockholm Tar available is 1 x Litre enough to dye the entire Spanish Armada which I doubt is possible for me to make in my remaining lifetime. It’s frustrating because I need to update my progress on “La Pinta” but I’m stuck on sails. Lord forbid when I get to Ratlines. Respectfully I’m using your guidance/instructions for sail making as denoted way above which I have bookmarked. Thank you for replying and cheers to you.
 
Back
Top