La Créole 1827 by archjofo - Scale 1/48 - French corvette

Hello,
thank you all for the nice birthday wishes. I was really very happy about that.

Continuation: Ratlines for the fore topmast shrouds - Enfléchures
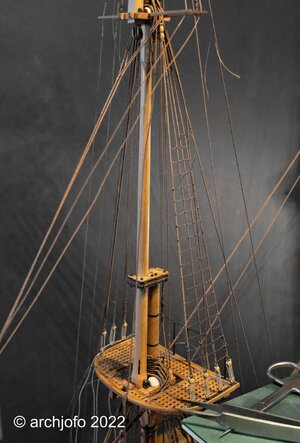
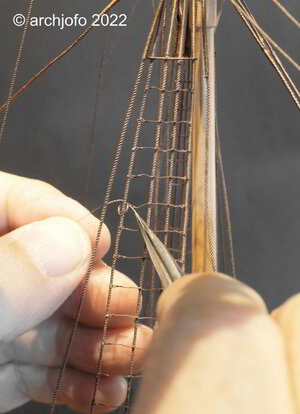
In the meantime, I have started working on the port side ratlines (ø 0.25 mm) of the fore topmast shrouds. These are already about three quarters made, as can be seen in the following pictures.
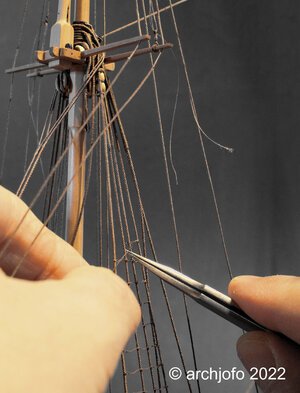
DSC00505.jpg

DSC00512.jpg


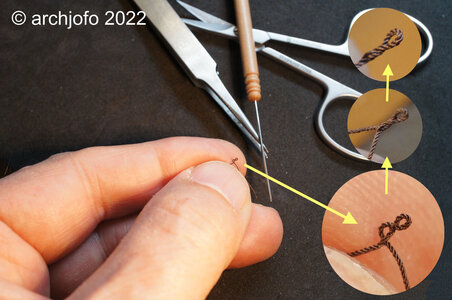
On the last picture I show again how the simplified splice for binding the ratlines to the outer shrouds is made step by step. For lifting and inserting the end of the rope twice between the strands, I use an appropriately prepared cannula, as already reported and shown.
DSC00519.jpg

The end of the chapter -ratlines- is within reach.
To be continued ...
 
Hi Johann

Thank you for sharing your build and your deep knowledge. I do believe every adjective has been used to describe your work.

With every update you demonstrate not just your knowledge of naval architecture, but how you think about the challenge and logically find the best method towards a solution. To me, it's evident you break complicated challenges/structures down into their simplest components and then reconstruct them to their final state. This realization hit me when I see how you illustrate for us, all the relevant components, show them in an "exploded" view just before you assemble and show the finished structure. Understanding "how" you think through these challenges is what really has been insightful to me. I hope to mimic this/your methodology, albeit, not to the gold standard you are able to achieve.

Thank you for sharing with us all, exactly how you logically approach your work. This, I believe, is the journey you referred to in an earlier post.

Ken
Ken - you have spoken very well - and you found correct words => I fully agree with you
 
@Hoss6262
Hello Ken,
I am very pleased to see the effect my report has had on you. Thank you for the very positive comment.
Since I benefit from the reports of other modelling colleagues, it is also important to me to share my way of working. In this way we can all develop as good model builders and enjoy looking at our models.

@Uwek
Hi Uwe,
thanks to you and all the others for their interest in my report.


What is the saying?
Little by little the bird builds its nest ...
So it goes on here with small steps ... ratline for ratline ...

Continuation: ratlines for the topmast shrouds - Enfléchures
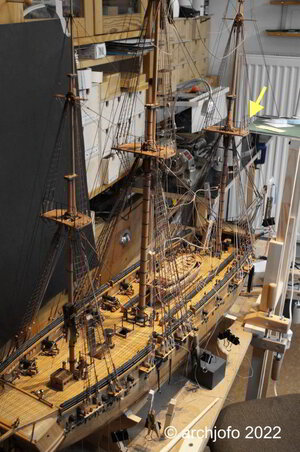
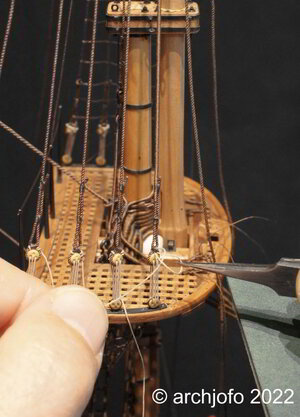
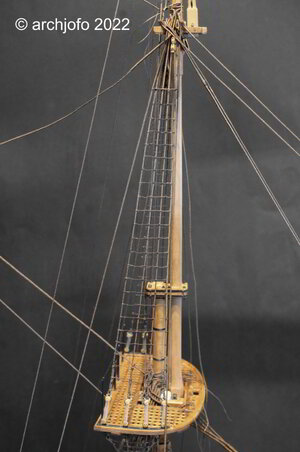
The last stage for the installation of the ratlines (ø 0.25 mm) was initiated, namely with the final fixing of the lanyards of the starboard side topmast shrouds.
On the following picture I have marked the corresponding place with an arrow, where work is going on at the moment.
DSC066743_wett.jpg

The next picture shows the fixing of a taljereep with the tweezers.
DSC066742_wett.jpg

After fixing the lanyards of the topmast shrouds, the knotting of the ratlines can be started in the way already described several times.
To be continued ...
 
Belated birthday wishes! I am in awe of your skills, having read your build log over and over again. looking forward to further chapters…Thank you for inspiring us!
 
@Algol1957
Thank you for your requests and your interest in my report.

Completion: Ratlines for the topmast shrouds - Enfléchures
It has been quite a while since I started attaching the ratlines for my French corvette at the lower shrouds.
Today I was able to tie the last ratline knots at the starboard side of the topmast shrouds and with the last binding the chapter -ratlines- was finished.
DSC066744_wett.jpg DSC066745_wett.jpg
Before I start to make the yards, I still have some rest work to do for the standing rigging, e.g.
- Fixing the topgallant shrouds
- Catharpins for the topmast and topgallant shrouds
- Fore topmast- and fore topgallant stay

To be continued ...
 
A good feeling finishing the ratlines, especially the way you perform this. Lots of work making these eyes. Thumbs-UpFirst Place Metal
The topgallant shrouds will get no ratlines? Don't know how 19th century ships are rigged. Just know a lot about 17th century.
 
Hello Johann,
I do plan to build the La Creole although I am debating whether to build it at 1:48 or perhaps at 1:72 or even 1:96. My space for construction is very limited and hence the dilemma. The question obviously is my ability to tackle the details at a significantly reduced scale…that will be a very significant challenge.

Best,
Suparno
 
Cleats for the topgallant lifts and royal lifts
I almost forgot!
Wasn't there something else with the shrouds? There are a few details I'd better mention now.


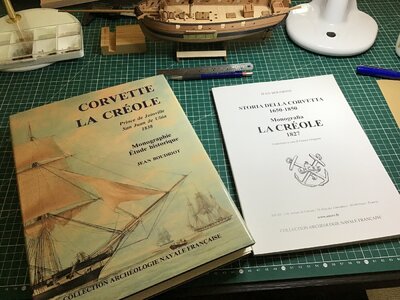
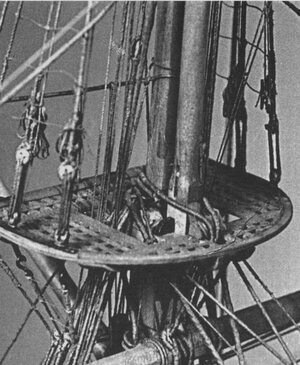
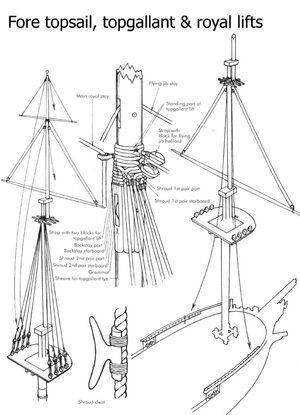
The description of the monograph for La Créole itself does not clearly state how the lifts for the topgallant yards and royal yards are to be attached. As far as I could tell from the description, the lifts were attached somewhere in the area of the top. On the original photos of the Paris model of the La Créole, you can clearly see two cleats on each of the topmast shrouds. Until now, I could not clearly identify the ropes used there. However, after some research, my suspicions were confirmed. These are the lifts for the topgallant yards and royal yards.
Kreuzmasttop_LaCreole_Topnanten_Kausch.jpg
Source: Monograph by J. Boudriot, detail of original model

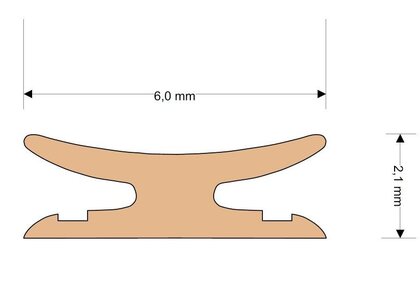
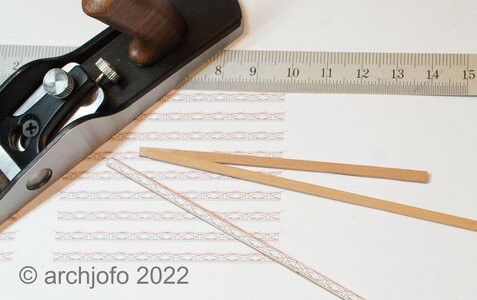
The next step was to clarify the shape and size of these cleats, a total of 3 x 4 pieces, which I derived from the original photograph and drew.
Klampe_Topnanten_LaCreole-klein.jpg


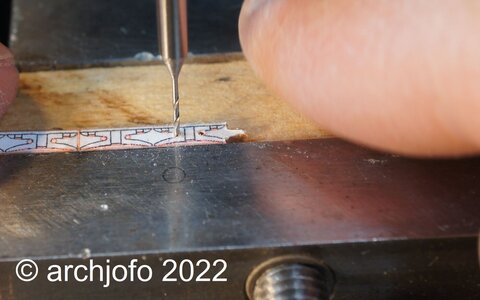
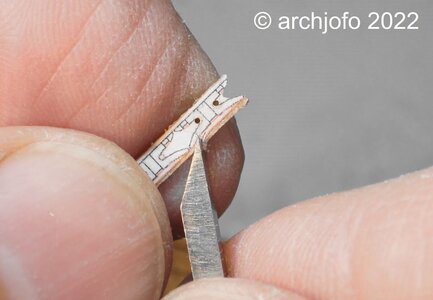
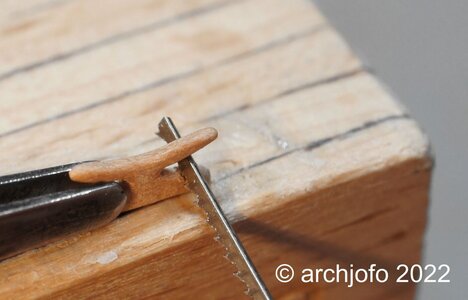
I made the cleats from service tree. The following pictures show different stages of the production.
DSC00544.jpg

DSC00552.jpg

DSC00550.jpg

DSC00557.jpg


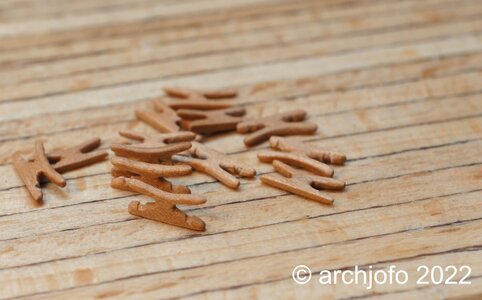
The last picture shows the result.
DSC00561.jpg
Attaching these cleats to the topmast shrouds will probably be another small challenge to master.
 
Good evening, in general, apart from the manual skills of the individuals, for an excellent model I am of the opinion of a good documentation also to have a knowledge of the individual details their functionality, Good evening to you all
 
@Frank48
I hope that with the following picture the functions become clear.

topgallant_royal_lifts.jpg
Source: https://www.sailboatmodel.info/

Continuation: Cleats for topgallant lifts and royal lifts
Mostly it comes differently than one thinks!
So in this case. While I had thought that binding the filigree cleats to the topmast shrouds would be very difficult, my first attempt showed that it would be relatively easy.
Before I started with the shrouds for this model, I first built a corresponding jig for experimental purposes. This served later among other things also with decisions for attaching the ratlines. And now it served to test how best to attach the cleats to the shrouds.
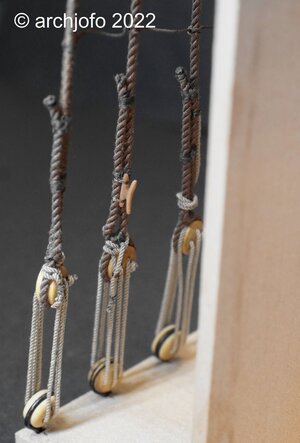
The trick, if you can call it that at all, is to tie the cleats comfortably to the shrouds from the front, and then simply turn them backwards to the desired position.
DSC00565.jpg
To be continued ...
 
Johann...
You will never stop impressing me with your work.

Simply OUTSTANDING JOB!!!!

I wish to see your model somewhere on display and spend good few hours staring on details ;)

Great progress Mate!

Cheers,
Matt
 
@Frank48
I hope that with the following picture the functions become clear.

View attachment 304448
Source: https://www.sailboatmodel.info/

Continuation: Cleats for topgallant lifts and royal lifts
Mostly it comes differently than one thinks!
So in this case. While I had thought that binding the filigree cleats to the topmast shrouds would be very difficult, my first attempt showed that it would be relatively easy.
Before I started with the shrouds for this model, I first built a corresponding jig for experimental purposes. This served later among other things also with decisions for attaching the ratlines. And now it served to test how best to attach the cleats to the shrouds.
The trick, if you can call it that at all, is to tie the cleats comfortably to the shrouds from the front, and then simply turn them backwards to the desired position.
View attachment 304447
To be continued ...
Dear friend My message was not for you but it was basically for eueryone at the Forum to encourage them to always be informed and research for naval architecture . Have a wonderful day
 
Back
Top