La Créole 1827 by archjofo - Scale 1/48 - French corvette

Maybe the builder decided on lighter color to stand out in display, and it didn't need to be sea worthy rigging for museum display.

I always cringe when someone says "It's a Museum Quality Model Ship" as many in museums are not the best representation of the actual ship or methods used for the period of actual construction.
 
Making a dust cover
Since the last post, very little has happened in my model building yard.
If you are not working on the model, you don't have it in view all the time, so to speak, and therefore the first dust build-up cannot be counteracted, then it is advisable to place it under a protective cover.
Since I will certainly be busy equipping the yards for some time, I have been thinking about protecting the model against dust for some time.
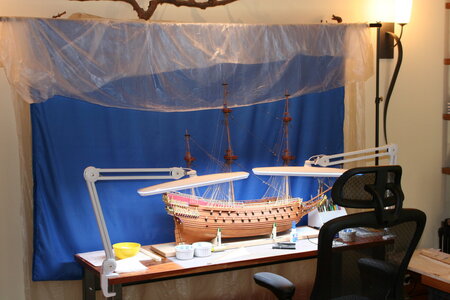
A display case would be too impractical because you have to work on the model from time to time. In this respect, I thought about building a cheap dust cover that makes it possible to open the front in order to be able to remove the model or work on it.
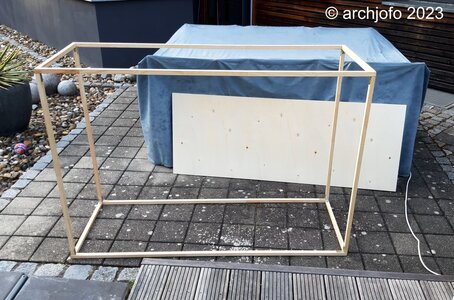
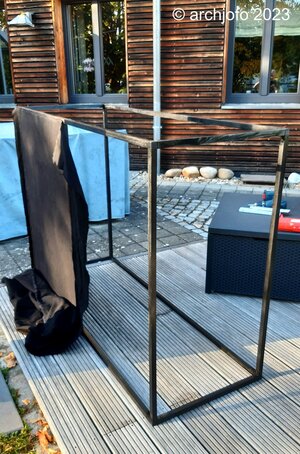
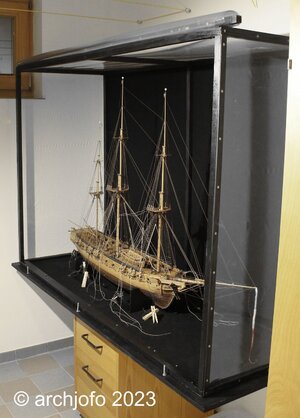
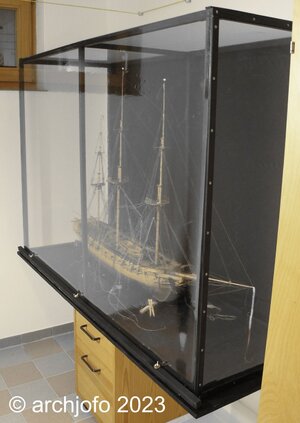
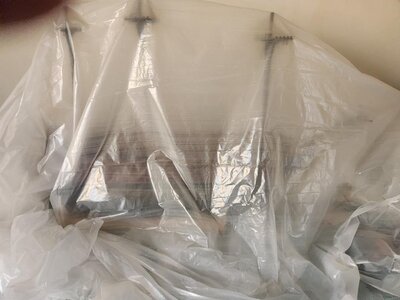
The frame was made with 20/20 mm spruce strips and metal angles and was covered with Molton fabric on the back. This ensures a neutral background and, if necessary, possible detailed shots. The remaining areas were covered with a crystal-clear PVC film. The front can be braced downwards using a longitudinal strip or rolled up at the top.
20230929_173203_Forum.jpg

20231013_165830_Forum.jpg

_DSC0559_Forum.jpg

_DSC0567_Forum.jpg
Hopefully soon I will be able to pick up where I left off almost 2 months ago.
So until then…
 
Making a dust cover
Since the last post, very little has happened in my model building yard.
If you are not working on the model, you don't have it in view all the time, so to speak, and therefore the first dust build-up cannot be counteracted, then it is advisable to place it under a protective cover.
Since I will certainly be busy equipping the yards for some time, I have been thinking about protecting the model against dust for some time.
A display case would be too impractical because you have to work on the model from time to time. In this respect, I thought about building a cheap dust cover that makes it possible to open the front in order to be able to remove the model or work on it.
The frame was made with 20/20 mm spruce strips and metal angles and was covered with Molton fabric on the back. This ensures a neutral background and, if necessary, possible detailed shots. The remaining areas were covered with a crystal-clear PVC film. The front can be braced downwards using a longitudinal strip or rolled up at the top.
View attachment 402480

View attachment 402481

View attachment 402478

View attachment 402479
Hopefully soon I will be able to pick up where I left off almost 2 months ago.
So until then…
Very inventive, Johann. I like the idea very much.
Regards, Peter
 
Hello Ken,
a nice solution for a dust cover...:D
No problem with the lower masts yet.
I once did a similar experiment with a light foil like you. However, the royal masts were already set and that wasn't ideal. Pulling it down was also an adventure with an uncertain outcome... :oops:
 
As always Johann your solutions exceed most and all of your work exceptional, including your dust covers. :D Here is my version of a dust cover. ROTF Not elaborate in any way, but keeps the dust off.:rolleyes:
View attachment 402594
Ha! I came up with the same primitive solution, Ken @Hoss6262 (may apologies to our host for the diversion):

IMG_8400.JPG
 
For everybody interested in the planset of this amazing model / ship, please take a look at this information / newsletter by ancre

The monograph and planset will be available soon ALSO IN ENGLISH LANGUAGE

 
Hello friends of model building of historical sailing ships,
at this point I would like to thank you very much for your interest in my construction report. Thank you also for your contributions and tips.

Continued: Equipping the main topsail yard - footropes and stirrups - Marchepieds et étriers etc.
The garden has been "tidied up" and made ready for the winter. Everything has also been done in the house. The days have become shorter and motivation is at a high level again.
So I'm continuing where I left off a good 2 months ago, with the footropes in the main topsail yard.
In the meantime, I have carried out further research into the design of the footropes and stirrups for this yard and have therefore decided, contrary to my previous assumptions (see sketch in previous reports), to attach two stirrups to each half of the yard. I will therefore move the outer attachment points of the footropes further inwards.
What seems important to me in this context is the fact that even with such inconspicuous details as the footropes, the following principle must be observed: the higher up in the rigging, the more delicate the rigging elements, such as ropes, thimbles and blocks, become.
This is why the following picture shows the difference between the stirrups of the main yard (top left in the picture) and the main topsail yard, which is quite recognizable.
DSC01563.jpg
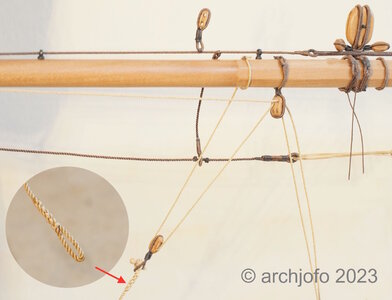
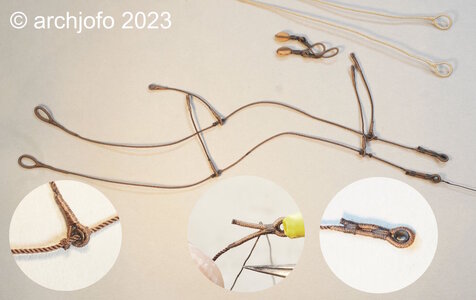
On the next picture you can see the finished footropes with the stirrups of the main yard and one or the other detail in an enlargement. The footropes have a diameter of 0.54 mm for the model (original size ø 26 mm), the stirrups ø 0.48 mm (ø 23 mm).
DSC01569.jpg

After attaching the footropes with the stirrups and the rest of the equipment, such as the brace blocks and the lifts, I also attached the sheets, clewlines and the ropes for the reef tackle.
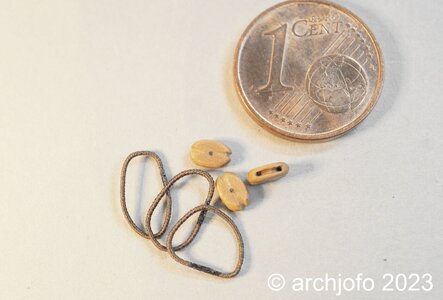
The length of the clewline blocks for the main topsail yard for the model is 4 mm, as can be seen in the next picture. The block strops are already lying next to it, ready to be tied in.
DSC01577.jpg

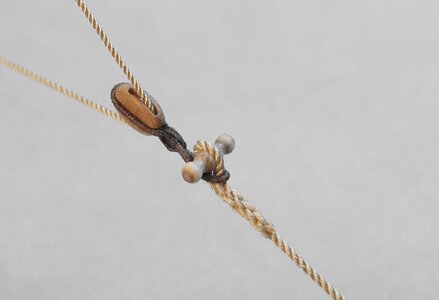
Since I do not attach sails to my model, I connect the sheet ends (eye splices) to lower clewline blocks with toggle, as seen on the Paris model and various contemporary models. Apparently the French preferred to use toggles (cabillot d'armarrage) to connect the clews to the sheets.
On the other hand, the stopper knot was obviously widespread among the English, at least that was my observation. Unfortunately I can't prove that.
DSC01578.jpg
I made these little toggles from dogwood, one of the hardest native woods, which is very suitable for turning and polishing, so ideal for this purpose.
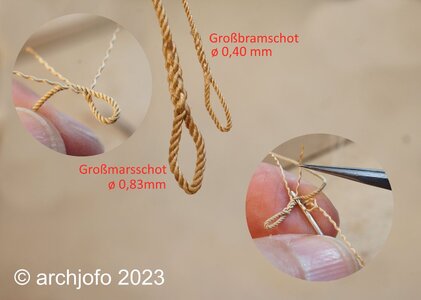
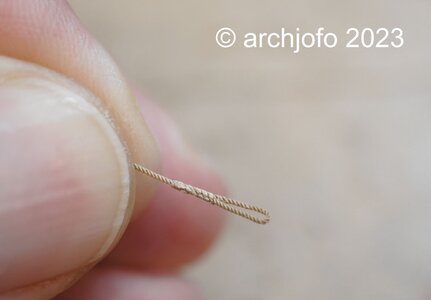
The following illustration shows the eye splice of a sheet for the main topgallant sail (0.40 mm), which will later be connected to the clewlines of the main royal sail using a toggle.
DSC01584.jpg

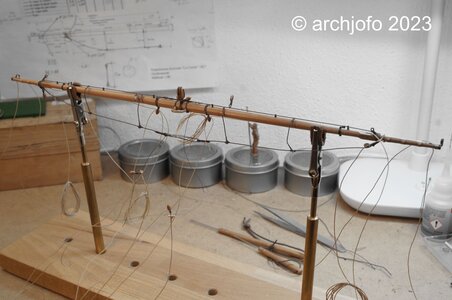
At the moment I'm still working on the main topsail yard, as you can see in the following picture.
DSC01582.jpg

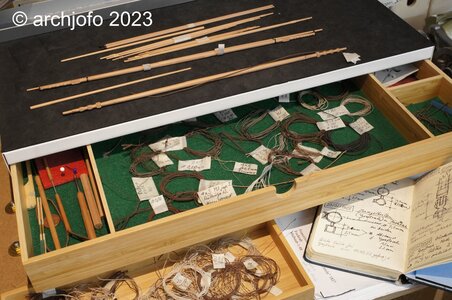
The last picture shows the back part of my “rigging workshop”. On the one hand, you can see the yards and spars that have not yet been equipped, and on the other hand, various rigging thread and a few rigging utensils, always ready to hand.
DSC01567.jpg

By attaching the studding sail booms, the main topsail yard will ultimately be fully equipped.


Sequel follows …
 
Good to see you back and your marvelous rigging quality. And having a look in you workshop is always a pleasure.
Your details one a 4 mm block are just..... that is difficult to make. But you nailed it. Thanks for sharing this with us.
 
WITAJ
Praca jak zawsze na najwyższym poziomie godna podziwu . Ja też robię takielunek będę podglądał twoją relację . Pozdrawiam Mirek
 
@Steef66
@Mirek
@Paulpk

Thank you very much for your nice comments, and thanks to the others for the LIKES.

Continuation: Equipment of the main topsail yard – eye splices for sheets
If I remember correctly, some time ago a dear fellow model maker once described weaving linen as a “complementary meditation”.
I discovered another passion by making eye splices... .
But seriously, making splices is really relaxing. The feeling of looking at the result also conveys a certain fulfillment, at least for me.
After many attempts, I am now more or less able to make usable eye splices in almost any rope thickness.
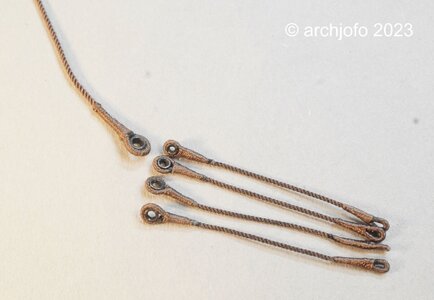
In the meantime I have formed the ends of the main topsail sheets and main topgallant sheets with eye splices so that I can later create the connection already described using a toggle on the clewline blocks or on the clewlines.
DSC01595.jpg

DSC01594.jpg
Up soon …
 
Back
Top