La Créole 1827 by archjofo - Scale 1/48 - French corvette

It is otherworldly good what you are making with the rigging on this scale.
I can imagine the feeling of fulfillment when you see the results of each step apart, let alone the feeling when you see the end result of a yard completed with all rigging - so much to see and all perfectly executed.
 
Your eyesplice looks very clean.
For me it's also very relaxing to make a eyesplice or a grommet. Even a knot on the end of a rope, the way sailers make them is possible. Real fun to do, just try it would I say to everybody here.
 
Hello colleagues,
thank you very much for your interest and the nice comments.

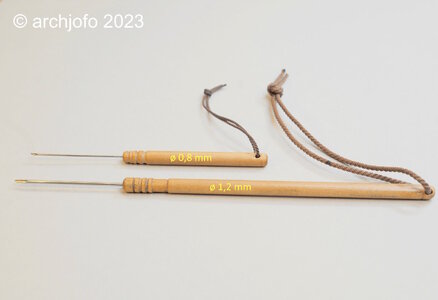
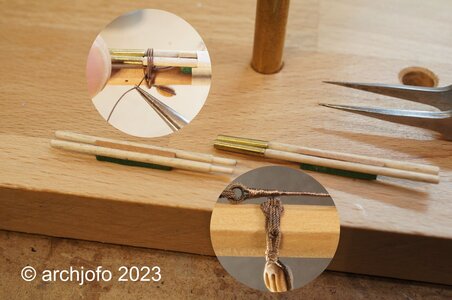
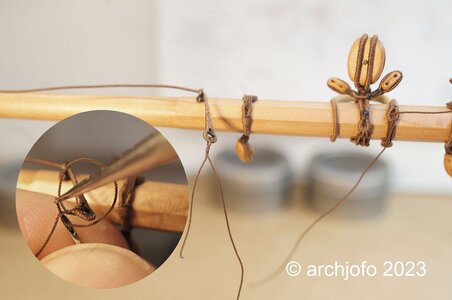
A long time ago I made these hollow spikes from cannulas in two thicknesses. For example, I used the thinner hollow spike to make the brummel eye splices at the ends of the ratlines.With these “model spikes” it works quite well after some practice.
DSC01597.jpg

It is recommended to make the sharp tips of the needles slightly rounded and blunt so that the thin ropes are not cut.
 
@kuba91nt
Thank you for your recognition of my work.

Completion: Equipment of the main fore yard
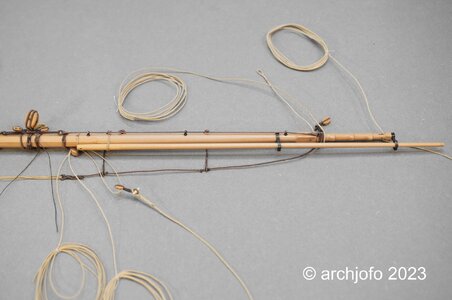
With the attachment of the studding sail booms, the equipment of the main fore yard was completed.
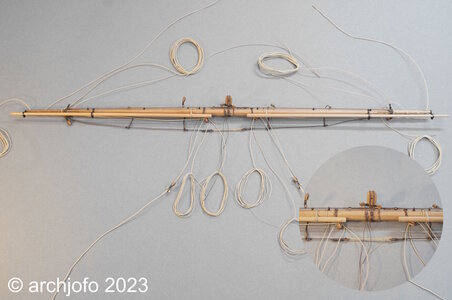
This means that this yard can be placed on its side next to the others until it is finally installed on the model. Finally, a picture that shows the entire yard with a detailed section.
DSC01598a.jpg

Everything that seemed possible and sensible was attached to the yard, which will make the later rigging work on the model a lot easier.
Next I will equip the fore topsail yard, similar to the main topsail yard. However, in an adapted form in terms of rope strengths and block sizes. Many rigging elements were already made with the parts for the main topsail yard. In this respect, I can assume that the new phase of work will progress a little more quickly. In addition, the research for the detailed training has also been completed.

Sequel follows …
 
@kuba91nt
Thank you for your recognition of my work.

Completion: Equipment of the main fore yard
With the attachment of the studding sail booms, the equipment of the main fore yard was completed.
This means that this yard can be placed on its side next to the others until it is finally installed on the model. Finally, a picture that shows the entire yard with a detailed section.
View attachment 410945

Everything that seemed possible and sensible was attached to the yard, which will make the later rigging work on the model a lot easier.
Next I will equip the fore topsail yard, similar to the main topsail yard. However, in an adapted form in terms of rope strengths and block sizes. Many rigging elements were already made with the parts for the main topsail yard. In this respect, I can assume that the new phase of work will progress a little more quickly. In addition, the research for the detailed training has also been completed.

Sequel follows …
My compliments (again) for this outstanding rigging, Johann.
Regards, Peter
 
@Steef66
@Mirek
@Paulpk

Thank you very much for your nice comments, and thanks to the others for the LIKES.

Continuation: Equipment of the main topsail yard – eye splices for sheets
If I remember correctly, some time ago a dear fellow model maker once described weaving linen as a “complementary meditation”.
I discovered another passion by making eye splices... .
But seriously, making splices is really relaxing. The feeling of looking at the result also conveys a certain fulfillment, at least for me.
After many attempts, I am now more or less able to make usable eye splices in almost any rope thickness.
In the meantime I have formed the ends of the main topsail sheets and main topgallant sheets with eye splices so that I can later create the connection already described using a toggle on the clewline blocks or on the clewlines.
View attachment 410469

View attachment 410470
Up soon …
Amazing, I have no words. Incredible work.
 
@Peter Voogt
@Uwek
@Adry

Hello,
I'm always happy to receive praise for what you do. Thank you very much for that. But of course I would also like to thank everyone for the many LIKES.

Equipment of the fore topsail yard – fore topsail yard truss, fore topsail yard tye block, quarter blocks and blocks for buntlines, Jackstay/ Racage d'une vergue, poulie d'itague et poulies de cargue fond, filière d'envergure

According to my announcement, I am currently working on the equipment of the fore topsail yard. As already mentioned, this is done in the same way as the equipment for the main topsail yard, but in an adjusted size.
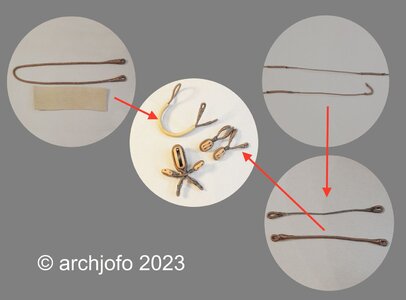
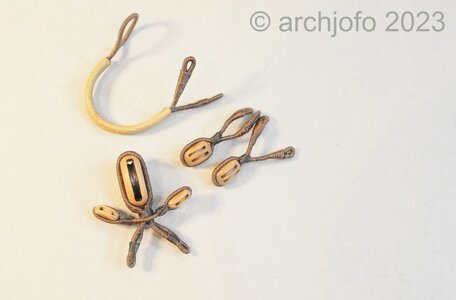
The following illustration is intended to show how the truss of the fore topsail truss is covered with leather and how the simple block strops are dressed. The tye block with the attached blocks for the buntlines (L=3.5 mm) is also shown, as is also the enlarged image in the next photo.
DSC01614.jpg

DSC01615.jpg

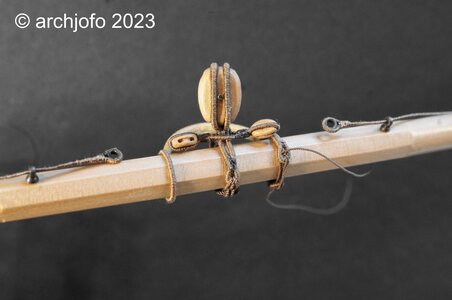
The tye block (L = 7 mm) was temporarily attached to the fore topsail yard using rose lashing and the yard truss was temporarily lashed in place.
DSC01619.jpg

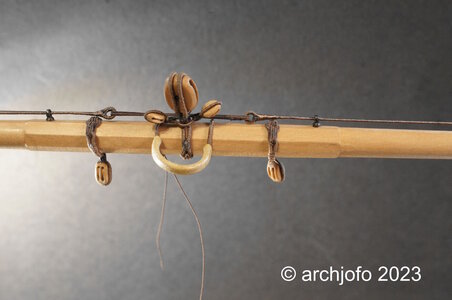
And as you can see in the last picture, I have already made and attached the jackstays. Only the rope in the thimbles still needs to be pulled in, which of course only makes sense after the double blocks for the clewlines and sheets have been secured.
DSC01620.jpg

But more about that soon…
 
Johann, thank you for explaining the steps in creating these complex rigging fixtures.

Looking at the finished block or fastener and admiring the work is one thing. Thinking to ourselves, "how does he do that?" is another. When you take the time to show us, it is SO helpful. While we might not be able to create the immaculate finished product you do, when we do create that first stropped block, it gives us satisfaction and confidence to continue to create better quality work.

Thanks again.
 
@Mirek
@Hoss6262
Hi,
thank you very much for your kind words.

Continuation: Equipment of the Fore topsail yard – quarter blocks / Poulies d'ecoute et Poulies de cargue point

As with the fore topsail yard, the clew lines and sheets each run over a double block, also known as a quarter block.
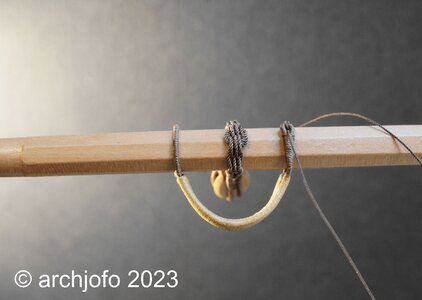
Here too, I attached these double blocks using rose lashing.
As I pointed out some time ago, I made a suitable tool that makes creating a rose lashing easier.
I saw this and copied it from our model builder colleague. I don't want to adorn myself with other people's feathers here...
DSC01624.jpg

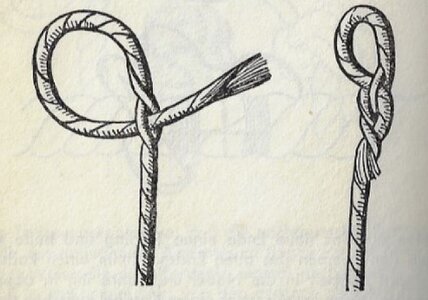
Fastening the quarter blocks was followed by pulling in the rope at the jackstay, which was attached to a thimble using a simple eye splice, as can be seen in the following picture.
DSC01628.jpg

Bändselspleiß_.jpg


And last but not least, the result of this work section.
DSC01630.jpg


Sequel follows …
 
I find myself thinking, all of these elements on a yard are all there to perform a specific function, yet I'm seeing them as artistic elements. I find my eyes going back to the rose lashings. To borrow an adjective from a grandson, "awesome"!
 
@Uwek
@dockattner
@Steef66
@Mirek
@kuba91nt
@Hoss6262

Hello,
thank you very much for your attention and the very kind words.
Of course I'm also happy for the many LIKES.

Wish everyone here in the forum a
Screenshot 2023-12-20 103133.jpg

Completion: Equipping the fore topsail yard - footropes and stirrups / Marchepieds et étriers etc.
By pulling in and tensioning the lanyard, the two halves of the jackstay were tensioned. The loose end of the ropge was carefully wrapped around the lanyard and tightened, as shown in various historical drawings.
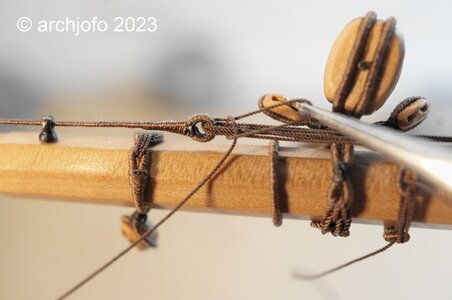
DSC01635.jpg

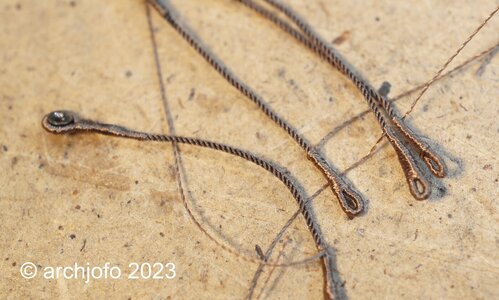
The footropes and stirrups for this yard were then made in the same way as for the main topsail yard, but with slightly reduced rope diameters.
The following picture shows the already prepared stirrups. Thimbles are spliced into one end of them, through which the rope of the footrope will later be pulled. The other ends were formed with served eye splices, which are then lashed to the jackstay.
DSC01638.jpg

The next picture shows the finished footropes with details.
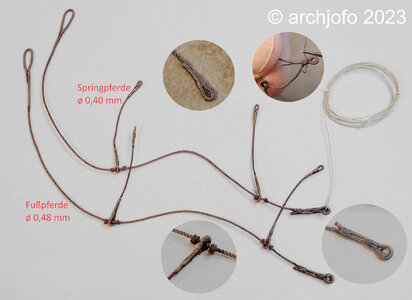
DSC01643.jpg

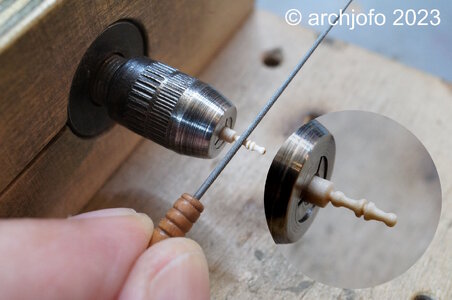
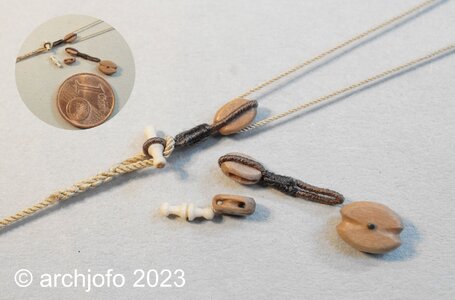
I continued with the lower blocks for clewlines l = 3.5 mm and the toggles to connect them to the topgallant sheets. As already mentioned, I made these from dogwood, a very hard and fine-grained wood, which is ideal for these small parts.
DSC01646.jpg

The following picture shows the stropped blocks for the clewlines, one is connected to a sheet. Next to it is a block for the main braces for comparison.
DSC01651.jpg

Here you can see the stropped blocks for the braces before they are placed on the yardarms.
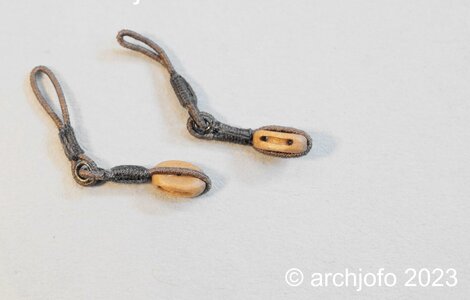
DSC01654.jpg

Here you can see how the studding sail booms are attached.
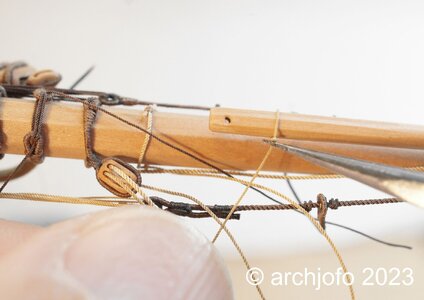
DSC01667.jpg


The next pictures show the fore topsail yard equipped with the necessary elements for rigging.
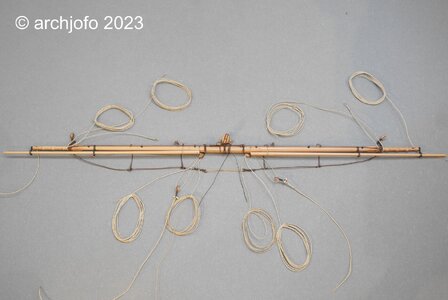
DSC01668.jpg

DSC01671.jpg

Last but not least, a picture of the yards fitted out so far.

Quite a jumble...
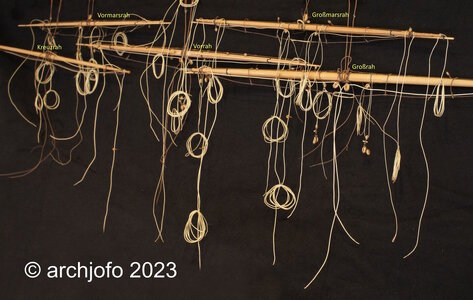
DSC01676.jpg

We continue with the cross yard.
To be continued ...
 
Last edited:
Da denkt man, "es geht nicht noch mehr" und du zeigst uns das Gegenteil

Once I need to see the ship model in real - only to check, that you do not have a mega cent-coin (in scale 10:1) and some artificial monster fingers
 
Back
Top