Kurt Konrath
Kurt Konrath
Thanks for point that you, I don't speak other languages, and didn't see it hiding.3 pictures above it there is the name Rettungsboje = Lifebuoy
It does make sense to have one.
 |
As a way to introduce our brass coins to the community, we will raffle off a free coin during the month of August. Follow link ABOVE for instructions for entering. |
 |
 |
The beloved Ships in Scale Magazine is back and charting a new course for 2026! Discover new skills, new techniques, and new inspirations in every issue. NOTE THAT OUR FIRST ISSUE WILL BE JAN/FEB 2026 |
 |
Thanks for point that you, I don't speak other languages, and didn't see it hiding.3 pictures above it there is the name Rettungsboje = Lifebuoy

Your level of detail of these little things most kits never offer as part of kit is outstanding.@Kurt Konrath
@Steef66
Sorry, I could have explained it in more detail.
But it is correct as Stephan wrote.
The French term is "bouée de sauvetage".

Hi, Johann. Many thanks for the link to the soldering plate holder. I will be trying to source these on Amazon Canada. They will be invaluable for doing soldering work.
One more question about the cutters you made for deadeyes. By the picture it seems the ends of cutters underwent some heat treatment. I would imagine the cutters were the high speed steel bars. Did you anneal them before shaping the cutters? Did you hardened them back? Could you please describe the process of how you heat treated them?
View attachment 466415

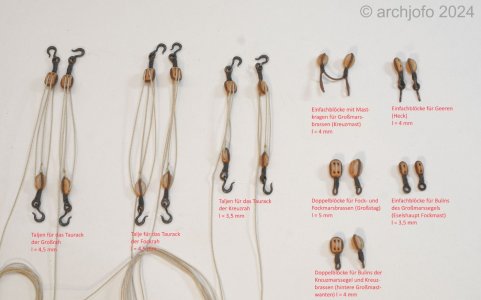
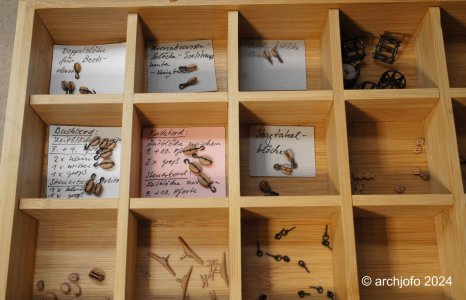


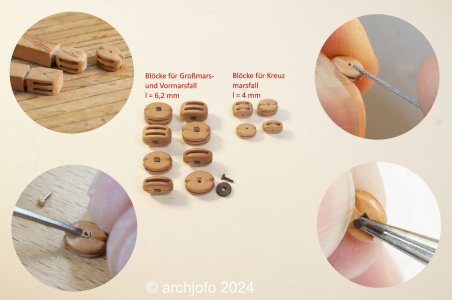
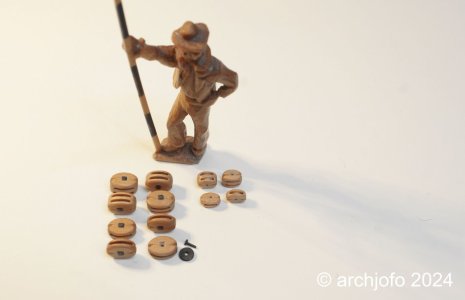

It always amazes me how you can translate the details from the drawings into the detailed parts you make. A feast for the eyes, Johann.@Mirek
@Uwek
Thank you for your loyalty and the motivating comments.
Thank you also for the LIKES.
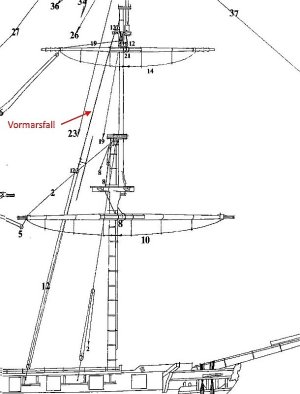
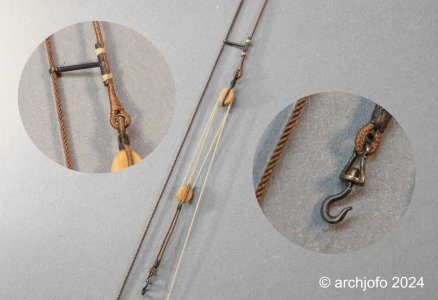
Continuation: Further accessories for the topsail halyards, including leader (guide bar) - Gouvernail de drisse
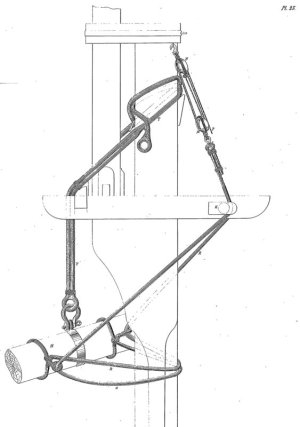
The leaders are another accessory required for the topsail halyards. This is a detail that is not always visible on all models, but is an important part of the rigging.
Under the considerable force required to set a topsail, the halyard tends to twist and become unclear. To prevent this, the upper halyard block was guided to the topmast backstay with a guide bar and a swivel hook was used at the channel.
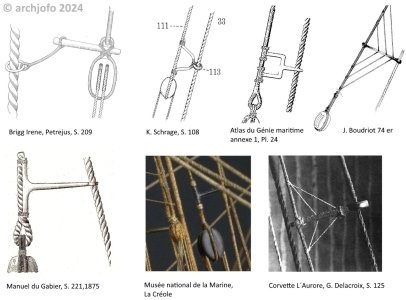
In the following, I have compiled a list of different types of guide bars that were used towards the end of the 18th century and in the 19th century. However, they all served the same purpose.
View attachment 476309
For my model of La Créole, I naturally used the original Parisian model and the Manuel du Gabier. Compared to the original model, however, I added the swivel hook and made a longer strop, which made it possible to keep the lower block free of the bulwark and the tackles of the backstays.
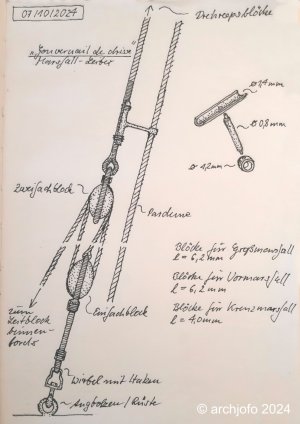
I then executed this rigging arrangement according to the following drawing.
View attachment 476311
I made all the elements in advance to see how it would look overall. If the “prototype” fits, all the other necessary parts for all the topsail halyards will be made.
Provisionally arranged, it then looks like this:
View attachment 476310
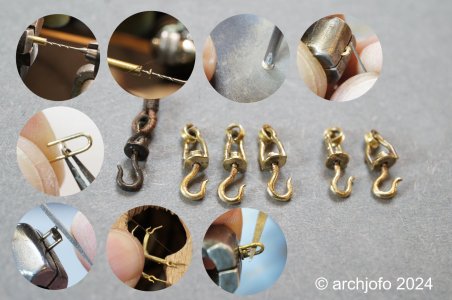
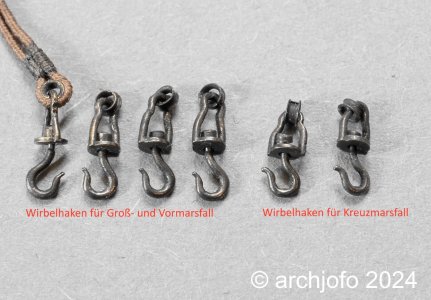
I had already made the swivel hooks in connection with the stay tackles, so that went quickly. Making the guide bar was also not a big job. For the sake of strength, I hard-soldered all the connections of these components.
It was a little more difficult to attach the guide bar to the topsail halyard. It would be unsightly if over-dimensional knots were to impair the filigree structure.
I have already considered how I can then attach the halyard to the model. In this respect, I have to finish one side completely as shown and then serve the appropriate places in advance, such as the passage through the tye blocks and the other end of the halyard. Then the rope of the topsail halyard is pulled through the tye blocks, then the eye with thimble is completed, taking the upper block into account. Finally, I have to dress a short remaining section freehand and attach the guide bar.
Certainly not an easy task on the model, but people also need certain challenges ...
To be continued ...
PS: I don't know if the term "guide bar" is correct?
I would be grateful if someone could tell me the correct term.


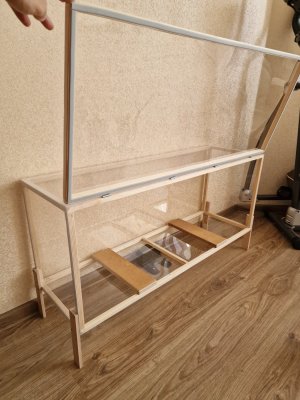
Making a dust cover
Since the last post, very little has happened in my model building yard.
If you are not working on the model, you don't have it in view all the time, so to speak, and therefore the first dust build-up cannot be counteracted, then it is advisable to place it under a protective cover.
Since I will certainly be busy equipping the yards for some time, I have been thinking about protecting the model against dust for some time.
A display case would be too impractical because you have to work on the model from time to time. In this respect, I thought about building a cheap dust cover that makes it possible to open the front in order to be able to remove the model or work on it.
The frame was made with 20/20 mm spruce strips and metal angles and was covered with Molton fabric on the back. This ensures a neutral background and, if necessary, possible detailed shots. The remaining areas were covered with a crystal-clear PVC film. The front can be braced downwards using a longitudinal strip or rolled up at the top.
View attachment 402480
View attachment 402481
View attachment 402478
View attachment 402479
Hopefully soon I will be able to pick up where I left off almost 2 months ago.
So until then…


WOW, Johan! You speak Ukranian! BTW, the translation is very accurate.
 Thanks to Google - Translation ...
