Slow progress but steady,
-

Win a Free Custom Engraved Brass Coin!!!
As a way to introduce our brass coins to the community, we will raffle off a free coin during the month of August. Follow link ABOVE for instructions for entering.
-

PRE-ORDER SHIPS IN SCALE TODAY!
The beloved Ships in Scale Magazine is back and charting a new course for 2026!
Discover new skills, new techniques, and new inspirations in every issue.
NOTE THAT OUR FIRST ISSUE WILL BE JAN/FEB 2026
You are using an out of date browser. It may not display this or other websites correctly.
You should upgrade or use an alternative browser.
You should upgrade or use an alternative browser.
Yes you are correct......I try every day to work on her, but only in the night, possible for one or two hoursSlow progress but steady,
Step by Step -> So the kit of the La Salamandre brings a lot of fun for a long time period.
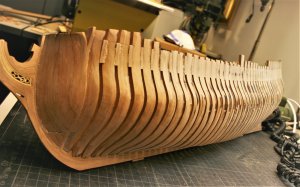
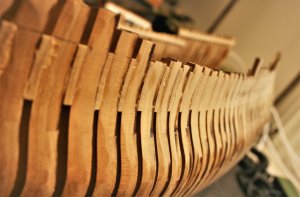
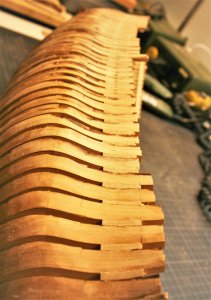
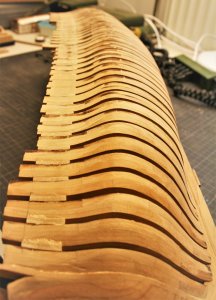
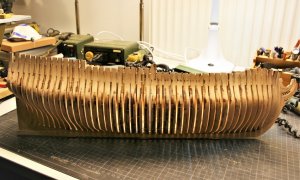
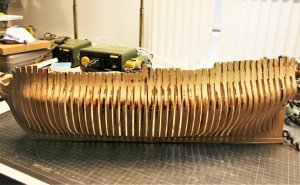
Some small progress for stiffening the hull. Time consuming work ..... the thickness of every piece had to be adjusted - one side permanently glued
View attachment 45157 View attachment 45158
View attachment 45159 View attachment 45161
Holy smokes, that is IMPRESSIVE!!! You have just made me start a separate savings HOBBY account fro this kit!!!
UweK
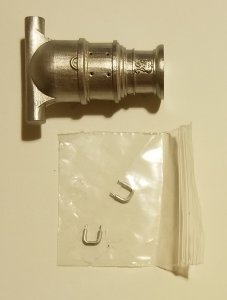
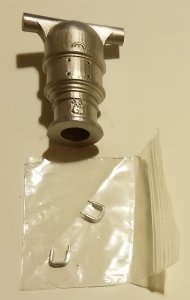
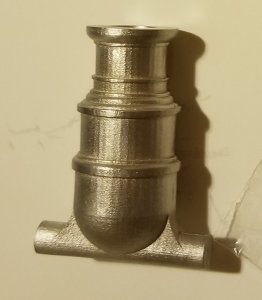
You mentioned you'd be interested in seeing the mortar didit was having made when it was ready. I only had a chance to open the package and look at it tonight but here it is.
These are looking very good it is a great add-on for the bomb vessels and mortar models.
......I have to compare them if they would be suitable for my La Salamandre, but I am afraid it would be too much adjustments necessary.
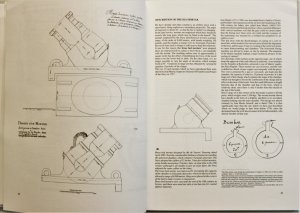
The Salamandre mortar are fixed in the angle, due to the fact, that these mortars were not turnable, but fixed (vertical and horizontal) and they shot the bombs only fore over the stern.
They had to fix the ketch with several anchors, so that the ship was directly aligned towards the target. Due to the fixed vertical angle of 45° they had to change the distance to the target or change the powder quantity to have a chance to hit target. This was the technique at this time.....
here is an excerpt of my Planset Review showing the mortar of the La Salamandre
Planset "The bomb ketch LA SALAMANDRE - 1752" Monograph with 34 plans in 1:48 by Jean Boudriot - Hubert Berti
All logs / wooden spacers were glued and I preliminary sanded them down to the level of the frames.
So now the hull is stiff, all frames are fixed together and the "big sanding" of the hull outside and inside can beginn.
Still I can remove the complete hull out of the jig without any problems and also re-assamble it into the jig -> well done CAF !!! Your 3D-model is realy working well.
Also I am very happy, that I fixed the frames with additional pegs towards the keel, so that I can assume, that this connection is strong and can not get loose during work on the hull. This is important (I guess) because i want to install the keelson after the sanding.
If the elements of the keelson would be already fixed installed I would damage them during the inside sanding activities.....I will see.....
BTW:
Yesterday I reached the total working hours of 200 on this kit model of my La Salamandre.
A lot of hours for only a hull, but enjoyed every single one.
And I am pretty sure, that I will not overtake @ADC with his built.......
Thanks for your interest ..... to be continued ......
So now the hull is stiff, all frames are fixed together and the "big sanding" of the hull outside and inside can beginn.
Still I can remove the complete hull out of the jig without any problems and also re-assamble it into the jig -> well done CAF !!! Your 3D-model is realy working well.
Also I am very happy, that I fixed the frames with additional pegs towards the keel, so that I can assume, that this connection is strong and can not get loose during work on the hull. This is important (I guess) because i want to install the keelson after the sanding.
If the elements of the keelson would be already fixed installed I would damage them during the inside sanding activities.....I will see.....
BTW:
Yesterday I reached the total working hours of 200 on this kit model of my La Salamandre.
A lot of hours for only a hull, but enjoyed every single one.
And I am pretty sure, that I will not overtake @ADC with his built.......


Thanks for your interest ..... to be continued ......
Hello Uwe the Salamandre is beginning to take shape, your 200 hours of work have not been for nothing
greetings
willy
greetings
willy
Uwe,
Will the sanding of hull be by hand or do have a “tool” for that?
Will the sanding of hull be by hand or do have a “tool” for that?
Uwe,
Will the sanding of hull be by hand or do have a “tool” for that?
During the last two evening I tried carefully different ways and tools, but at the end i have to recognize, that the hand sanding is the way, to get the best quality results. With every power-tool there is the possibility of un-wanted scratches and small damages. Outside the hull it is easier, Hull inside is much more complicate, and Hereford i am still learning, what is the best way......
I used a combination of hand sanding and a dremel with 25mm disks. I have been careful with the dremel. Using 120 grit disks at lower speeds. Only worked about 20 minutes a day. Worked slowly a little bit at a time with no hurry.During the last two evening I tried carefully different ways and tools, but at the end i have to recognize, that the hand sanding is the way, to get the best quality results. With every power-tool there is the possibility of un-wanted scratches and small damages. Outside the hull it is easier, Hull inside is much more complicate, and Hereford i am still learning, what is the best way......
During the last two evening I tried carefully different ways and tools, but at the end i have to recognize, that the hand sanding is the way, to get the best quality results. With every power-tool there is the possibility of un-wanted scratches and small damages. Outside the hull it is easier, Hull inside is much more complicate, and Hereford i am still learning, what is the best way......
I found this one in this link https://www.segelschiffsmodellbau.c...entre-ein-Arsenalmodell-im-Massstab-Teil.html
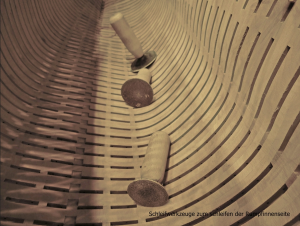
Dear @ADC and @Olivers Historic Shipyard ,
many thanks for the infos and hints.
What I forgot to mention is the use of my Proxxon Pen-sander PS13 which I use partly for the inside sanding, which can make the work partly similar like the tool Oliver showed in the photo.
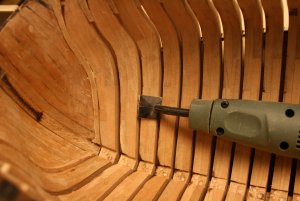
Here is the link to the Proxxon web-page:
https://www.proxxon.com/en/micromot/28594.php
I have two slightly different one´s (PS12 and PS13)
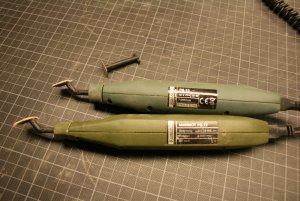
Proxxon is offering special prepared sanding paper for the sander
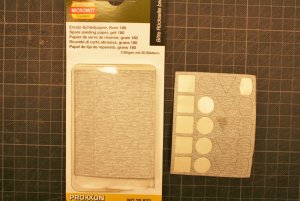
But for the complete sanding these are too expensive, due to the fact, that I have to change latest every 5 minutes the sanding pat.
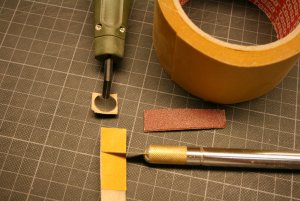
The cheap alternative to the Proxxon original sanding pats are a double adhesive tape and standard sanding paper with (best for me) textile (and not paper) backside. Looks not nice, but they are working better and the lifetime are longer......and most important -> costs are more or less nothing.
many thanks for the infos and hints.
What I forgot to mention is the use of my Proxxon Pen-sander PS13 which I use partly for the inside sanding, which can make the work partly similar like the tool Oliver showed in the photo.

Here is the link to the Proxxon web-page:
https://www.proxxon.com/en/micromot/28594.php
I have two slightly different one´s (PS12 and PS13)

Proxxon is offering special prepared sanding paper for the sander

But for the complete sanding these are too expensive, due to the fact, that I have to change latest every 5 minutes the sanding pat.
The cheap alternative to the Proxxon original sanding pats are a double adhesive tape and standard sanding paper with (best for me) textile (and not paper) backside. Looks not nice, but they are working better and the lifetime are longer......and most important -> costs are more or less nothing.

Recently bought one and I love it.
G'day Uwe, your Salamandre is looking great, you have come so far since I was last here, I am going to try and keep up with your build,
Best regards John,
Best regards John,
I have the pensander too but really used it yet,maybe soon on the Ontario,good idea to attach sandpaper on a double sided adhesive tape.
I realized, that the last report of the working status was already several days old - No Worry, I am still working on my Salamandre every day´s evening.
Still sanding the outside and inside hull - I do not know, maybe I am too much perfectionist (not in the work done, only in my wish to be), so that it is hard to stop....
....it is not easy to say: "Now the hull is good - next working step"
Latest on weekend, maybe a little bit earlier I will show you guys the final result - as usual than with some more photos -
Once it has to be enough, has to be good enough
Hi Uwe,
You can show is pictures of the piles of dust you have been creating.
You can show is pictures of the piles of dust you have been creating.
Hi Uwe,
You can show is pictures of the piles of dust you have been creating.
I am a posterchild, so I clean my table from sawdust regularly........
Like everybody from us, or?
this evening i checked the dustbin of my vac -> there is still space enough for an additional model
Absolutely stunning kit and workmanship! Your workshop leaves me a little envious as well! I was wondering about the use of various grades of steel wool
for final smoothing other than sand papers. I use steel wool for fine furniture refinishing as the wool tends to shave/slice off wood instead of disturbing the fibers with paper.
for final smoothing other than sand papers. I use steel wool for fine furniture refinishing as the wool tends to shave/slice off wood instead of disturbing the fibers with paper.
A very good pointAbsolutely stunning kit and workmanship! Your workshop leaves me a little envious as well! I was wondering about the use of various grades of steel wool
for final smoothing other than sand papers. I use steel wool for fine furniture refinishing as the wool tends to shave/slice off wood instead of disturbing the fibers with paper.


