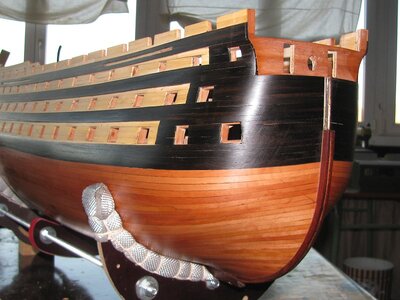
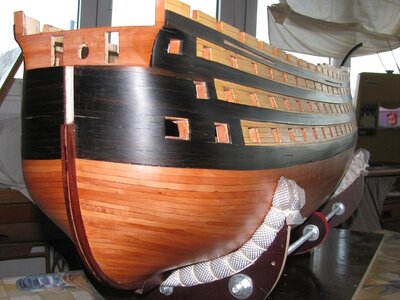
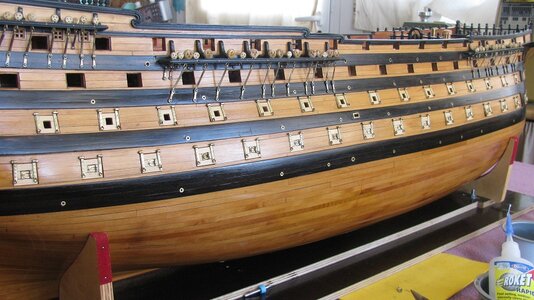
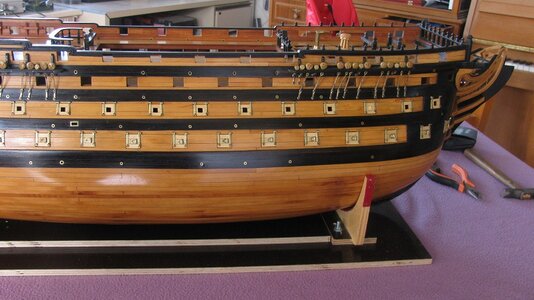
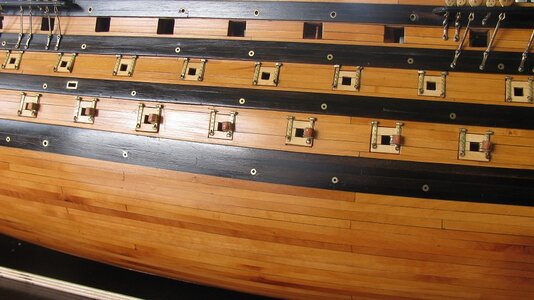
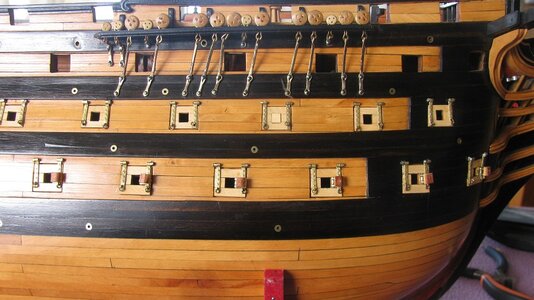
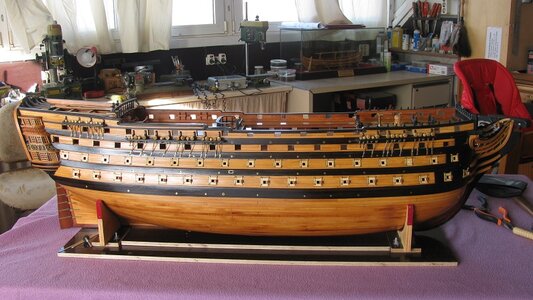
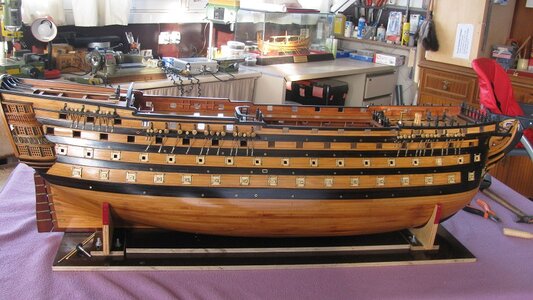
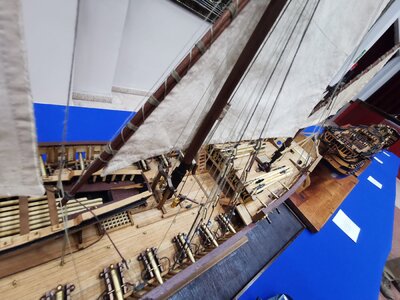
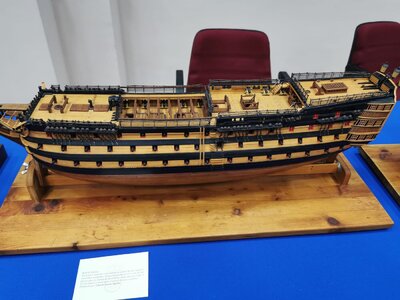
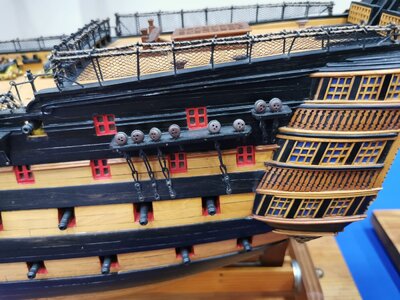
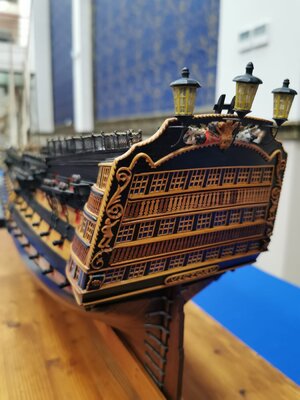
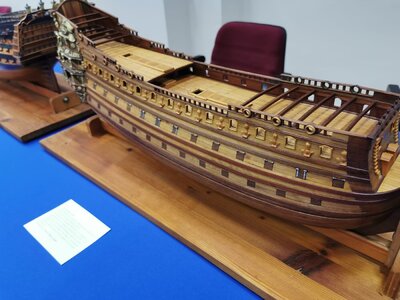
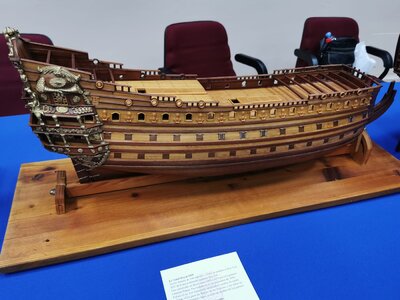
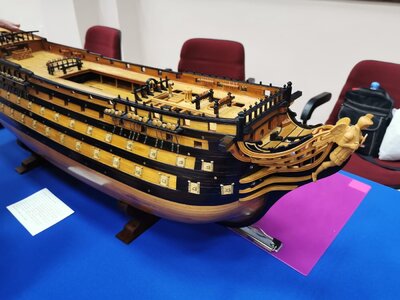
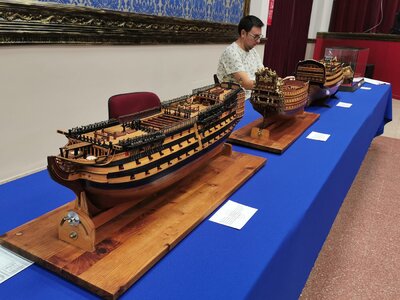
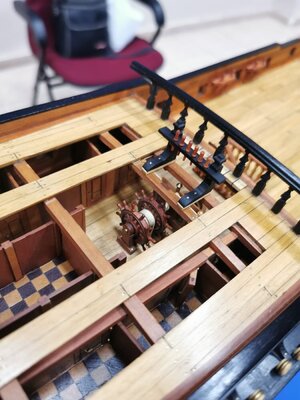
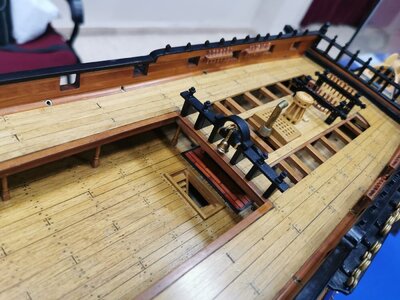
La Santísima Trinidad 1797 / 1805

Absolutely in love with your precious way of fabricating parts, Liberto! So, much to learn. Thumbsup
 
very informative work and photos - many thanks for showing us your way
 
Saludos cordiales y gracias a todos por vuestros generosos comentarios…

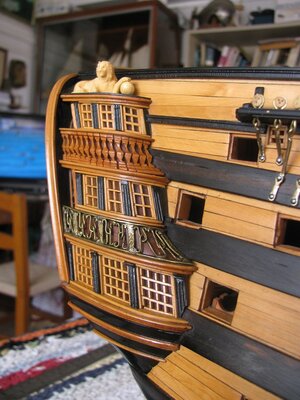
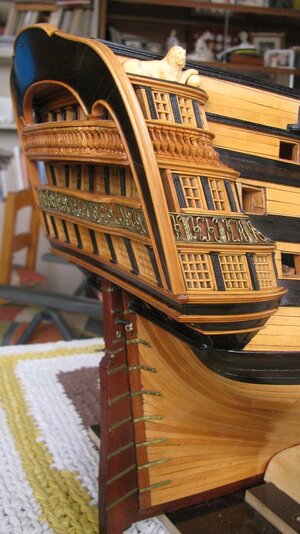
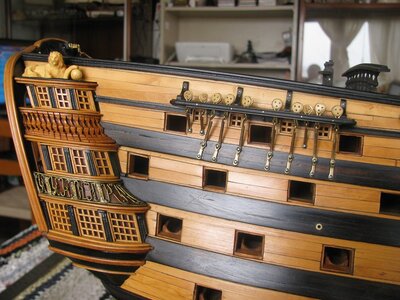
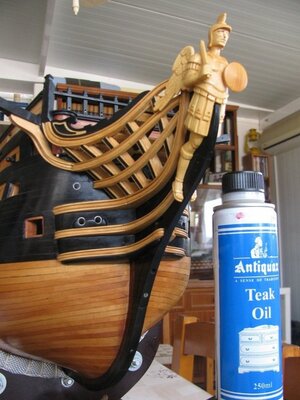
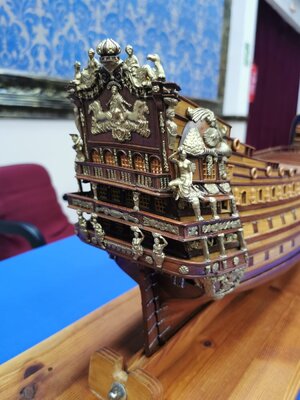
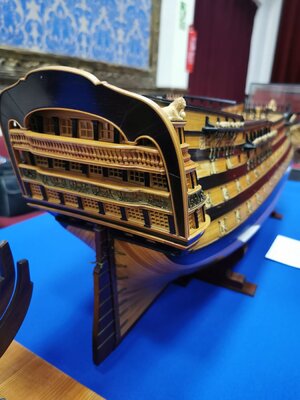
En la última reforma realizada a “La Santísima Trinidad” por Josef Romero y Landa, la Carraca 3 de septiembre de 1796 - Trafalgar 1805. En los planos de dicha reforma se puede apreciar la figura del Arcángel Miguel como mascaron de proa, y también la de los leones que coronan los jardines de los costados de popa, etc.

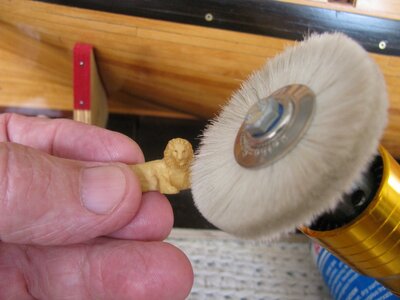
Paso unas imágenes de los leones que anteriormente os comentaba, son un trabajo de talla muy delicado, realizado de nuestro buen amigo y compañero Leopoldo García Echeveste… la madera empleada es Boj del Pirineo y son una auténtica obra de arte…

Gracias Leopoldo… Cuidaros mucho

Liberto

google translation:
Best regards and thank you all for your generous comments ...
In the last reform carried out to "The Holy Trinity" by Josef Romero y Landa, La Carraca September 3, 1796 - Trafalgar 1805. In the plans of this reform you can see the figure of the Archangel Michael as a figurehead, and also the of the lions that crown the gardens of the stern sides, etc.
I pass some images of the lions that I previously commented to you, they are a very delicate carving work, made by our good friend and colleague Leopoldo García Echeveste ... the wood used is Pyrenean Boxwood and they are an authentic work of art ...
Thank you Leopoldo ... Take care of yourselves a lot
Liberto

1.JPG002.JPG003.JPG004.JPG005.JPG006.JPG
 
Last edited by a moderator:
I like the colours of your timber very much - it has a close touch to contemporary models.
How you treat the timber surface? Are you using oil or something else? Which product?
 
Saludos Uwek y Kaleu… gracias por vuestros comentarios, y gracias también los que van dejando en silencio un “me gusta”

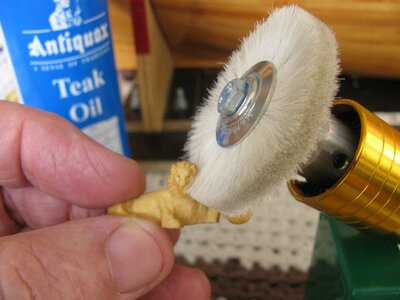
Uwek perdona que no contestara antes, como sabes en el mercado hay aceites muy variados y de gran calidad… yo empleo desde hace varios años Antiquax - Teak Oil.

Como lo empleo:

Una vez tengo el tablazón de las cubiertas totalmente terminado, y el exterior del casco totalmente cerrado, empleo lija de grano medio para alinear, continuo con grano fino, y termino can grano superfino… limpiamos de polvo todo el interior y exterior y lo dejamos preparado para dar el aceite… en la parte exterior, las cubiertas las dejaremos para mas adelante…

Para dar el aceite, preparo con un trapo de algodón (muñequilla) y en un pequeño recipiente, deposito una pequeña parte del contenido de Antiquax o bien otro similar.

En una mesa… coloco el barco con la quilla hacia arriba, con el trapo de algodón que no deje pelusa (muñequilla) impregnado de aceite, doy una mano abundante, y dejo que la madera lo absorba, unos minutos 5/10 minutos, según la temperatura ambiente, puede ser incuso algo mas, recomiendo que hagan algunas pruebas. No hay que dejar que secue, pues costaría mucho trabajo limpiar el sobrante.

Pasado este tiempo tenemos que hacer una limpieza de todo el aceite sobrante… es de suma importancia que quede muy limpio, una vez limpio, frotaremos toda la superficie tratada con el trapo de algodón seco, y veremos como la madera va recuperando su color natural.

Si es un modelo de gran tamaño como el mío, es conveniente dar primero en un costado, y una vez terminado el proceso hacer el otro costado.

Os iré acompañando unas imágenes que ya conocéis… para que os puedan ayudar un poco en este proceso


Tratamiento para la conservación y prestación de mi S. Trinidad.

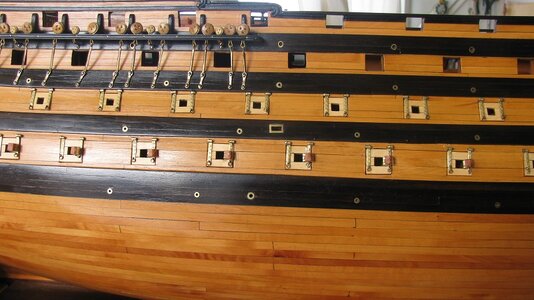
Las maderas empleadas para la construcción de este modelo.

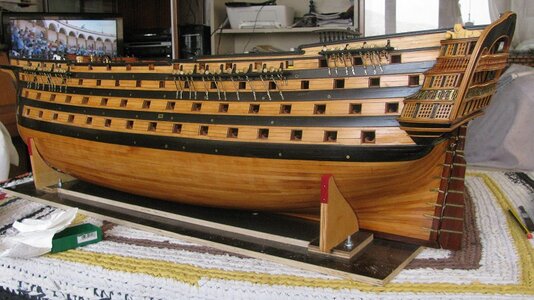
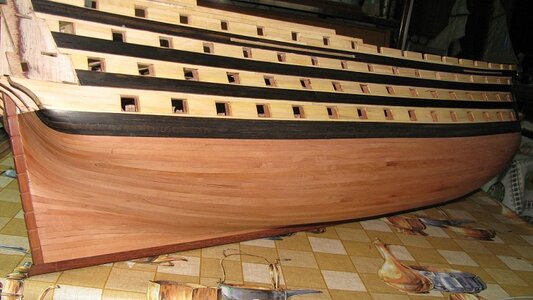
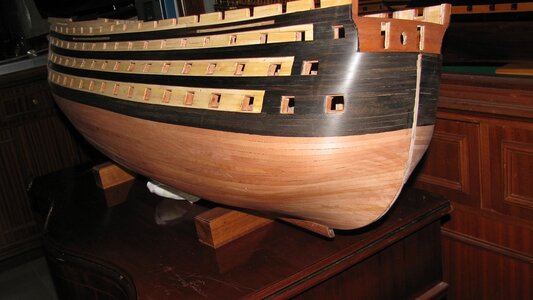
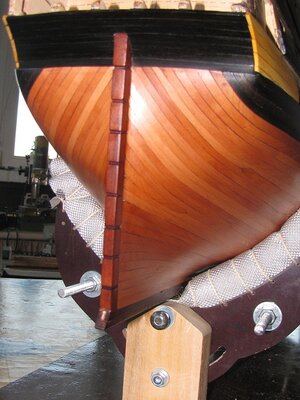
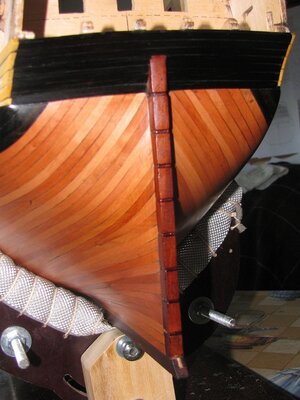
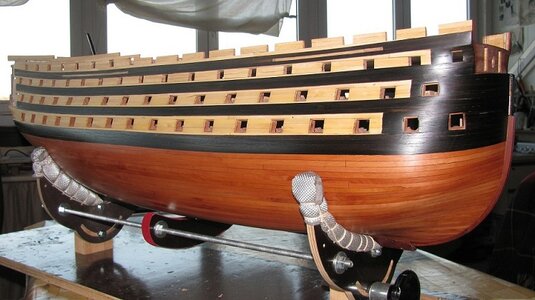
Peral para las tracas del la obra viva… ébano para las cintas y regala… caoba para la quilla, codaste y roda… boj del pirineo para las franjas y naranjo de mi pueblo Gádor - Almería - España… para las cubiertas


El casco esta totalmente cerrado y preparado para recibir el. Antiquax - Aceite de teca

Imágenes 096 - 097


Ya ha recibido 2 manos de aceite de teca y limpiada toda la superficie... para alcanzar un brillo agradable hará falta repetir el proceso entre 5/7 veces.

365-098-099-100-101


Bueno por hoy, aquí lo dejamos… en unos días seguiremos y os pasare nuevos adelantos del S / Trinidad

Gracias de nuevo a todos… cuídense mucho.

Liberto

096.JPG097.JPG365.JPG098.JPG099.JPG100.JPG101.JPG102.JPG103.JPG
 
Greetings Uwek and Kaleu... thank you for your comments, and thank you also to those who silently leave a "like".

Uwek sorry I did not answer before, as you know in the market there are very varied and high quality oils... I use for several years Antiquax - Teak Oil.

How I use it:

Once I have the planking of the decks completely finished, and the exterior of the hull completely closed, I use medium grit sandpaper to align, continue with fine grain, and finish with superfine grain ... we clean all the interior and exterior dust and leave it ready to give the oil ... on the outside, the decks will be left for later ...

To give the oil, I prepare with a cotton cloth (muñequilla) and in a small container, I deposit a small part of the content of Antiquax or another similar one.

On a table... I place the boat with the keel upwards, with the cotton cloth that does not leave lint (muñequilla) impregnated with oil, I give an abundant hand, and I let the wood absorb it, some minutes 5/10 minutes, according to the ambient temperature, it can be even something more, I recommend that you make some tests. It is not necessary to let it dry, because it would cost a lot of work to clean the surplus.

After this time we have to do a cleaning of all the excess oil ... it is of utmost importance that it is very clean, once clean, rub the entire treated surface with the dry cotton cloth, and we will see how the wood is recovering its natural color.

If it is a large model like mine, it is convenient to give first on one side, and once the process is finished to do the other side.

I will accompany you with some images that you already know... so that they can help you a little in this process.


Treatment for the preservation and rendering of my S. Trinidad.

The woods used for the construction of this model.

Pearwood for the strakes of the hull... ebony for the ribbons and the spars... mahogany for the keel, stern and stem... boxwood from the Pyrenees for the strips and orange tree from my village Gádor - Almería - Spain... for the decks.


The hull is totally closed and ready to receive the... Antiquax - Teak oil

Images 096 - 097


The hull has already received 2 coats of teak oil and the entire surface has been cleaned... to achieve a nice shine the process will need to be repeated 5/7 times.

365-098-099-100-101


Well for today, here we leave it ... in a few days we will continue and I will pass you new advances of the S / Trinidad.

Thanks again to all... take care of yourselves.

Liberto

Translated with www.DeepL.com/Translator (free version)
 
Buenos días… espero que todos se encuentren bien.
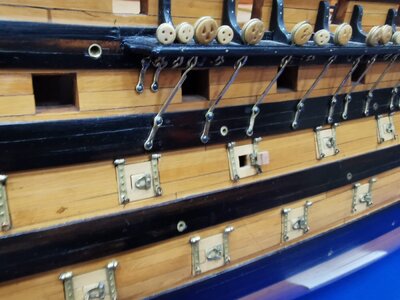
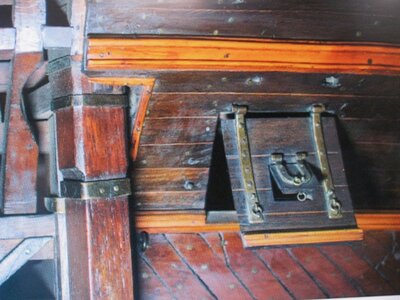
Paso unas imágenes de los adelantos que se van produciendo, las portas las tengo ajustadas y enumeradas, a falta de ir colocando los herrajes.
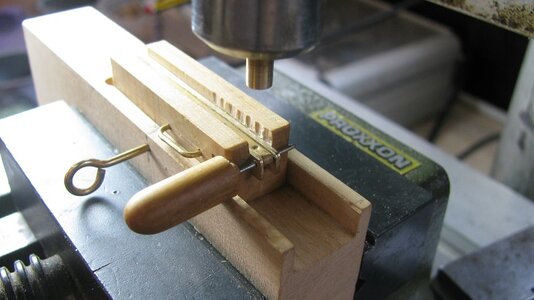
El pequeño útil que he preparado para simular las cabezas de los clavos, es bastante rápido y no seria problema aumentar o disminuir el diámetro de las cabezas…
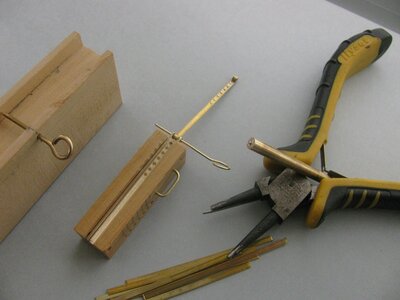
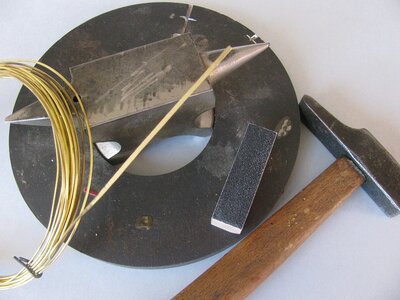
Para las pletinas de las bisagras, utilizo alambre cocido (dulce) latón de 1mm, y lo aplano sobre este pequeño yunque… hacerlo es algo complicado, pero es cuestión de practicar un poco.
una vez aplanada y con la medida que necesito 1,7m/m, le paso un pequeño disco de silicona, y elimino las marcas que pudieran haber dejado los golpes de martillo…
Es normal que los golpes de martillo, temple la pletina, para convertirla y hacerla nuevamente dulce y maleable, las caliento con mi soplete… lo suficiente como para que cambie de color…ya estaría preparada y podríamos hacer las embuticiones y doblados que precisemos…
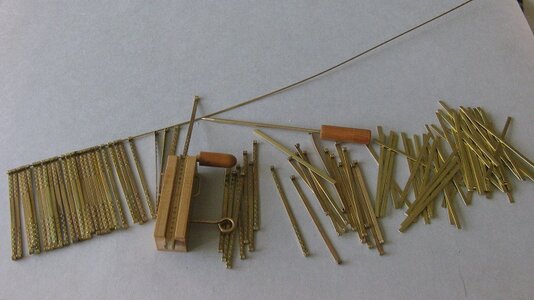
Transformar este alambre de latón en 2 bisagras para una puerta, teniéndolo todo preparado, se puede tardar unos 15 minutos incluido el embutido de las cabezas.
Ya seguiremos... cuidaros mucho¡¡¡
Liberto

Nota: La imagen Nº 003 JPG esta tomada del libro San Juan Nepomuceno. Autor - Alejandro Yáñez Barea

***
Good morning... I hope everyone is well.

I have some images of the advances that are taking place, I have the doors adjusted and numbered, in the absence of placing the hardware.

The small tool that I have prepared to simulate the heads of the nails, is quite fast and it would not be a problem to increase or decrease the diameter of the heads...

For the hinge plates, I use 1mm brass wire, and I flatten it on this little anvil... it is a bit complicated, but it is a matter of practicing a little bit.

once flattened and with the measure that I need 1,7m/m, I pass a small disc of silicone, and I eliminate the marks that could have left the blows of hammer...

It is normal that the blows of hammer, temper the plate, to turn it and to make it again sweet and malleable, I heat them with my blowtorch... enough so that it changes color... it would already be prepared and we could make the embuticiones and bent that we need...

Transforming this brass wire into 2 hinges for a door, having everything ready, can take about 15 minutes including the drawing of the heads.

We will continue... take care of yourselves very much!

Liberto

Note: The image Nº 003 JPG is taken from the book San Juan Nepomuceno. Author - Alejandro Yáñez Barea

Translated with www.DeepL.com/Translator (free version)
003.JPG033 .JPG034.JPG035.JPG038.JPG039.JPG
 
Great work on the hinches - :cool: cool job with the helping jigs to make a "mass-production"
 
Saludos compañeros y gracias por vuestro seguimiento…

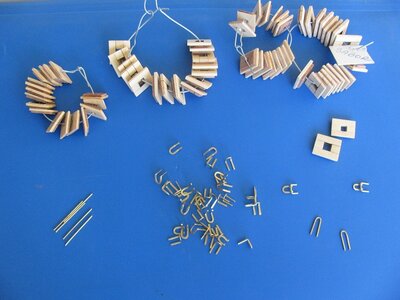
Preparando las bisagras de las portichuelas… y unas imágenes del proceso, yotras de cómo quedaran una vez montadas en las portas de las troneras…

Cuidaros mucho Liberto

480.JPG

481.JPG

482.JPG

483.JPG

484.JPG

485.JPG

486.JPG

487.JPG

488.JPG

489.JPG

490.JPG

491.JPG

492.JPG

493.JPG

494.JPG

495.JPG

496.JPG

497.JPG

498.JPG

499.JPG

500.JPG

501.JPG

502.JPG

503.JPG

504.JPG
 
Very good accurate work on the metal works for the lids and ventilation lids
Many Thanks for showing us your way how to do it
 
Saludos Uwek, donfarr y demás compañeros…gracias por vuestros amables comentarios y por el seguimiento que hacéis a mi trabajo
He terminado de colocar parte de las portichuelas, es muy entretenido pero merece el esfuerzo…me alegro de que en su momento los compañeros Leopoldo y Alejandro Yánez, recordaran este detalle, y me hiciereis la sugerencia de colocarlas…
Ya tengo montadas la 1ª batería 34, pendiente de las 4 que van en las portas de las troneras de los guardatimones, que abrirán hacia arriba…
Sigo con las que faltan, calculo que en un mes aprox. las terminare de colocar…
Liberto


Greetings Uwek, donfarr and other comrades...thanks for your kind comments and for following my work.
I have finished placing part of the portichuelas, it is very entertaining but it is worth the effort...I am glad that at the time the comrades Leopoldo and Alejandro Yánez, remembered this detail, and you made me the suggestion to place them...
I have already mounted the 1st battery 34, pending the 4 that go in the portholes of the gun ports, which will open upwards...
I'm still working on the remaining ones, I estimate that in about a month I'll finish fitting them...
Liberto

Translated with www.DeepL.com/Translator (free version)
505.JPG

506.JPG

507.JPG

508.JPG

509.JPG

510.JPG

511.JPG
 
Last edited by a moderator:
amazing accurate work on the gun port and sweep port lids - WOW :cool:
and there are so much lids .....
 
Saludos compañeros… gracias por vuestros generosos comentarios, después de unas largas vacaciones, continuo pasando imágenes de mi trabajo, tratando de poneros al día de los adelantos que voy realizando.

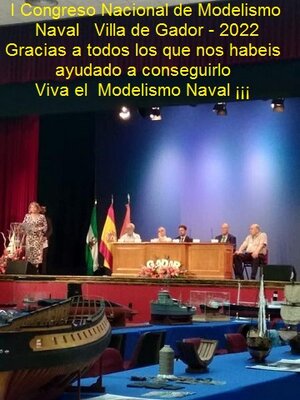
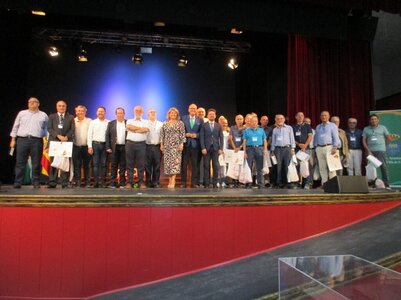
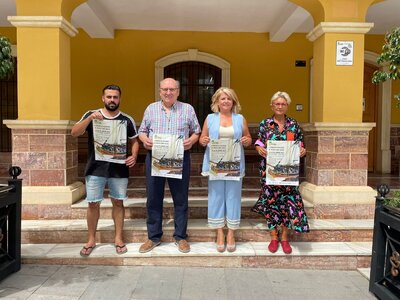
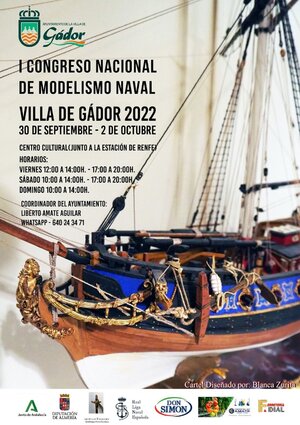
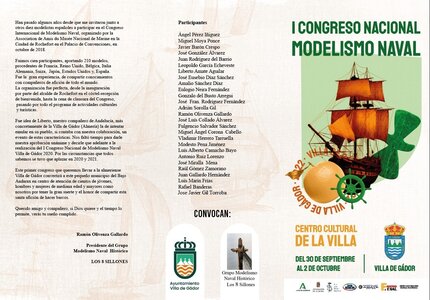
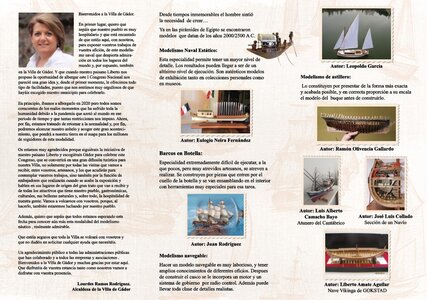
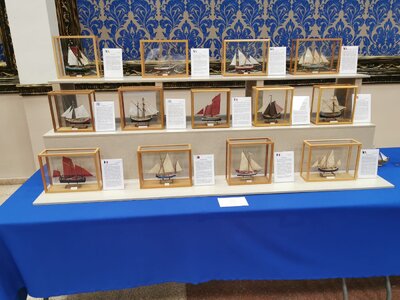
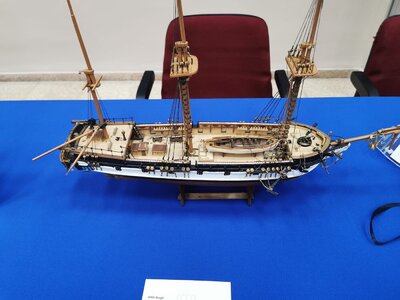
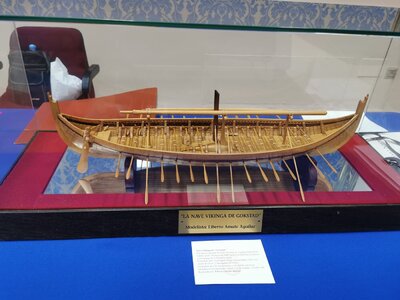
Del 30 de septiembre al 2 de octubre se ha celebrado en mi pueblo Gádor (Almería –España) e I Congreso Nacional de Modelismo Naval Villa de Dador 2022.
Os paso un adelanto podéis seguir viéndolo en

Espero que os guste un cordial saludo Liberto


Greetings colleagues… thank you for your generous comments, after a long vacation, I continue to post images of my work, trying to update you on the progress I am making.
From September 30 to October 2, the I National Congress of Naval Modeling Villa de Dador 2022 was held in my town Gádor (Almería -Spain).
I'll give you an advance you can continue watching it in
I hope you like it a cordial greeting Liberto


000000000000.jpg

000000000.jpg

00000000 Presentacion del Cartel.jpg

000000Cartel- Diseño de Blanca Zurita .jpg

000000Triptico .jpg

00000Triptico .jpg

0008 Javier Baron Crespo .jpg

0018Luis Alberto Camacho Bayo .jpg

0021 Jose Eusebio Diaz Sanchez .jpg

0023 Liberto Amate Aguilar .jpg

0024.jpg

0025.jpg

0026.jpg

0027.jpg

0028.jpg

0029.jpg

0029-1 .jpg

0030.jpg

0032.jpg

0033.jpg

0034.jpg

0035.jpg
 
Last edited by a moderator:
I agree with Uwe, a great collection, and the very good news is that people around the globe have an interest in our hobby as well.

Many thanks for sharing with us.
 
Back
Top