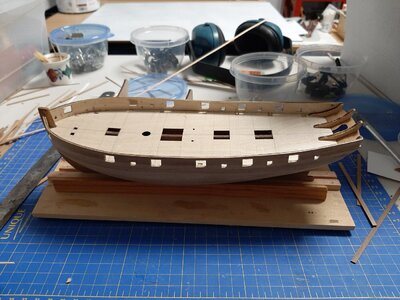
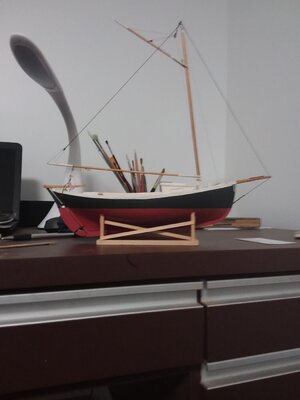
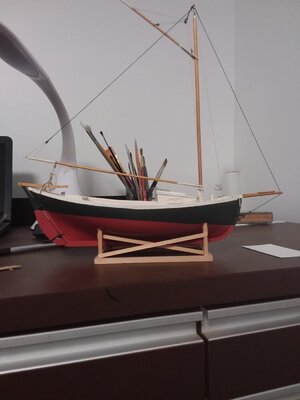
Lady Nelson - Amati 1:64 by Tangopapa - First time PoB Project [COMPLETED BUILD]

Your hull looks great, see you have a beer can of Grolsch on the table, thats the most important tool. I just live around the corner of their brewery :cool: .

To apply small amounts of PVA I use a seringe with a needle. I dillute the pva with water to get it through the needle easily. In this way you can apply only drops.
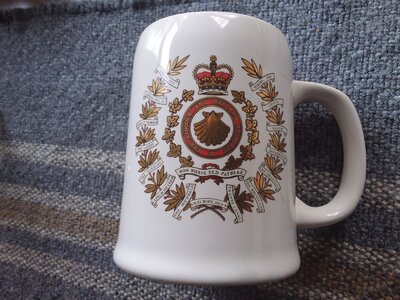
Well, it's Grolsch 0.0% Non-alcoholic beer, but the Dutch fake beer is the best as far as I'm concerned, along with Beck's from Germany. My wife's family is Dutch from Leiden and Hoogeveen mostly. When I looked up Enschede on a map, I saw "Twente", whichsounded familiar. Here is a photo of the colours of my old Canadian army regiment (on my beer mug!). You will see "Twente Canal" at around 5:30 (from the WW2 liberation battle there).
20201105_082154.jpg
 
I am hoping someone who scratch builds comes alongside here, but if you mean sheets of veneer that you intend to rip into planks, no, personally I would not take that on. You can buy the exact planks listed in the instruction sheets online at a number of locations. The kit comes with metric, but in a pinch you could use the next nearest Imperial size, I guess, for example, 1/8" x 1/32" (0.125" x 0.031") in place of 3mm x 1mm (which, doing the math in my head [YMMV] is 0.120" x 0.040"). My kit came with the wrong deck plank thickness, and the supplier, Cornwall Model Boats, sent me 24 sticks of 3 x 1mm beechwood in a cardboard tube from the UK. I got them in about 10 days IIRC. Great Hobbies in Mississauga sells plonk materials, we bought some there for our scratch build, but my brother is in Toronto. [Edit: meant to say "plank materials". You can get plonk at the Cornwall LCBO. LOL.]
The varnish will work fine. Glue does not adhere to filler very good so it should be sealed. When double planking I always seal the first layer whether I have used filler or not, followed by a light sanding. Many may say it is not necessary but it is something I do just to be safe, however, filler should always be sealed before adding the second layer. IMHO
What is the best sealer to use?
 
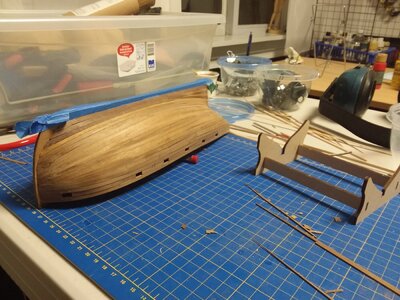
Lower transom is planked and shaped, which is quite a small area. Three out of four bulwark planks on each side are in place. I tried a few different ways in trials to curve these laterally before I attached them. The best seemed to be to soak them in quite hot water for an hour, then clamp them to a board with a bend in excess of what I'd need. After drying overnight, they sprang back somewhat, but fitted in place fairly easily. I bent them in the other plane using th Amati Form-a-Strip, with the blunt side of the blade showing. That worked fine.

I tried to use the Chuck Passaro (sp?) method where he clamps the plank, bent laterally, and heated with a hair dryer. When he does it, the plank is now bent. When I did it, and I gave the plank lots of time, it sprang back totally straight. This is 1x4 mm walnut. No idea why.

Finally, for glue, I did not use the contact cement as I was concerned about the need for exact initial placement, so I used the dot/dash method where you start with a dot of CA 10 second gel, then a line of 10 minute LePage's Express Quick Dry Glue. It let me get everything in position and 10 seconds at each CA "tack", clamp the PVA glue area, next dot, next dash, etc.

I happened to be in a Lee Valley store a week ago and picked up a BabeBot for applying glue. I was impressed, it gave me great control in how much and where to apply the LePages. The bottles it comes in have huge slots and you can easily dump WAY too much, so you have to use an applicator of some kind otherwise. The more handling of glue, the better odds of getting some where you don't want it, I figure. So I like the applicator.

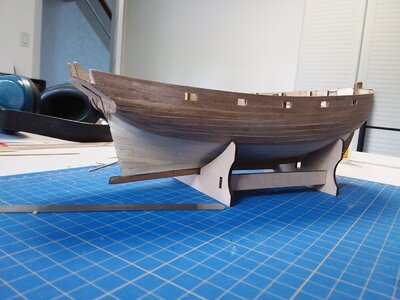
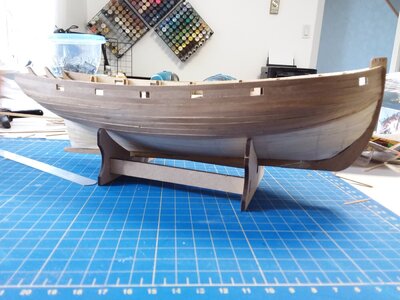
It seems to me that the outboard stern counter frames should maybe have been installed a bit further aft and the surface that supports the stern fascia faired like a bulkhead, but once everything is installed there will be just a small triangu gap on the inboard face against the fascia, which I can just fill with filler before painting. I will show how this works when I get to it, probably the next step, although I am debating whether to put the stern fascia on now or when all the planking is on. It could get damaged. The instructions required that it be in place already, but that would have meant teiming the bulwark planks to their exact length before attaching. I can't see any benefit to that!View attachment 189764View attachment 189766View attachment 189765
What do you use to clamp the second layer? Have you tried to use just ca and hold for a minute?
 
Well, it's Grolsch 0.0% Non-alcoholic beer, but the Dutch fake beer is the best as far as I'm concerned, along with Beck's from Germany. My wife's family is Dutch from Leiden and Hoogeveen mostly. When I looked up Enschede on a map, I saw "Twente", whichsounded familiar. Here is a photo of the colours of my old Canadian army regiment (on my beer mug!). You will see "Twente Canal" at around 5:30 (from the WW2 liberation battle there).
View attachment 189785
Grolch has also a good regular beer.
Its coincidence that you mention the Twente Kanaal, I live at the beginning of the Twente Kanaal along the river IJssel, close to my home the Canadians crossed the IJssel for which there is still a memorial. From there they started liberating the western part of Holland, long before my time though but never to be forgotten.
 
I described in my log how I do planking, but there are many ways to accomplish this. You cannot follow someone else's measurements as your hull will be different, you need to do your own measurements.
I can see now you will need stealers at the stern as there is a larger area there to plank than anywhere else.
I would now turn it over and start planking from the keel and fill in as necessary, this is your first layer so there is not too much to worry about other than getting it filled. Some filler and sanding will eventually give you a nice smooth finish, you are doing fine.
Both layers are 1mm thick. Inner is limewood and outer is I believe walnut, in two different shades. Others have found this too. I will use the lighter shade above where it will be natural and the greyish colour below the waterline, which will be painted white. The wales are pretty wide and will be black, so not all that much natural wood will show, but enough to look nice if I do my part.
Do you use a plank bender, and if so do you know where I can order one, I seen one at Cast your Anchor, but would be almost $100 can
 
Hi levmiller,

You actually don t need a plank bender.
The process of the properly bending a plank is quite simple. I soak the planks in hot water and bend them by hand over the stem of a heated soldering iron. If the planks are wet they wont burn and stay in the shape created by the bending.
 
Grolch has also a good regular beer.
Its coincidence that you mention the Twente Kanaal, I live at the beginning of the Twente Kanaal along the river IJssel, close to my home the Canadians crossed the IJssel for which there is still a memorial. From there they started liberating the western part of Holland, long before my time though but never to be forgotten.
We never forget here either. Every year the Regiment has a memorial parade to remember the battle at Bergen op Zoom, 75 years later. Those men are long gone, but I am old enough to have met many of them and trained under a few, including one sergeant major who jumped with the British airborne, I think at Arnhem.
 
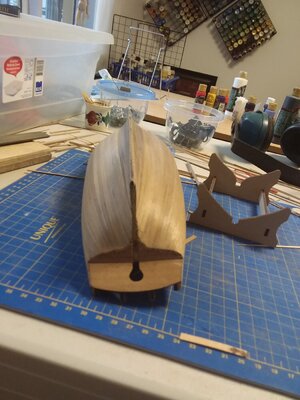
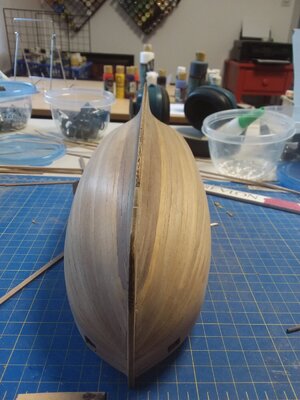
Work continues. 5 planks installed each side below the bulwarks. Tricky but manageable. Using thin "shims" , I adjusted the line of the planks starting at the fifth plank, as I was getting slight clinkering. The first 4 planks come to a point at the stem, due to the curvature of the hull. That is OK (I wouldn't mind in any case on my first hull that I have pointed ends) because the wider wales will cover the first 6mm below the deck line anyway. I pretty happy with things so far.20201112_111538.jpg20201112_111548.jpg
 
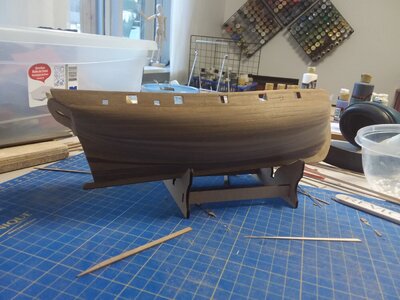
Outer layer of planking filled and sanded. Working on opening up the gunports and sweep holes along each side. Then stern post and transom go on next, then either the inside of the bulwarks or the deck. If I do the bulwarks first and paint them, I won't risk getting red paint on the deck. If I do the deck first, the bulwark planks will cover any imperfections in the edges of the deck fitting. Hmmm.... decisions. The instructions advise bulwarks then deck. One thing I notice is that they make no mention of when to paint areas. Also, final rundown with steel wool seems to have knocked some sawdust out of some fine seams. I may want to fill them? We also burn wood to heat the house and cracks open up in a lot of wooden things here in winter.20201128_155053.jpg20201128_155036.jpg20201128_155008.jpg
 
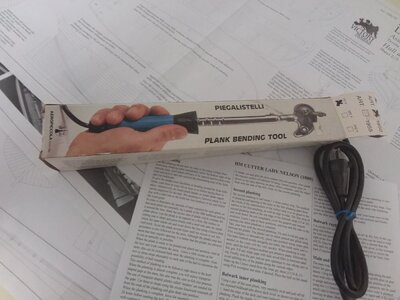
Gunports and sweep ports are squared away on the bulwarks exterior. The "horns" on the top of the bulkheads that provided shaping support for the bulwark plywood are now removed and flush at the deck. Now I will practice with the Aeropiccola bending tool I was given to see about bending inner bulwark planks. I can't use the Amati pinch plank bender on a concave bend, so it is either soak-and-shrink or hot bend. 20201130_164049.jpg1606772189390_20201130_161818.jpg
 
By the way, before long if I am going to use either the cradle stand or the brass pedestals-on-a-base that the kit came with, I have to think about a mod. The keel is not level, the ship is deeper at the stern, by about 1cm, on the model. Unfortunately, the cradle stand is an imperfect fit to the hull and in any case, both stands display the ship with the keel level. This means the waterline will slope down from stern to bow. It also means the ship wont look right -- it should sit with the bow high, and this gives extra upward angle to the bowsprit, which otherwise is in danger of looking like it slopes down also. You can see what I mean in these photos of my old Eastport Pinky (built when I lived about a half hour from Eastport -- great memories). The bow should look high and ready to ride up on waves, not plow through them. 20201130_165138.jpg20201130_165240.jpg
 
By the way, before long if I am going to use either the cradle stand or the brass pedestals-on-a-base that the kit came with, I have to think about a mod. The keel is not level, the ship is deeper at the stern, by about 1cm, on the model. Unfortunately, the cradle stand is an imperfect fit to the hull and in any case, both stands display the ship with the keel level. This means the waterline will slope down from stern to bow. It also means the ship wont look right -- it should sit with the bow high, and this gives extra upward angle to the bowsprit, which otherwise is in danger of looking like it slopes down also. You can see what I mean in these photos of my old Eastport Pinky (built when I lived about a half hour from Eastport -- great memories). The bow should look high and ready to ride up on waves, not plow through them. View attachment 196337View attachment 196338
Dive! Dive! Dive!
 
I need your info, is the main mast glued in place or just resting in the hole and slot?
 
Back
Top