Hello Roland, I have a similar problem. I used La Palme twice dry -> without glue and it fitted perfectly. Now that I've glued everything together, I'm faced with the problem that the last or penultimate frame no longer fits. I don't know what went wrong either. I hope I can find a solution, you still have it relatively well because nothing is glued.
-

Win a Free Custom Engraved Brass Coin!!!
As a way to introduce our brass coins to the community, we will raffle off a free coin during the month of August. Follow link ABOVE for instructions for entering.
-

PRE-ORDER SHIPS IN SCALE TODAY!
The beloved Ships in Scale Magazine is back and charting a new course for 2026!
Discover new skills, new techniques, and new inspirations in every issue.
NOTE THAT OUR FIRST ISSUE WILL BE JAN/FEB 2026
You are using an out of date browser. It may not display this or other websites correctly.
You should upgrade or use an alternative browser.
You should upgrade or use an alternative browser.
Le Commerce de Marseille 1788 - 1801 scale 1:48 from Gerard Delacroix
Hi Tobias, unfortunately everything is glued, so going back is difficult.... What I said, I went too fast and didn't think...Hello Roland, I have a similar problem. I used La Palme twice dry -> without glue and it fitted perfectly. Now that I've glued everything together, I'm faced with the problem that the last or penultimate frame no longer fits. I don't know what went wrong either. I hope I can find a solution, you still have it relatively well because nothing is glued.
or sometimes we think, that we have thought - but afterwards we realized, that we did not ..... but this is the salt in the soup of ship modelingHi Tobias, unfortunately everything is glued, so going back is difficult.... What I said, I went too fast and didn't think...
or sometimes the sand in the gearboxbut this is the salt in the soup of ship modeling
It will be fun following your progress. Have fun! Magic Mike
Oh well, then we have the same problem, but I don't want to say that I was too quick. 3 weeks to glue everything but it doesn't help, we will find a solution. Roland how did you go about it, I went from the middle to the front and then to the stern, I have now seen some model builders who always install one every 5-7 frames, so about 10 frames and have a gap between them and then prepare them from both sides. I will try this on my next ship. I think if you only do small sections at a time, it will work more accurately.Hi Tobias, unfortunately everything is glued, so going back is difficult.... What I said, I went too fast and didn't think...
Hi Maarten,Hi Ronald, unfortunately these things are part of our hobby but convinced you find a good solution.
From the pictures it is hard to see the issue, but can it be the height of the stern frames instead of placing them more foreward or aft. This as the open space between the most aft full frame and the stern is wedge shaped and becomes more narrow towards the bottom. Placing the stern frames lower will fill the space.
Just a thought.
The height of the stern frames are determined by notches, I cannot move them to another position. It is made exactly conform spec's...
Hey Ronald, call me stupid, but I fail to see the error, even after going through your pictures for the fourth time.
Regardless, it remains a very impressive build.
Johan
I failed to describe the problem, so some photos to clarify a bit more...Hello Ronald, I'm sorry, I can't understand (translation), what's the problem with your model, Thanks
Regards Frank
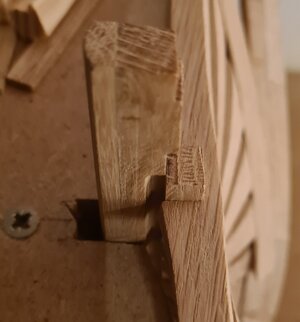
This is where the top stern frame is connected to the main frame. There is no more room to place it more to the back because the shape of the top stern frame would not match anymore on the rabbit...
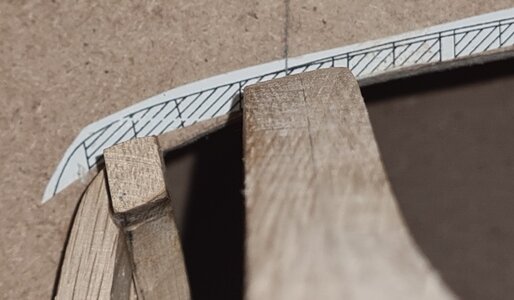
Here you can see that the last full frame is exactly matched to the drawing while the vertical stern bean is pushed a bit too much foreward towards the full frame. The difference is about 4 mm.
I cannot place the stern part more to the back because of the rabbit. Except for the fact that de stern part seems to be placed a bit too far towards the bow, there is nothing wrong with the shape of the stern...
I am not convinced that tearing it down again and do it over again will lead to a better result. So what I do is first making sure that the last full frame is fixed and therefore cannot move anymore, thereafter I will make the filling between the stern and the full frame a bit wider then the space now available to pust the stern a bit more to the back. It might be that as a result the rudder gets a slightly different angle but I believe that will be negligible.
Last edited:
That is a good question Tobias. I directly started with the idea to start at the bow and work my way towards the stern. I must say, I fail to see the benefit to start in the middle or every 5 to 7 frames because you start without a fixed frame to use as a matching point. What I mean to say is, when you place a frame next to the other you are better able to fix the frame in the correct position because you have the frame next to it as a reference...Oh well, then we have the same problem, but I don't want to say that I was too quick. 3 weeks to glue everything but it doesn't help, we will find a solution. Roland how did you go about it, I went from the middle to the front and then to the stern, I have now seen some model builders who always install one every 5-7 frames, so about 10 frames and have a gap between them and then prepare them from both sides. I will try this on my next ship. I think if you only do small sections at a time, it will work more accurately.
- Joined
- Sep 3, 2021
- Messages
- 5,190
- Points
- 738

Thanks for your explanation, Ronald, this actually makes a lot of sense.I failed to describe the problem, so some photos to clarify a bit more...
View attachment 335282
This is where the top stern frame is connected to the main frame. There is no more room to place it more to the back because the shape of the top stern frame would not match anymore on the rabbit...
View attachment 335281
Here you can see that the last full frame is exactly matched to the drawing while the vertical stern bean is pust a bit too much foreward towards the full frame. The difference is about 4 mm.
I cannot place the stern part more to the back because of the rabbit. Except for the fact that de stern part seems to be placed a bit too far towards the bow, there is nothing wrong with the shape of the stern...
I am not convinced that tearing it down again and do it over again will lead to a better result. So what I do is first making sure that the last full frame is fixed and therefore cannot move anymore, thereafter I will make the filling between the stern and the full frame a bit wider then the space now available to pust the stern a bit more to the back. It might be that as a result the rudder gets a slightly different angle but I believe that will be negligible.
Some inputs maybe to consider:
1. There appears to be a discrepancy between the cut-out in the board and the drawing; the cut-out appears to be smaller than the drawing indicates.
2. Using a paper drawing is a bit tricky, since paper is not dimensionally stable. Expansion over rather large lengths may be easily 4mm or more. If you used the glued-on drawing to align your frames at the top, this kiight cause issues, however, the deviations should benign and gradual, but accumulating.
Starting in the middle allows you to reduce the accumulated deviations by splitting them between fore and aft.That is a good question Tobias. I directly started with the idea to start at the bow and work my way towards the stern. I must say, I fail to see the benefit to start in the middle or every 5 to 7 frames because you start without a fixed frame to use as a matching point. What I mean to say is, when you place a frame next to the other you are better able to fix the frame in the correct position because you have the frame next to it as a reference...
Another option could be to start at both ends and in the middle and then filling up the spaces.
But whatever method you choose, all have their specific pro's and cons. The main concern always is what the effects are on the rest of the build and sometimes you just don't have the foresight to predict the consequences. and sometimes one becomes eligible for a do-over certificate.
Again, it has been a while since the last update... Time flies when you don't have a lot of it...
I managed to fit all the frames to the keel, see photos:
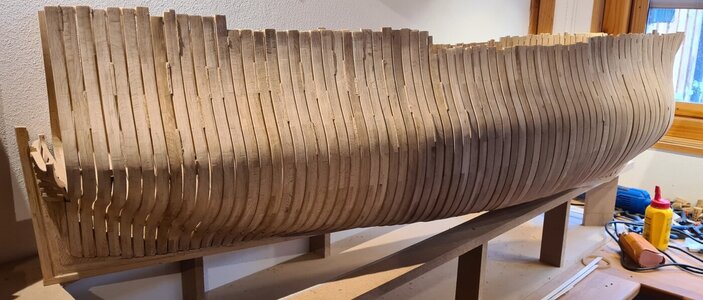
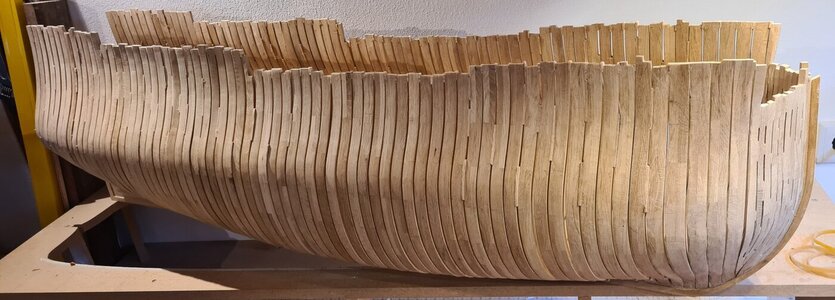
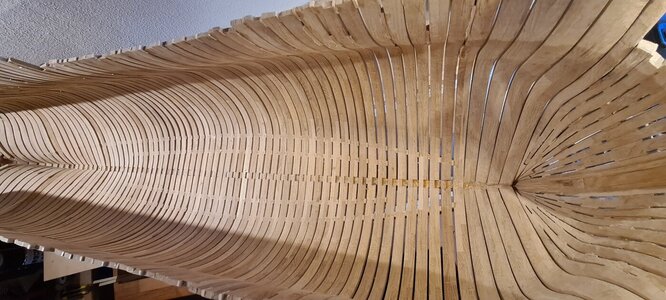
The hull can stand on it's own now without the assistence of rubbers
The plan now is to finish the hull at the stern-side...
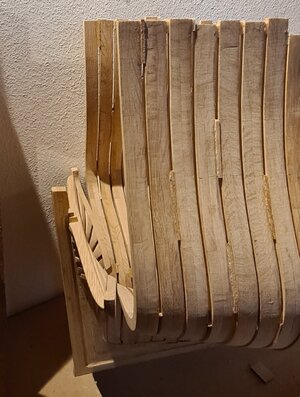
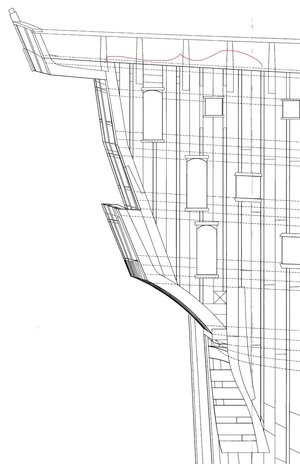
After this the sanding begins, probably mainly by hand.. Before I start with this I plan to fit a flexible plank along the edge of the hull..
I managed to fit all the frames to the keel, see photos:


The hull can stand on it's own now without the assistence of rubbers
The plan now is to finish the hull at the stern-side...


After this the sanding begins, probably mainly by hand.. Before I start with this I plan to fit a flexible plank along the edge of the hull..
Quite an impressive hull Ronald. Well done.
Cleanly done Roland, fits very well.
A big thing, looks absolutely great.
Roland, your attention to detail is amazing! The hull is fantastic! Wow!! Magic Mike
Real "WOODEN WALLS" - good work
and congratulations for reaching this stage
and congratulations for reaching this stage
I'll try to report more frequently, but in this case it means that I'll ventilate more frustration....
See photo below...
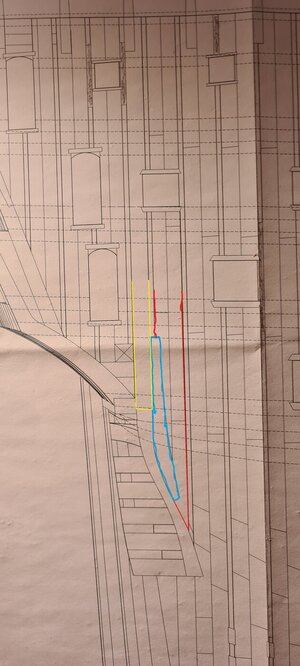
This time the mission is to place the next frame (red), but it contains a special fitting piece (blue) that should serve as a support for the next narrow frame (yellow). Now the frustration begins... The red frame does not fit at all as indicated on the drawing, there is no drawing of the blue fitting piece, and after four attempts to glue the red/blue part to the hull (and now it really is firmly attached) I find out that it is placed a little too much to the outside and therefore the yellow part is not really in line with it.. Anyway, first the realization of the red frame. This one is made in the same way as the other frames, with two layers, each consisting of a number of parts. The yellow frame consists of one part.
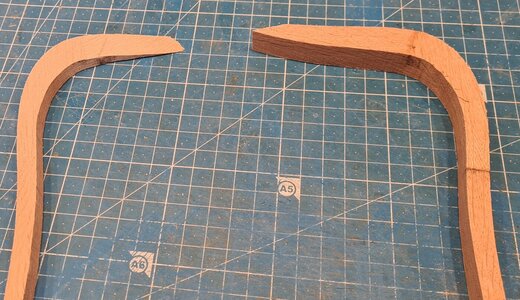
On the right the original shape from the drawing, on the left after it has been made fit on the hull, quite a difference...
Then I made the fitting (blue). Since I couldn't find a drawing of it (doubt if this would also be of added value given the difference I already have). The first step is to cut out the red frame, then put a piece of enough thickness in the milled part, then sand it again until it fits the frame again. Then it turned out that the yellow frame should not be placed flat, but at a small angle on the fitting piece, so I added another piece, sigh....
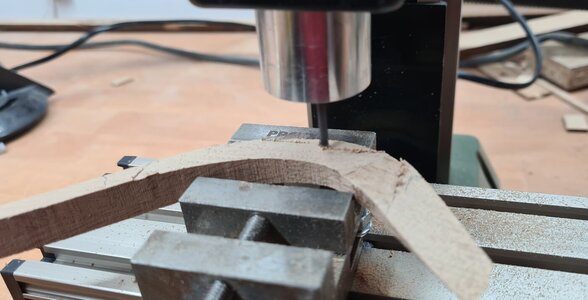
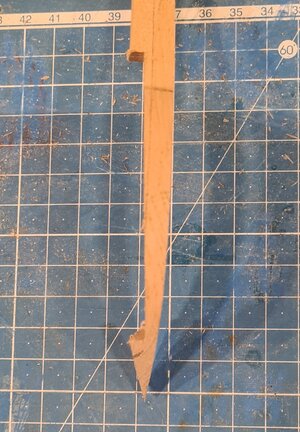
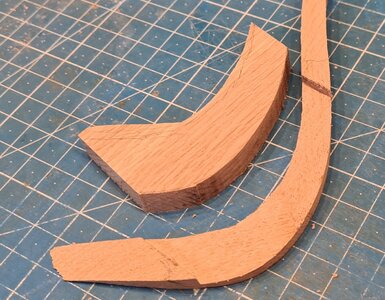
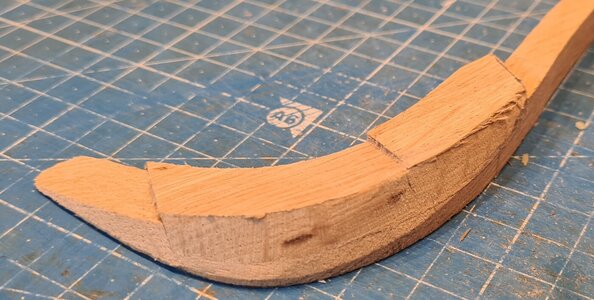
After the necessary corrections and many attempts, it was finally fitted on the hull and the yellow frame could then be placed.
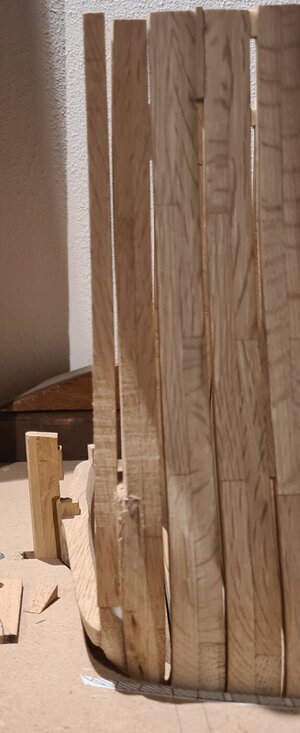
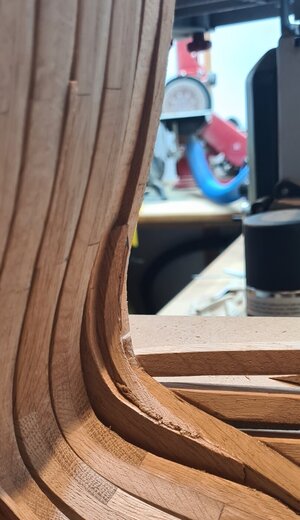
You were warned, some frustration would be present
Have accepted it, the outside won't be a problem, I'll sand that into shape, maybe the inside needs to fill up a bit. But here too I suspect that this will not be visible since so close to the stern both the outside and inside will be provided with planking, and I really don't want to look any longer where it went wrong.....
Now for the other side, hope this one goes better with what I learned on this side....
See photo below...

This time the mission is to place the next frame (red), but it contains a special fitting piece (blue) that should serve as a support for the next narrow frame (yellow). Now the frustration begins... The red frame does not fit at all as indicated on the drawing, there is no drawing of the blue fitting piece, and after four attempts to glue the red/blue part to the hull (and now it really is firmly attached) I find out that it is placed a little too much to the outside and therefore the yellow part is not really in line with it.. Anyway, first the realization of the red frame. This one is made in the same way as the other frames, with two layers, each consisting of a number of parts. The yellow frame consists of one part.

On the right the original shape from the drawing, on the left after it has been made fit on the hull, quite a difference...
Then I made the fitting (blue). Since I couldn't find a drawing of it (doubt if this would also be of added value given the difference I already have). The first step is to cut out the red frame, then put a piece of enough thickness in the milled part, then sand it again until it fits the frame again. Then it turned out that the yellow frame should not be placed flat, but at a small angle on the fitting piece, so I added another piece, sigh....


After the necessary corrections and many attempts, it was finally fitted on the hull and the yellow frame could then be placed.


You were warned, some frustration would be present
Have accepted it, the outside won't be a problem, I'll sand that into shape, maybe the inside needs to fill up a bit. But here too I suspect that this will not be visible since so close to the stern both the outside and inside will be provided with planking, and I really don't want to look any longer where it went wrong.....
Now for the other side, hope this one goes better with what I learned on this side....
sometimes some things are not working or running smoothly - and sometimes we have to live with it like it is
Keep everytime in mind - sometimes also the old shipwrights made something - not nice looking, but "working"
Keep everytime in mind - sometimes also the old shipwrights made something - not nice looking, but "working"


