-

Win a Free Custom Engraved Brass Coin!!!
As a way to introduce our brass coins to the community, we will raffle off a free coin during the month of August. Follow link ABOVE for instructions for entering.
-

PRE-ORDER SHIPS IN SCALE TODAY!
The beloved Ships in Scale Magazine is back and charting a new course for 2026!
Discover new skills, new techniques, and new inspirations in every issue.
NOTE THAT OUR FIRST ISSUE WILL BE JAN/FEB 2026
You are using an out of date browser. It may not display this or other websites correctly.
You should upgrade or use an alternative browser.
You should upgrade or use an alternative browser.
Le Commerce de Marseille 1788 - 1801 scale 1:48 from Gerard Delacroix
Thank you Shota70!
I added a few pieces to the keel. I know, I should have turned this part 90 degrees because of the grain in the wood. I saw it too late, and there is nothing further that went wrong, so I decided to leave this part as it is.... It won't be visible in the end...
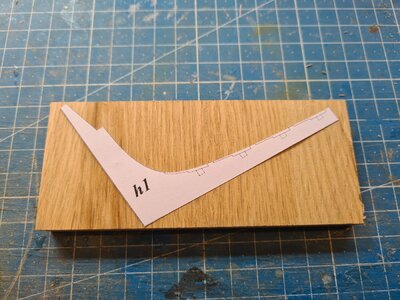
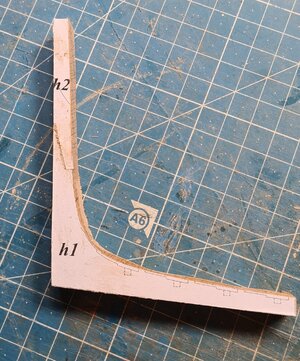
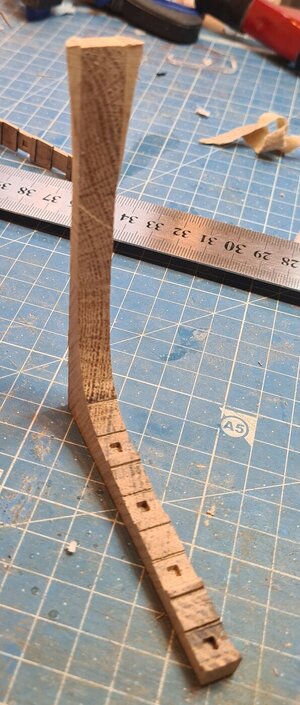
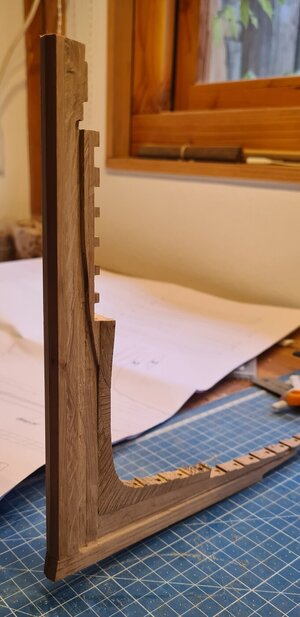
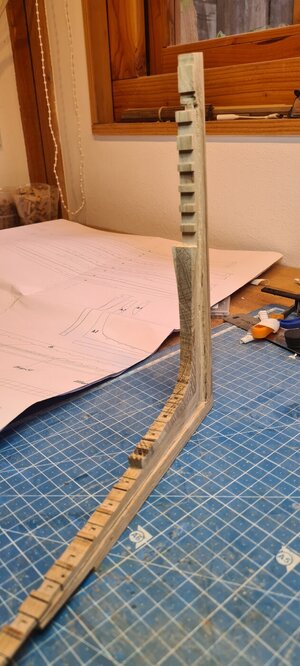
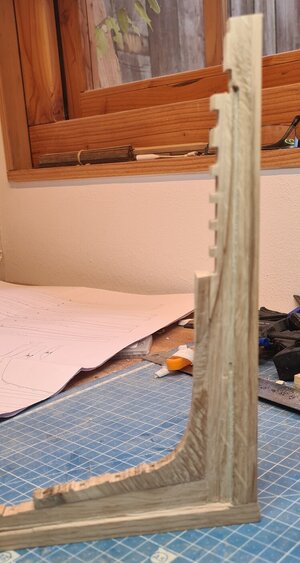
Ready for the next part...
I added a few pieces to the keel. I know, I should have turned this part 90 degrees because of the grain in the wood. I saw it too late, and there is nothing further that went wrong, so I decided to leave this part as it is.... It won't be visible in the end...


Ready for the next part...
Very good work - and I realized in your following post, that you made these notches afterwards.And now I realised I forgot something, these holes....
View attachment 241817
I think I can still clamp the entire piece in de milling machine..., we'll see...
I guess later on they are not visible anymore, due to the fact, that the frames are sitting on top, and in real life inside these notches .....
Hello Uwe, yes, these details won't be visible at all. But I guess that will be the case with many parts to come, so I will try to follow the original instruction. It suit's my goal, to improve my skills...Very good work - and I realized in your following post, that you made these notches afterwards.
I guess later on they are not visible anymore, due to the fact, that the frames are sitting on top, and in real life inside these notches .....
I reached a small milestone, I finished the keel from bow to stern.....
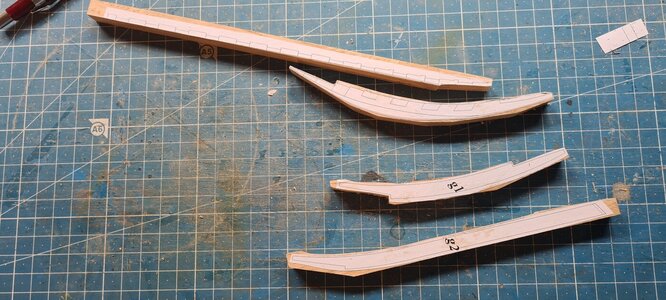
These were the final four parts. For me the challenge was to make these laying tight to the other part the entire curve...
I wanted to make sure the curve is exactly followed, so first I glued the first two parts before I milled them into shape...
Then I found out that I did a lowsy job sanding the outer curve, there was a small gap.. So I had to fill this before I could attach the two curves...
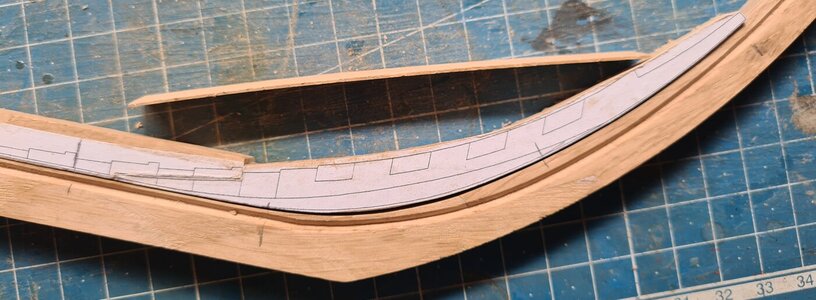
I created a thin piece of oak and glued it to the inside of the curve. After this it was all sanding (by hand)...
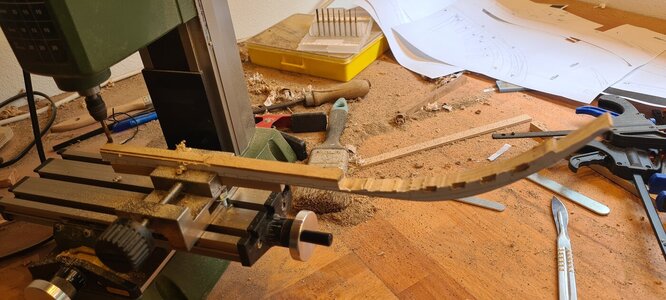
On this picture you can see how thin the piece is where the two parts are glued together.
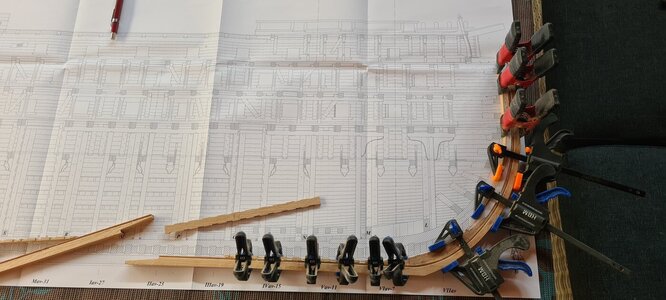
Finally, time to glue all the parts together (I think there are about 23 parts)

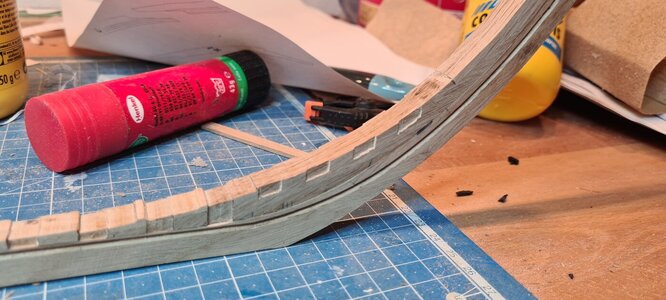
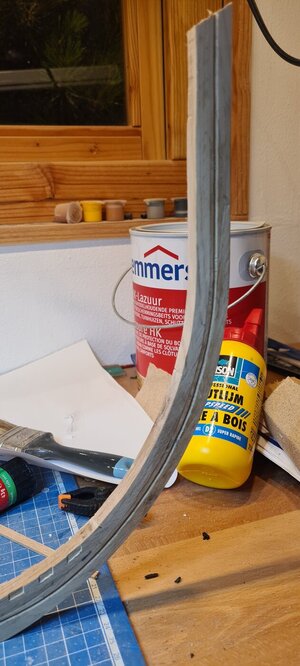
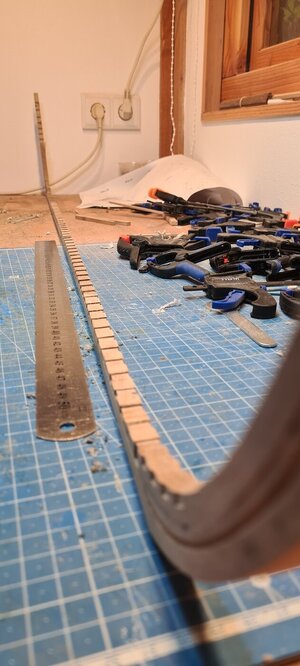
Now I have to figure out the next step....

These were the final four parts. For me the challenge was to make these laying tight to the other part the entire curve...
I wanted to make sure the curve is exactly followed, so first I glued the first two parts before I milled them into shape...
Then I found out that I did a lowsy job sanding the outer curve, there was a small gap.. So I had to fill this before I could attach the two curves...

I created a thin piece of oak and glued it to the inside of the curve. After this it was all sanding (by hand)...

On this picture you can see how thin the piece is where the two parts are glued together.

Finally, time to glue all the parts together (I think there are about 23 parts)


Now I have to figure out the next step....
Last edited:
Another small update from the last week.... I still don't know how exactly I'm going to keep the side open. Most examples I've seen have the gun decks fairly closed, and therefore not really a problem with breaking the ribs (because of the gun hatches). If I also want to keep these decks open, then there is only support from the ribs that remain, and if these are also interrupted by the gun holes, where do I get the support for the upper decks... That's why I'm still pushing this problem foreward, and start with the bow of the ship. I expect this to stay closed anyway...
For this I started with the first full rib on the bow side. All ribs that come before that are no longer for the full cross-section of the ship because they are placed obliquely on the keel in connection with the curvature of the bow.
The method that I use for the time being for making the ribs is rather labour-intensive. I will list this step by step:
1 - Copy the rib from the original drawing 3x. For the complete rib I need four sheets of A4.
2 - Stick the different sheets together in such a way that the rib is exactly the same as the original drawing (so also three times)
3 - Each rib consists of two halves that are later glued together. 2 of the 3 copies are used to cut out the different parts of the rib (1 copy for each half)
4 - Stick the cut-out parts on wood that has been sawn to the correct thickness beforehand. This rib consists of 18 different parts.
5 - Saw out all these parts so that there is still some margin along the edges, so don't cut exactly into shape!
6 - Cut the two parts that will be on the center rafter exactly to size and make sure it fits well on the center keel.
7 - Now glue the parts of the two halves together so that they completely cover the rib on the drawing using the 3rd copy.
8 - Now glue the two halves together, making sure they are aligned with each other by placing them both on the center rafter while aligning them.
9 - Now paste the third copy over the rafter again so that a complete rib is shown again, you can then use the lines of this copy to sand the rib into the final shape.
10 - Then sand the inside and the outside to size according to the outer lines of the drawing (the drawing also has intermediate lines that indicate how the rib should be sanded obliquely.
11 - Then the ribs should be sanded obliquely in line with the hull.
I haven't done step 11 yet. I suspect that I can do this better when the adjacent ribs are also ready, then I can sand/file them smoothly at an angle relative to each other.
And now the pictures:
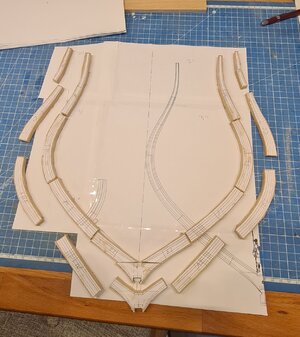
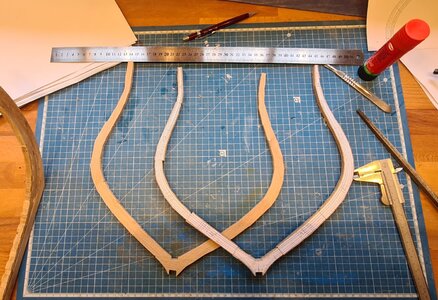
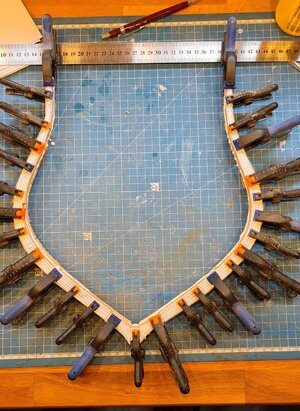
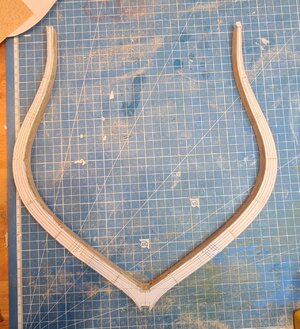

I only sanded the rib where it meets the construction board so that I can place it here. It is still a bit tight here, I suspect that the building board is a bit too tight, but I still have to check that.
See the drawing below:
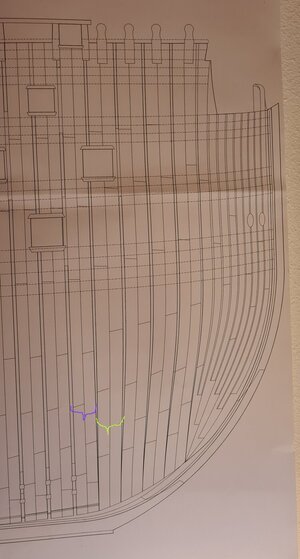
The 'purple' rib is the one I showed before. The green rib consists of two separate pieces, port and starboard, each of which consists of 8 parts...

And here are the parts for that rib...
I expect the frequency of the updates to go down a bit... Reasonably repetitive work, but each and every one of them difficult because they all have to be sanded into their unique shape....
If anyone knows a better method for making the ribs I'd love to hear it! Apart from the bow and stern I still have 69 to go....
For this I started with the first full rib on the bow side. All ribs that come before that are no longer for the full cross-section of the ship because they are placed obliquely on the keel in connection with the curvature of the bow.
The method that I use for the time being for making the ribs is rather labour-intensive. I will list this step by step:
1 - Copy the rib from the original drawing 3x. For the complete rib I need four sheets of A4.
2 - Stick the different sheets together in such a way that the rib is exactly the same as the original drawing (so also three times)
3 - Each rib consists of two halves that are later glued together. 2 of the 3 copies are used to cut out the different parts of the rib (1 copy for each half)
4 - Stick the cut-out parts on wood that has been sawn to the correct thickness beforehand. This rib consists of 18 different parts.
5 - Saw out all these parts so that there is still some margin along the edges, so don't cut exactly into shape!
6 - Cut the two parts that will be on the center rafter exactly to size and make sure it fits well on the center keel.
7 - Now glue the parts of the two halves together so that they completely cover the rib on the drawing using the 3rd copy.
8 - Now glue the two halves together, making sure they are aligned with each other by placing them both on the center rafter while aligning them.
9 - Now paste the third copy over the rafter again so that a complete rib is shown again, you can then use the lines of this copy to sand the rib into the final shape.
10 - Then sand the inside and the outside to size according to the outer lines of the drawing (the drawing also has intermediate lines that indicate how the rib should be sanded obliquely.
11 - Then the ribs should be sanded obliquely in line with the hull.
I haven't done step 11 yet. I suspect that I can do this better when the adjacent ribs are also ready, then I can sand/file them smoothly at an angle relative to each other.
And now the pictures:


I only sanded the rib where it meets the construction board so that I can place it here. It is still a bit tight here, I suspect that the building board is a bit too tight, but I still have to check that.
See the drawing below:

The 'purple' rib is the one I showed before. The green rib consists of two separate pieces, port and starboard, each of which consists of 8 parts...

And here are the parts for that rib...
I expect the frequency of the updates to go down a bit... Reasonably repetitive work, but each and every one of them difficult because they all have to be sanded into their unique shape....
If anyone knows a better method for making the ribs I'd love to hear it! Apart from the bow and stern I still have 69 to go....
- Joined
- Aug 8, 2019
- Messages
- 5,568
- Points
- 738

take a look here:If anyone knows a better method for making the ribs I'd love to hear it! Apart from the bow and stern I still have 69 to go....
Oliver Cromwell, POF ,Scale 1:48 by Lawrence [COMPLETED BUILD]
Hello Ship Mates Here is a rather fun picture that I wanted to share with my Ship Mates. This is the package that my Oliver Cromwell building board from the Lumberyard came in along with the building board, and 4 Pear carving blocks came in. I have never seen so many stamps applied to a...
shipsofscale.com
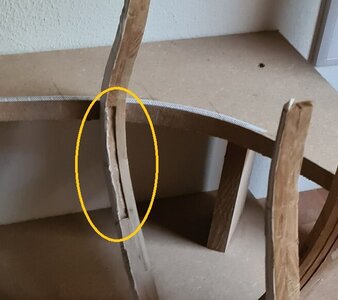
And when you planning an open side to see the inner parts, the inside needs as much attention as the outside. For a fully planked ship this isn't a problem but in your case it could keep you awake
Maybe you can ask them if there is a pdf for the rough drawings. I seen a discussion about it but can't find it back.
Hopefully I gave you a good advice, I'm not for real an expert in this kind of building. I just reaing a lot of build logs.
You are building a great ship. And you're brave doing this with so less experience in this way of building. Hope you get some good advice from the experts here.
Hi Stefan, thank you for your reply and kind words! I looked at the report you mentioned, thank you for thistake a look here:
They make a rough drawing for frames and using glass plates to glue them straight. Also they make the frames with a big oversize to make sure after cutting and sanding the end product is straight and looking good. I see this:Oliver Cromwell, POF ,Scale 1:48 by Lawrence [COMPLETED BUILD]
Hello Ship Mates Here is a rather fun picture that I wanted to share with my Ship Mates. This is the package that my Oliver Cromwell building board from the Lumberyard came in along with the building board, and 4 Pear carving blocks came in. I have never seen so many stamps applied to a...shipsofscale.com
View attachment 244954
And when you planning an open side to see the inner parts, the inside needs as much attention as the outside. For a fully planked ship this isn't a problem but in your case it could keep you awake
Maybe you can ask them if there is a pdf for the rough drawings. I seen a discussion about it but can't find it back.
Hopefully I gave you a good advice, I'm not for real an expert in this kind of building. I just reaing a lot of build logs.
You are building a great ship. And you're brave doing this with so less experience in this way of building. Hope you get some good advice from the experts here.
There are some differences comparing to my method, but I think in general there are really no big differences. I didn't use a glass plate (yet) but I did use a flat surface. But the biggest difference is that I use much less margin so I don't have much room for error. I started this way to use less wood (since it is a rather big model). After I glued the rib together I only have to use the sander...
However, like I said, marginal room for error... I will reconsider my method on this part... It would certainly speed up the process...
About paying attention to the inner side, I like to believe I do... The photo didn't show the end result because I thought it was better to wait until the other rib's are also ready, and than sand the entire hull into shape... In the next photo I sanded the inside to an almost finished shape...
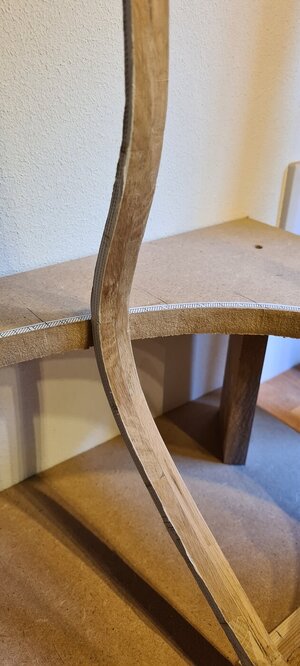
This already looks a lot better I think...
Last edited:
I checked my board if it has the correct width, and I discovered something strange in the drawings. I guess I don't read the plan's correctly, maybe someone knows what is going on?It is still a bit tight here, I suspect that the building board is a bit too tight, but I still have to check that.
See the next picture:
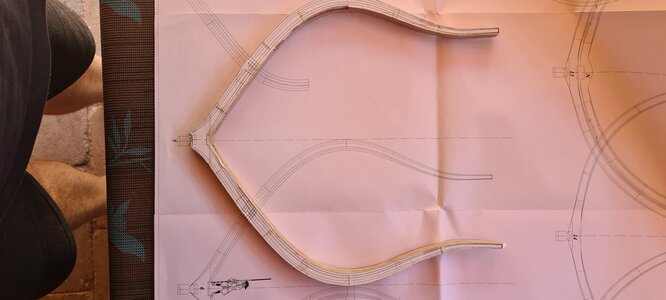
I made this rib exactly according to this drawing, rib no. 5.
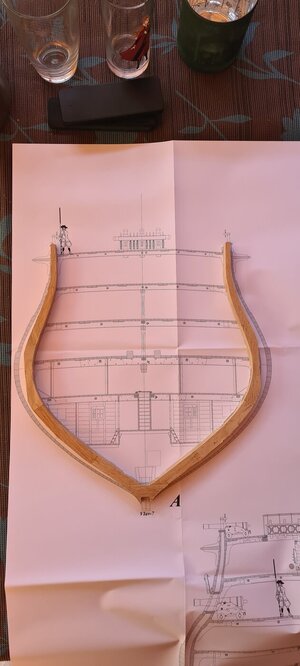
This picture shows rib no. 7, but this looks ok. The top part of the rib's are about the same width as expected... Now see the next plan:
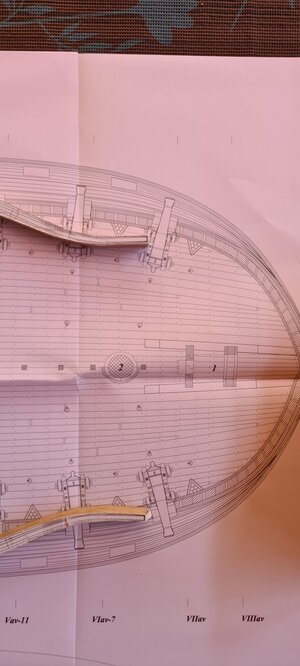
The points of the rib are where rib no. 5 is. It should be about the same width. However, there is a big difference of app. 2cm. of where the points should be... the drawings are all in the same scale... Where am I going wrong here?
I checked the width of rib no. 30, and this one is exactly in line with my board...
Last edited:
I have to say I am rather embarrassed.... I immediately checked your prognosis and you are totally correct...I may be mistaken, but it seems to me that you have a plan of the gun deck second from below, quarterdeck. The frames naturally taper towards the top of the body. On the frames, apply the lines of the decks and everything should come together.
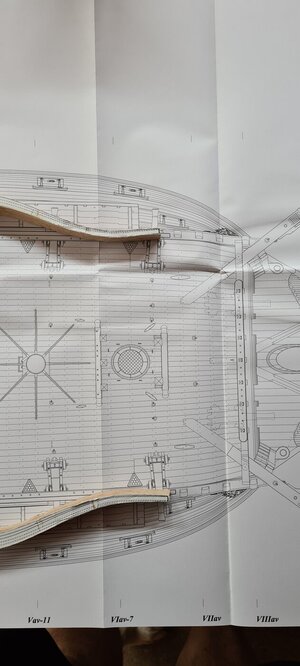
Thank you for pointing this out to me...
Another mistake I won't repeat....
Wonderful because I can get a lot of inspiration
- Joined
- Aug 8, 2019
- Messages
- 5,568
- Points
- 738

I think you mean does happen.Do not scold yourself too much. It doesn't happen to anyone.
But it is true, sometimes you can't see the forest through the trees (so we say that in Dutch) it means so much info that you makes mistakes.
The one who doesn't try usually doesn't make mistakes. 
I know what you mean, моя жена русская , so we have also russian friends, I know automatic translators to russian are truly terrible...Yes, I wanted to say that this happens to many people. Difficulties of the automatic translator. Sometimes it is not possible to convey your idea correctly to the interlocutor.
Work continues, so another small update....
I decided to stop working on the bow, and continue with the rib's halfway the ship. This I can do because I decided what to do concerning the open side. I'm not going to take the gun holes into consideration at first. This made it a bit easier to determine how I want to keep the side open.... At first I skip all ribs with the exception of the ribs which are also provided with an 'inner rib' as shown in the drawing in the photos shown below.
The ribs that are used for the open side are shown in the next photo. I still have to figure out what to do at the stern, but for the most part it is now clear....
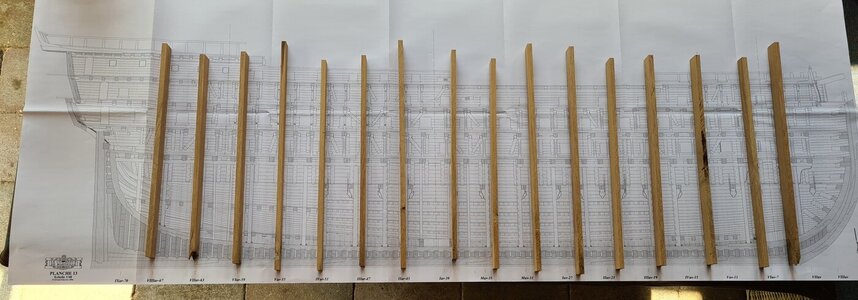
So instead of continuing with the bow I first made rib nr 30, which is about in the middle... I plan to make the frames first that will also be on the open side, then the frames that are only used on the closed side and on the bottom....
Here are a few pictures of rib 30. This rib consists of 19 parts...
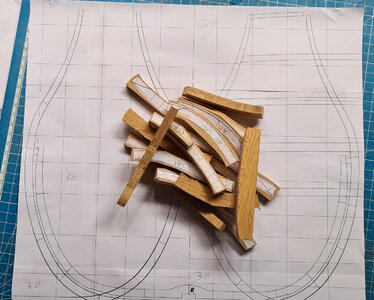

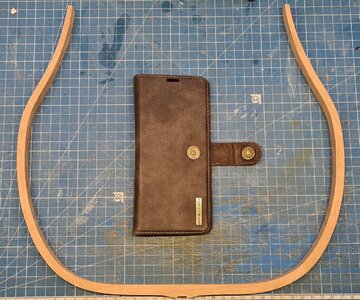
I find 1:48 scale very 'motivating' so far. It doesn't feel so fragile Rib 30 roughly shows how wide the model will be...
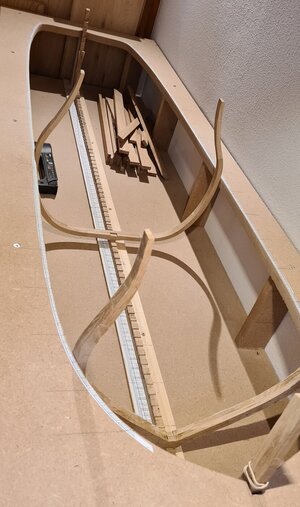
Still looks empty, now a matter of repeating the steps for the other ribs... I expect the next update will take a while until there is something worth mentioning again...
I decided to stop working on the bow, and continue with the rib's halfway the ship. This I can do because I decided what to do concerning the open side. I'm not going to take the gun holes into consideration at first. This made it a bit easier to determine how I want to keep the side open.... At first I skip all ribs with the exception of the ribs which are also provided with an 'inner rib' as shown in the drawing in the photos shown below.
The ribs that are used for the open side are shown in the next photo. I still have to figure out what to do at the stern, but for the most part it is now clear....

So instead of continuing with the bow I first made rib nr 30, which is about in the middle... I plan to make the frames first that will also be on the open side, then the frames that are only used on the closed side and on the bottom....
Here are a few pictures of rib 30. This rib consists of 19 parts...


I find 1:48 scale very 'motivating' so far. It doesn't feel so fragile

Still looks empty, now a matter of repeating the steps for the other ribs... I expect the next update will take a while until there is something worth mentioning again...


