-

Win a Free Custom Engraved Brass Coin!!!
As a way to introduce our brass coins to the community, we will raffle off a free coin during the month of August. Follow link ABOVE for instructions for entering.
-

PRE-ORDER SHIPS IN SCALE TODAY!
The beloved Ships in Scale Magazine is back and charting a new course for 2026!
Discover new skills, new techniques, and new inspirations in every issue.
NOTE THAT OUR FIRST ISSUE WILL BE JAN/FEB 2026
You are using an out of date browser. It may not display this or other websites correctly.
You should upgrade or use an alternative browser.
You should upgrade or use an alternative browser.
Le Commerce de Marseille 1788 - 1801 scale 1:48 from Gerard Delacroix
"Steam ahead" sounds good - 
Back from a holiday so back to my project...
Working on the rib's, and a question about these....
I believe that metal pin's were used to fixate the different parts together. In this case I expect that the different parts of the rib's needs pin's to make it strong. However, Michele didn't use pin's in de rib's in his model of the Commerce... Maybe because these are hardly visible when the rib's are so close together placed...
Looking foreward reading your opinions about this!
Usually these pins in the frames (of a model) are only for decoration, means to show and immitate the bolts used for the connection of the frame elements.
Normal wood glue keeps the parts together and are producing a good connection.
Also they are hardly visible, so most of modelers are not doing them, but it is (like often) a question of taste.....
Normal wood glue keeps the parts together and are producing a good connection.
Also they are hardly visible, so most of modelers are not doing them, but it is (like often) a question of taste.....
With sistered frames there is no need to install nails/bolts for structural purpose. In real practices they were bolted together. As Uwe pointed out, it's a matter of taste. Great work so far.Back from a holiday so back to my project...
Working on the rib's, and a question about these....
I believe that metal pin's were used to fixate the different parts together. In this case I expect that the different parts of the rib's needs pin's to make it strong. However, Michele didn't use pin's in de rib's in his model of the Commerce... Maybe because these are hardly visible when the rib's are so close together placed...
Looking foreward reading your opinions about this!
Hi Uwe,Usually these pins in the frames (of a model) are only for decoration, means to show and immitate the bolts used for the connection of the frame elements.
Normal wood glue keeps the parts together and are producing a good connection.
Also they are hardly visible, so most of modelers are not doing them, but it is (like often) a question of taste.....
Agreed, the pins are not necessary to make the model stronger but only for decoration. I will try to add the pins of brass 0.5mm. I guess the pins were black in real life so I need to blacken the pins....
Does anyone have experience with Birchwood Casey “Super Blue” or “Brass Black”? Or is there a better alternative to make brass black?
Small update...
I applied brass pens of 0.5mm to one frame... First drilling, then applying the pen, sand the pins flat to the frame and after that blackening the pens:
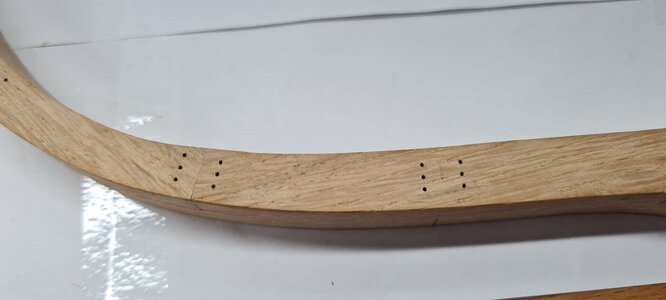
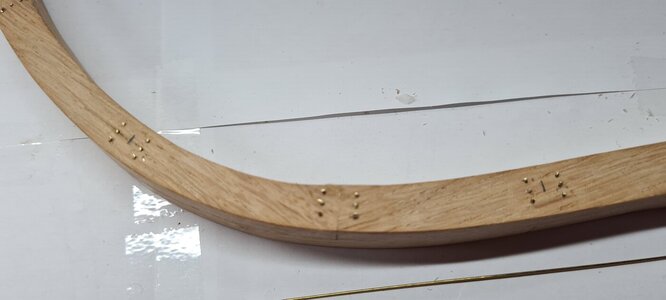
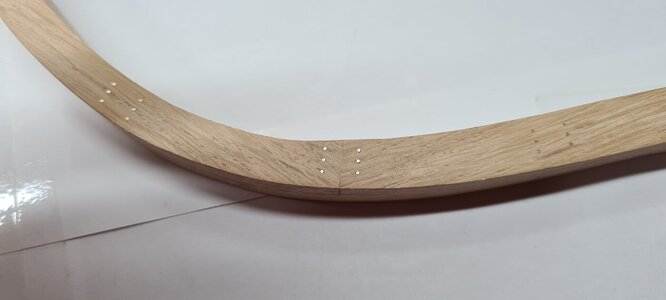
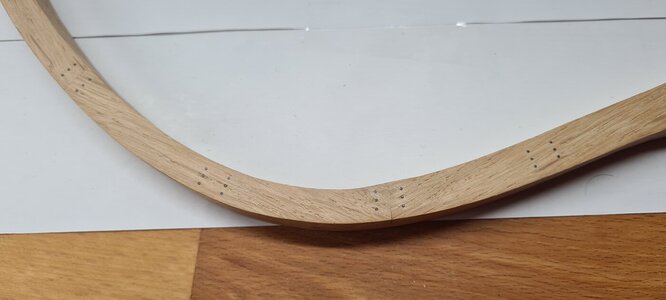
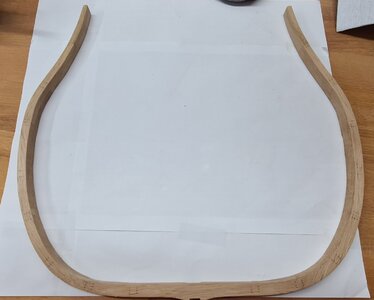
I thought this pattern of pens could be realistic...
At first I was planning of applying the pens to every frame, but I believe it is not worth the effort because there are 184 pens in this frame already, and when the frames are so close connecten to eachother (2mm between them) you can hardly see it. Therefore I think it is better to just use the pins that are visible, so on the open side... What do you think?
I applied brass pens of 0.5mm to one frame... First drilling, then applying the pen, sand the pins flat to the frame and after that blackening the pens:


I thought this pattern of pens could be realistic...
At first I was planning of applying the pens to every frame, but I believe it is not worth the effort because there are 184 pens in this frame already, and when the frames are so close connecten to eachother (2mm between them) you can hardly see it. Therefore I think it is better to just use the pins that are visible, so on the open side... What do you think?
I had previously planned to only sand the frames into the correct shape when I fix them side by side on the keel so that I can let the entire hull determine the shape itself. However, I can't fit the pins until they've already been sanded to the right shape. This is especially important for frames that have to be sanded diagonally at the bow and stern. So unfortunately I will have to sand the frames at an angle based on the extra lines on the drawing....
I ave the same opinion - nice to know, that they would be there, but I think it is not worth to spend several days work for not visible bolts....Therefore I think it is better to just use the pins that are visible, so on the open side... What do you think?
How do you blacken the heads of the brass pins after installation in the wood?
Hi Uwe,I ave the same opinion - nice to know, that they would be there, but I think it is not worth to spend several days work for not visible bolts....
How do you blacken the heads of the brass pins after installation in the wood?
I use Patina Zwart of Kolderstok, it is like Birchwood Casey “Super Blue” or “Brass Black”...
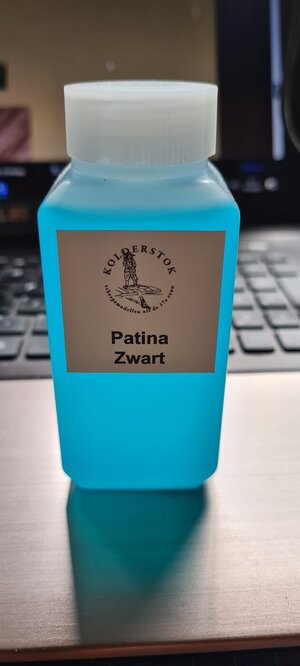
I attached a video.....
View attachment Fragment converteren 20210818_132941_Trim.mp4
(The video was cut short, I don't know why but you get the picture...)
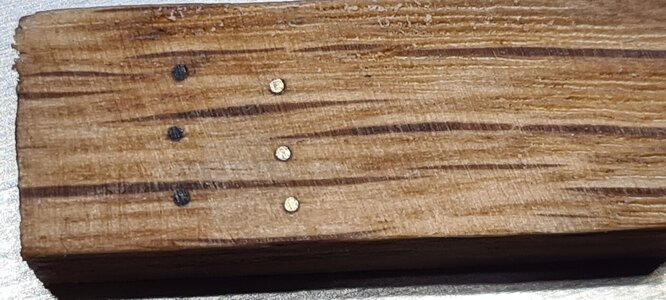
Endresult:
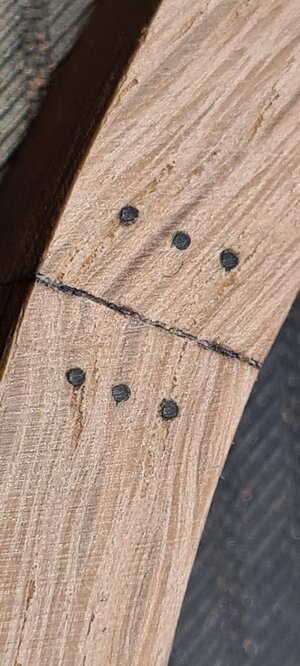
I was worried that the surrounding wood would be damaged, but after I treated it with oil (linseed oil), this was the result
Last edited:
Updates are going slow..., but here is one.... I created half of the frames wich supports both port and starboard... The pictures doesn't really do it justice but it gives an impression...
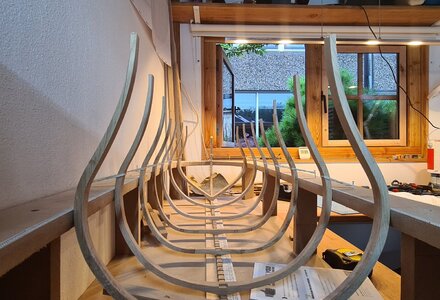
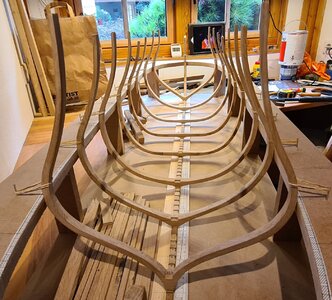
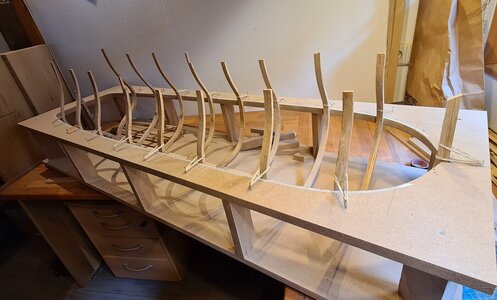
I am not sure I want to have more frames on the open starboard side since it will block the view of the interior... On the other hand, more frames does show the line of the hull much better.... I would really like to hear your opinion on this..
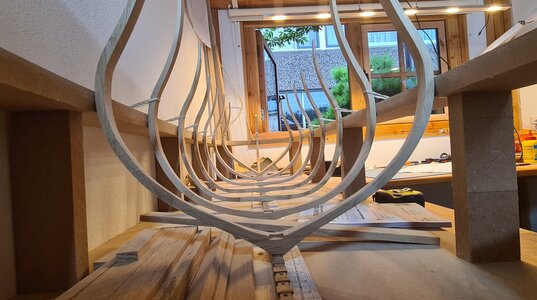


I am not sure I want to have more frames on the open starboard side since it will block the view of the interior... On the other hand, more frames does show the line of the hull much better.... I would really like to hear your opinion on this..

Last edited:
- Joined
- Jan 9, 2020
- Messages
- 10,566
- Points
- 938

Hello Ronald. In my humble opinion, I do not think that you have nearly enough frames - even though you do plan on leaving the starboard side open. I would double the number and frames on the port side and see what that looks like before you make a call. By the way - the wooden window frames are beautiful!
What is the plan exactly ? Open one side and let the other closed ?
Agree, the Windows are beautiful !
Agree, the Windows are beautiful !
Hello Heinrich, thank you for the complement, I do not believe you need to be humble when I look at the work you do with your projects, very impressive...Hello Ronald. In my humble opinion, I do not think that you have nearly enough frames - even though you do plan on leaving the starboard side open. I would double the number and frames on the port side and see what that looks like before you make a call. By the way - the wooden window frames are beautiful!
I don't have anybody nearby which shares my hobby, so I really like to hear any remarks on my work, postive and negative...
Now about your remark, I cannot make half a frame for the port side, and eventually add the starboard side later on... What I can do is remove that half later on. So this is what I will do... I create the other frames (eventually) necessary for the starboard side and indeed make the call later. Worst case scenario is that I have to remove part of the frames, not a big deal... Thanks for your input! It really helps me....
Hi Oliver, the plan is to leave the starboard side almost entirely open. I want to create a complete interior, and to remain good visibility on this interior I need no create as much an open side as possible, but I also want to show the flow of the hull, so I need to find the right balance here....What is the plan exactly ? Open one side and let the other closed ?
Agree, the Windows are beautiful !
By the way, thanks for the complement
I think it´s impossible. Form follows function. Do it or loose it. I have the same problem. Kill the hull or hide the whole work of the interior. One side closed doesnt help because nobody will see this side on the wall. In my eyes the benfit to open the hull is much bigger than let it closed. The problem in my eyes is as well to show the details from the gundeck and the upperdeck. There are a lot of interesting details to show.
If you will open the hull, you have to build it complete, after mounting the shelfs and the wales you can cut the frames.
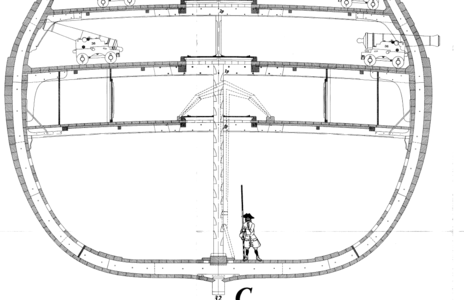
One little detail ! Your bolts from the frame arent correct. Take a look in the sections from the CdM and you will find the correct arrangement. The bolts for the floortimbers and the cross-chocks of the uprising frames arent shown in the planset. You have to look in alternative Monos or contempory documentation to get the correct positions.
First of all you are making a very good job - in moment your model is looking like on a real ship yard when the shipwrights started to install the first frames - Great!
If you want to keep one side open, you definitely have to build all the frames of the other side with minimum the floor timber, on the open side you need the framing behind the wales and upwards. So I think you will have to make all the frames and cut out later the "windows"
If you want to keep one side open, you definitely have to build all the frames of the other side with minimum the floor timber, on the open side you need the framing behind the wales and upwards. So I think you will have to make all the frames and cut out later the "windows"
Hi Oliver,I think it´s impossible. Form follows function. Do it or loose it. I have the same problem. Kill the hull or hide the whole work of the interior. One side closed doesnt help because nobody will see this side on the wall. In my eyes the benfit to open the hull is much bigger than let it closed. The problem in my eyes is as well to show the details from the gundeck and the upperdeck. There are a lot of interesting details to show.
If you will open the hull, you have to build it complete, after mounting the shelfs and the wales you can cut the frames.
One little detail ! Your bolts from the frame arent correct. Take a look in the sections from the CdM and you will find the correct arrangement. The bolts for the floortimbers and the cross-chocks of the uprising frames arent shown in the planset. You have to look in alternative Monos or contempory documentation to get the correct positions.
The longer I think about it, the more I think you are on the right track. Besides, also Michele Padoan created entire frames while opening them later on… He also used a different type of wood for the parts he would remove later. I am not sure if I will follow this example….
About the bolts, I am searching and searching, so far I didn’t find anything about the placement of the bolts in the framing but I keep looking…
Thanks for the remarks!
Hi Uwe, thanks for the support! I agree, this way of building gives you a real insight about how real ships came together, a very rewarding feeling. Also the scale 1:48 makes it extra interesting….First of all you are making a very good job - in moment your model is looking like on a real ship yard when the shipwrights started to install the first frames - Great!
If you want to keep one side open, you definitely have to build all the frames of the other side with minimum the floor timber, on the open side you need the framing behind the wales and upwards. So I think you will have to make all the frames and cut out later the "windows"
Yes, when I say leaving one side open, I only mean the top timbers, not the floor timbers… Also the bottom side of the starboard hull will be planked.
Indeed, your advise is the same as Olivers, and is also how Michele has done it. Who am I to argue
At first I will create the entire hull like Michele did. However, he used an other kind of wood for the parts he removed later on, I am not sure I will follow on this part. The advantage of using one kind of wood is that, when the time comes to open the side, you are not limited in creating the windows….
Still time to sleep a couple of nights about this….
There it is , why did I miss that one … I was looking in the added booklet…!!! Its important to build a symetric framework until the system get his own stiffness !!! Otherwise the frame will twist. It doesnet matter which wood you use for this. The risk is too high for that.
Planche 14
View attachment 257641
About the stiffness, you are correct… I was already in doubt, was hoping to spare me some work but the risk is too high…. I will be building the entire hull and give it it’s stiffness before I open the side…
Really, thank you for the information!


