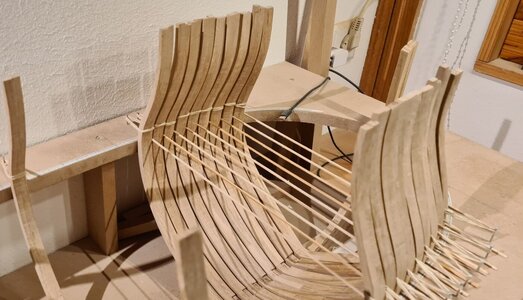
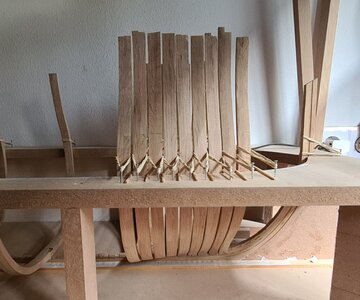
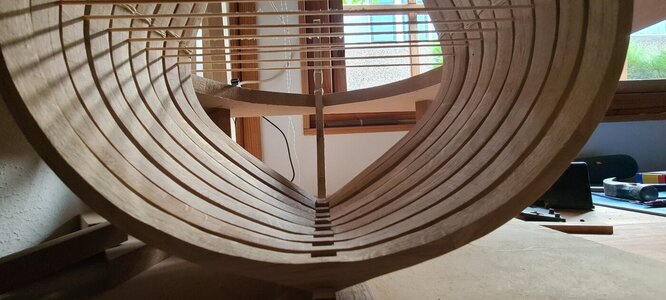
-

Win a Free Custom Engraved Brass Coin!!!
As a way to introduce our brass coins to the community, we will raffle off a free coin during the month of August. Follow link ABOVE for instructions for entering.
-

PRE-ORDER SHIPS IN SCALE TODAY!
The beloved Ships in Scale Magazine is back and charting a new course for 2026!
Discover new skills, new techniques, and new inspirations in every issue.
NOTE THAT OUR FIRST ISSUE WILL BE JAN/FEB 2026
You are using an out of date browser. It may not display this or other websites correctly.
You should upgrade or use an alternative browser.
You should upgrade or use an alternative browser.
Le Commerce de Marseille 1788 - 1801 scale 1:48 from Gerard Delacroix
Great to see you back posting, Ronald. BTW, you have really nice progress. Keep yem coming!
Wow. You have embarked on a mammoth project ... BUT ... the first 15 frames look excellent! With those under your belt, you will have the confidence to tackle the rest. Well done Ron!
Thank you for the compliments Heinrich and JimskyGreat to see you back posting, Ronald. BTW, you have really nice progress. Keep yem coming!
Such a project of a bigger POF model will take "some" time, but you knew it from the beginning, that you will work on her for the next years.
Enjoy the time working on such a beautiful model ...... especially when you are making very good work like we can see ....
Enjoy the time working on such a beautiful model ...... especially when you are making very good work like we can see ....
A really great result Roland. Step by step
Thanks for the compliments! Keeps me motivated for the next frame 
I wanted a small intermezzo between frame-making, so I thought I try to make an ornament... Here you can see an example of how you should not make an ornament....
Because it was just practice I used a piece of oak. First I milled the contoures using my milling-machine, thereafter I tried to add some details with my handmill...
When I saw to what result I worked I quit the attempt.... Don't laugh too hard when you look at the pictures....

I already know this... Don't use oak, and don't start with an ornament this complex.....
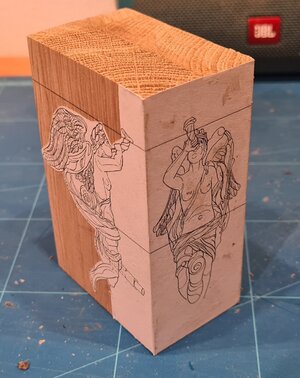
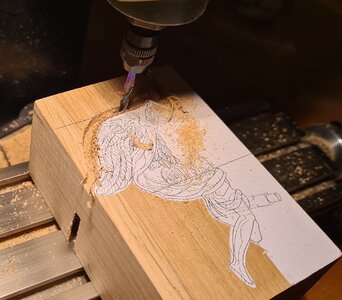
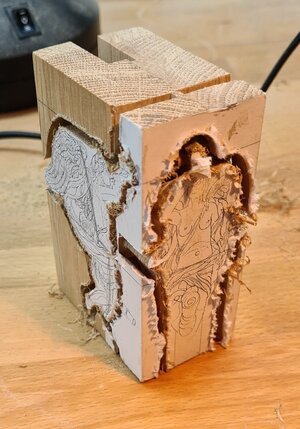
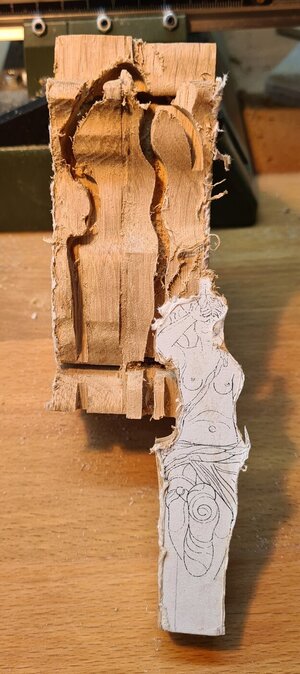
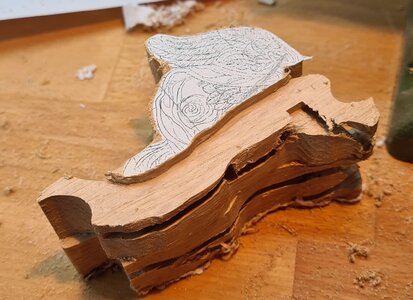
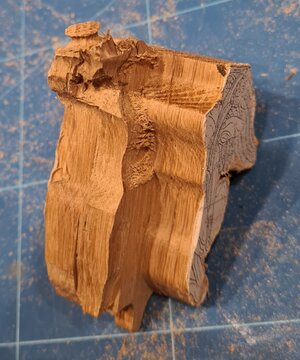
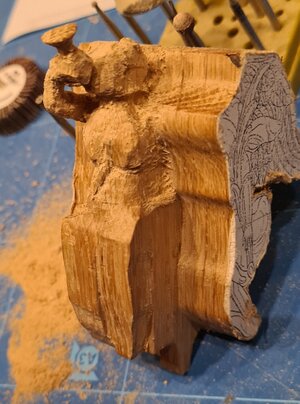
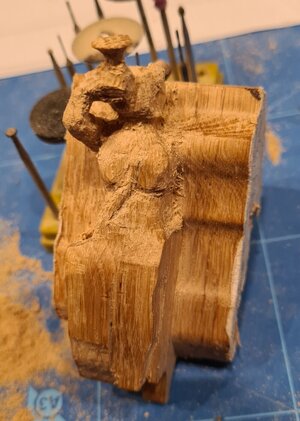
And this is how it should be....
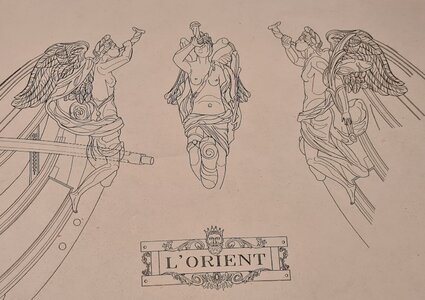
I wanted a small intermezzo between frame-making, so I thought I try to make an ornament... Here you can see an example of how you should not make an ornament....
Because it was just practice I used a piece of oak. First I milled the contoures using my milling-machine, thereafter I tried to add some details with my handmill...
When I saw to what result I worked I quit the attempt.... Don't laugh too hard when you look at the pictures....
I already know this... Don't use oak, and don't start with an ornament this complex.....


And this is how it should be....

Last edited:
- Joined
- Aug 8, 2019
- Messages
- 5,568
- Points
- 738

Carvings and ship decorations related build logs
This Forum discusses the many techniques for Carving and Etching Images using various materials. Enjoy Carving your own Figure Heads, Stern Decorations, etc. Your imagination is unlimited in this forum.
shipsofscale.com
Hi Ronald, just test with a fine grained wood like pear. Boxwood is best but maybe to pricy for a test.
Hi Ronald. Why didn’t find your build-log earlierTime for a small update..., just some pictures...
View attachment 270190
View attachment 270189
View attachment 270188
So far the frames are only sanded based on the drawing. After fixing all the frames to the keel it need further sanding...
15 frames done, 55 to go....
 These frames looks very nice.
And it shows courage to show your carving/milling work.
I'm sure there will be an image soon that will have your own approval.
Regards, Peter
I spent time reading a majority of your work and I must say you have more courage than I do to undertake this type of project. However, if I were to ever try to accomplish this particular model, I would follow your log to assist me in my progress. It is very well done and a pleasure to watch your progress.
Thank you Donald, really nice to read your response 
As we approach the end of the year, I thought it would be nice to take a short look back at the realization of this model....
On June 6, I started making the construction plank, after which I immediately started with the keel. I made the keel twice because the first time went wrong when applying the notch. Fitting the 'bolts' into the frames seemed to go well until it was pointed out to me that I was using the wrong pattern, I stopped doing this after three frames (don't know if I'll be making them again for this reason). Blackening the brass 'bolts' after they were installed in the frames seemed to go quite well. However, over time I do see some effect of the patina on the surrounding wood, not sure if I will continue with this. In any case, do not think about investing further in installing the pins, as they will not be visible or will hardly be visible.
After making an x number of frames, I did something else, namely an attempt to make a figurehead... Nice attempt, but went wrong...
Which has also been discussed about the necessity of whether or not to completely manufacture the frames, since this model has an open side. Opinions are divided on this.... I think there are different methods that eventually work, but it is clear that precautions must be taken....
What I finally decided to do is complete the frames and decide later which pieces to remove. The reason is that I don't want to fix myself on where the openings will be located yet, I want to have the space later to be able to use all the possibilities. That is why I first work on a complete hull...
Obviously, creating frames is a lot easier than "future challenges...
Status now is that of the 65 frames (ex bow and stern) I have now completed 27... In more than six months time, I think that is an acceptable result, see photos...
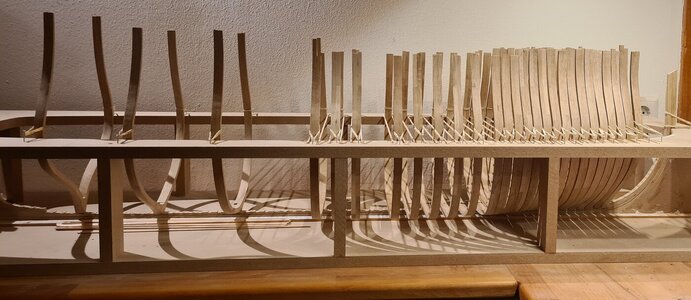
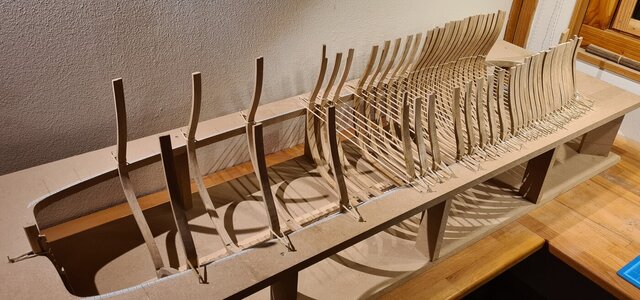
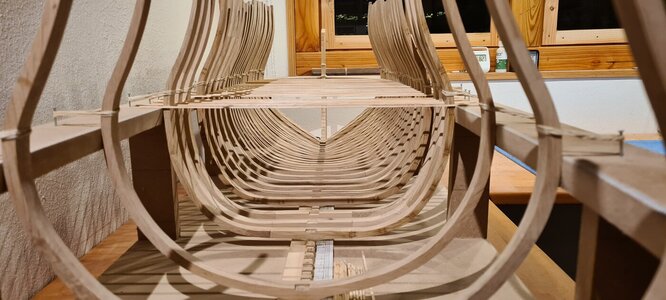
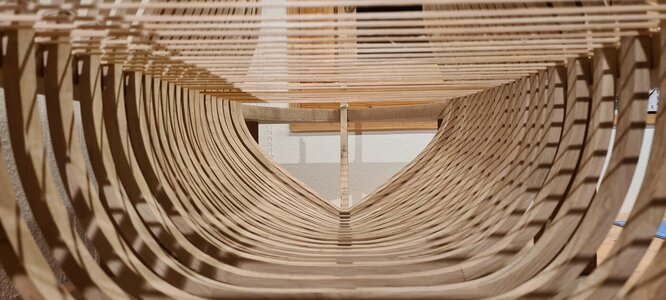
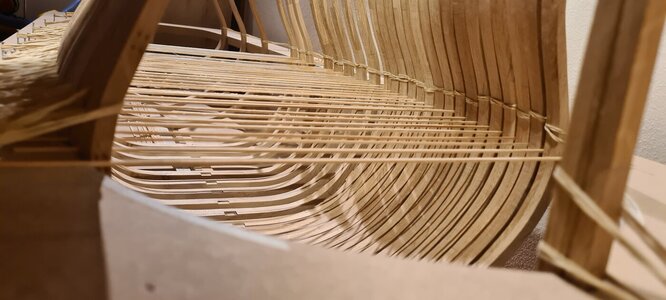
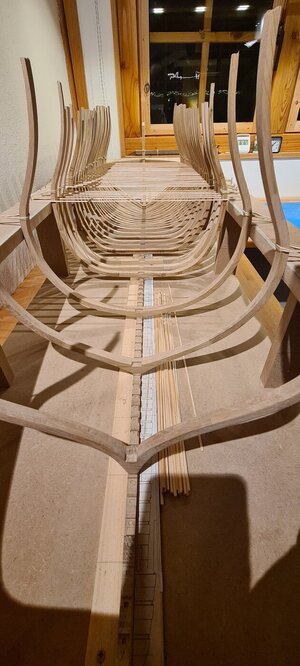
It now remains for me to wish everyone a good end and a prosperous but above all healthy 2022, and that our hobby will provide everyone with many fun hours..

On June 6, I started making the construction plank, after which I immediately started with the keel. I made the keel twice because the first time went wrong when applying the notch. Fitting the 'bolts' into the frames seemed to go well until it was pointed out to me that I was using the wrong pattern, I stopped doing this after three frames (don't know if I'll be making them again for this reason). Blackening the brass 'bolts' after they were installed in the frames seemed to go quite well. However, over time I do see some effect of the patina on the surrounding wood, not sure if I will continue with this. In any case, do not think about investing further in installing the pins, as they will not be visible or will hardly be visible.
After making an x number of frames, I did something else, namely an attempt to make a figurehead... Nice attempt, but went wrong...
Which has also been discussed about the necessity of whether or not to completely manufacture the frames, since this model has an open side. Opinions are divided on this.... I think there are different methods that eventually work, but it is clear that precautions must be taken....
What I finally decided to do is complete the frames and decide later which pieces to remove. The reason is that I don't want to fix myself on where the openings will be located yet, I want to have the space later to be able to use all the possibilities. That is why I first work on a complete hull...
Obviously, creating frames is a lot easier than "future challenges...
Status now is that of the 65 frames (ex bow and stern) I have now completed 27... In more than six months time, I think that is an acceptable result, see photos...


It now remains for me to wish everyone a good end and a prosperous but above all healthy 2022, and that our hobby will provide everyone with many fun hours..

- Joined
- Apr 20, 2020
- Messages
- 6,241
- Points
- 738

it's looks great progress,As we approach the end of the year, I thought it would be nice to take a short look back at the realization of this model....
On June 6, I started making the construction plank, after which I immediately started with the keel. I made the keel twice because the first time went wrong when applying the notch. Fitting the 'bolts' into the frames seemed to go well until it was pointed out to me that I was using the wrong pattern, I stopped doing this after three frames (don't know if I'll be making them again for this reason). Blackening the brass 'bolts' after they were installed in the frames seemed to go quite well. However, over time I do see some effect of the patina on the surrounding wood, not sure if I will continue with this. In any case, do not think about investing further in installing the pins, as they will not be visible or will hardly be visible.
After making an x number of frames, I did something else, namely an attempt to make a figurehead... Nice attempt, but went wrong...
Which has also been discussed about the necessity of whether or not to completely manufacture the frames, since this model has an open side. Opinions are divided on this.... I think there are different methods that eventually work, but it is clear that precautions must be taken....
What I finally decided to do is complete the frames and decide later which pieces to remove. The reason is that I don't want to fix myself on where the openings will be located yet, I want to have the space later to be able to use all the possibilities. That is why I first work on a complete hull...
Obviously, creating frames is a lot easier than "future challenges...
Status now is that of the 65 frames (ex bow and stern) I have now completed 27... In more than six months time, I think that is an acceptable result, see photos...
View attachment 278643
View attachment 278644
View attachment 278645
View attachment 278646
View attachment 278647
View attachment 278648
It now remains for me to wish everyone a good end and a prosperous but above all healthy 2022, and that our hobby will provide everyone with many fun hours..
have a great year
- Joined
- Jan 9, 2020
- Messages
- 10,566
- Points
- 938

Hello Ronald. I am so glad that you posted us an update on the current status of your build. Those completed frames look lovely and have you the added knowledge and satisfaction that they are correct! I wish you and your family a very healthy 2022 full of model building!
Nice work Ronald. 

Not much exciting has happened in this report lately, can't make it much more interesting, frame after frame....
To spice it up a bit, I tried to make a video how I make the frames, perhaps of added value for other starting modellers... Spoiler-alert: everyone can do it the way I do it
To spice it up a bit, I tried to make a video how I make the frames, perhaps of added value for other starting modellers... Spoiler-alert: everyone can do it the way I do it
- Joined
- Sep 28, 2018
- Messages
- 250
- Points
- 373

Grazie per i complimenti! Mi mantiene motivato per il prossimo frame
Volevo un piccolo intermezzo tra le cornici, quindi ho pensato di provare a fare un soprammobile... Qui potete vedere un esempio di come non si dovrebbe fare un soprammobile....
Poiché era solo pratica, ho usato un pezzo di quercia. Prima ho fresato i contorni utilizzando la mia fresatrice, poi ho provato ad aggiungere alcuni dettagli con la mia fresatrice manuale...
Quando ho visto con quale risultato ho lavorato ho rinunciato al tentativo... Non ridere troppo quando guardi le foto....:fresco:
Lo so già... Non usare la quercia, e non iniziare con un ornamento questo complesso...
View attachment 270490
View attachment 270491
View attachment 270492
View attachment 270493
View attachment 270494
View attachment 270495
View attachment 270496
View attachment 270497
Ed è così che dovrebbe essere....
View attachment 270498
Ciao, se può esserti utile, qui sotto puoi vedere le immagini di come ho realizzato la polena da un unico blocchetto di bosso.
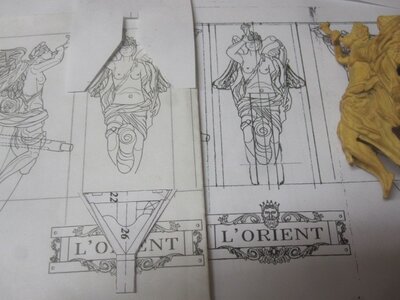
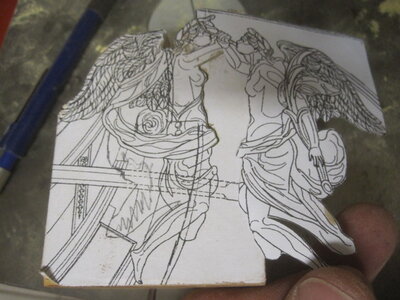
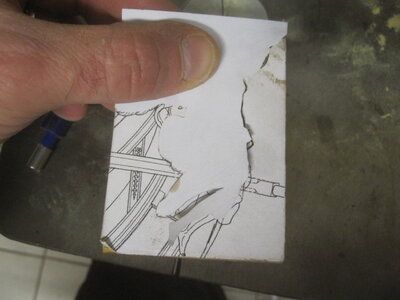
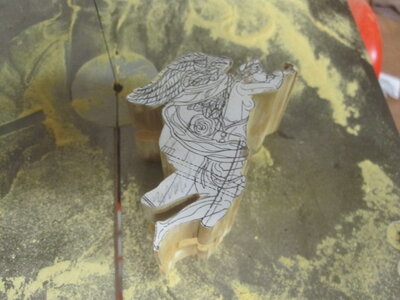
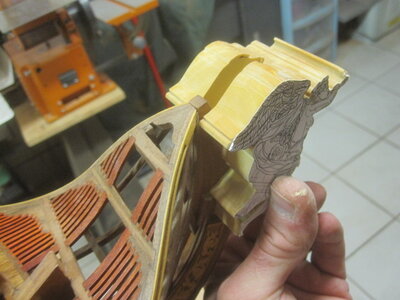
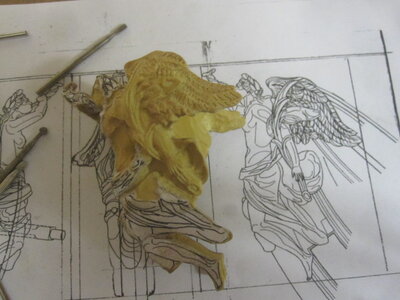
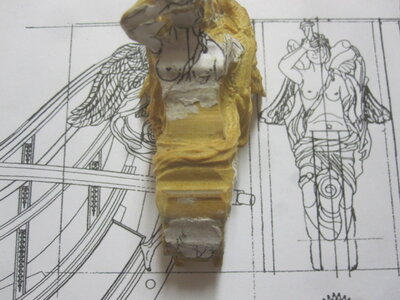
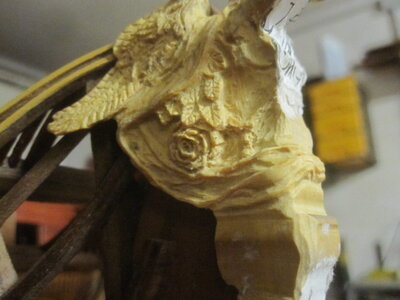
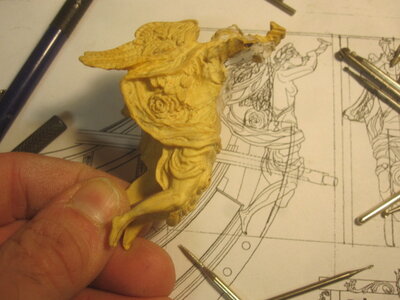
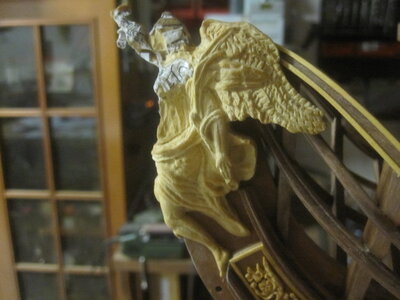
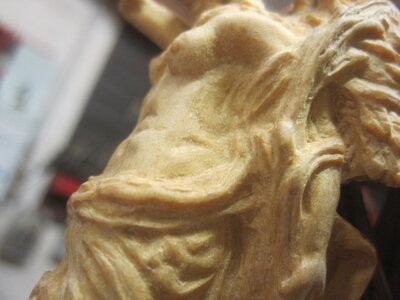
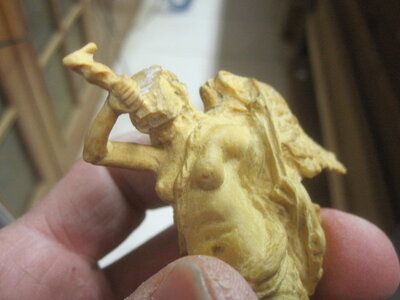
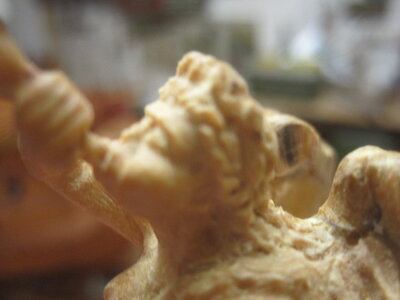
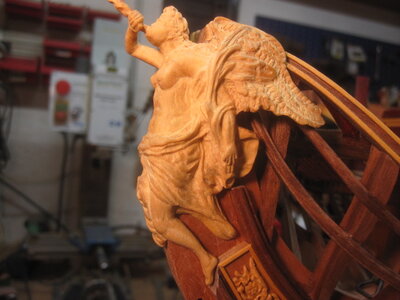
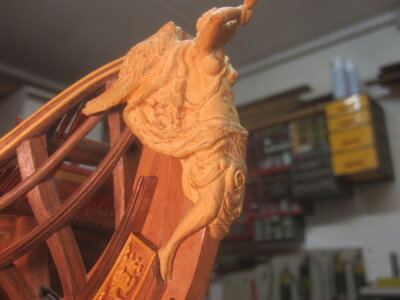
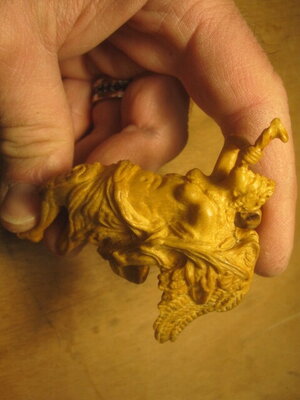
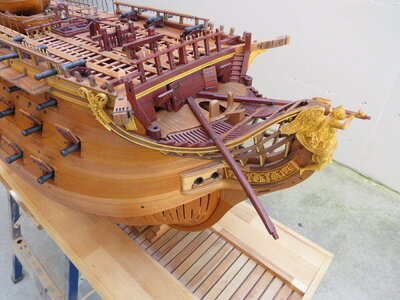
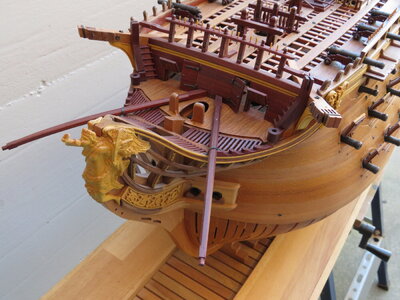
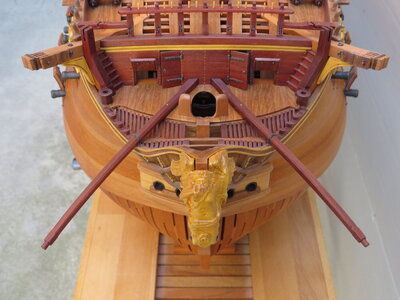
Questa è la polena dell'Orient rappresentata come alternativa nella monografia dei 118 cannoni Le Commerce de Marseille di Gerard Delacroix.
Nella monografia Gerard Delacroix propone la polena dei 120 cannoni Dauphin Royal del 1791 prima che nel 1795 gli è cambiato il nome in Oriente.
La feci una prima volta anni addietro quando ancora non avevo fatto la serpe e l'ho dovuto rifare in quanto c'erano delle cose che dovevano essere corrette.
Dalle foto potete vedere che le gambe risultavano troppo sottili una volta praticata la fessura creata per incorporarla nello sperone e la parte finale sarebbe quasi scomparsa.
Inoltre ho pratico lo scasso meno profondo, ho mantenuto un paio di millimetri in più per non trovarmi a forare il busto in fase di rifinitura. Così pure ho dovuto rivedere l'apertura alare che non è abbastanza sufficiente per accogliere la polena. Ho provato anche a rosicchiare qualche millimetro ma non mi piaceva affatto. Quindi ho dovuto rifarla, pazienza, anche se devo ammettere che quella precedente aveva alcuni errori dovuti alla mia inesperienza d'allora. Circa 80 ore di lavoro...
Nella prima foto puoi vedere le modifiche a cui mi riferivo e la vecchia polena poi rifatta.
Nelle altre tre la polena originale del Dauphin Royal.


