Le Fleuron 1729 - 64 Gun Ship PoB Scratch Build in 1:48 - (Ancre Monograph-J. Boudriot/G. Delacroix)

Stephan, to answer your question, yes I have given filler some thought as well as black acrylic rods. I actually have a list. Both of those are towards the bottom of the list meaning I will give them a test if the options higher on the list fail.

I do love Jim's final results. I know he works with steel a lot and has become a expert working with it.
 
Jim, I forgot to ask you. Would you post a link to the steel wire source please. I'd like to look a little closer at it as a solution. I forget you live right around the corner from me in NYC.
 
I do love Jim's final results. I know he works with steel a lot and has become a expert working with it.
LOL, I have some experience working with steel, but no way can be called an expert. ;)
Jim, I forgot to ask you. Would you post a link to the steel wire source please. I'd like to look a little closer at it as a solution. I forget you live right around the corner from me in NYC.
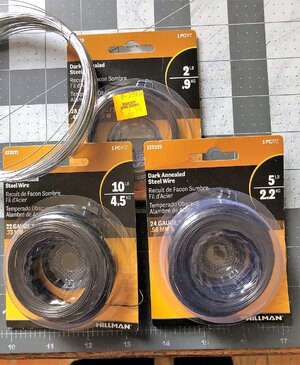
Yep, just across the Hudson, we should meet one day for a cup of coffee. I have no particular place, but HILLMAN (it is a brand name) has some common sizes and can be found on amazon as well as in common hardware stores like Doodys or Homedepot. Another place I found is the department stores or 99 and UP. They are no brand names wire but can be considered for such tasks, you may need to anneal it before use.

IMG_2614.jpeg
IMG_2615.jpeg
 
Well your results are expert, IMO....I'm sticking with that. ;) Found them on Amazon, thanks. Wish they had 26 gauge, but picked up 28, 24, 19.
 
Well your results are expert, IMO....I'm sticking with that. ;) Found them on Amazon, thanks. Wish they had 26 gauge, but picked up 28, 24, 19.
you can use the jeweler's drawplate (not Jim Bernes, the one we use for treenails), to downsize wire to the diameter you precisely need. You will need to anneal the wire constantly, say every other hole, before processing. It is easy to move when the wire is soft.
 
you can use the jeweler's drawplate (not Jim Bernes, the one we use for treenails), to downsize wire to the diameter you precisely need. You will need to anneal the wire constantly, say every other hole, before processing. It is easy to move when the wire is soft.
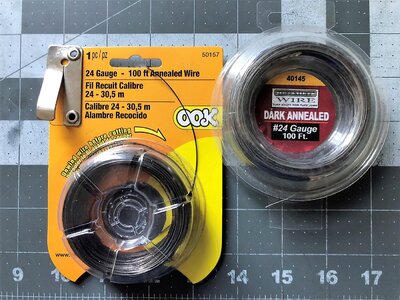
Jimsky, I have wire similar to this here which I use for random things. I assume its just wire off the rack at Home Depot or Lowes ? Ill anneal some and see how it works out. the fact that its in a coil doesn't make it hard to work with does it ? I guess after annealing it can just be pulled straight between some blocks of wood. I can see it being better than dealing with lengths of brass rod because its soft.
 
Jimsky, I have wire similar to this here which I use for random things. I assume its just wire off the rack at Home Depot or Lowes ? Ill anneal some and see how it works out. the fact that its in a coil doesn't make it hard to work with does it ? I guess after annealing it can just be pulled straight between some blocks of wood. I can see it being better than dealing with lengths of brass rod because its soft.
Yes, Tony, it is soft as is, however, if you put it thru a couple of holes (do downsize the diameter), it will harden. To straighten it up after annealing put one end in the wise, and gently pull until it is straight. ;) The wire is available in the Home Depot, Lowes, and online.
 
Thanks Jim.
I picked up some different sizes of "Dark Annealed" steel wire, in different diameters to test on your recommendation. I will definitely find use for it. I'm just not sure yet if I will use it for hull nails. Only for one reason. I would prefer to find a "turn key" solution rather than manufacturing 4,000 of them myself. And I think I may have found one.

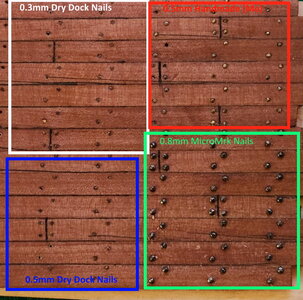
I received some "Tiny Nails" from Zoly's Dry Dock inventory, 0.3mm and 0.5mm. They are truly tiny, uniform and high quality. I only wish I ordered the 0.7mm as I think they will be my choice.
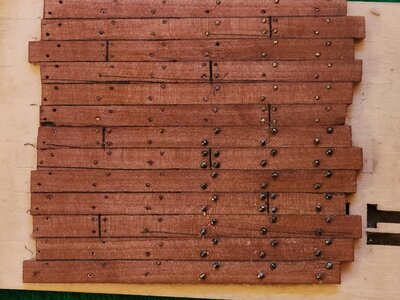
Below is another nail test board. Four different nails. What I really liked about the nails from Dry Dock is that the heads were marginally larger than the shank of the nail, which made them realistic, in my opinion. The heads of the nails from Micro Mark were somewhat bulbous and stuck out much too high from the hull. The nails I made from 0.5mm brass wire were acceptable IMO. They did have some of the blackening get scuffed when I forced them in a drilled hole a bit to small. I'm currently altering a set punch with a leather face to prevent this from happening when I insert them into the ship.

With all this said, I do believe I will be using Dry Dock's 0.6mm nails. I've ordered another 1,200 and will do a final, final, final test.

NailTest.jpgNailTestBoard2.jpg

It will be some time before I actually need nails for the hull. But I wanted to show my approach.

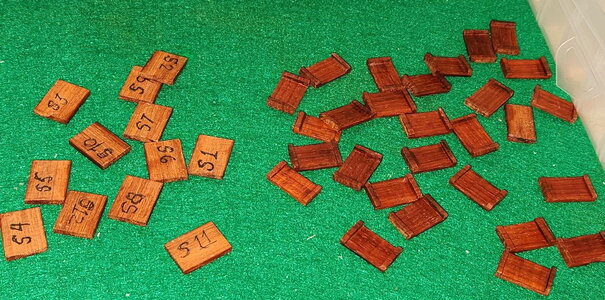
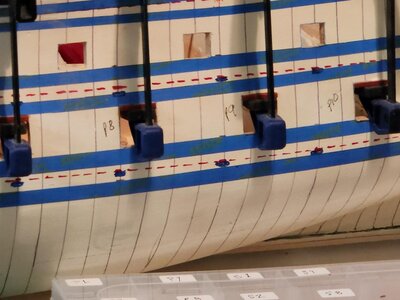
I have made some small progress with the gunport sills. On Stephan's recommendation, I reprocessed the lower and upper gunport sills so that the Padauk's grain runs in a stem-to-stern direction with the ship.

I have custom fit both upper and lower sills for each gunport, even though dimensions say I shouldn't have to. Maybe being overly cautious...
TopBottom Sills.jpg
The image above shows the upper sills labeled and untreated and the lower sills treated and labeled by gunport on the underside. I leave sides to be glued untreated.

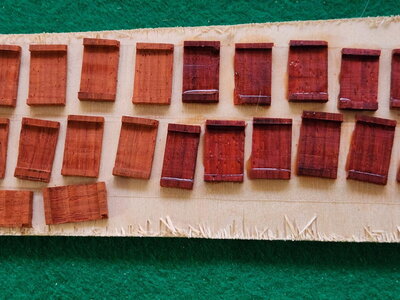
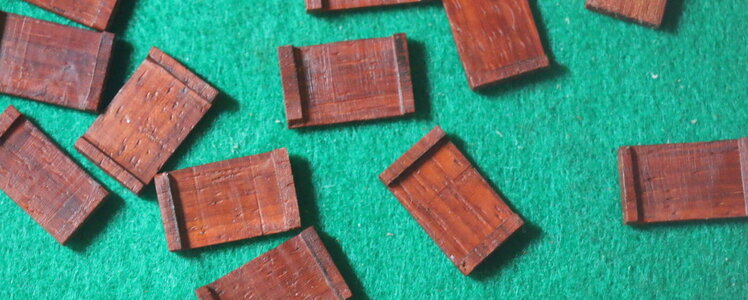
Lower sills, some treated, others not.
LowerSills.jpg

I want to try and achieve a somewhat weathered realistic look, wherever I can.
BottmGPSills.jpg

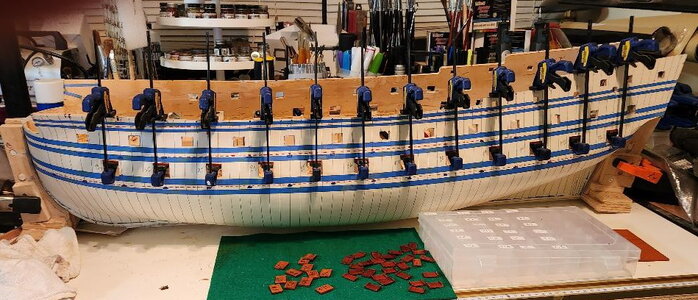
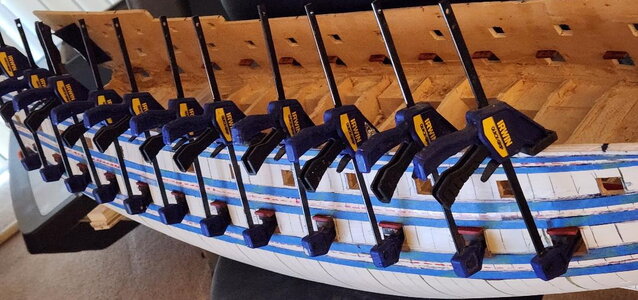
Gluing ONLY the upper sills at the moment to allow for measurement and dry fitting of side pieces

GPHullVise.jpg


GP Vices.jpg

UpperSillVices.jpg

Following the gunports focus will be on the first gun deck. Working on deck beams as fill in work. After that, hawse holes,
Hawseholes.jpg

keel, bow and stern. One bite at a time.

This update is not without its drama, but I will wait until another time to share.

Thanks for following along everyone! Thank you for your comments and advice. Until next time...
 
Last edited:
Hello All,
First, I want to apologize to everyone following my build. I've been thinking about how I was going to make this next post as it's been 2 months since my last. I have made progress in the last 2 weeks, but nothing for the 1 1/2 months immediately after my last post. I mentioned a little "drama" in that post. I'll share that now. I always appreciate when people share their best practices and innovative ways to accomplish success. But where I find REAL value is when they are brave enough to show their mistakes, re-dos, etc. It allows all of us to learn how not to do things, save time and in some cases avoid accidents. I'm going to attempt to do that. This is my story. :rolleyes:

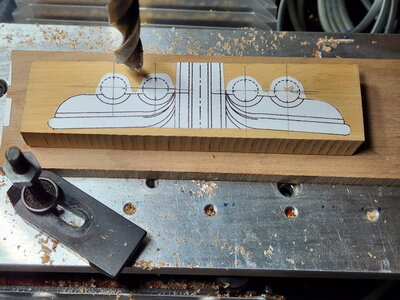
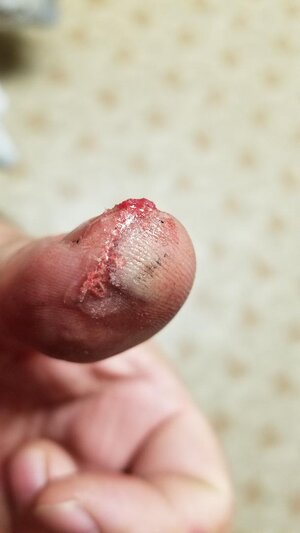
A week before my last post, Sandy (the Admiral) and I were to meet some friends for dinner. As is the case, I was ready to go. Sandy usually takes about 20-30 minutes longer than me to get ready. In her defense, she looks a lot better than I do. Taking more time wouldn't help me. With that said, I just can't sit still and wait for her, so I decided to grab some of my gun port frame pieces and trim them. I always, well almost always use my Panavise when working with small pieces, but since I was told to stay out of the dockyard, I grabbed a scalpel and pieces and brought them into the living room. I bet you can guess where this story is going, yes? I didn't want to be caught working so I was constantly looking up to the hallway towards the bathroom. The last glance cost me....OUCH!

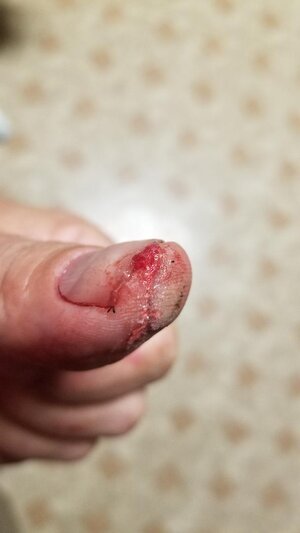
WARNING: The next photo is a little graphic. Not sure I should have posted it actually, but I thought it's shock value would help others to use their Panavise.


thumb3.jpgthumb2.jpg

When I looked up, the Admiral was standing there with that look on her face, worry, anger, fear, even love. And I looked back, stupidly. As an OR Nurse, she quickly, but calmly went back into the bathroom and grabbed a small bottle of medium viscosity CA glue. This CA glue has anti microbial properties though. The photos are after she applied it and held pressure on it until the bleeding stopped. She was ready to cancel dinner plans to go to the hospital to have sutures performed, but I insisted we keep them. I'm not that stupid. ;):oops: So we put a bandage on it and went out.

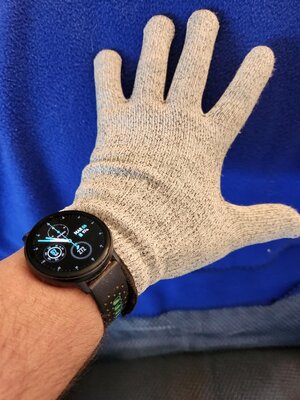
The following week I placed an order with Amazon for a glove to wear if I was ever to cut a piece without using a vise. I was so proud of my idea that I had to show Sandy. Her response was, "Isn't that like closing the barn door AFTER the horse ran away.". I had to remind her, I had 4 other horses in that barn.
glove1.jpg
I took this photo on March 6, when I was deciding how I would share my story.

The moral of the story is, don't rush something that needs time to do correctly, or more importantly, SAFELY. I've learned my lesson. The thumb is pretty much healed, on the outside. Since the cut was to the bone, I still don't have feeling in the tip, just numbness and tingling sensations. I think it will be some time for nerves to heal up.

I've made some progress on my ship over the last 2 weeks and look to share next week.

I'm closing the chapter on the drama now. Back to normalcy!
 
Oh Ja - Memories - sweet memories
Sorry to here (and see) the result of your accident - unfortunately these things happens
But I think, that this will need some stitches and not only glue
 
Hello All,
First, I want to apologize to everyone following my build. I've been thinking about how I was going to make this next post as it's been 2 months since my last. I have made progress in the last 2 weeks, but nothing for the 1 1/2 months immediately after my last post. I mentioned a little "drama" in that post. I'll share that now. I always appreciate when people share their best practices and innovative ways to accomplish success. But where I find REAL value is when they are brave enough to show their mistakes, re-dos, etc. It allows all of us to learn how not to do things, save time and in some cases avoid accidents. I'm going to attempt to do that. This is my story. :rolleyes:

A week before my last post, Sandy (the Admiral) and I were to meet some friends for dinner. As is the case, I was ready to go. Sandy usually takes about 20-30 minutes longer than me to get ready. In her defense, she looks a lot better than I do. Taking more time wouldn't help me. With that said, I just can't sit still and wait for her, so I decided to grab some of my gun port frame pieces and trim them. I always, well almost always use my Panavise when working with small pieces, but since I was told to stay out of the dockyard, I grabbed a scalpel and pieces and brought them into the living room. I bet you can guess where this story is going, yes? I didn't want to be caught working so I was constantly looking up to the hallway towards the bathroom. The last glance cost me....OUCH!

WARNING: The next photo is a little graphic. Not sure I should have posted it actually, but I thought it's shock value would help others to use their Panavise.


View attachment 362675View attachment 362674

When I looked up, the Admiral was standing there with that look on her face, worry, anger, fear, even love. And I looked back, stupidly. As an OR Nurse, she quickly, but calmly went back into the bathroom and grabbed a small bottle of medium viscosity CA glue. This CA glue has anti microbial properties though. The photos are after she applied it and held pressure on it until the bleeding stopped. She was ready to cancel dinner plans to go to the hospital to have sutures performed, but I insisted we keep them. I'm not that stupid. ;):oops: So we put a bandage on it and went out.

The following week I placed an order with Amazon for a glove to wear if I was ever to cut a piece without using a vise. I was so proud of my idea that I had to show Sandy. Her response was, "Isn't that like closing the barn door AFTER the horse ran away.". I had to remind her, I had 4 other horses in that barn.
View attachment 362676
I took this photo on March 6, when I was deciding how I would share my story.

The moral of the story is, don't rush something that needs time to do correctly, or more importantly, SAFELY. I've learned my lesson. The thumb is pretty much healed, on the outside. Since the cut was to the bone, I still don't have feeling in the tip, just numbness and tingling sensations. I think it will be some time for nerves to heal up.

I've made some progress on my ship over the last 2 weeks and look to share next week.

I'm closing the chapter on the drama now. Back to normalcy!
I feel with you and I wish you a quick and full recovery.

It reminds me of my accident with the circle saw last year 25th of April when I almost amputated a part of my finger. I shared it at that time in the thread "Ouch, be aware of the sawing machines", but you can do a lot of damage by hand/scalpel too of course. My nail, sliced to a double nail had to be removed and everything stitched up in hospital. It healed nicely and most of the feeling has come back.
 
Wow,, I just told the people in my build log that the red dots on the wing transom are blood. Looking to you finger and looking to mine. I'm sure I overdone the situation a bit. Mine accident looks now more like a needle stitch.
Get well soon Ken, you must be lucky with your Admiral.
 
Yikes - that hurts just to look at it. I am glad that you are back on the road to recovery. Yep, nerves will heal, but it takes time for them to grow back. Your Le Fleuron looks incredible, especially how you managed to take a POF and turn it into a POB.
 
That's good to hear. Question. Why use scalpel.Excel/exacto knifes are not enough? I too have cut myself using them by accidence , but never that deep
I do use Exacto #11 a lot of the time. For delicate pieces the #3 scalpel and blade tends to result in less breakage for me. The blade is about 1/2 the width of the #11. I just need to be smarter using it. :rolleyes:
 
Back
Top