Le Fleuron 1729 - 64 Gun Ship PoB Scratch Build in 1:48 - (Ancre Monograph-J. Boudriot/G. Delacroix)

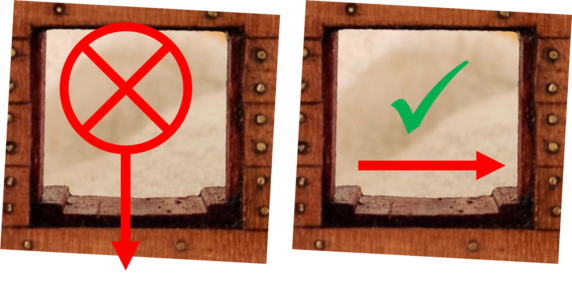
Interesting test sample Ken.A couple of points, firstly the wood grain on the lower cills need to run along the length of the ship.Secondly, if you have a go at nail rolling, it is all about the edge of the blade, it needs to be dull with about a 90 degree included angle between the "cutting" edges

Kind Regards

Nigel
Thanks Nigel. I am aware of the dull requirement for the blade. I just need to find a knife the Admiral is willing to appropriate for service. Normally, I'm a guy who operates under the "It's better to ask for forgiveness, rather than permission." Not in this case. ROTF

I was not aware of the fact that the grain needs to run longitudinally with the ship. I did not find anything mentioned in Jean Boudriot's 74 Gun Ship.

To build my own knowledge, would you share why the shipwright's did this? Was it a universal practice or just on French ships?

Thanks!
 
Hi Ken good to see you are getting back to work. Your pattern looks very good.
I agree with Nigel, just great eye for detail.
 
Interesting test sample Ken.A couple of points, firstly the wood grain on the lower cills need to run along the length of the ship.Secondly, if you have a go at nail rolling, it is all about the edge of the blade, it needs to be dull with about a 90 degree included angle between the "cutting" edges

Kind Regards

Nigel
I can't understand the meaning, translator you have me
 
Hi Ken,

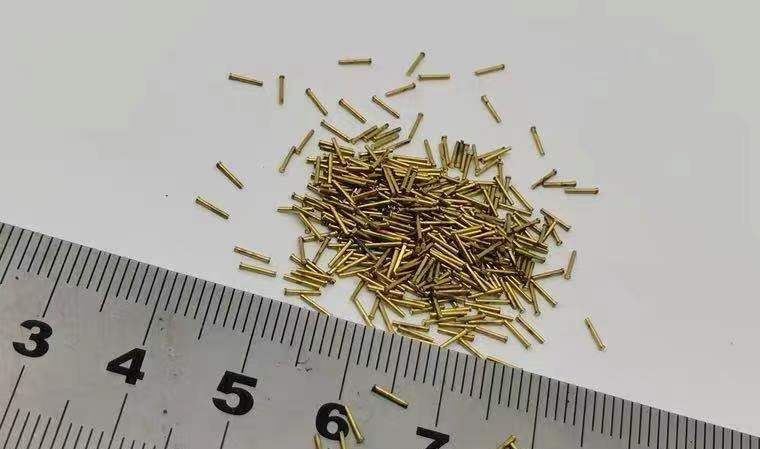
Micromark has tiny nails that might get you close:


And even something like a clinched bolt:


Zoly has tiny nails too:


You can't die poor if you don't spend it all while you are alive.
 
Hi Ken,

Micromark has tiny nails that might get you close:


And even something like a clinched bolt:


Zoly has tiny nails too:


You can't die poor if you don't spend it all while you are alive.
Thanks Paul. I'm starting to question my own investigation skillset now. Especially as I've been a "frequent flier" with MM in the past.

I think 0.02 inch diameter nails may be serviceable. Time to make a purchase and since MM is about 20 miles from where I live. I'll get them soon. Time to build another test board. As a bonus, I don't to ask my better half a difficult question, thanks!

Edit: I spoke too soon. Actually Zoly's nails look better. I like the smaller head and rather give a fellow SoS brother some business. INC order Zoly. Thumbsup

The clenched bolts may be an option, but I will try for a bit more detail, with the hopes that doing so will help me develop some additional fabrication skills.

Thanks Paul!
I have both of these tiny nails - they are more similar than they appear in the photos. These are the smallest I could find for the hull of my Vasa.

This will give you a sense:

 
I can't understand the meaning, translator you have me
Frank, I may be able to help.

Nigel pointed out that the grain of the wood should be aligned Stem to Stern. I have it going in the wrong direction.
Picture7.png

And the other point he made is to make sure the if I was going to form nails by cut-rolling with a knife to have the blade be dull, approximately 90 degrees.
Rolling Knife Edge Angle.jpg.png

But I may not have to endure the tedious task of making nails. I've just placed an order with Zoly for two sizes and will test both.
 
Last edited:
I have both of these tiny nails - they are more similar than they appear in the photos. These are the smallest I could find for the hull of my Vasa.

This will give you a sense:


Oh yes, they will definitely work and considering the number needed save me a lot of time.

For some reason, this is the first time I noticed the "nail/treenail" fastener configuration on your Vasa. I do like the treenail simulation. Period French ships also use this configuration of opposing nail/treenail of fastening, below the waterline only.

We never stop learning, do we?
 
Frank, I may be able to help.

Nigel pointed out that the grain of the wood should be aligned Stem to Stern. I have it going in the wrong direction.
View attachment 347874

And the other point he made is to make sure the if I was going to form nails by cut-rolling with a knife to have the blade be dull, approximately 90 degrees.
View attachment 347891

But I may not have to endure the tedious task of making nails. I've just placed an order with Zoly for two sizes and will test both.
Thanks Ken, correct observation Nigel.Frank
 
Oh yes, they will definitely work and considering the number needed save me a lot of time.

For some reason, this is the first time I noticed the "nail/treenail" fastener configuration on your Vasa. I do like the treenail simulation. Period French ships also use this configuration of opposing nail/treenail of fastening, below the waterline only.

We never stop learning, do we?
The bolts on the Vasa specifically relate to the knees on the inside of the ship. I just did some simulated treenails as a nod to their existence rather than shooting for total accuracy at 1:64.
 
Thanks Nigel. I am aware of the dull requirement for the blade. I just need to find a knife the Admiral is willing to appropriate for service. Normally, I'm a guy who operates under the "It's better to ask for forgiveness, rather than permission." Not in this case. ROTF

I was not aware of the fact that the grain needs to run longitudinally with the ship. I did not find anything mentioned in Jean Boudriot's 74 Gun Ship.

To build my own knowledge, would you share why the shipwright's did this? Was it a universal practice or just on French ships?

Thanks!

Ken as far as I am aware the grain ran lengthwise on all cills no matter the country of origin.

Why, I can only hypothesise, the cills were notched into housing joints in the frames and had no other means of mechanical fixing. The cills were subject to the ravages of seawater ( Fleuron features drain holes in these ) and continued exposure may result in cupping or splitting of the cill over time had the grain ran across the port.Also the timber would swell when wet and this could have caused issues had the grain ran across the port.

Kind Regards

Nigel
 
Don’t try to blacken anything in the wood plus after cutting the brass hit it with a cut off wheel or grinder in a Dremel it’ll give you a nice fiat head.
 
Thanks Tony, for visiting my log and your input.

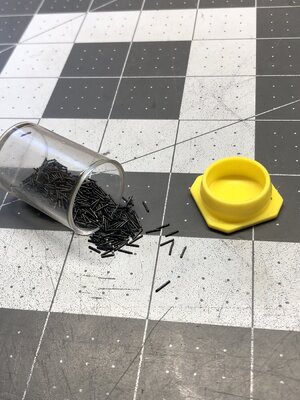
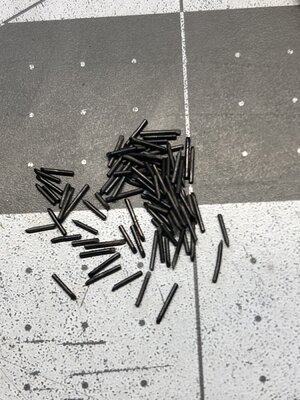
The reason I attempted to blacken the nails while in the wood is because there have modelers' who have done this successfully with impressive results. They explained there were two prerequisites for doing it this way. The first was the planks have to be treated with oil and the oil must find its way into the drill holes. This prevents any liquid blackening solution from bleeding into the wood and staining it black. As you can see I did not execute this part very well at all.

The second is the nails need to be pressed through the planks and the frames with a very tight fit. Much like real nails. This is because the oil in the drilled holes would prevent any glue from holding them fast.

This is all a mood point at the moment as it looks like some other members have pointed out that there are nails small enough for me to use that would be in scale. As you can imagine this is a welcome piece of news as grinding the ends of 6,000, 4mm x 0.5mm nails with a Dremel might have a number of adverse effects on my fingers, sanity and general well being. :)

Thanks for following my journey Tony. I see you're on the new group build. I wish you luck and fun on the project. One of these days I will join a group project, when the timing is good.
 
Yes understood. Working with tiny thin brass isn’t fun. I’ll have to look into those miniature nails too. Anything beats cutting them by hand.
Brass is just a royal pain unless it’s going to stay brass. Mine might as I don’t mind that look. Good luck
 
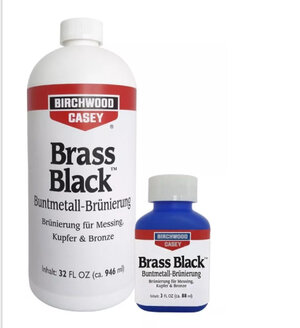
Hi Ken, yes blackening nails in wood is possible as you may remember from my blog. I use two blackening agents, one is Black Brasse like you, but I don't use it on nails in wood, it works very quickly and so soaks into the wood. The other one I use is from Ballistol, unfortunately I found out that it is not available in America. Ballistol is not as aggressive and it also takes longer for the metal to discolour and therefore does not penetrate the wood.
FB3A9CF7-B0CD-4B4D-AE89-1EFD327AFAA9.jpeg3859B9FD-1C1E-411B-9D77-A0C77B1F90DB.jpeg
 
Thank Tobias! I was silently wondering where I went wrong on the black-bleed into the wood. Sometimes the right steps with the wrong materials yield unexpected and unwanted results.

I have discovered, sometimes the hard way, that it's the little details that matter in this hobby. Also that the word "assumption" has no place in it. My next test, while I expand-cut the remaining gun ports in the ship, will be to see how the nails from Zoly's shop look in the same application after being blackened.

Thanks for shedding some light on the issue.
 
Greetings, Ken. It is hard, I should say, the results are unpredictable, to get blackening the way you wanted. Most, if not all, blacking is the chemical reaction affecting the surface in question. All furious metal is made from different alloys. Even brass (as we called brass) could be different in the alloy. Some have more copper than bronze, and some have more nickel... The reaction between brass wires made by two different manufacturers and Brass blackening solution could be various.

Why not use just copper or brass wire? Over time (may take more than you expect :cool:), it will oxidize naturally and will give a nice aging patina.
Another method I use on my models is the soft steel wire. If the wire is made from stainless steel, I lightly heat it with a torch until the wire\bolts turn 'blue', the effect we want on the gun barrels. If you have a regular steel wire, there is an old jeweler's trick to protect the wire from corrosion\rust: use a torch and heat the wire until it turned red, then dip it into an oil. The wire will turn black and oil will act as a protectant.

Below are steel bolts (round heads)

IMG_2612.jpeg
IMG_2613.jpeg
 
Greetings, Ken. It is hard, I should say, the results are unpredictable, to get blackening the way you wanted. Most, if not all, blacking is the chemical reaction affecting the surface in question. All furious metal is made from different alloys. Even brass (as we called brass) could be different in the alloy. Some have more copper than bronze, and some have more nickel... The reaction between brass wires made by two different manufacturers and Brass blackening solution could be various.

Why not use just copper or brass wire? Over time (may take more than you expect :cool:), it will oxidize naturally and will give a nice aging patina.
Another method I use on my models is the soft steel wire. If the wire is made from stainless steel, I lightly heat it with a torch until the wire\bolts turn 'blue', the effect we want on the gun barrels. If you have a regular steel wire, there is an old jeweler's trick to protect the wire from corrosion\rust: use a torch and heat the wire until it turned red, then dip it into an oil. The wire will turn black and oil will act as a protectant.

Below are steel bolts (round heads)

View attachment 348061
View attachment 348063
Jim, thanks for your perspective. Yep, I agree with all of you points. The crazy thing is, we all do what we will do. ROTF Sorry to cut this reply short, but I have a silly idea. I cannot share at the moment....but stay tuned...

Edit: I should have mentioned Jim your results are impeccable. I have quenched steel before, but on much larger scale. Just another note, the test board I showed used 0.5mm brass wire. I think I may be one of the few that does not like the look of shiny brass nails. I imagine the nails would have to be inserted after the wood was treated with oil to keep the brass exposed to the elements, yes? If they were inserted then the wood treated the oil would keep the brass from oxidizing or slow down the process significantly.

One last question, what size are the steel pins you created in the photo? The blackening on them is as good as the job you did on your gun.
Thanks
 
Last edited:
Back
Top