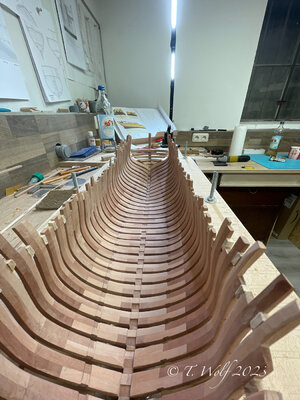
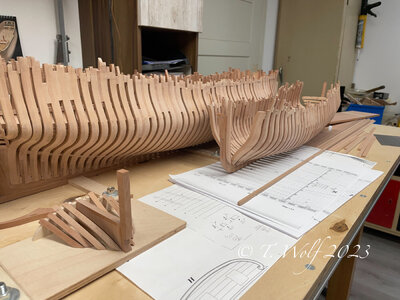
LE ROCHEFORT - Harbour yacht from 1787 1:36 by Tobias (Monograph by ANCRE)

Ich benutze die auch. Aber sagt mir, warum M6 oder M8? M2 - M4 funktioniert einwandfrei. Wir bauen ein Modell, keine Möbel oder Stühle.
Je mehr Holz um die Gewindeeinsätze herum ist, desto stärker ist das Teil.

Hello Stephan, that was only briefly out of my shopping cart at Amazon and the M6 were stored there. For La Palme and Le Rochefort I used M3, I bought the set with different sizes.
Hallo. Hervorragende Arbeit! Was verwenden Sie, um Nägel mit quadratischem Querschnitt zu simulieren? Vielen Dank im Voraus!

Albert (I assume that Alberto is right) to your question, I use brass wire, which you can buy as a square, in this case it is 0.6mm. I believe I have the link to this in the La Palme report.
Post in the thread 'POF La Palme (L'Amarante) Corvette 1744 1:36 (Ancre Monograph) by Tobias'
https://shipsofscale.com/sosforums/...36-ancre-monograph-by-tobias.9295/post-249676
 
Last edited:
I use those too. But tell me guys why M6 or M8? M2 - M4 works perfect. We building a model, not a furniture or chair.
The more wood aroud the thread inserts, the more stronger the part is.
Hi Stephan,

It is all about the size and weight of your model.
With or without rigging.
For instance on my Royal Caroline are 5 mm screws but also side supports. Without side supports my 1,5 mtr high model would not be sufficiently supported with 5 mm screws.
Just do what feels right.
 
@Maarten and @Nersch The problem is that you need a little wood around the inserts. When you use inserts that are 7,5 or 8,7 mm in a keel of 10,1 mm. You weaken the keel, it's better to use smaller inserts and smaller bolts. Use extra bolts if you think the ship is to heavy. When you don't leave anough wood around the inserts they could break out. Keep the one-third rule. In case of a 10 mm keel max 3,3 mm for the insert
 
Hi Stephan,

It is all about the size and weight of your model.
With or without rigging.
For instance on my Royal Caroline are 5 mm screws but also side supports. Without side supports my 1,5 mtr high model would not be sufficiently supported with 5 mm screws.
Just do what feels right.
@Maarten and @Nersch The problem is that you need a little wood around the inserts. When you use inserts that are 7,5 or 8,7 mm in a keel of 10,1 mm. You weaken the keel, it's better to use smaller inserts and smaller bolts. Use extra bolts if you think the ship is to heavy. When you don't leave anough wood around the inserts they could break out. Keep the one-third rule. In case of a 10 mm keel max 3,3 mm for the insert
Good morning @Steef66 and @Maarten , very helpful tips from you both.
I think that both aspects play a very big role depending on what we want to do with the model later and how we want to display it, so we should take all those things into account.
(With or without rigging, on a yard or in an acrylic block, on narrow brass feet or on wide wooden bases, etc).
 
Hello Stephan, that was only briefly out of my shopping cart at Amazon and the M6 were stored there. For La Palme and Le Rochefort I used M3, I bought the set with different sizes.


Albert (I assume that Alberto is right) to your question, I use brass wire, which you can buy as a square, in this case it is 0.6mm. I believe I have the link to this in the La Palme report.
Post in the thread 'POF La Palme (L'Amarante) Corvette 1744 1:36 (Ancre Monograph) by Tobias'
https://shipsofscale.com/sosforums/...36-ancre-monograph-by-tobias.9295/post-249676
Really appreciated, Tobias.
 
Hello everyone,
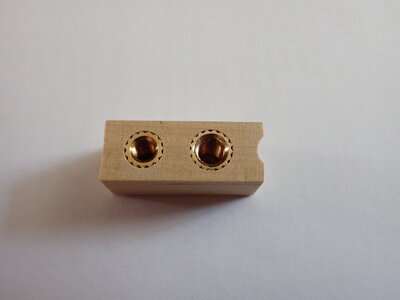
I have very good experience with the ruthex thread insert.
They come in all sizes, as well as drill bits and pull-in tools.

Thanks for this info Tobias. In looking at the Amazon site these inserts appear to be use in 3D printed parts using heat to melt them into the part. How do you set these in wood? Oversize the hole and epoxy is all I can think…
 
Good morning guys,
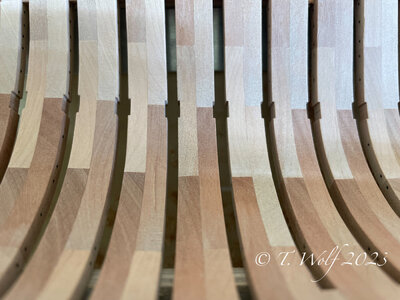
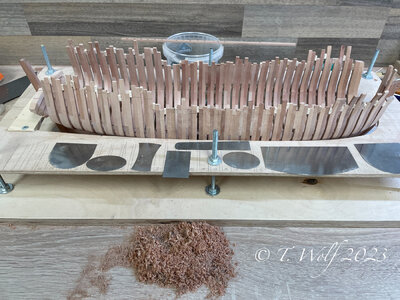
It got late last night, some chips fell on the inside of the backboard. The individual frames were brought into the right shape with various scrapers and the edges were cleaned with abrasive wool. Johann @archjofo had asked some time ago which degree of fineness I use and unfortunately I couldn't give an answer because I had disposed of the packaging. I had to buy new ones anyway and I bought 00 fine and 000 extra fine, albeit stainless steel wool, the advantage of this, according to my friend who is a carpenter, is that stainless steel wool does not give the wood a gray haze.


C8B134AD-E8F8-4C63-9F33-7E8D0D0B1087.jpeg

4814151D-71AB-4715-8926-B4313B2FDBE1.jpeg

F6E6DAB9-9312-4D4D-AE59-934B9E0F69D0.jpeg

BC1328F1-69DF-4D3A-B328-DD1FC05C12A1.jpeg
 
Last edited:
Thanks for this info Tobias. In looking at the Amazon site these inserts appear to be use in 3D printed parts using heat to melt them into the part. How do you set these in wood? Oversize the hole and epoxy is all I can think…
Hello Oliver,
basically you're absolutely right, that's also why I bought it 2 years ago, but I had to fix the Admiralty's Thermomix. You can use them in wood too, either do your suggested method with resin or make yourself a mixture of sawdust and glue and then put the nut in. Works well with superglue too.
 
Good morning guys,
It got late last night, some chips fell on the inside of the backboard. The individual frames were brought into the right shape with various scrapers and the edges were cleaned with abrasive wool. Johann @archjofo had asked some time ago which degree of fineness I use and unfortunately I couldn't give an answer because I had disposed of the packaging. I had to buy new ones anyway and I bought 00 fine and 000 extra fine, albeit stainless steel wool, the advantage of this, according to my friend who is a carpenter, is that stainless steel wool does not give the wood a gray haze.


View attachment 372859

View attachment 372860

View attachment 372861

View attachment 372862
WOW! That just looks SO GOOD Tobias. I have great respect for your woodworking skills - the finish is breathtaking!
 
Last edited:
@pianoforte
@dockattner
@Nersch

Thanks for the outspoken praise.

After almost 4 hours I was glad that one side was done and my fingers were also glad that I finally stopped. I hope I will have some time over the weekend to continue working because the starboard side is still waiting. I wish you all a nice and relaxing weekend.
 
Hello Tobias,
I learned that you are blackening the bolds after installing them. What do you use for it?
I guess you just apply a drop of this media, but isn't it needed to wash it afterwards to remove any residue?

 
Hello everyone,
I have very good experience with the ruthex thread insert.
They come in all sizes, as well as drill bits and pull-in tools.
I made a test with the Ruthex thread inserts with a scrap part same thickness as my keel (10.13 mm).
Left: M4, inserted in a 6 mm hole
Right: M5 inserted in a 7 mm hole

For me both are looking okay for this wood thickness.
Which version would you recommend? M4 or M5?
And how many would you install in your keel?
One recommendation I heard was to divide the keel in three equal parts and to install one in the middle of the first third and one in the middle of the last third. So two in total. Does this make sense?

2023-05-06_Gewindebuchse.JPG
 
I made a test with the Ruthex thread inserts with a scrap part same thickness as my keel (10.13 mm).
Left: M4, inserted in a 6 mm hole
Right: M5 inserted in a 7 mm hole

For me both are looking okay for this wood thickness.
Which version would you recommend? M4 or M5?
And how many would you install in your keel?
One recommendation I heard was to divide the keel in three equal parts and to install one in the middle of the first third and one in the middle of the last third. So two in total. Does this make sense?

View attachment 373055
In your case M4, if this is the thickness of the keel. Better would be M3. 1/3 is the wood around the insert. And then as many as necessary. Depends on the scale and wood of your ship, like Maarten mentioned. I build in scale 1/75 and use 3 M2 inserts.

By the way, I drill the hole a little smaller then the insert. The sharp edges of the insert will cut in the wood and make the fit stronger.
 
Now it gets a little tricky since we have two different pitches, so place about half of the previous piece of wood under the other end and then continue routing to the first mark on the top small arch.
Hello Tobias,
I'm having a question for the taper on the sternson knee.
Isn't it just one flat surface which can be milled by underlaying some part with the proper height?
You are doing two different milling cuts (yellow and red in your picture). Why are these two steps needed? I can't see the different angles in the drawings.

And sorry for keeping you busy by asking so many questions.
 
I made 3 holes as it was important to me to mount the keel straight on the jig. At La Palme the holes will be covered later because the wrong keel will be mounted and I will not build a stand. At Le Rochefort I don't have a plan yet because I might do it with rigging and sails. As I said, straight assembly was important to me
 
Back
Top