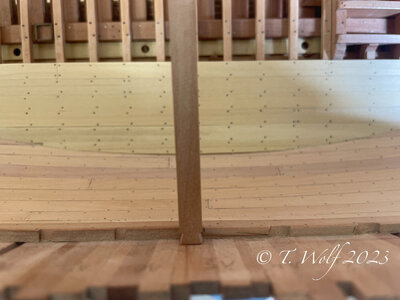
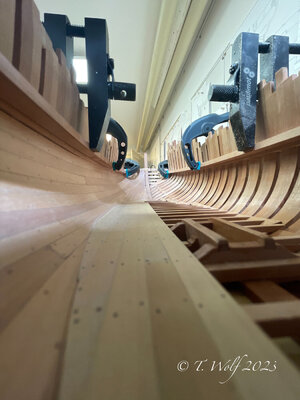
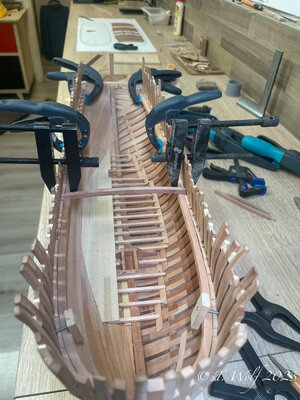
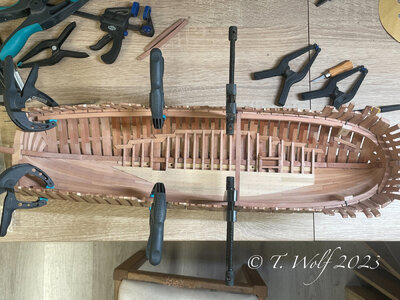
LE ROCHEFORT - Harbour yacht from 1787 1:36 by Tobias (Monograph by ANCRE)

Hi all,
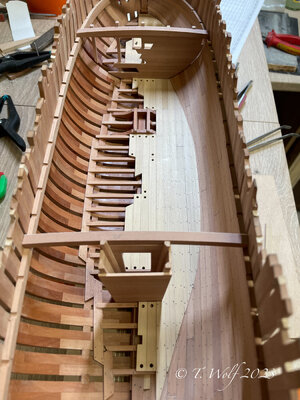
Thank you for your feedback regarding the ring eyelets for the load floor boards. I took the precaution of asking Gerard again and he told me that it was not right, because there were holes drilled in the boards. I rebuilt all the boards, took out the eyelets and put in the holes.
eZy Watermark_21-10-2023_11-06-09-7140PM.jpeg

IMG_1227.jpeg

Gerard explained it to me too:

Hello,

to lift the removable parts, there are no loop pins, but holes drilled in the boards. The loops would interfere with the placement of the powder kegs.

Nevertheless, it is a nice job, very neat.

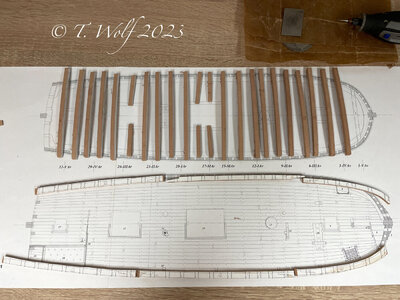
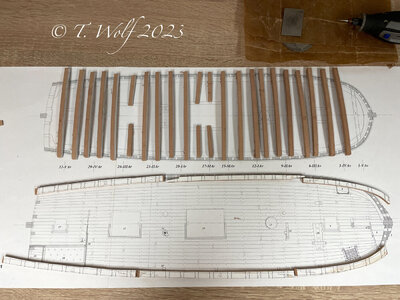
Furthermore, I have prepared all the beams of the deck, there will be an update on this in the next few days.
eZy Watermark_21-10-2023_11-08-36-1590PM.jpeg
 
Hi all,
Thank you for your feedback regarding the ring eyelets for the load floor boards. I took the precaution of asking Gerard again and he told me that it was not right, because there were holes drilled in the boards. I rebuilt all the boards, took out the eyelets and put in the holes.

View attachment 401646

View attachment 401648

Gerard explained it to me too:

Hello,

to lift the removable parts, there are no loop pins, but holes drilled in the boards. The loops would interfere with the placement of the powder kegs.

Nevertheless, it is a nice job, very neat.

Furthermore, I have prepared all the beams of the deck, there will be an update on this in the next few days.

View attachment 401647
My respect for your changing the eyelets into the holes, Tobias. Both looks nice, but Gerard’s arguments are logical. It prevents your ship fir a big blast.
Regards, Peter
 
Hi all,
Thank you for your feedback regarding the ring eyelets for the load floor boards. I took the precaution of asking Gerard again and he told me that it was not right, because there were holes drilled in the boards. I rebuilt all the boards, took out the eyelets and put in the holes.
Your dedication to getting it right is admirable. It does make a lot more sense and looks cleaner with the holes in the planks, a worthy effort.
 
@Peter Voogt @glennb17
@Uwek @RogerD
Thank you for your visit and your comment and to everyone else for the likes and love

Hello everyone, as announced there is a somewhat more detailed update on the deck beams and the beam traveller.

eZy Watermark_21-10-2023_11-08-36-1590PM.jpeg

First of all, I would like to say that it was quite a ***** job to fit the joist joist and adjust the joists.


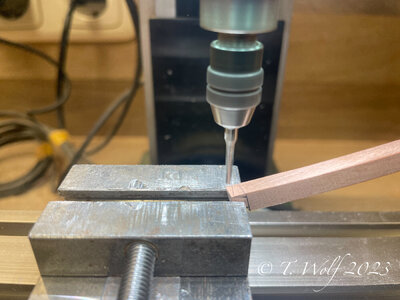
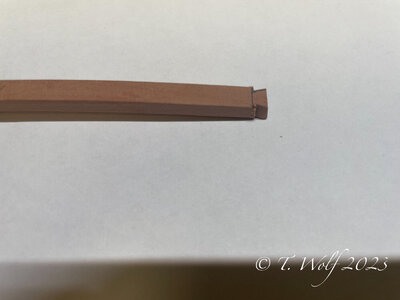
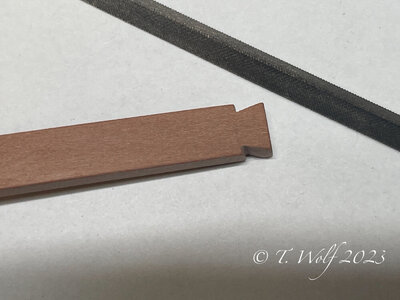
In the first step, I adjusted all the beams after sawing them out and then milled the dovetails. Next, I used the plan to determine the exact position and marked the dovetails on the last plank and carefully cut them out. I kept checking and reworking where necessary

eZy Watermark_31-10-2023_03-15-26-4240PM.jpeg

eZy Watermark_31-10-2023_03-16-34-6080PM.jpeg

eZy Watermark_31-10-2023_03-22-05-9500PM.jpeg

eZy Watermark_31-10-2023_03-24-17-9100PM.jpeg

Now to the actual Balkweger, which consists of three parts on each side. Unfortunately I didn't take any pictures here, for whatever reason.
Here I milled the bevelled edges and glued and adjusted all 3 parts. The beam is bevelled on the inside and outside so that it forms a rhombus in profile. In the end, it has to take on the slight bend of the deck beams so that they rest on the entire surface.

eZy Watermark_01-11-2023_11-04-55-4310AM.jpeg

eZy Watermark_01-11-2023_10-59-54-0710AM.jpeg

eZy Watermark_01-11-2023_11-02-15-6020AM.jpeg

After I had aligned everything with pliers and clamps, the next tricky part came. All the beams had to be put back in their positions so that they could be marked on the beam traveller. Then everything had to be taken out again and the marked areas removed with the router. As already mentioned, I didn't take any pictures at this stage of the build as I was concentrating too much on the work. However, I will make a sample and take pictures.
In the next step, I dry fitted everything again to check where I still needed to rework. The same game again beam in...... beam out....... file and so on. Once everything was in place, I glued the joist walker and made and fitted the rear bulkhead.

eZy Watermark_01-11-2023_11-12-26-5860AM.jpeg

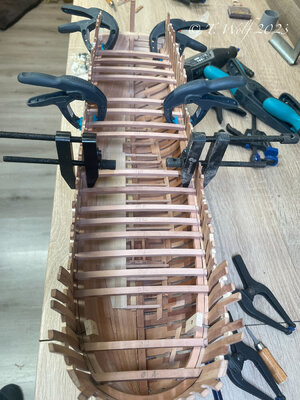
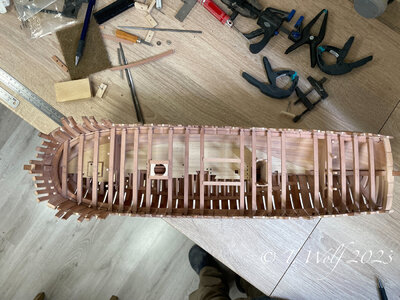
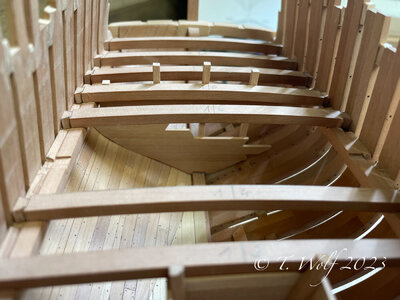
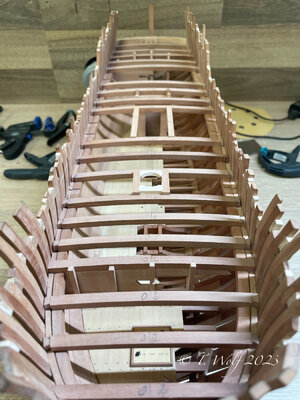
I inserted individual deck beams in order to glue the beam walker in the correct position. In the following pictures you can see the whole result of the last days. I would like to add that nothing is glued yet, the mast passage is only a test piece and there is still some work to be done on the beams.

eZy Watermark_03-11-2023_12-51-12-1650PM.jpeg

eZy Watermark_03-11-2023_12-49-53-8560PM.jpeg

eZy Watermark_03-11-2023_12-49-02-9800PM.jpeg

The next jobs will be the wedges at the base of the mast, making the intermediate floor in the stern area and milling out various recesses in the beams. Thank you very much for your interest.
 
Last edited:
@Peter Voogt @glennb17
@Uwek @RogerD
Thank you for your visit and your comment and to everyone else for the likes and love

Hello everyone, as announced there is a somewhat more detailed update on the deck beams and the beam traveller.

View attachment 404308

First of all, I would like to say that it was quite a ***** job to fit the joist joist and adjust the joists.


In the first step, I adjusted all the beams after sawing them out and then milled the dovetails. Next, I used the plan to determine the exact position and marked the dovetails on the last plank and carefully cut them out. I kept checking and reworking where necessary

View attachment 404309

View attachment 404310

View attachment 404311

View attachment 404328

Now to the actual Balkweger, which consists of three parts on each side. Unfortunately I didn't take any pictures here, for whatever reason.
Here I milled the bevelled edges and glued and adjusted all 3 parts. The beam is bevelled on the inside and outside so that it forms a rhombus in profile. In the end, it has to take on the slight bend of the deck beams so that they rest on the entire surface.

View attachment 404316

View attachment 404314

View attachment 404315

After I had aligned everything with pliers and clamps, the next tricky part came. All the beams had to be put back in their positions so that they could be marked on the beam traveller. Then everything had to be taken out again and the marked areas removed with the router. As already mentioned, I didn't take any pictures at this stage of the build as I was concentrating too much on the work. However, I will make a sample and take pictures.
In the next step, I dry fitted everything again to check where I still needed to rework. The same game again beam in...... beam out....... file and so on. Once everything was in place, I glued the joist walker and made and fitted the rear bulkhead.

View attachment 404321

I inserted individual deck beams in order to glue the beam walker in the correct position. In the following pictures you can see the whole result of the last days. I would like to add that nothing is glued yet, the mast passage is only a test piece and there is still some work to be done on the beams.

View attachment 404324

View attachment 404323

View attachment 404322

The next jobs will be the wedges at the base of the mast, making the intermediate floor in the stern area and milling out various recesses in the beams. Thank you very much for your interest.
Sometime before I die I would like to achieve half a good as you are.
thanks for the tutorial and inspiration.
 
@Peter Voogt @glennb17
@Uwek @RogerD
Thank you for your visit and your comment and to everyone else for the likes and love

Hello everyone, as announced there is a somewhat more detailed update on the deck beams and the beam traveller.

View attachment 404308

First of all, I would like to say that it was quite a ***** job to fit the joist joist and adjust the joists.


In the first step, I adjusted all the beams after sawing them out and then milled the dovetails. Next, I used the plan to determine the exact position and marked the dovetails on the last plank and carefully cut them out. I kept checking and reworking where necessary

View attachment 404309

View attachment 404310

View attachment 404311

View attachment 404328

Now to the actual Balkweger, which consists of three parts on each side. Unfortunately I didn't take any pictures here, for whatever reason.
Here I milled the bevelled edges and glued and adjusted all 3 parts. The beam is bevelled on the inside and outside so that it forms a rhombus in profile. In the end, it has to take on the slight bend of the deck beams so that they rest on the entire surface.

View attachment 404316

View attachment 404314

View attachment 404315

After I had aligned everything with pliers and clamps, the next tricky part came. All the beams had to be put back in their positions so that they could be marked on the beam traveller. Then everything had to be taken out again and the marked areas removed with the router. As already mentioned, I didn't take any pictures at this stage of the build as I was concentrating too much on the work. However, I will make a sample and take pictures.
In the next step, I dry fitted everything again to check where I still needed to rework. The same game again beam in...... beam out....... file and so on. Once everything was in place, I glued the joist walker and made and fitted the rear bulkhead.

View attachment 404321

I inserted individual deck beams in order to glue the beam walker in the correct position. In the following pictures you can see the whole result of the last days. I would like to add that nothing is glued yet, the mast passage is only a test piece and there is still some work to be done on the beams.

View attachment 404324

View attachment 404323

View attachment 404322

The next jobs will be the wedges at the base of the mast, making the intermediate floor in the stern area and milling out various recesses in the beams. Thank you very much for your interest.
My dear friend Tobias
you have done wonderful work on the deck beams and the beam traveller.
I salute you for the attention to detail and precision that lead to the most beautiful results! Thank you for the detailed explanations accompanied by pictures that allow us to understand and learn from you.
 
@Peter Voogt @glennb17
@Uwek @RogerD
Thank you for your visit and your comment and to everyone else for the likes and love

Hello everyone, as announced there is a somewhat more detailed update on the deck beams and the beam traveller.

View attachment 404308

First of all, I would like to say that it was quite a ***** job to fit the joist joist and adjust the joists.


In the first step, I adjusted all the beams after sawing them out and then milled the dovetails. Next, I used the plan to determine the exact position and marked the dovetails on the last plank and carefully cut them out. I kept checking and reworking where necessary

View attachment 404309

View attachment 404310

View attachment 404311

View attachment 404328

Now to the actual Balkweger, which consists of three parts on each side. Unfortunately I didn't take any pictures here, for whatever reason.
Here I milled the bevelled edges and glued and adjusted all 3 parts. The beam is bevelled on the inside and outside so that it forms a rhombus in profile. In the end, it has to take on the slight bend of the deck beams so that they rest on the entire surface.

View attachment 404316

View attachment 404314

View attachment 404315

After I had aligned everything with pliers and clamps, the next tricky part came. All the beams had to be put back in their positions so that they could be marked on the beam traveller. Then everything had to be taken out again and the marked areas removed with the router. As already mentioned, I didn't take any pictures at this stage of the build as I was concentrating too much on the work. However, I will make a sample and take pictures.
In the next step, I dry fitted everything again to check where I still needed to rework. The same game again beam in...... beam out....... file and so on. Once everything was in place, I glued the joist walker and made and fitted the rear bulkhead.

View attachment 404321

I inserted individual deck beams in order to glue the beam walker in the correct position. In the following pictures you can see the whole result of the last days. I would like to add that nothing is glued yet, the mast passage is only a test piece and there is still some work to be done on the beams.

View attachment 404324

View attachment 404323

View attachment 404322

The next jobs will be the wedges at the base of the mast, making the intermediate floor in the stern area and milling out various recesses in the beams. Thank you very much for your interest.
A beautiful example of ‘zwaluwstaart verbindingen’, Tobias. My respect!
A ‘dove’ is to big, we used ‘swallow’s’.
Regards, Peter
 
@dockattner @Steef66 @Herman
@Jimsky @glennb17 @Mirek
@OlivierF @shota70 @Peter Voogt
Thank you very much for your appreciative words and of course to everyone who has pressed a Like or Love button.

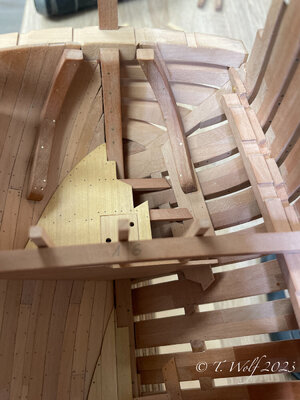
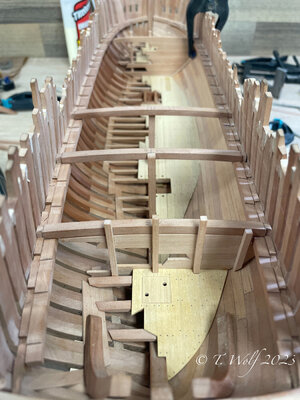
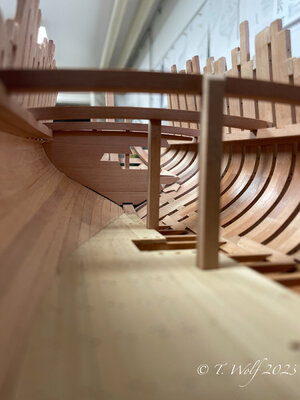
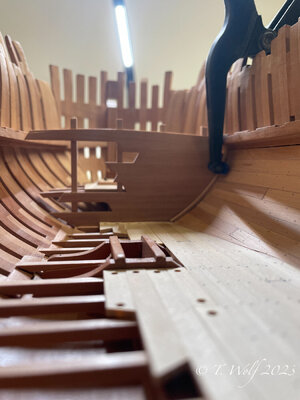
A small update.
Yesterday I was able to fit the hooks in the stern and make the intermediate floor in the stern. The front bulkhead has been glued and is in place. There are still a lot of small details to be done in the interior and I hope to finish them today.

eZy Watermark_04-11-2023_09-34-54-9770PM.jpeg

eZy Watermark_04-11-2023_09-30-00-0340PM.jpeg

eZy Watermark_04-11-2023_09-32-24-4130PM.jpeg

eZy Watermark_04-11-2023_09-33-17-7850PM.jpeg
 
Back
Top