LE ROCHEFORT - Harbour yacht from 1787 1:36 by Tobias (Monograph by ANCRE)

This is just excellent work in all regards Tobias! My respect!
Ditto :) wonderful work, thanks for the explanations
Really nice progress, Tobias. The result is looking excellent.
Very good result - on my next project, I will try this treenailing method - slightly more work, but in my opinion with a better (more regular) result
Beautiful precise work TobiasThumbsup
Beautiful work Tobias, I agree with all the previous comments and posts. Your planking and treenailing is superb. I’ll have to remember your method of using tape for lining up the treenails. Also the method you use, thanks for showing us.
Amazing precision! Almost makes me wonder if the original shipbuilders themselves would be embarrassed by their own efforts?
Witaj
Tobiaszu tylko dwa słowa pięknie, pięknie .Pozdrawiam Mirek

Hello
Tobias just two words beautifully, beautifully .Regards Mirek
Fantastic work! I am getting ready for some treenailing and decided to give your method a whirl on some scrap. Amazing result and so easy! A handheld drill, disk sander, flush cutter, a little sanding, and it looks fantastic. I tried birch vs. bamboo toothpicks, birch was noticeably better. They came out slightly darker than bamboo with some Danish oil and just looked cleaner. Thanks for sharing this cool, simple technique; I put my draw plate away.
Good morning Tobias. Immaculate. I concur with all the other comments Thumbsup. Cheers Grant
“Nice&Precise” as usual, Tobias. A lust for the eyes.
Regards, Peter

Wow I am overwhelmed by your positive response and it makes me blush slightly, thank you guys.

At the moment I'm continuing with the interior work and therefore I can't show much news. There are a lot of preparations to which I will bring a detailed update in due course.
Just a few impressions for you.

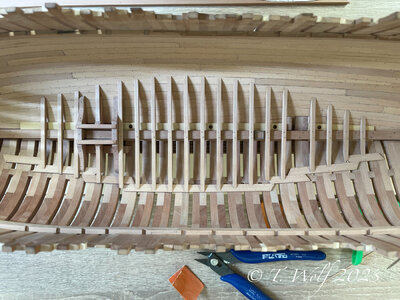
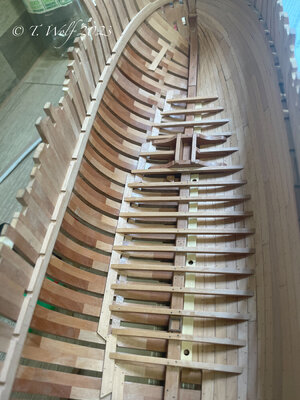
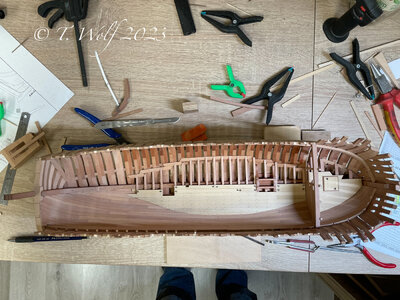
The cross beams are still all in place and all the wooden nails for the floorboards are also in place, 1477 nails in total.o_O
eZy Watermark_05-10-2023_09-29-02-9110PM.jpeg

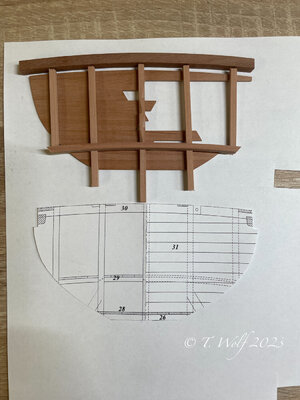
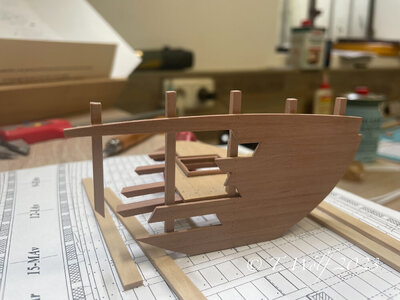
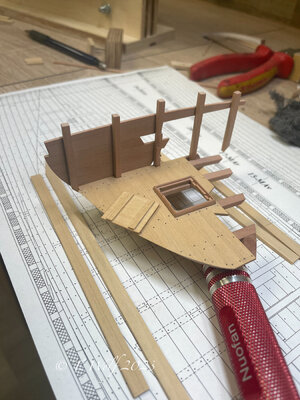
Prepare the front bulkhead.
eZy Watermark_05-10-2023_09-27-00-8970PM.jpeg

Breast hooks and crossbars for the front tween deck.
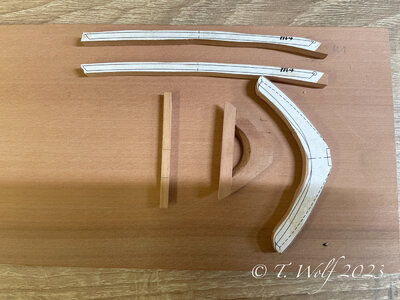
eZy Watermark_05-10-2023_09-30-06-8730PM.jpeg

And now the (sorry I don't know the technical term - Balkweger) support for the crossbeams of the main deck.
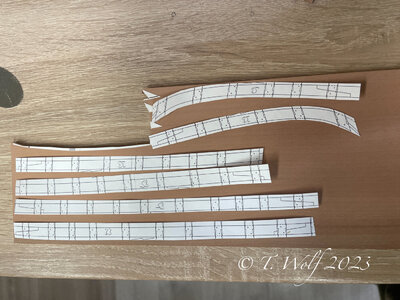
eZy Watermark_05-10-2023_09-27-53-3350PM.jpeg
 
Dear Tobias
gret work on the planking and treenailing,
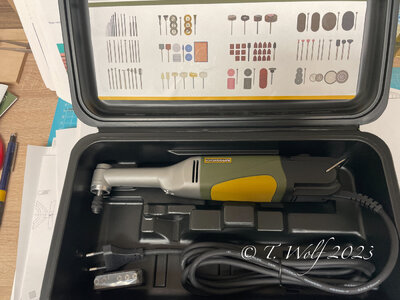
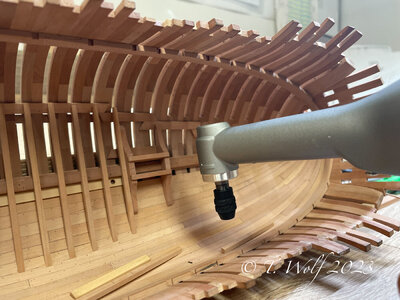
can you please explain on the new tool, a long-necked angle drill
Hello @shota70 here again the tool.

eZy Watermark_27-09-2023_07-46-30-2840PM.jpeg
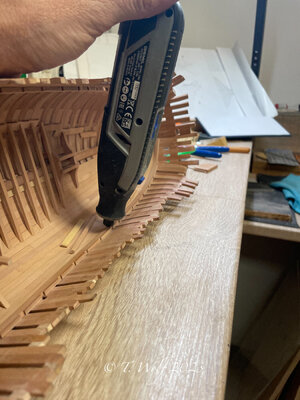
Here is a picture with the Dremel, because the Dremel is too long I can no longer drill straight holes, ....

eZy Watermark_27-09-2023_07-47-09-3790PM.jpeg

...... therefore the new tool with which I have more space and can drill perpendicular to the floorboard again.

eZy Watermark_27-09-2023_07-48-09-3680PM.jpeg
 
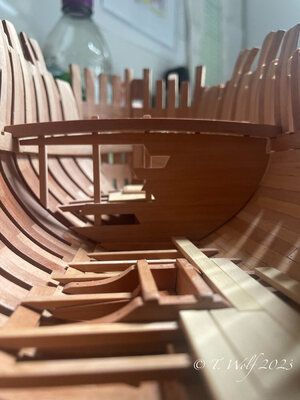
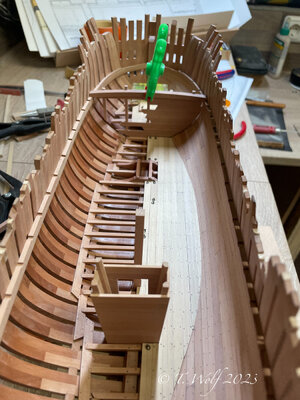
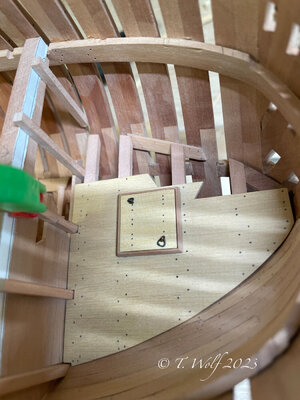
Hello everyone, last week there was a lot to do in the garden and I had almost no time for Le Rochefort. Not much happened but it was very time consuming. I treated the lower part with Clou sanding primer and made the front bulkhead and the tween deck and built them in dry.

eZy Watermark_12-10-2023_10-06-51-0000AM.jpeg

eZy Watermark_12-10-2023_10-05-37-4680AM.jpeg

eZy Watermark_12-10-2023_10-04-30-6690AM.jpeg

eZy Watermark_12-10-2023_10-03-37-4480AM.jpeg

eZy Watermark_12-10-2023_10-01-48-8780AM.jpeg

eZy Watermark_12-10-2023_10-00-23-1520AM.jpeg

The next step is the load compartment floor, the rear bulkhead and the intermediate floor.
Thanks for looking in, have fun.
 
Partie 2

COLLAGE, SCIAGE ET MEULAGE.

En plus de coller le papier sur le bois: Dans la dernière section de la partie 1, j’ai déjà discuté de l’adhésif que j’ai utilisé et je voudrais vous montrer à nouveau une image et aussi revenir sur ses propriétés. Contrairement au bâton de colle ou à la colle liquide Uhu, il n’y a pas d’agglutination (bâton de colle) ou de trempage du papier avec Fixo GUM, le papier se détache facilement et il n’y a pas de résidus sur le bois ni même de décoloration due à la pénétration de la colle dans le bois

[JOINDRE]354932[/ATTACH]

Une fois ma mise en page terminée, je commence à coller le papier. Dans un premier temps, je nettoie le bois avec un chiffon légèrement humide pour enlever la poussière et la sciure de bois. Ensuite, je dessine une fine ligne de colle sur le papier et je l’étale avec le cure-dent. Dans l’étape suivante, je le colle au bois et apporte de petites corrections. Lors du collage, je fais attention à la direction du grain du bois. Toujours dans le sens longitudinal sur la longueur, évitant ainsi la rupture du bois et la déformation lors du collage de ces pièces fines.

[JOINDRE]354827[/ATTACH]

[JOINDRE]354828[/ATTACH]

[JOINDRE]354829[/ATTACH]

SCIAGE :
Dans l’étape suivante, je découpe mes pièces et prépare diverses coupes. J’ai eu l’expérience de faire ces petites coupes sur les joints au préalable parce qu’elles sont plus difficiles à couper par la suite ou qu’il y a beaucoup de surplomb pour le ponçage.

[JOINDRE]354832[/ATTACH]

Cette image montre clairement que les déchets sont limités.

[JOINDRE]354833[/ATTACH]

MEULAGE AVEC LA MEULEUSE À DISQUE:
Je fais attention à plusieurs choses ici. Avant de commencer à poncer, je vérifie à nouveau si l’angle entre le disque de ponçage et la table est exactement de 90 degrés, puis je vérifie la vitesse, avec mon Poxxen je le règle à environ 3500 - 4000 tr / min. un. La raison en est que la surface de meulage sur le bois ne brûle pas. Pourquoi le bois ne devrait-il pas brûler à ce stade, vous pourriez penser que vous ne pouvez pas le voir de toute façon, mais c’est faux. Vous le verrez comme une marque de crayon après le collage et le ponçage. Avant de commencer à poncer, je tire les différentes pièces sur une planche de bois à laquelle j’ai attaché une feuille de papier de verre avec du ruban adhésif double face. Nous reverrons cette plaque de ponçage plus tard dans la partie 3 ou 4. Alors maintenant un peu de sécurité, je porte des protections auditives lors du ponçage car le ponçage et le fonctionnement simultané du dépoussiérage sont bruyants.
Addition: Dans l’image suivante, vous pouvez voir le degré créé en coupant la scie à chantourner. Pour supprimer cette qualité, j’utilise la planche de ponçage mentionnée ci-dessus. Si cela n’est pas fait, votre pièce ne reposera pas proprement sur la table et vous n’obtiendrez pas un bord propre sur les joi
Aujourd’hui, j’ai travaillé sur les traverses de la poupe.

J’ai découpé les bois individuels et les ai préparés avec la ponceuse à bronzage. Ensuite, je colle un autre modèle au dos. Dans l’étape suivante, je fraise les rainures et lime les biseaux pour les récipients (dans la rainure).
Maintenant, j’utilise la petite ponceuse à bande et pré-ponce grossièrement les biseaux du bois, puis je travaille le reste avec la lime et le fer à tréfiler. Mettez tout en place et prenez des photos.

[JOINDRE]349503[/ATTACH]

[JOINDRE]349504[/ATTACH]

[JOINDRE]349502[/ATTACH]

[JOINDRE]349501[/ATTACH]

[JOINDRE]349505[/ATTACH]

[JOINDRE]349506[/ATTACH]
Bonjour Tobias
Bonsoir chers collègues,
Merci encore à tous pour vos souhaits de vacances. Nous sommes rentrés sains et saufs et le samedi je me suis perdu dans mon atelier, j’ai rangé un peu et j’ai mis la main sur Le Rochefort.

[JOINDRE]396571[/ATTACH]

[JOINDRE]396572[/ATTACH]

Les 800 ou 900 premiers clous d’arbres ont trouvé leur place à l’intérieur et j’attends maintenant mon nouvel outil, une perceuse à angle long, pour percer les trous dans la partie supérieure (environ 400 trous de plus). Le roulement du mât a été installé et maintenant je suis arrivé aux traverses pour le plancher pour la cargaison. Comme seul le côté tribord est en planches, j’ai décidé d’utiliser des planches simples du côté bâbord pour créer une surface d’appui pour les traverses.

[JOINDRE]396573[/ATTACH]

[JOINDRE]396574[/ATTACH]

Merci de votre intérêt et il y aura

Hello everyone, last week there was a lot to do in the garden and I had almost no time for Le Rochefort. Not much happened but it was very time consuming. I treated the lower part with Clou sanding primer and made the front bulkhead and the tween deck and built them in dry.

View attachment 399594

View attachment 399595

View attachment 399596

View attachment 399597

View attachment 399598

View attachment 399599

The next step is the load compartment floor, the rear bulkhead and the intermediate floor.
Thanks for looking in, have fun.
Magnifique
 
Hello everyone, last week there was a lot to do in the garden and I had almost no time for Le Rochefort. Not much happened but it was very time consuming. I treated the lower part with Clou sanding primer and made the front bulkhead and the tween deck and built them in dry.

View attachment 399594

View attachment 399595

View attachment 399596

View attachment 399597

View attachment 399598

View attachment 399599

The next step is the load compartment floor, the rear bulkhead and the intermediate floor.
Thanks for looking in, have fun.
I like your half planked bulkhead, Tobias.
A kind of deja-vu …. ;)
Building the interior is always fun.
Regards, Peter
 
Hello everyone and have a nice evening.
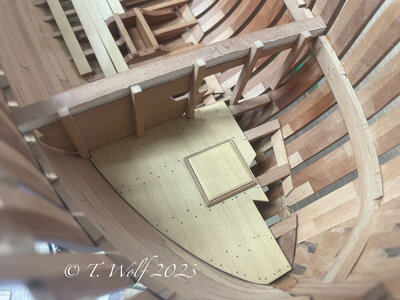
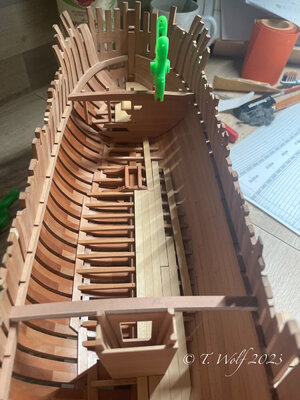
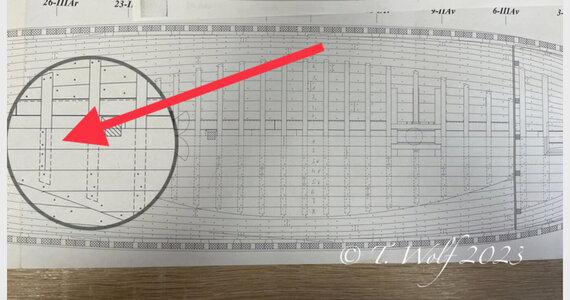
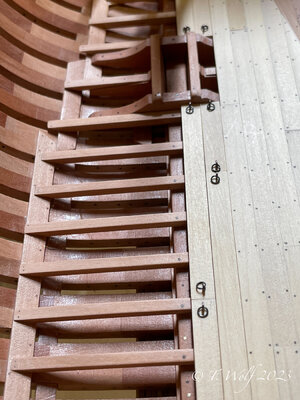
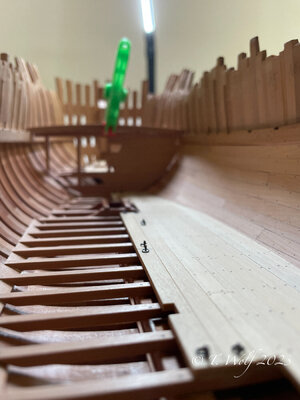
The load compartment floor has been completed up to the middle. In the plan I noticed that the middle 4 (2) rows are not nailed to the substructure, i.e. they must be removable to get to the lower limber boards.

IMG_1221.jpeg

In the monograph I could not find any indication of what these boards were fitted with to remove them, so I fitted them with small ring eyelets.

eZy Watermark_19-10-2023_08-56-56-3280PM.jpeg

eZy Watermark_19-10-2023_08-58-42-5830PM.jpeg

eZy Watermark_19-10-2023_09-00-11-4270PM.jpeg

eZy Watermark_19-10-2023_08-57-51-0390PM.jpeg

eZy Watermark_19-10-2023_09-02-28-7740PM.jpeg

There is still a lot to do until the next update.

A small hint: there are still some interesting protocols in the Le Rochefort assembly.
 
Last edited:
Hello everyone and have a nice evening.
The load compartment floor has been completed up to the middle. In the plan I noticed that the middle 4 (2) rows are not nailed to the substructure, i.e. they must be removable to get to the lower limber boards.

View attachment 401280

In the monograph I could not find any indication of what these boards were fitted with to remove them, so I fitted them with small ring eyelets.

View attachment 401275

View attachment 401277

View attachment 401278

View attachment 401276

View attachment 401279

There is still a lot to do until the next update.

A small hint: there are still some interesting protocols in the Le Rochefort assembly.
Good morning Tobias. I like the ringlet idea. I hope that once you are done we will be able to see all this brilliant detail here. Cheers Grant
 
Back
Top