Just
WOW
Good work
WOW
Good work
 |
As a way to introduce our brass coins to the community, we will raffle off a free coin during the month of August. Follow link ABOVE for instructions for entering. |
 |
 |
The beloved Ships in Scale Magazine is back and charting a new course for 2026! Discover new skills, new techniques, and new inspirations in every issue. NOTE THAT OUR FIRST ISSUE WILL BE JAN/FEB 2026 |
 |

Dear TobiasThank you @RogerD @Herman @shota70 @dockattner @pianoforte @Mirek @Uwek @OlivierF @GrantTyler @Peter Voogt @Tony P for your comments and interest. Also thanks to everyone for the likes received.
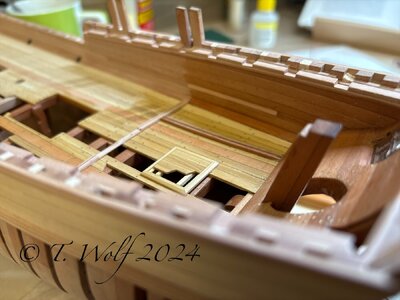
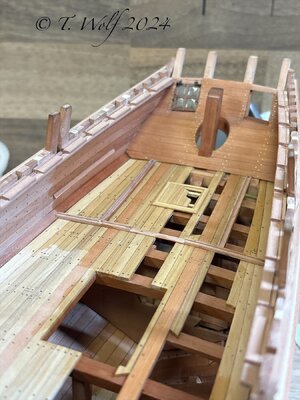
Next I made the rudder, intended as a prototype from two different types of wood, walnut and pear, to see how it looks, but I might leave it. The main thing is the upper rudder passage in the aft deck. Two longitudinal beams with dovetails have to be installed here and an oval opening has to be filed. For this reason I built the rudder to see how everything fits.
View attachment 464138
View attachment 464139
View attachment 464140
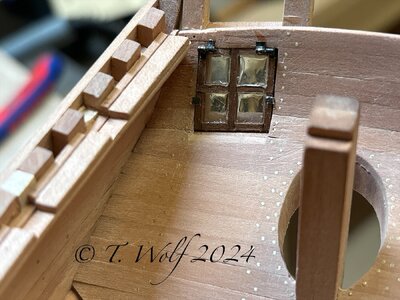
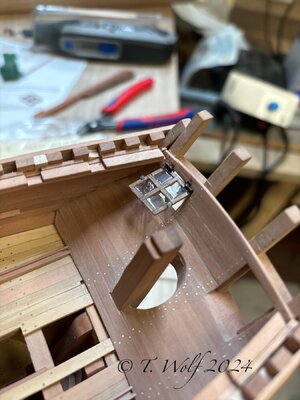
Like everything in the rear, nothing has been glued yet because the next step is to install the windows. For this, the hinges and the side locks still had to be made. The hinges for the small cupboard door were also on the agenda.
View attachment 464141
View attachment 464142
The plan is that everything is movable, and the plan worked for the small cupboard door. I hope it works for the windows too. Since a window like this also has glass panes, these cannot be missing. Here I am using "Micro Crystal Klear" and I am attaching a picture of the product.
View attachment 464143
View attachment 464144
Last but not least, the hatch for the cargo area in the rear area, various brass parts are still missing and the second window and parts of the interior fittings, then the rear area will be finished. I hope I can get it done before our big vacation in Croatia.
View attachment 464145
View attachment 464146
View attachment 464147
I wish you a wonderful Sunday, see you soon.

DittoJust
WOW
Good work
It's always to see your updates with close up pictures to be reminded of just how good your work really is. Ecellent!Frame construction of the rear windows:
View attachment 460805
Step 1:
Make a template, in my case I used a slightly firmer cardboard. I cut this until it fits.
View attachment 460806
Step 2:
On the cardboard, I mark the upper edge on the inside with an arrow and stick double-sided tape on both sides.
View attachment 460807
3rd step:
Here I make 6 small strips 1x1mm with a slight overhang.
View attachment 460808
Step 4:
Glue the two outer strips on. The advantage of the window frames is that they are not mitred. Then I adjust the upper and lower strips and fix them with superglue. Let the whole thing dry a little and very carefully remove it from the template (if it breaks, do it again straight away).
View attachment 460809
View attachment 460810
View attachment 460811
Step 5:
Now for the center cross, place a small piece of double-sided tape on the vice of the MF70 and mill it halfway.
View attachment 460812
Step 6:
Now place the two struts next to the window, adjust them to the shape of the window and glue them.
View attachment 460813
Step 7:
Once the cross has dried, align it on the frame and mark it. Fasten the frame back onto the vice with double-sided tape and mill the marked frame.
View attachment 460814
View attachment 460815
Last step:
Carefully remove the frame again and place the cross in the joints and then mark the inside of the cross on the frame. The cross is also fixed to the vice again with double-sided adhesive tape and the ends are milled. Now glue the cross and the frame together, sand off the excess, clean everything and you're done.
View attachment 460816
View attachment 460817
I hope I was able to explain it clearly. If something is unclear, just ask.

Just
WOW
Good work
Double ditto .Ditto
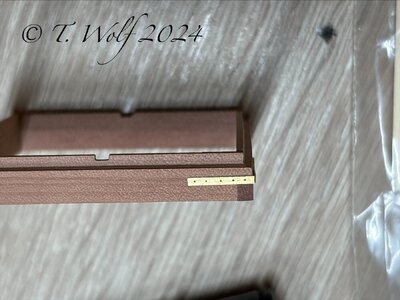
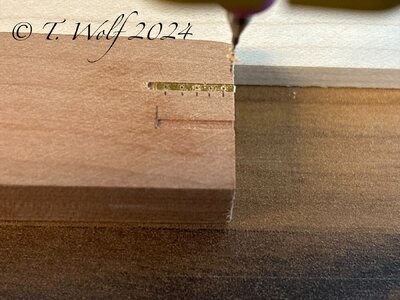
Sorry, if I already asked this already once, but the nailing on the hatch cover is great
How you do this? Drilling with 0,3mm and ?
I agree with Oliver and there's always something to learn by following your excellent work Tobias.Thanks Tobias. Great tutorial! I’ve bookmarked it for future reference and use.
A nice tutorial with the in between steps, Tobias.Thanks @Steef66 @Herman @RogerD
Hello everyone, Uwe @Uwek asked two good questions about how to approach straight drilling, Paul @dockattner was also interested in it. The same goes for the production of the hinges.
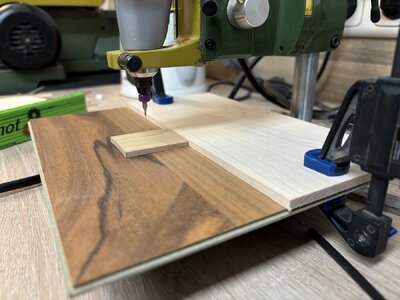
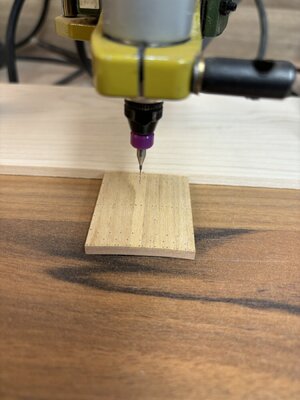
Now I would like to add two pictures about drilling. I have attached a stop to my small drill and marked the board with a pencil line where the drill bit goes into the wood. Then the holes are drilled one after the other, next row, the stop is moved and drilling continues.
View attachment 464859
View attachment 464860
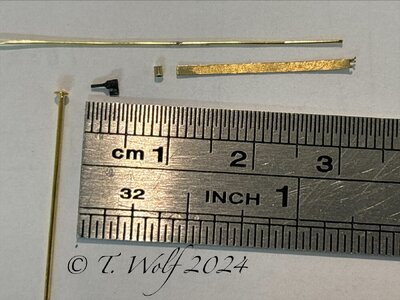
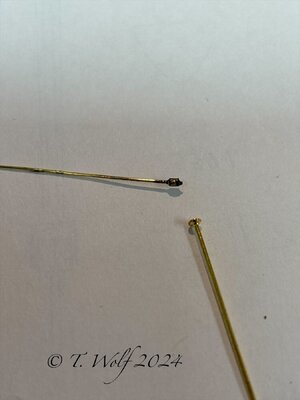
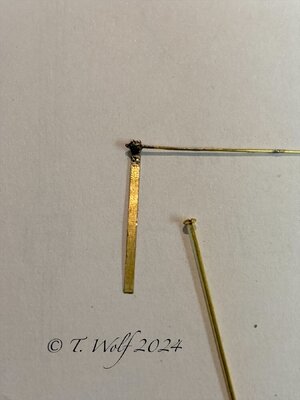
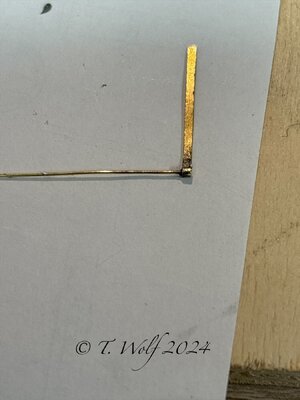
To make the hinges, I use a brass tube with an outer diameter of 1.2 mm and a wall thickness of 0.4 mm, a brass wire of 0.4 mm, and the whole thing is soldered together. In the next step, I use a 0.5 mm thick brass sheet. This is also soldered to the existing parts. For soldering, I use a solder paste and a small Bunsen burner or a soldering iron, depending on the case. I cut small strips from the brass sheet, depending on the width of the strips required.
Preparing the brass strips:
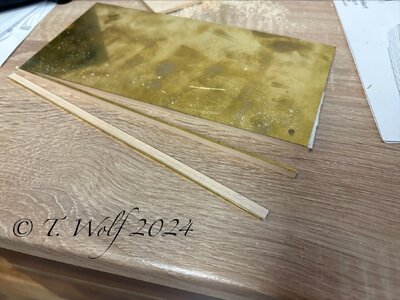
Here I take a 5mm thick wooden board, stick double-sided adhesive tape on it and fix the brass sheet on it, then set up the small table saw and cut off small strips. The advantage of this method is that it doesn't tear, bend or wrinkle. I adopted this method from Johann @archjofo .
View attachment 464867
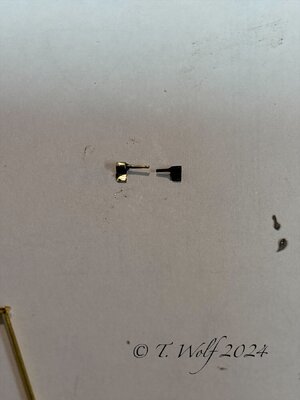
As for the construction of the hinges, I will let the following pictures speak for themselves.
View attachment 464868
View attachment 464869
View attachment 464870
View attachment 464871
View attachment 464872
Finally, everything is blackened and installed in the ship; with a bit of luck, it will then be movable.
View attachment 464873
View attachment 464874
