
-

SUBSCRIBE TO SHIPS IN SCALE TODAY!
The beloved Ships in Scale Magazine is back and charting a new course for 2026!
Discover new skills, new techniques, and new inspirations in every issue.
NOTE THAT OUR NEXT ISSUE WILL BE MARCH/APRIL 2026 -

Win a Free Custom Engraved Brass Coin!!!
As a way to introduce our brass coins to the community, we will raffle off a free coin during the month of August. Follow link ABOVE for instructions for entering.
- Home
- Forums
- Ships of Scale Build Logs
- Super Detailing Static Models / Other Genres
- Historical Trailways, Guns, Aircraft, and Cars
You are using an out of date browser. It may not display this or other websites correctly.
You should upgrade or use an alternative browser.
You should upgrade or use an alternative browser.

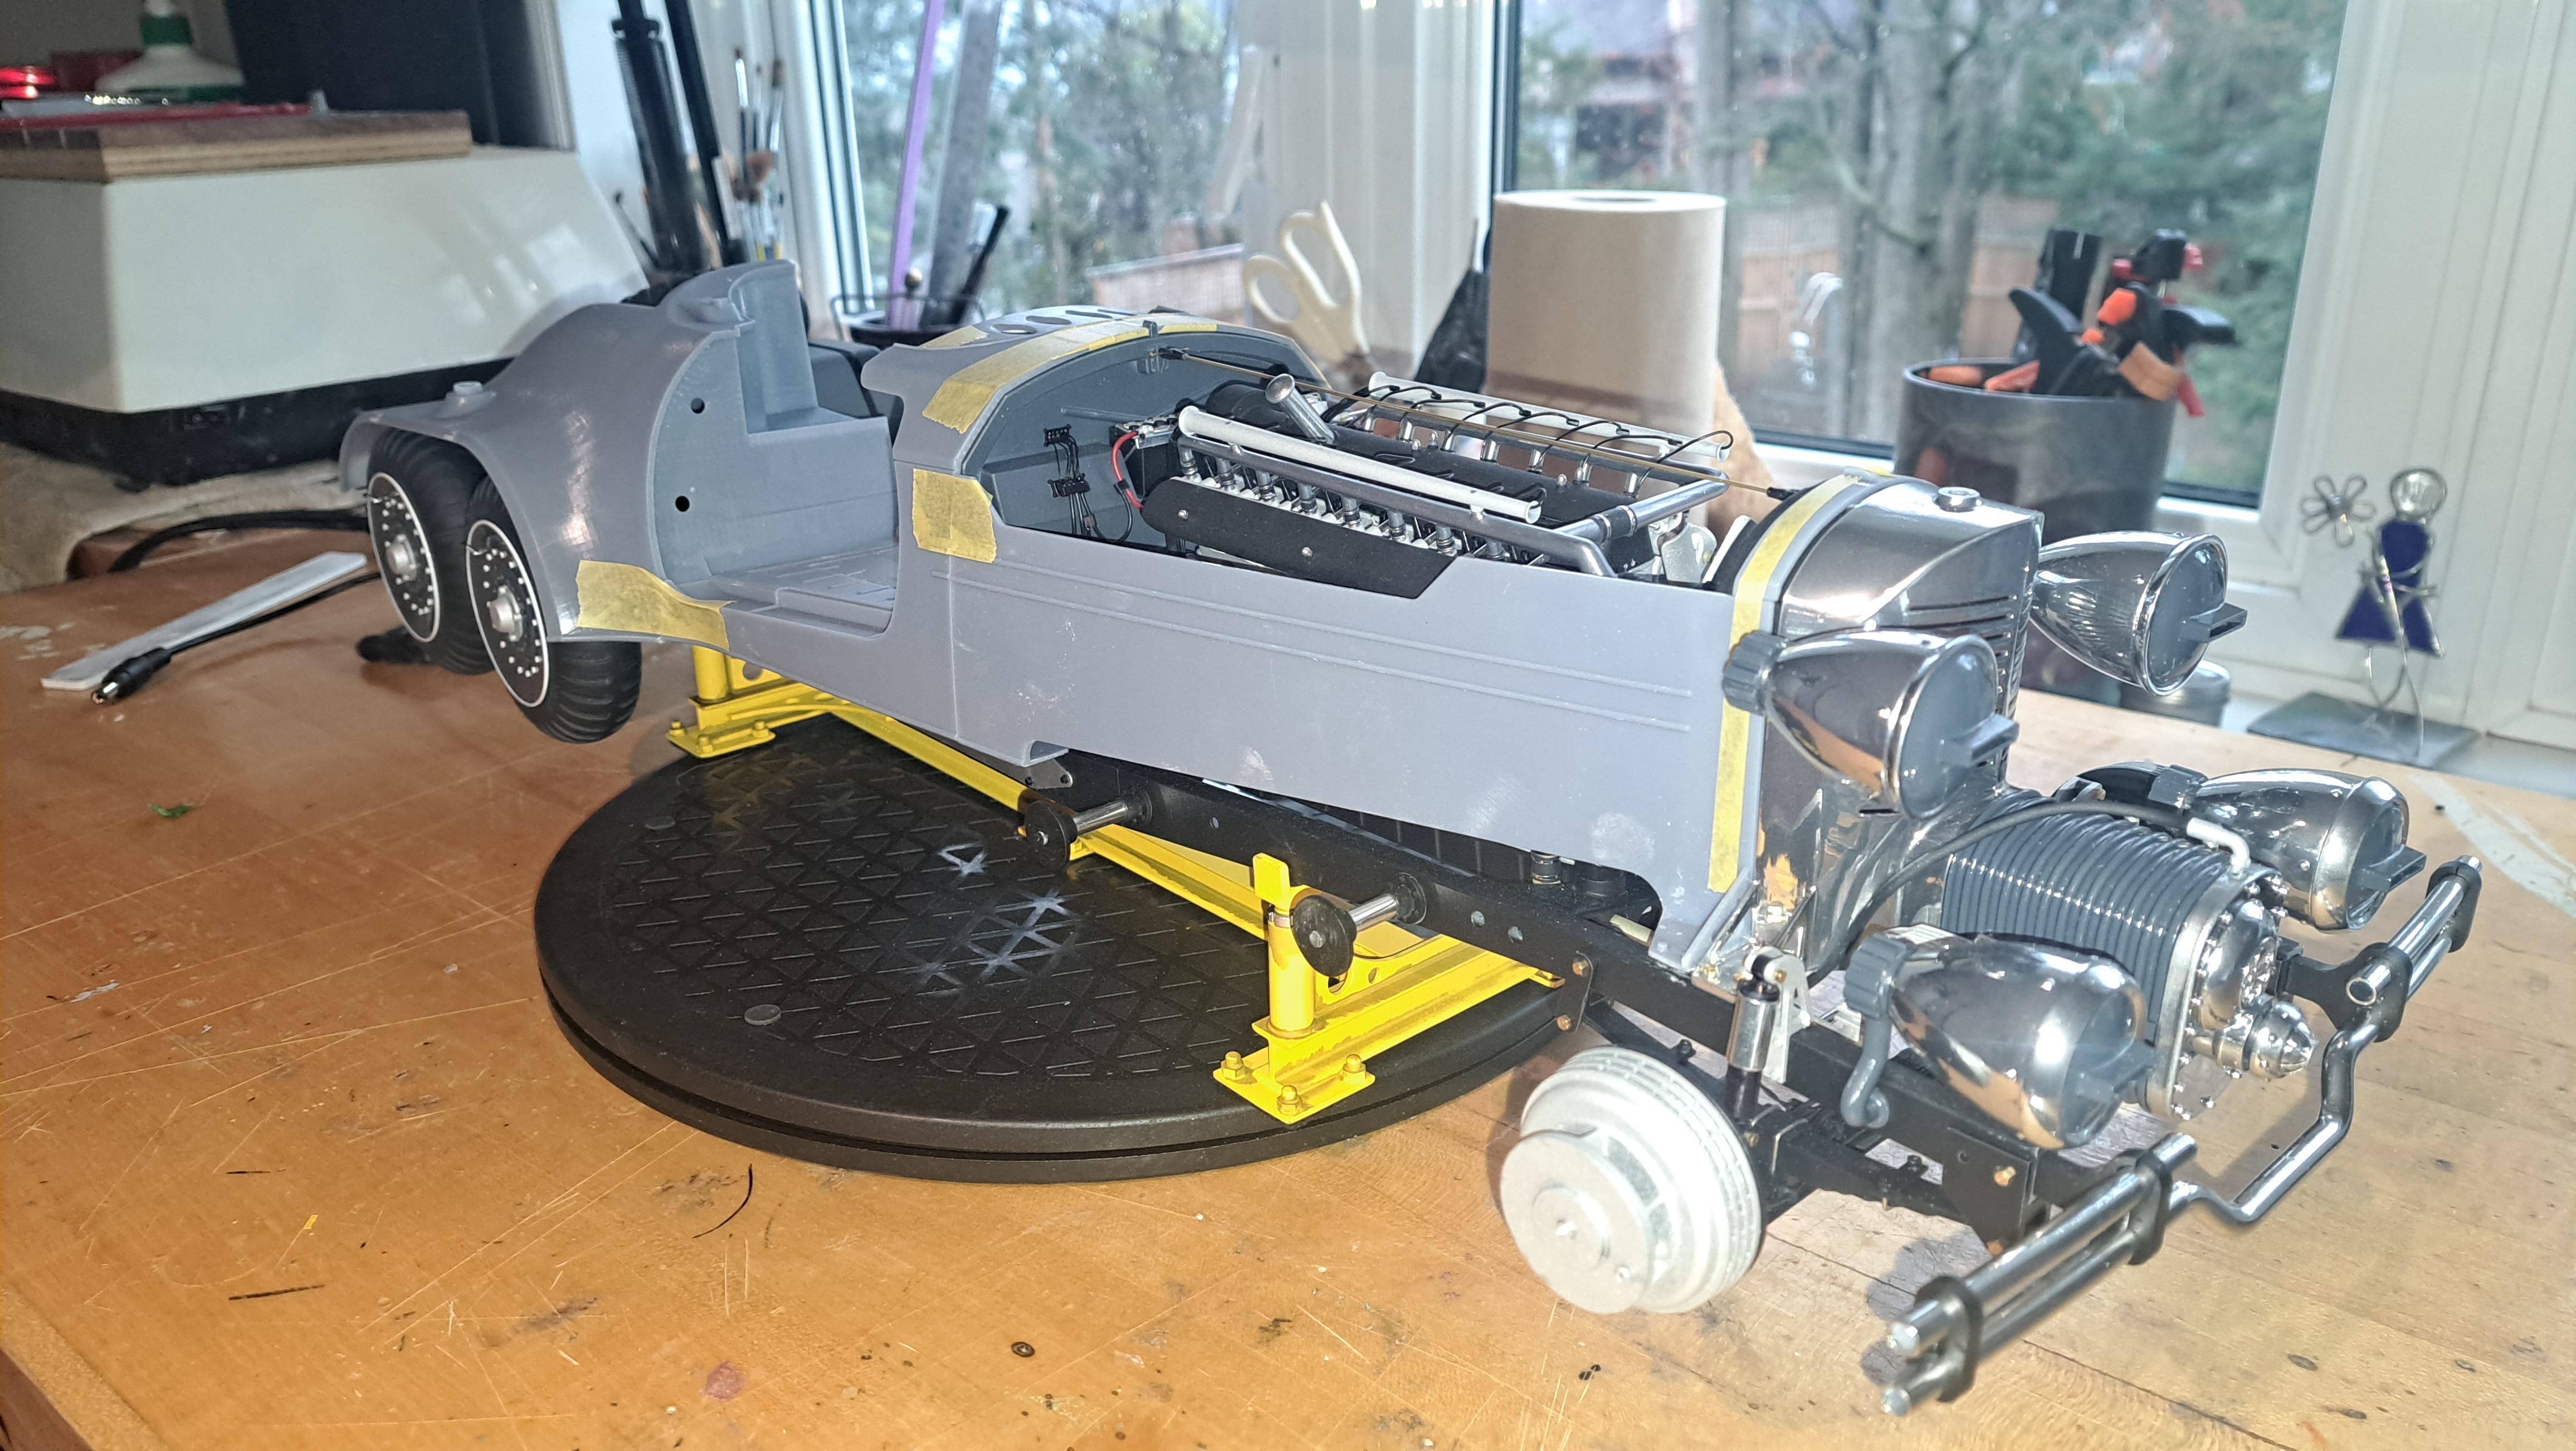
For those who wonder why I hesitate in hiding the rolling frame, here's a reminder.
View attachment 20250418_215155~2.mp4
I just can't hide all this neat stuff.
View attachment 20250418_215155~2.mp4
I just can't hide all this neat stuff.
I post on 3 different forums and explained on all 3 my conundrum. I received plenty on interesting ideas l. But there's one that I think will be best. It's rtwpsom2's. I'll but the body on the rolling chassis but I'll modify one of the front lower panels to give a good view of the motor and all the bits and pieces that are worth seeing, probably on the steering column side. The underside of the model could be seen by reflexion on a mirored floor. I can also raise the hoods to give an even better view. I slightly modified the body to be able to lift it from the frame if need be. With this solution, I get the best of both worlds, a good view of the fun moving stuff and the great looks of the body on the frame with the wheels and all the trimming. I'll post a pictures of the 3d model showing all this soon.

It really is quite amazing. I do agree that you can't hide all that stuff.
Perhaps next you should build one of the Titanic's engines. I think those huge ship engines were quite something. I saw one really nice model at a museum in Halifax a few years ago, all made in brass, and with a couple of people standing beside it, to show the scale. A working model of one of those engines would be pretty cool.
A 1:12 version would stand some 30" high!
Last edited:
Thank you everyone for your positive comments and insights.
So here's the 3d model showing the modified left front body panel that give a good view of the engine.
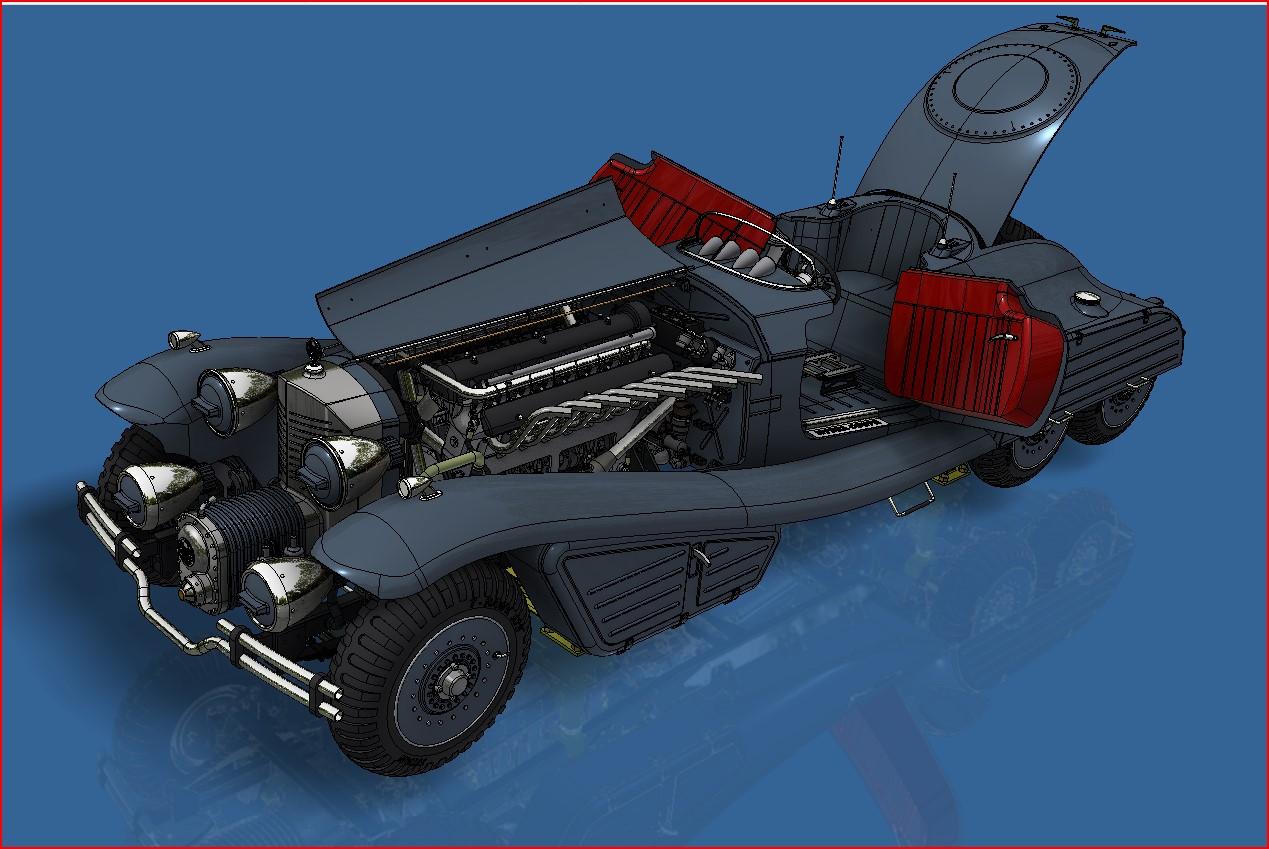
And when seen from the other side
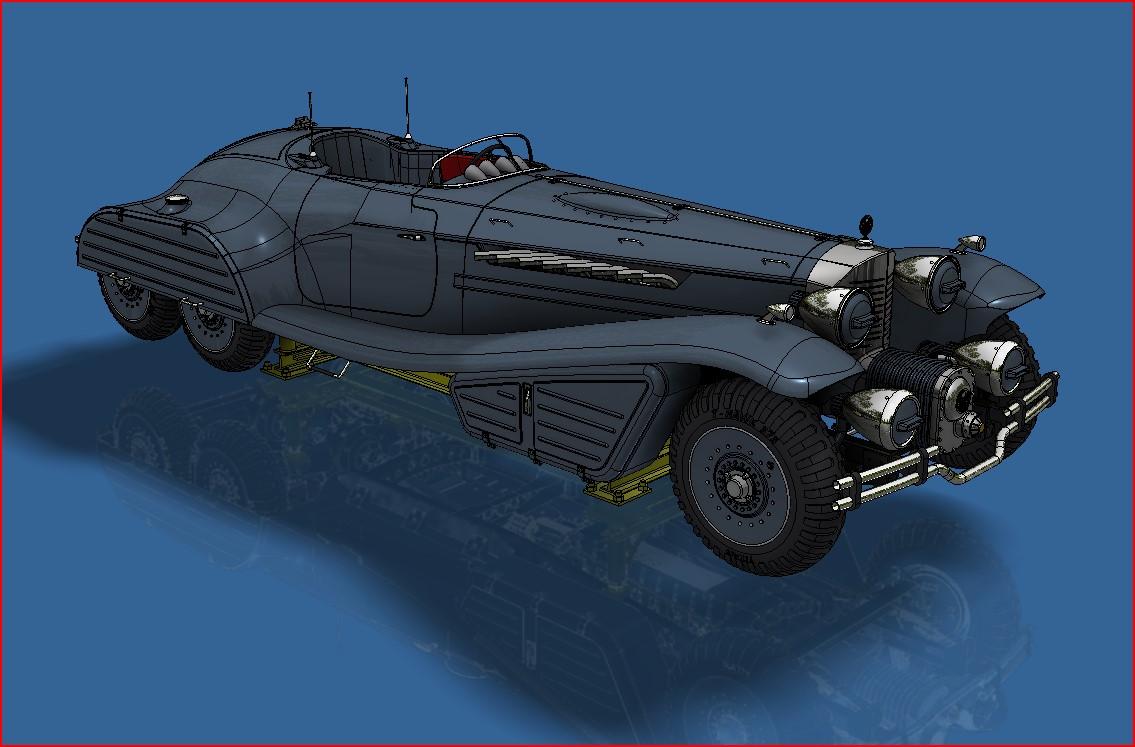
So here's the 3d model showing the modified left front body panel that give a good view of the engine.
And when seen from the other side

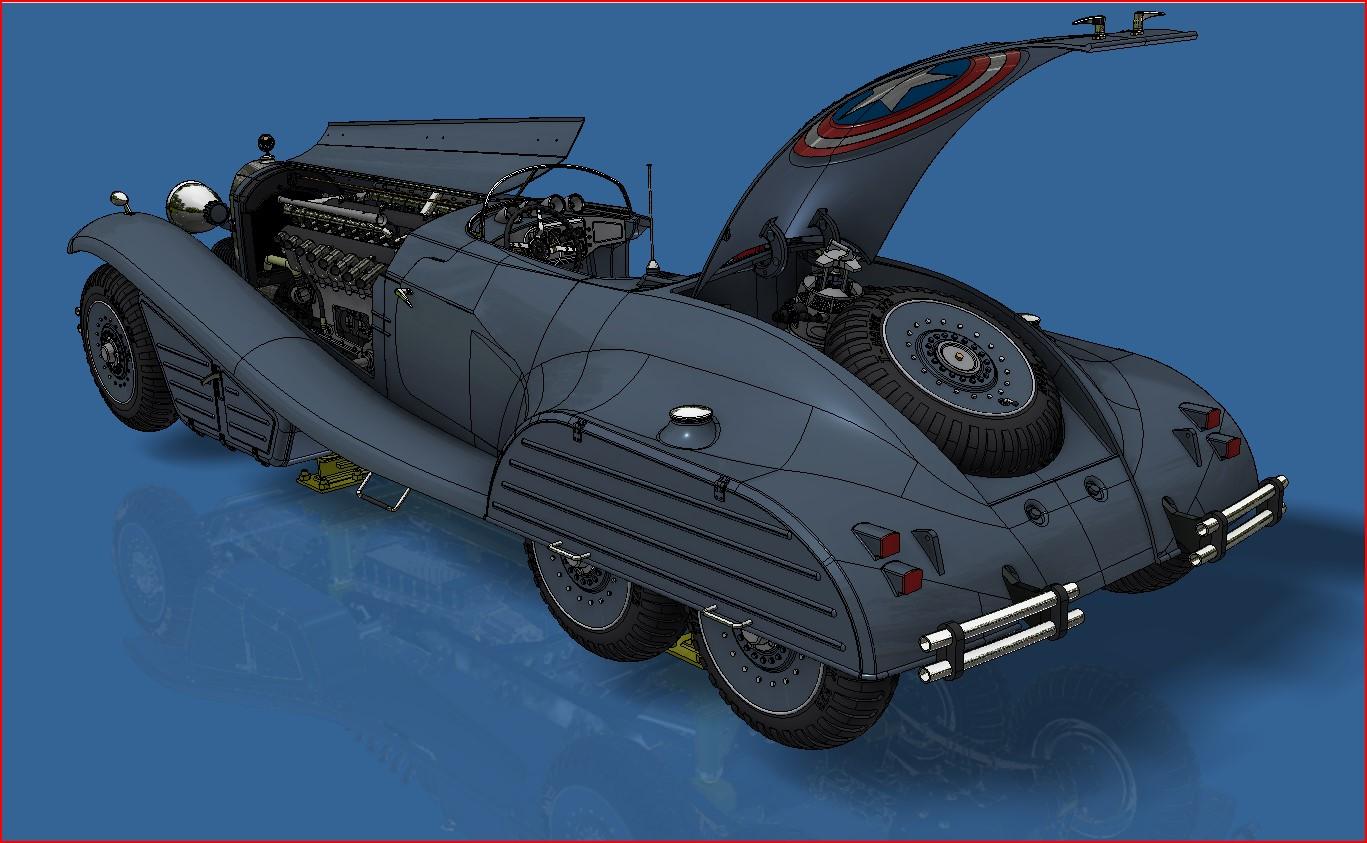
Capt America's shield hidden inside a Hydra vehicle? What kind of crazy Easter Egg is that? Shouldn't it be a Hydra logo?

I always thought that the bump on the rear bonnet kinda looks like the shield so I decided that the it would make a little cameo. After all, both Captain America and Red Skull are 'super power bros'.
Have you decided what is going to go in those storage boxes under the front fenders? Considering the size of the car, they can have four or five attack robots in there. I am not really up on the Marvel-verse, but there is probably some unholy creation that can fit in there.
Cheers,
Rick
Cheers,
Rick
Do be determined...
The body is slowly being printed. The rear end is quite big to print, even in 2 halves. My first try didn't work. But still, it's starting to look like something a vilain would drive.
First rear end half print, close but no cigar. It's as if the max printing volume the slicing program gives me is incorrect, the top of the part didn't print (circled in red). It took over 12 hrs to print and 500 ml of resin, oh well...


But still, it's getting there


For those wondering where this gadget is going

First rear end half print, close but no cigar. It's as if the max printing volume the slicing program gives me is incorrect, the top of the part didn't print (circled in red). It took over 12 hrs to print and 500 ml of resin, oh well...
But still, it's getting there
For those wondering where this gadget is going
- Joined
- Jul 18, 2024
- Messages
- 496
- Points
- 323

Printing issues aside, it is becoming a monster of a vehicle (in a positive sense).
Since the bentley and this car are both 1/12, I barrowed the seats from the Bentley to see how they fit in the cockpit. The size is pretty good, but the Bentley's seat are small to begin with. I'll widen them a bit and it shoul be ok.


The Bentley's tub next to the Hydra's just for fun

The Bentley's tub next to the Hydra's just for fun
All major body components are printed. I had another issue with a rear body half ( problem with the U shaped cutout for the bumper) but this time I was able to repair it. I printed a patch and replaced the section. Still needs a bit of putty but it should be ok. Also printed a test door, the outter sheet is too thin. I'll have to thicken it a bit. I decided to print the outter sheet and inner panel as a unit. Once painted, I'll be able to apply the leather. Speaking of leather, I found a piece of nice thin brown leather that should look pretty good (thanks Rick).
Rear end repair

And once repaired

Test door


Door hinge insert

And so far


The brown leather

Rear end repair
And once repaired
Test door
Door hinge insert
And so far
The brown leather
I ordered a roll of that amazing tape I discovered. I used a bit on the start of the seats for the Bugatti, and it's really good. You'll have to try it. It's called Speedtape and it's available in Canada from Grainger. You can look it up on their website as FILM TAPE, DOUBLE-SIDED, TRANSPARENT, 1 IN X 16 ¾ YD, 5.5 MIL THICK, ACRYLIC, INDOOR.that should look pretty good (thanks Rick).
Cheers,
Rick
Thanks for the info Rick, I'll look it up.
I reprinted the doors with thicker outter panel and it is now perfect. I also beefed up the hinges a bit. I did a preliminary test fitting of the door on the rear body and it looks like it will work.


View attachment 20250424_203951.mp4
I reprinted the doors with thicker outter panel and it is now perfect. I also beefed up the hinges a bit. I did a preliminary test fitting of the door on the rear body and it looks like it will work.
View attachment 20250424_203951.mp4
I printed the hood today, really not a success. At .030", they are way too thin. I reprinted with a .050" thickness and with stiffener ribs. I think it should help.


But at least, the pivot works

But at least, the pivot works
Second try is much better but there's a hole in one of the parts and I have no idea how it got there. I think I'll add another. 010" to the thickness.


Meteor strike, obviouslySecond try is much better but there's a hole in one of the parts and I have no idea how it got there. I think I'll add another. 010" to the thickness.
I find it really interesting to see how many times you redesign and reprint something. This goes to all those millions of parts out there that one can buy and download for next to nothing. I have always said that the design is the thing, and all this work really proves the point. It is no wonder that sites like Shapeways eventually fail; 99% of what they sell just isn't good enough, even at a price of $0. Even if Shapeways is resurrected in some form or other, sites like that, and dozens of others, really need to have a system where designs are checked, double-checked, and tested, before they are allowed to be sold to the public. I honestly wish I had the time to design such a site. Perhaps when I "retire", whatever that means.
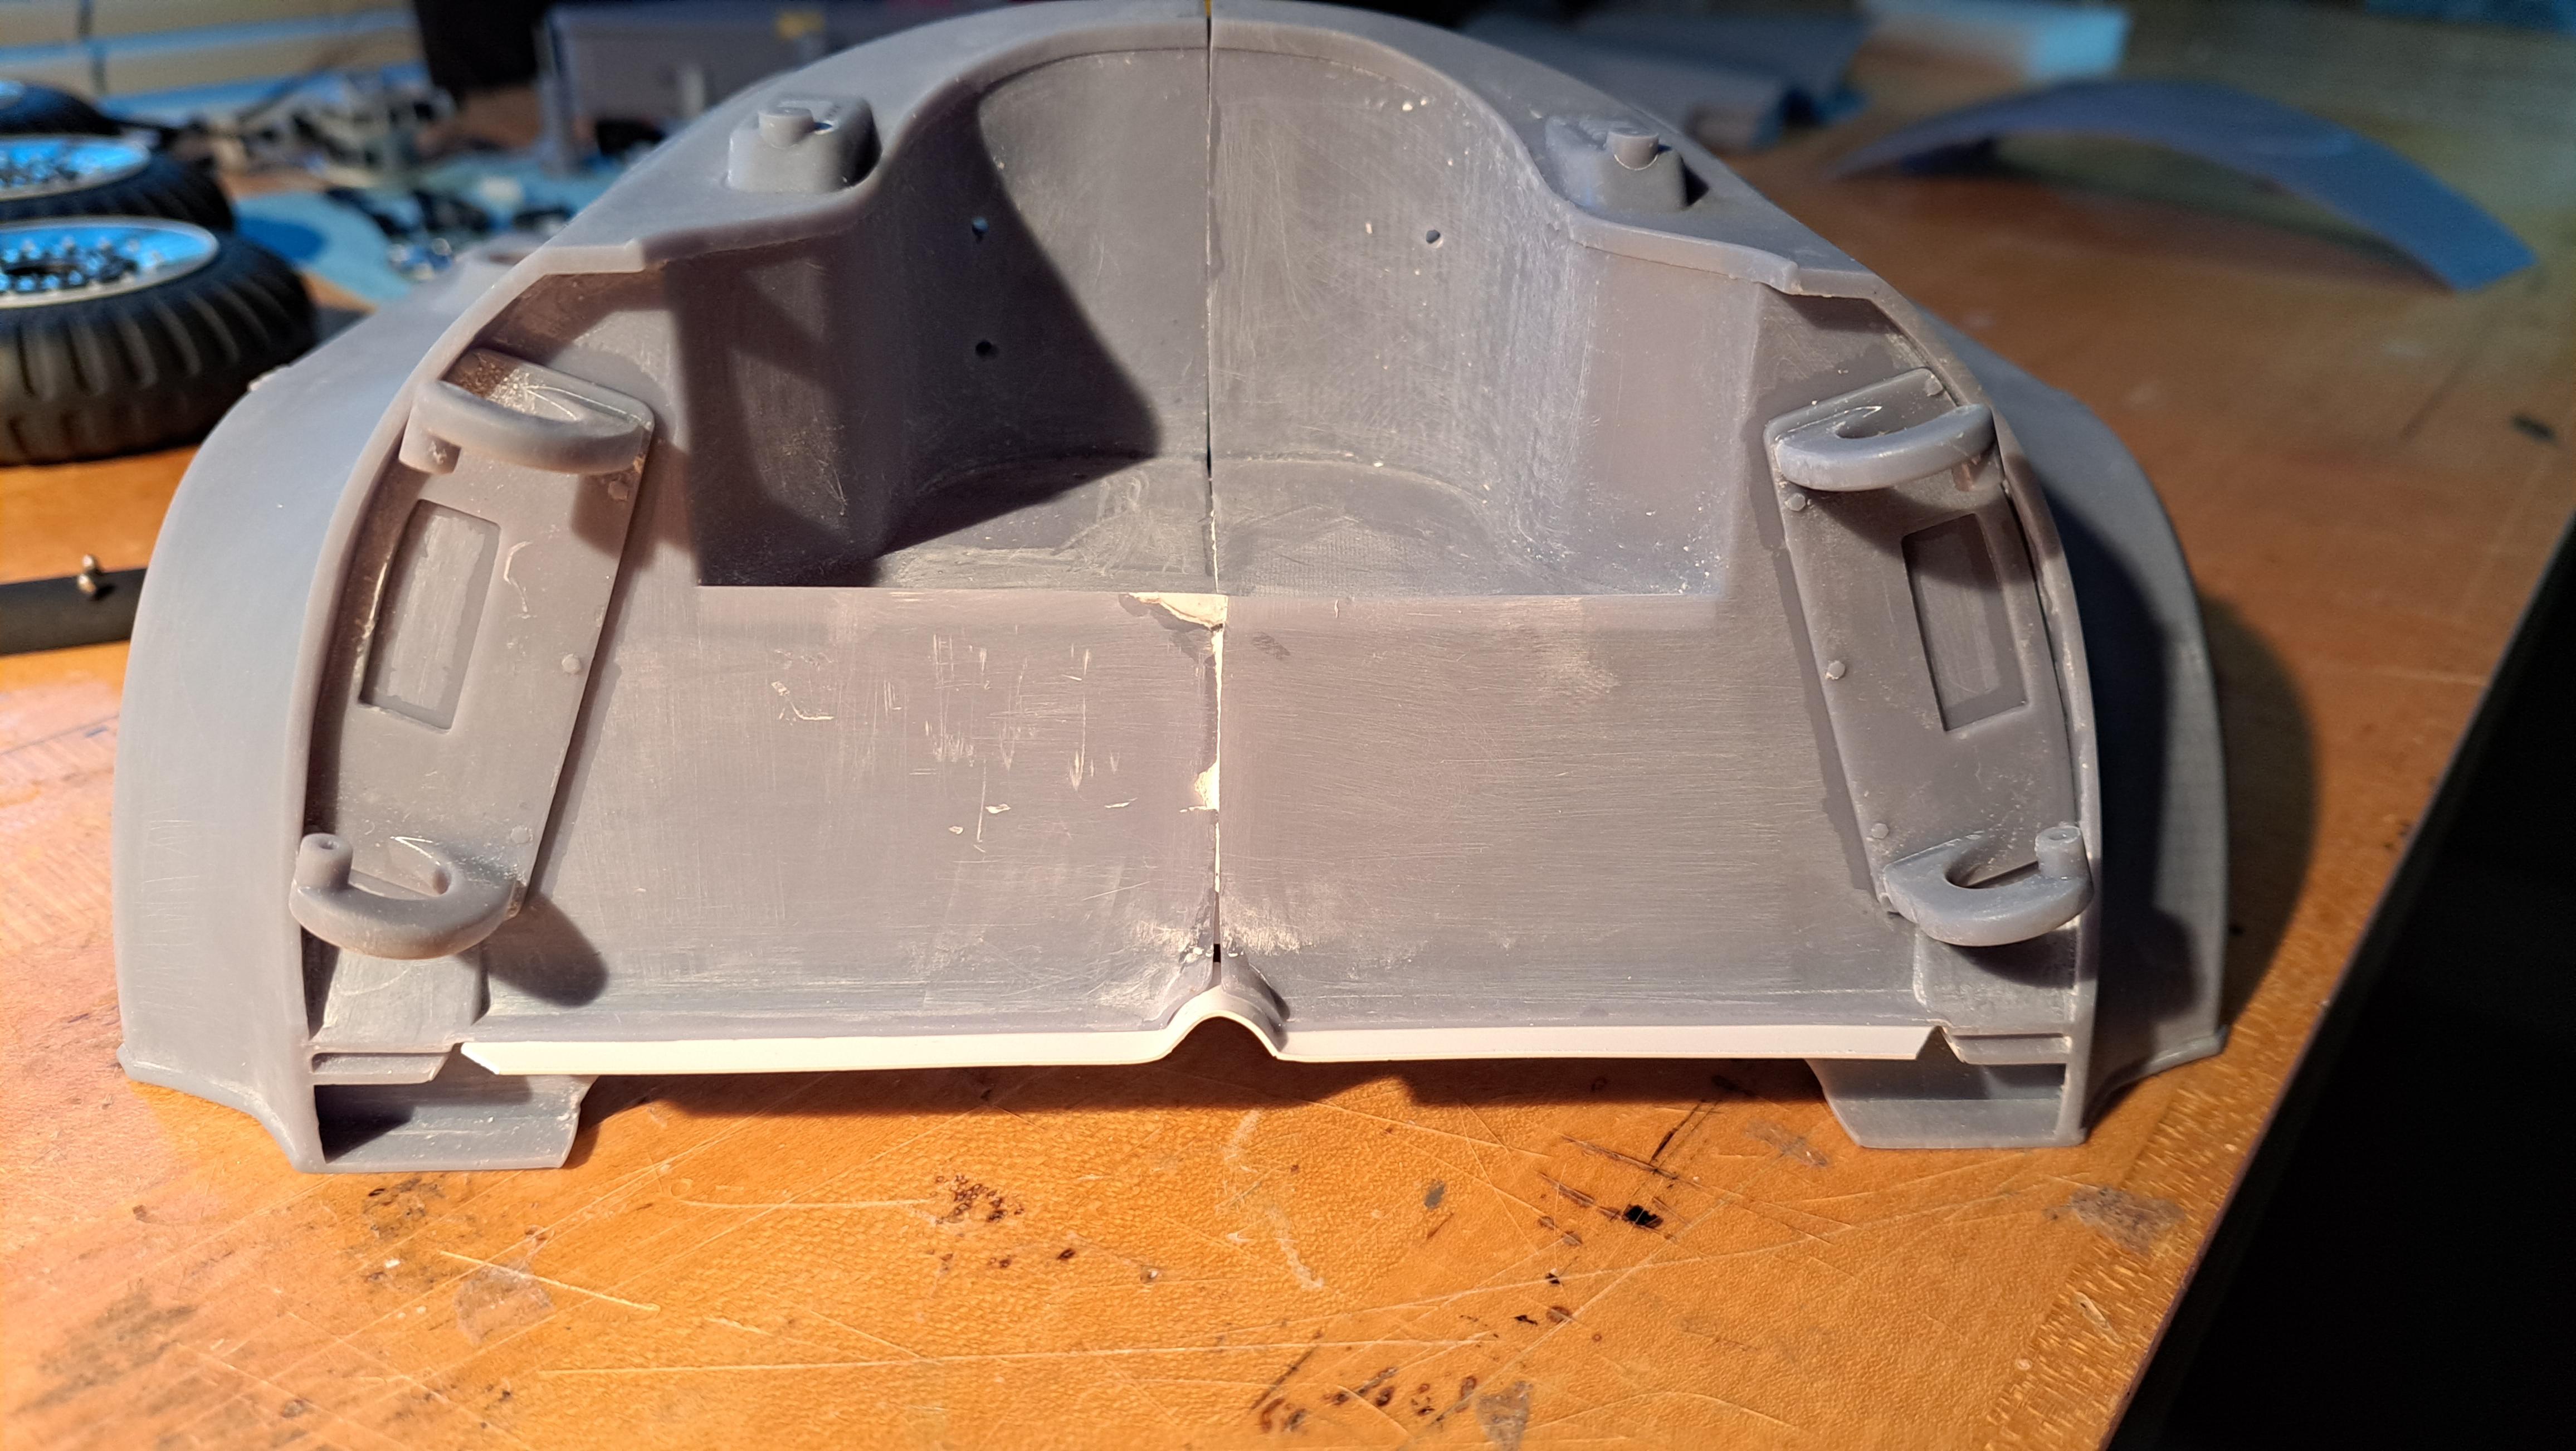
It's update time. I started gluing up tge body together. First is the rear two halves. I installed some fish plates to better align the two halves and to get more gluing surface. It came out good, is rock solid and very well aligned. I'll need to do a bit of epoxy putty on the seams and gaps but I think it should look pretty good. Both door hinges are glued in and I even added some rivets to the only fish plate that will be visible (with the trunk lid opened). I also printed the trunk lid but it's not to my liking, I added some longitudinal stiffeners to the new one that should help to better maintain the shape. But even with it not being perfect, it still looks good.
Two halves glued together with white styrene fish plates in place

Riveted fish plate

Hinges installed
Test fitting of the bleu cube thingy which fits as planned

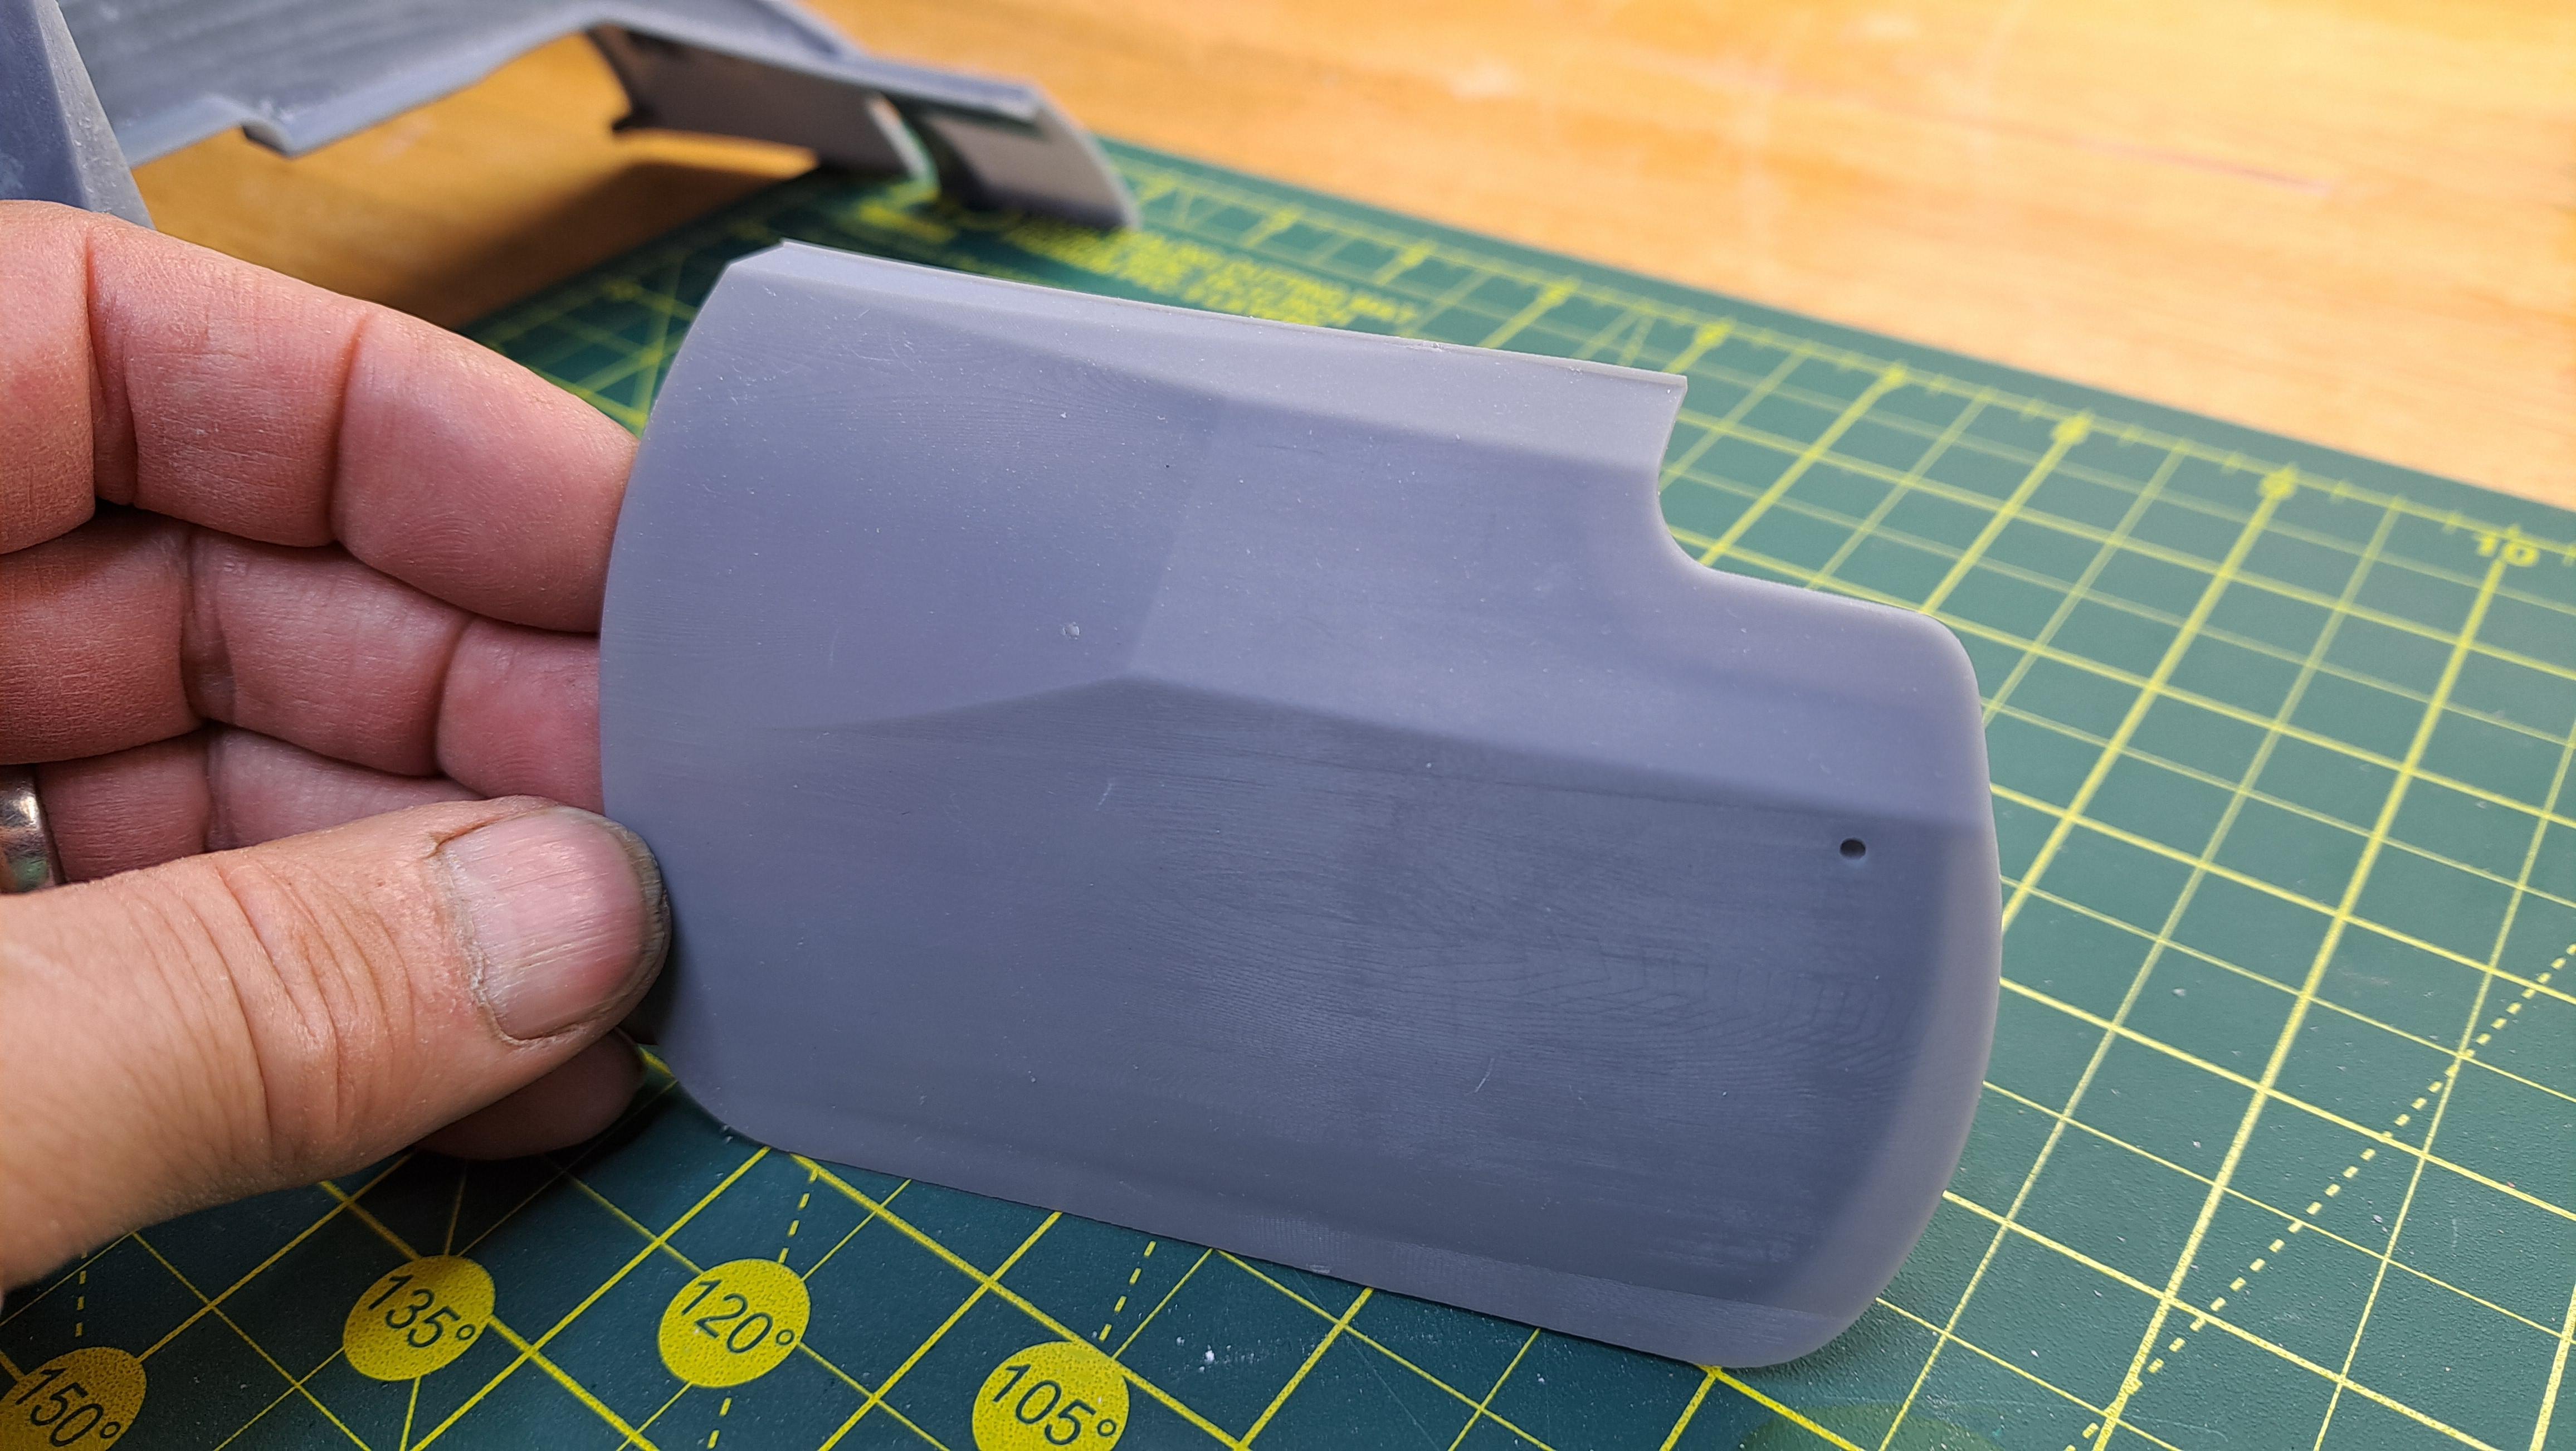
test fitting of not perfect trunk lid
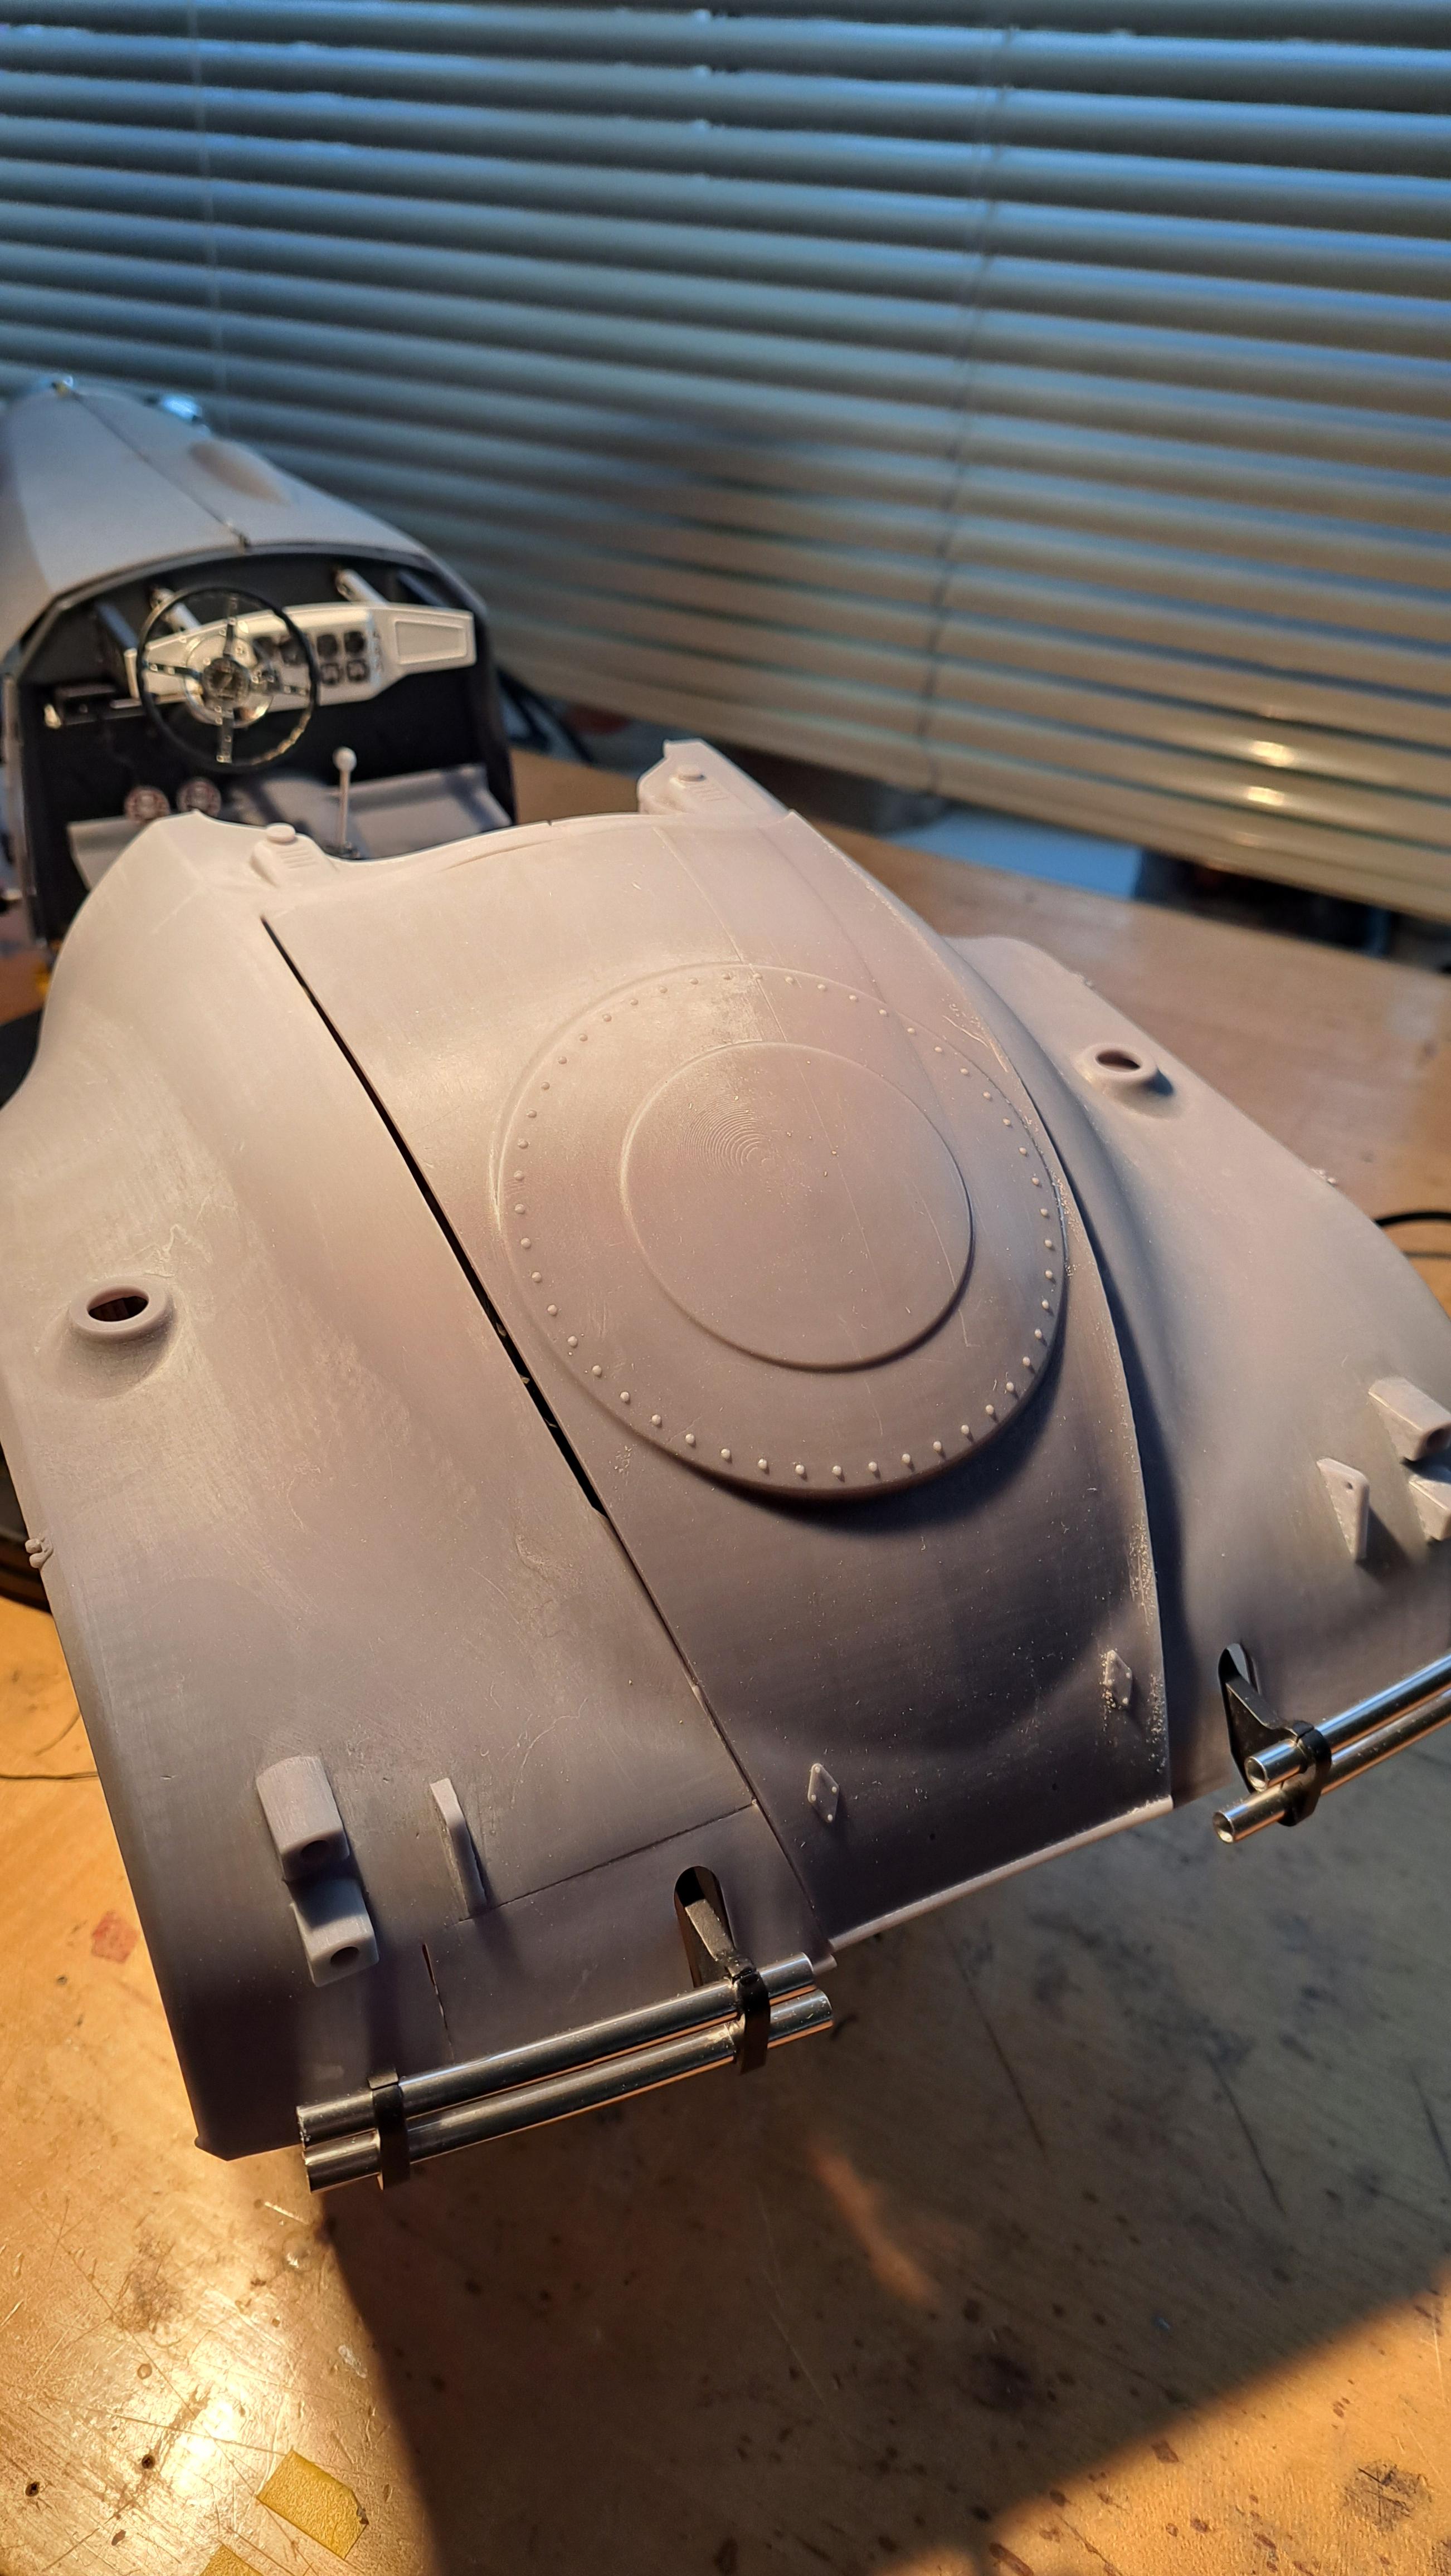

captain america's shield cameo

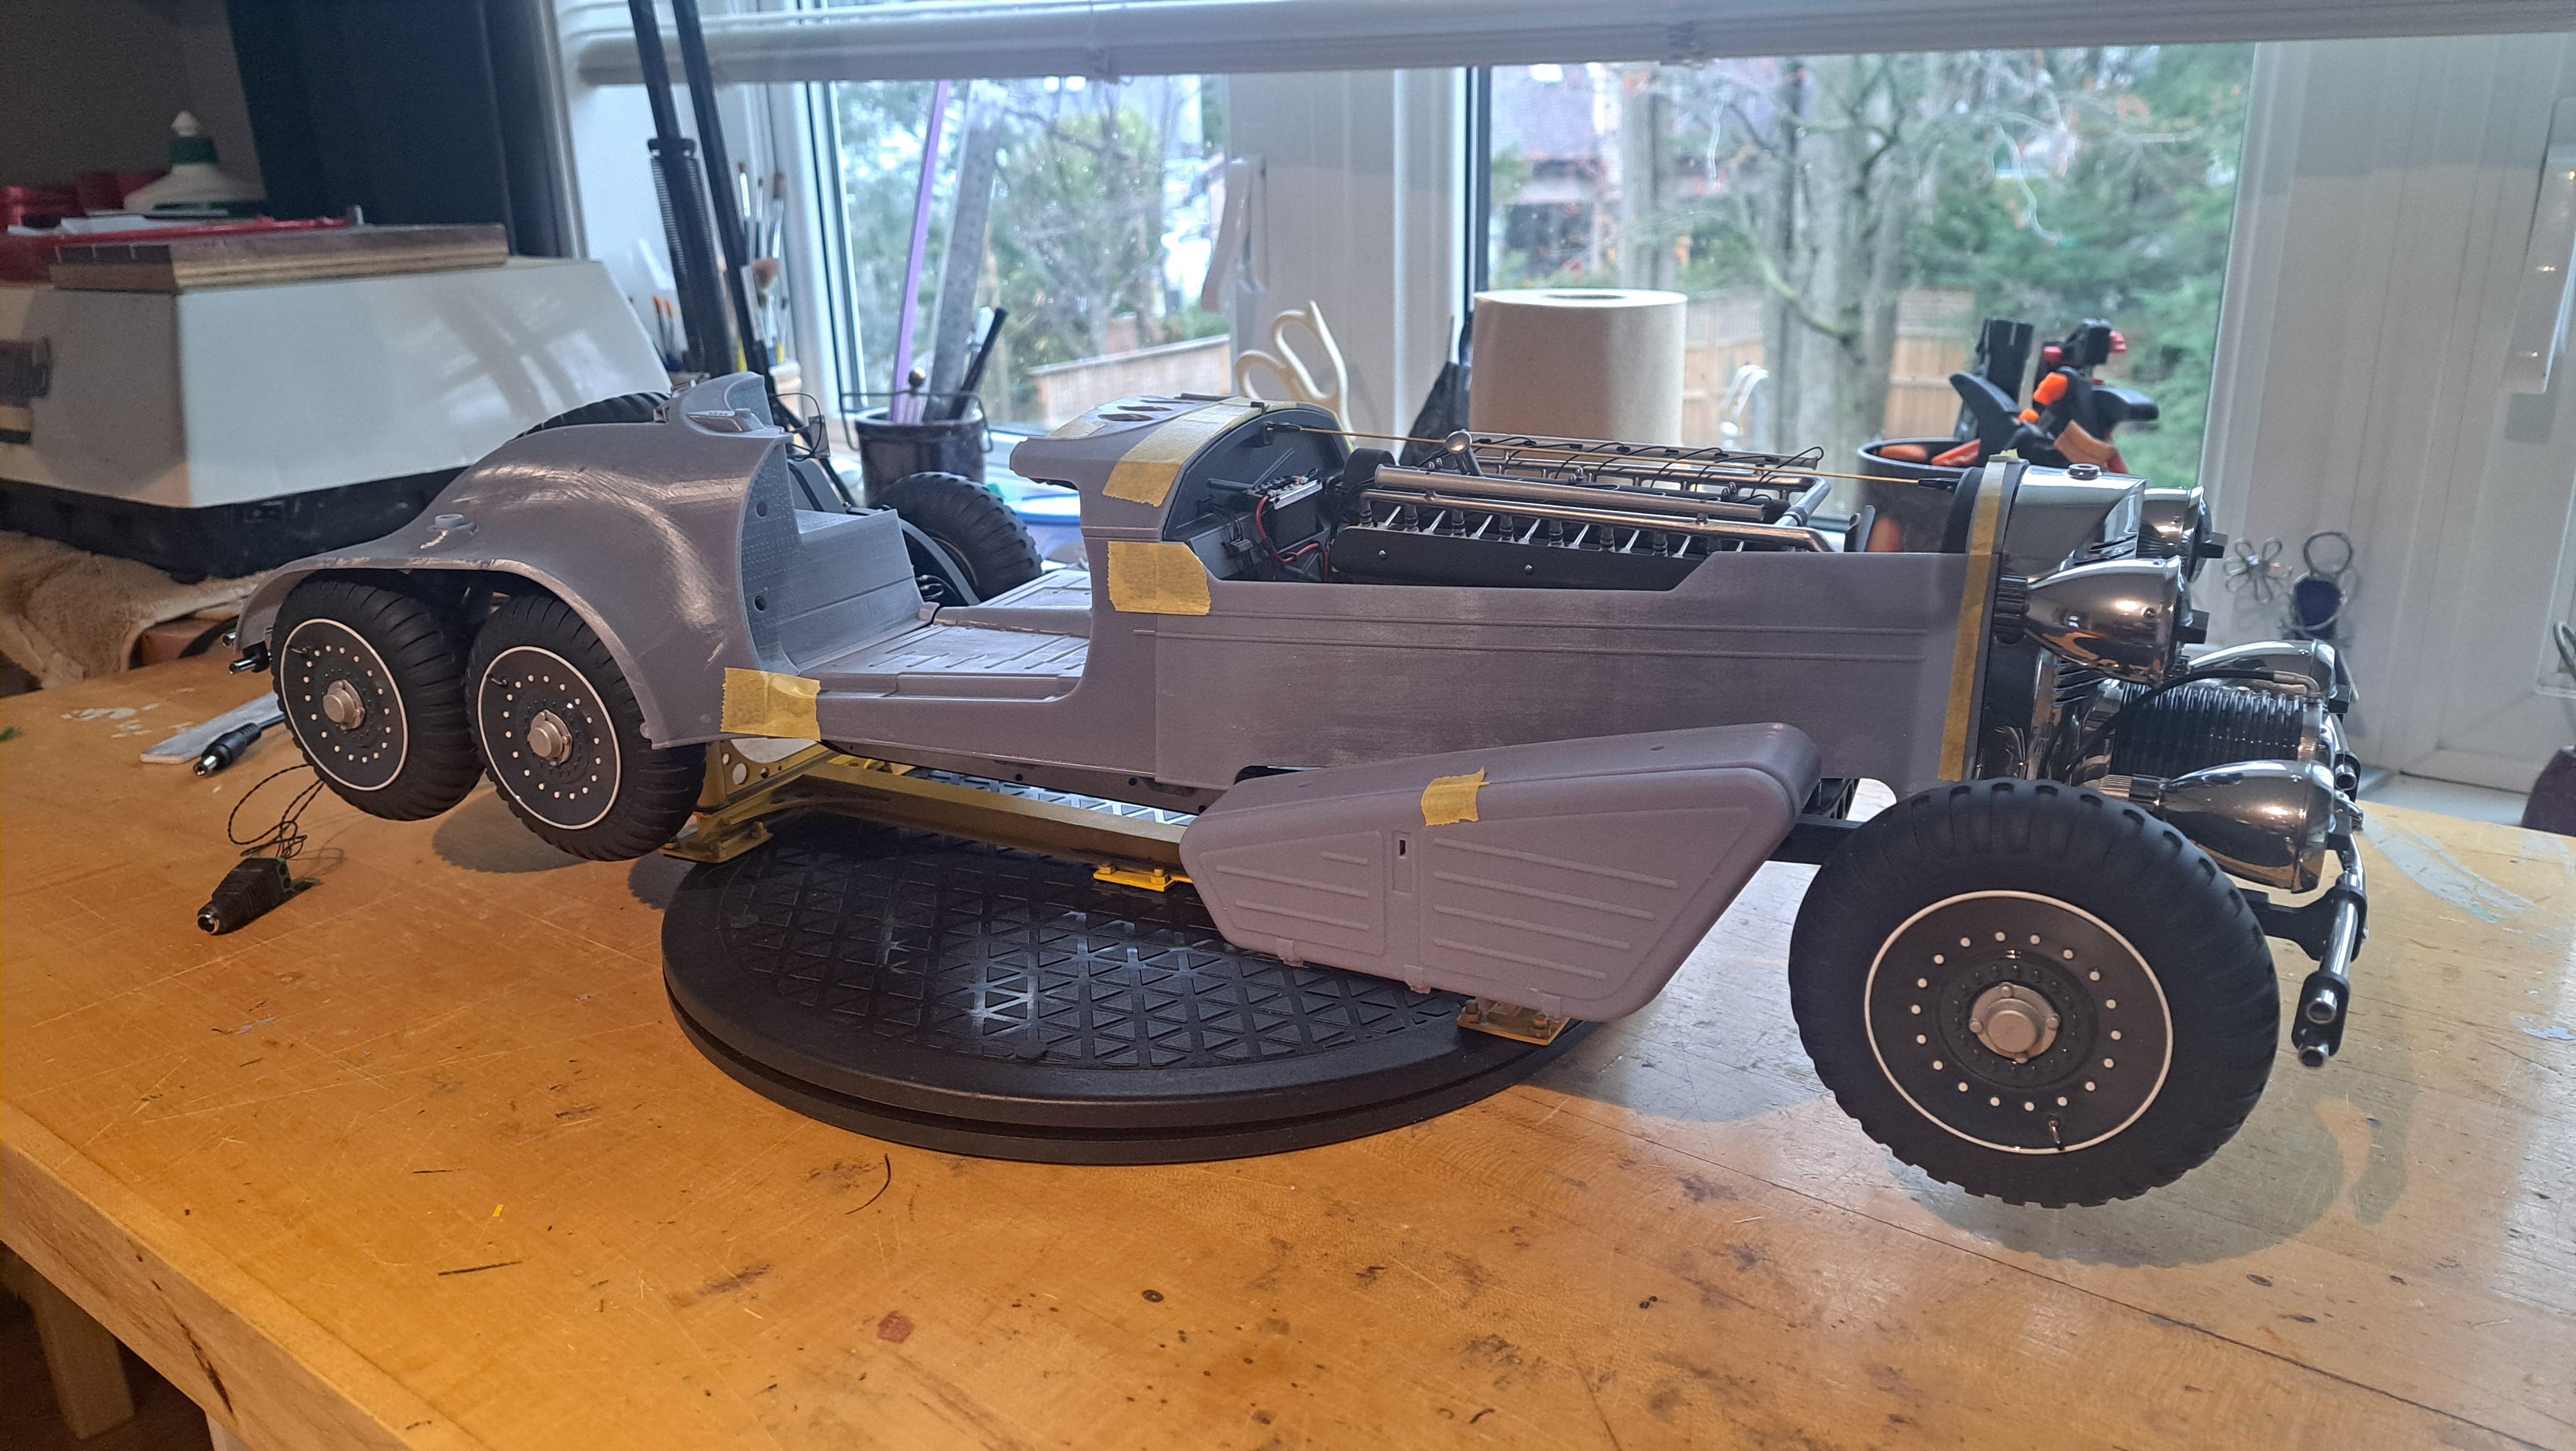
And a few general pictures


Two halves glued together with white styrene fish plates in place
Riveted fish plate
Hinges installed
Test fitting of the bleu cube thingy which fits as planned
test fitting of not perfect trunk lid
captain america's shield cameo
And a few general pictures