Magnifique travail, bravo. Les portes et fenêtres font elles partie du kit d origine? Je fais en ce moment un kit de chez Aedes Ars mais les portes et volets sont très rudimentaires; c est dommage cela gâche un peu. Comment fais tu pour vieillir la pierre?
Beautiful work, well done. Are the doors and windows part of the original kit? I'm currently making a kit from Aedes Ars but the doors and shutters are very rudimentary; it's a shame that it spoils a bit. How do you age the stone?
Merci !
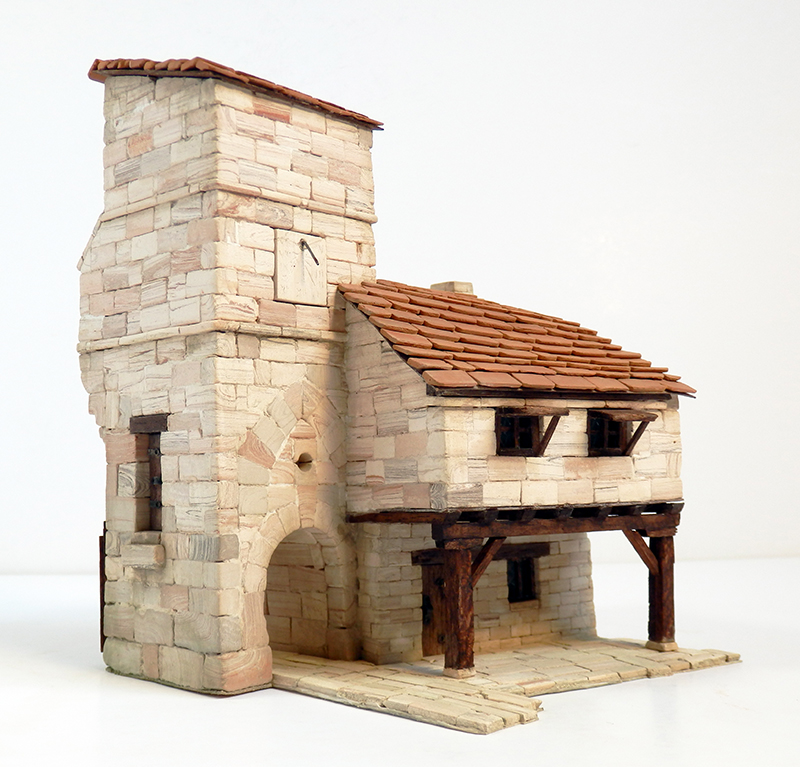
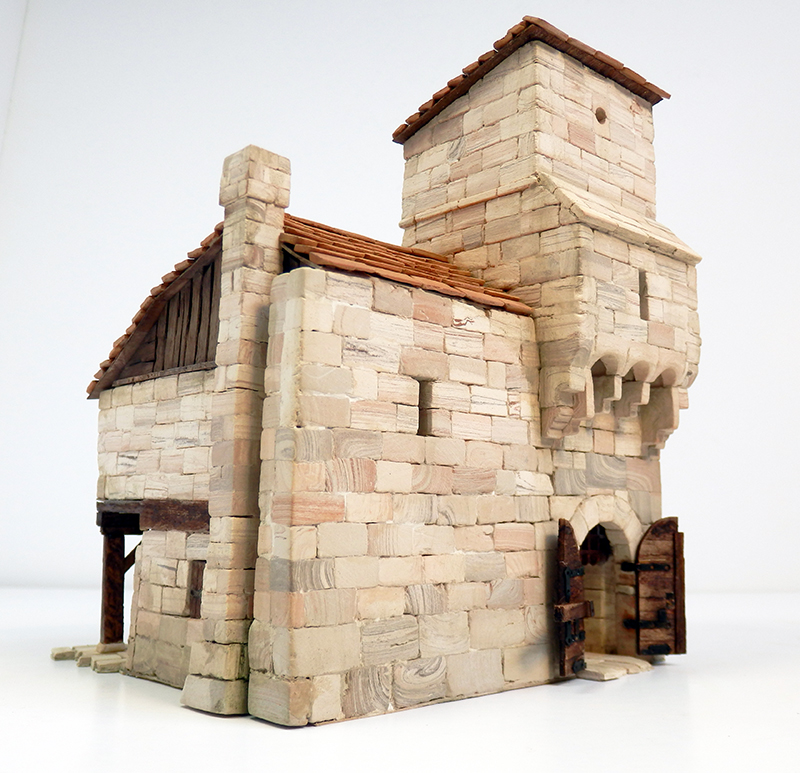
Je suis déjà très loin du kit d'il y a 20 ans...
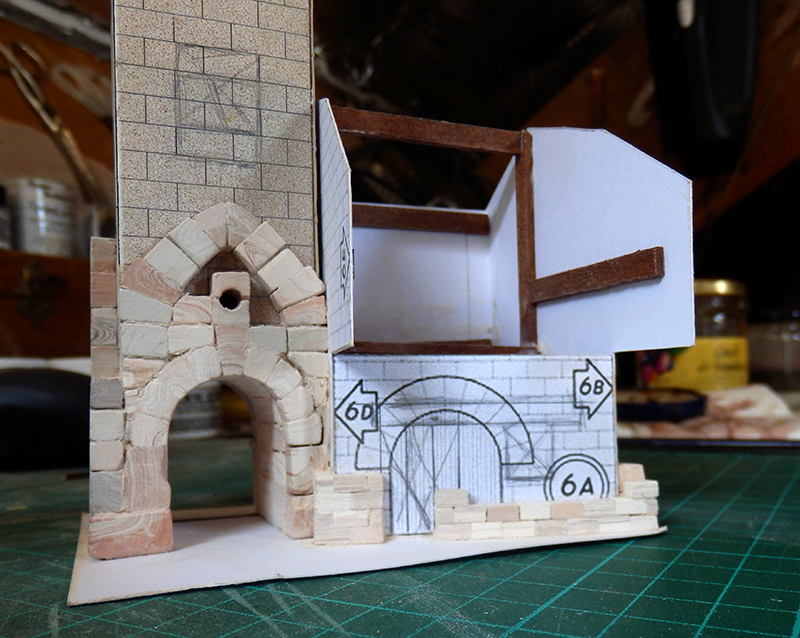
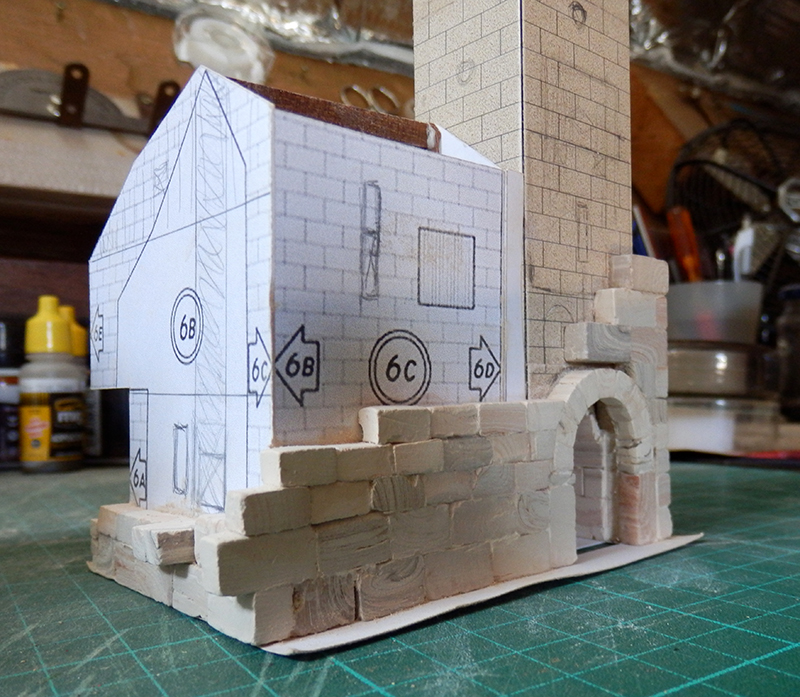
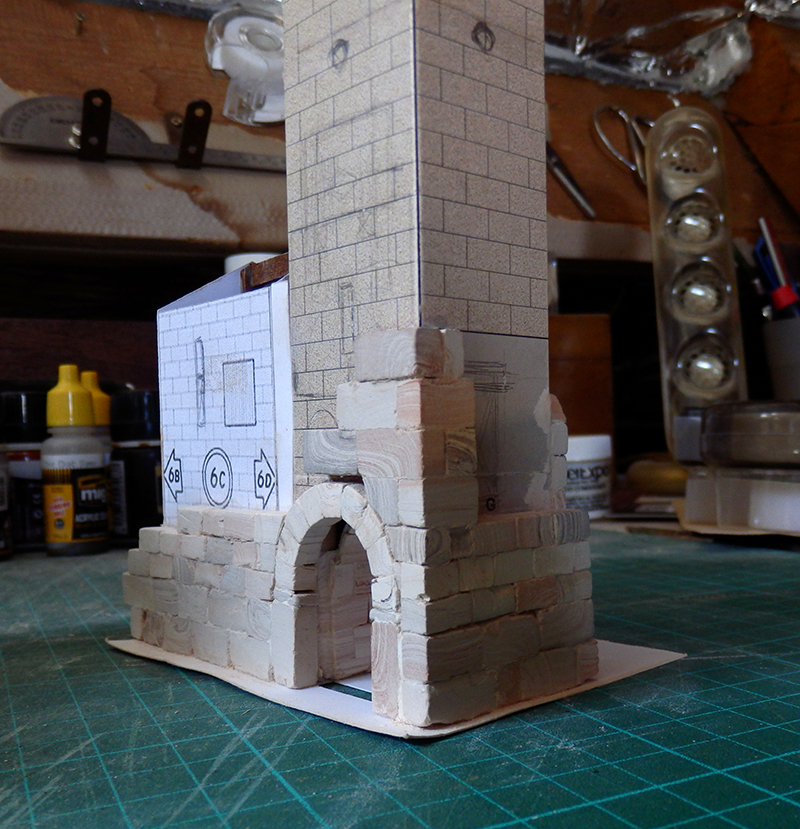
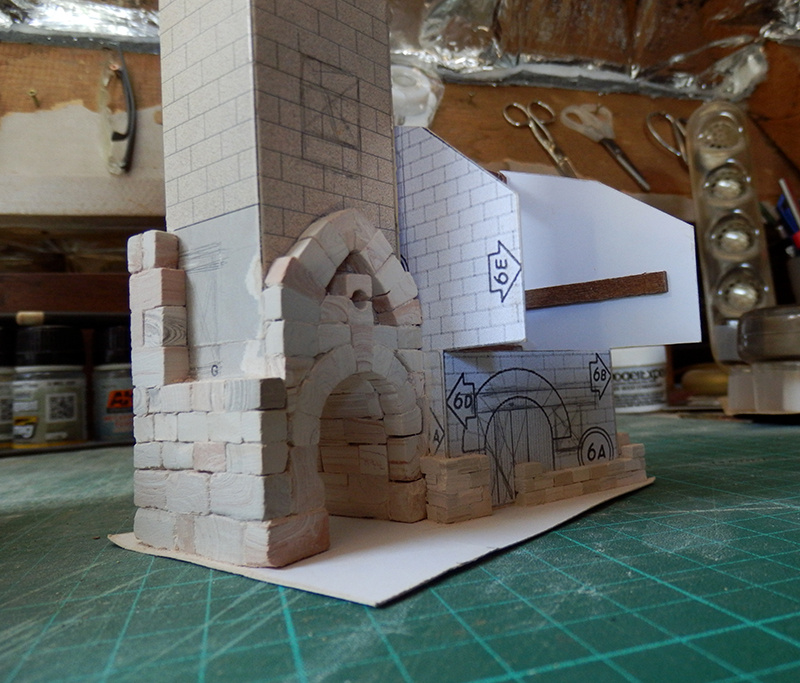
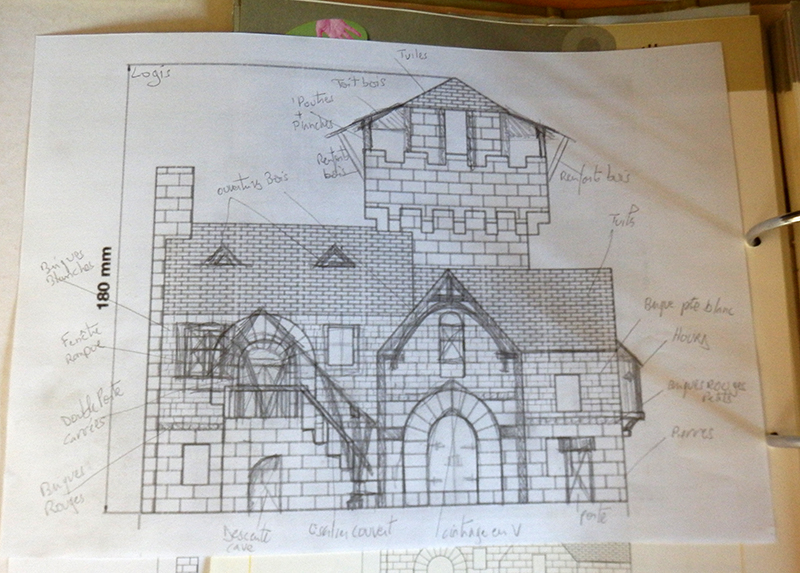
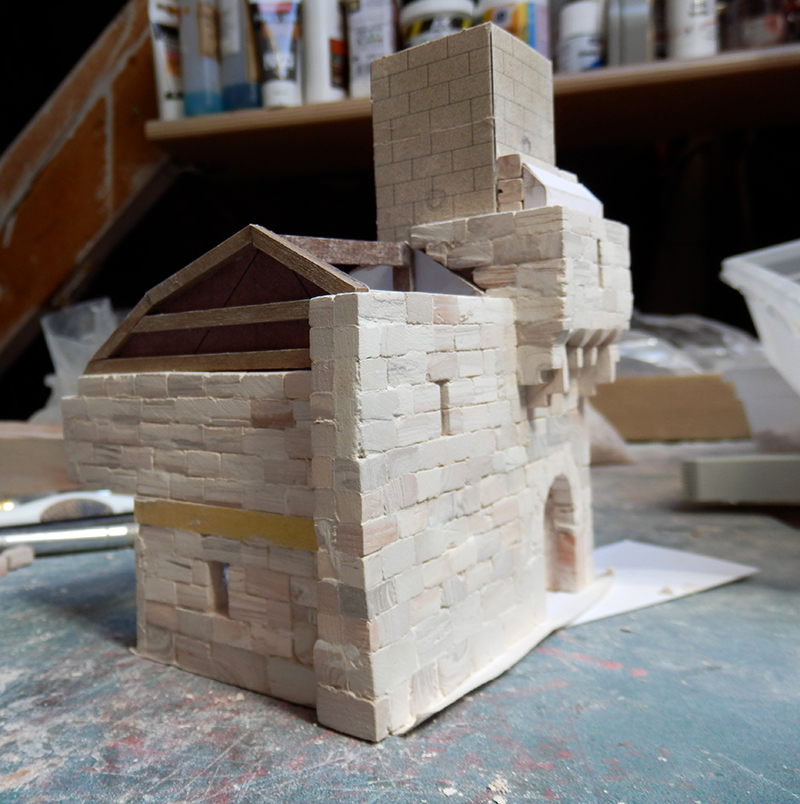
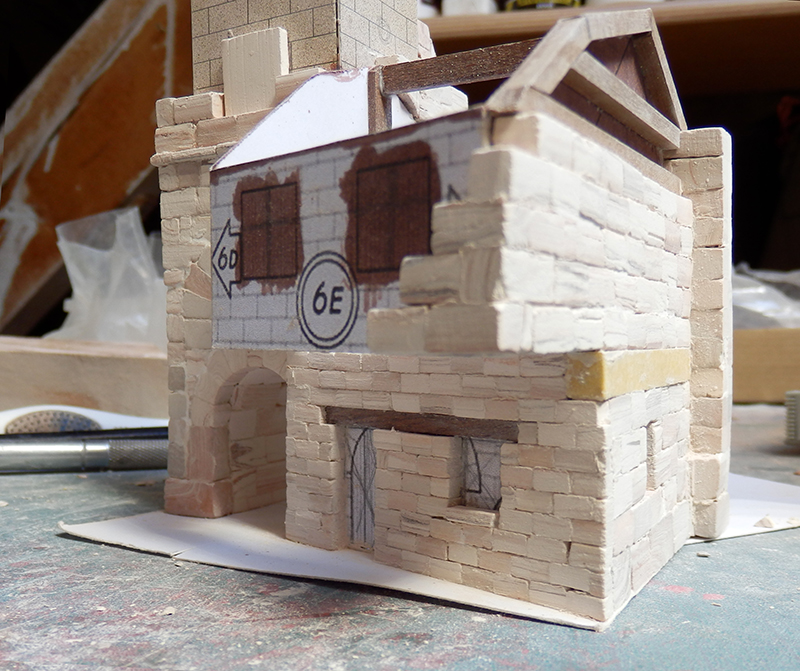
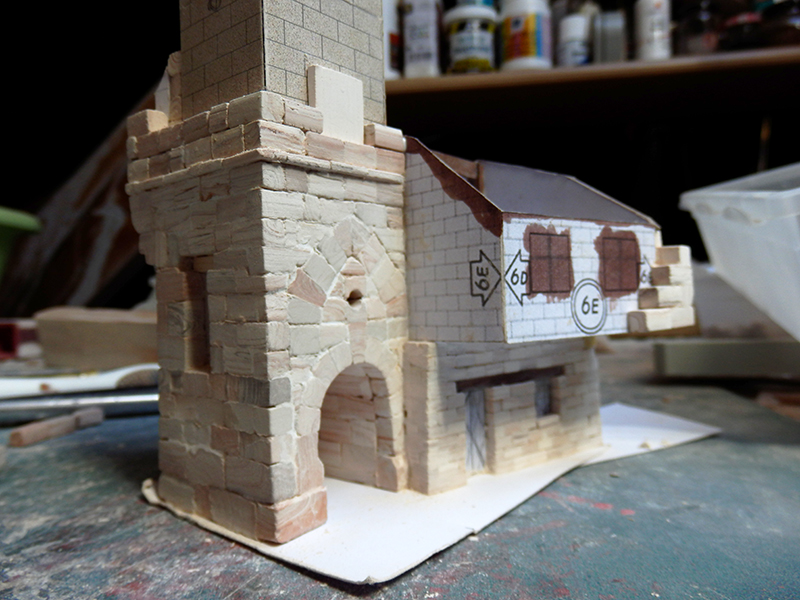
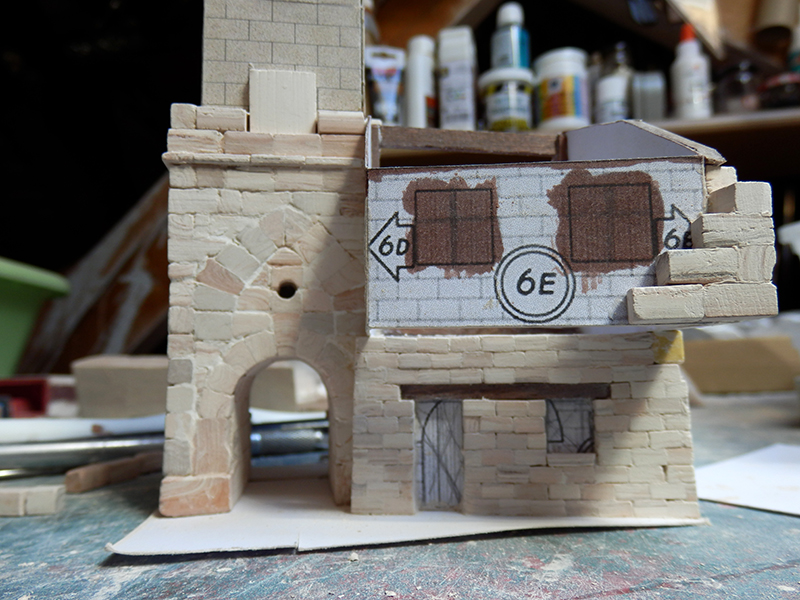
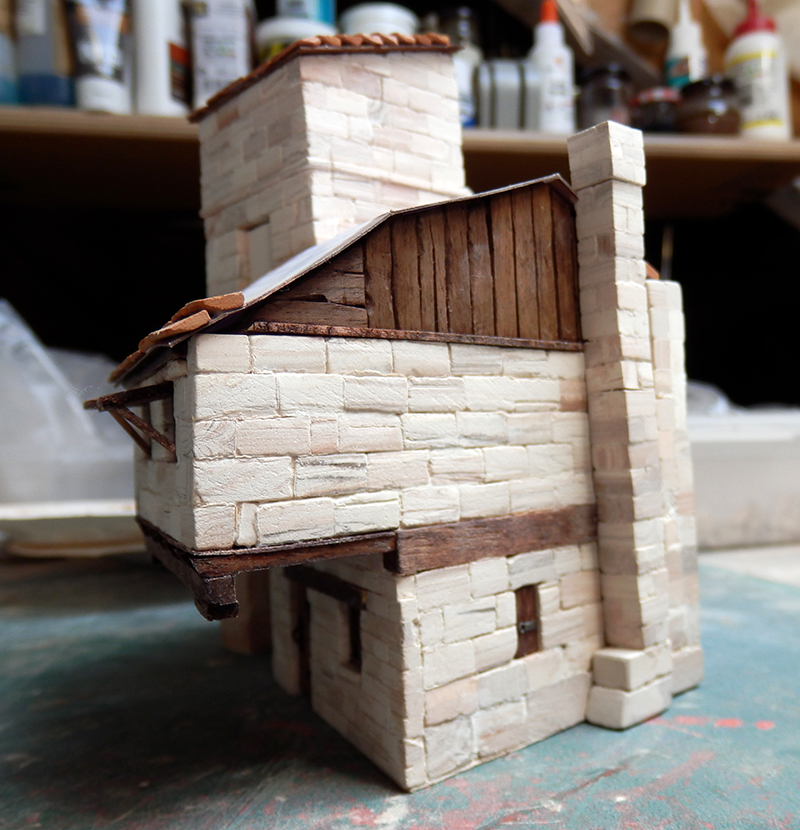
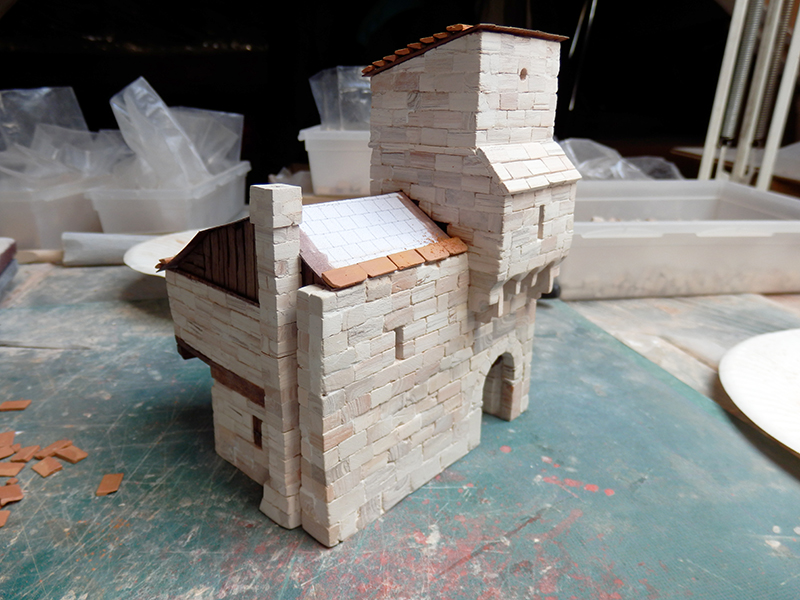
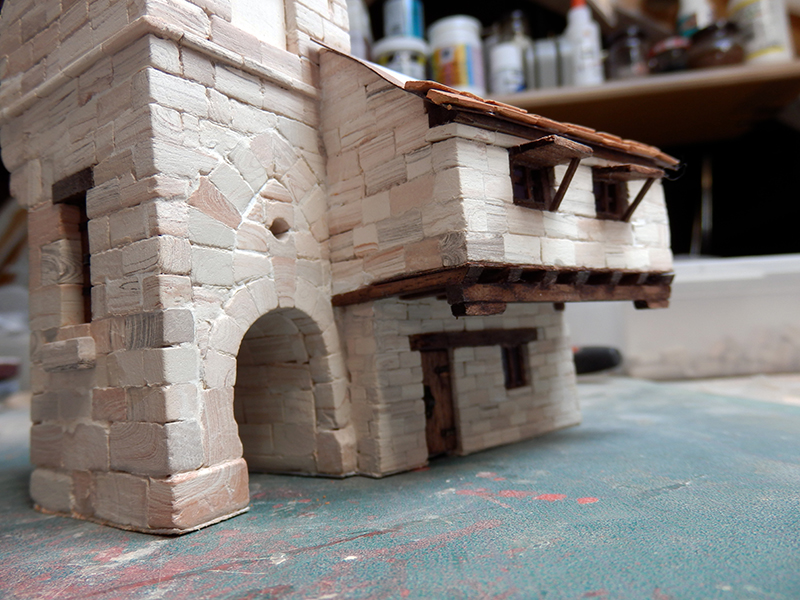
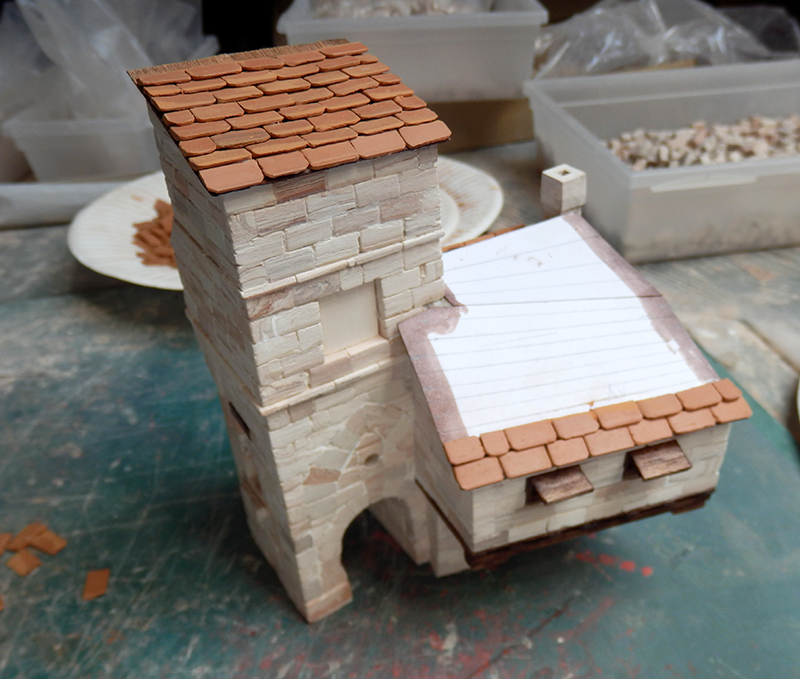
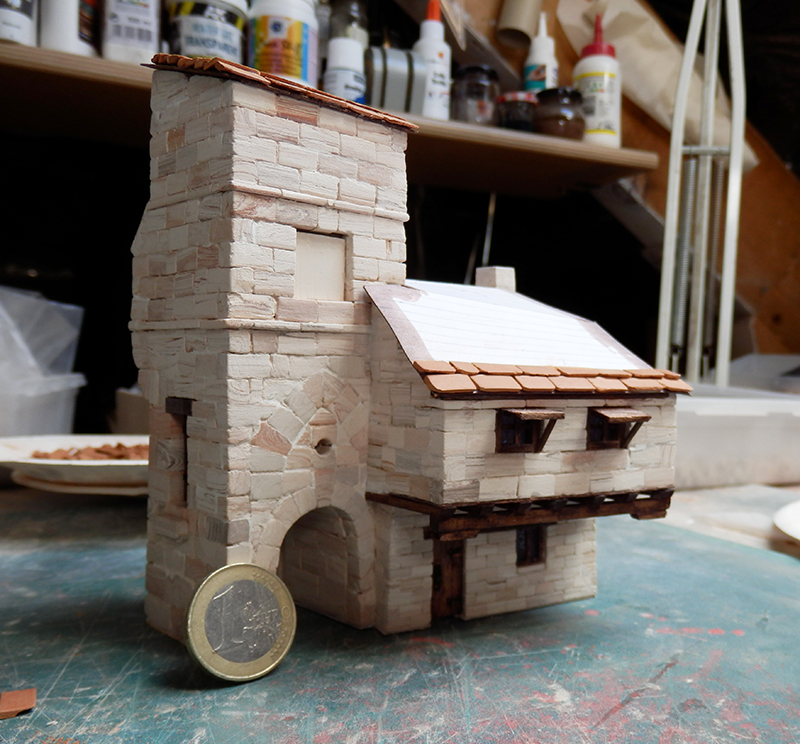
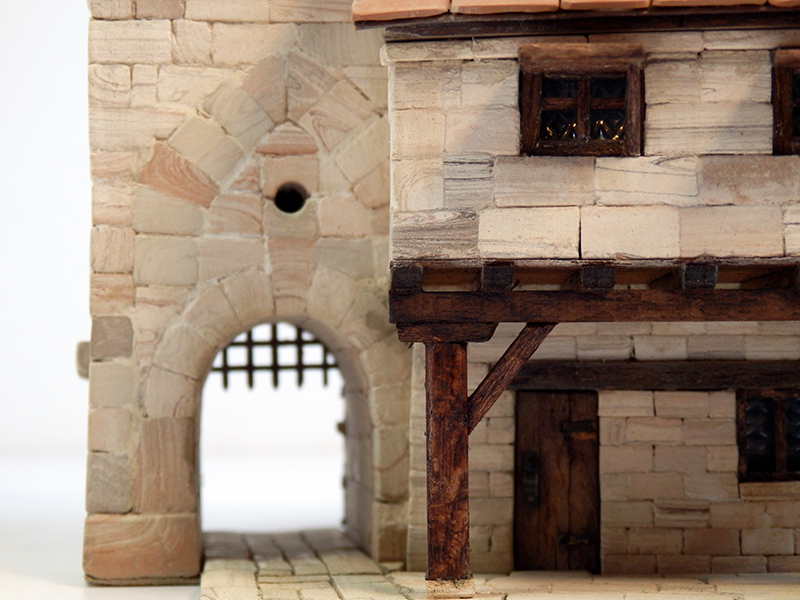
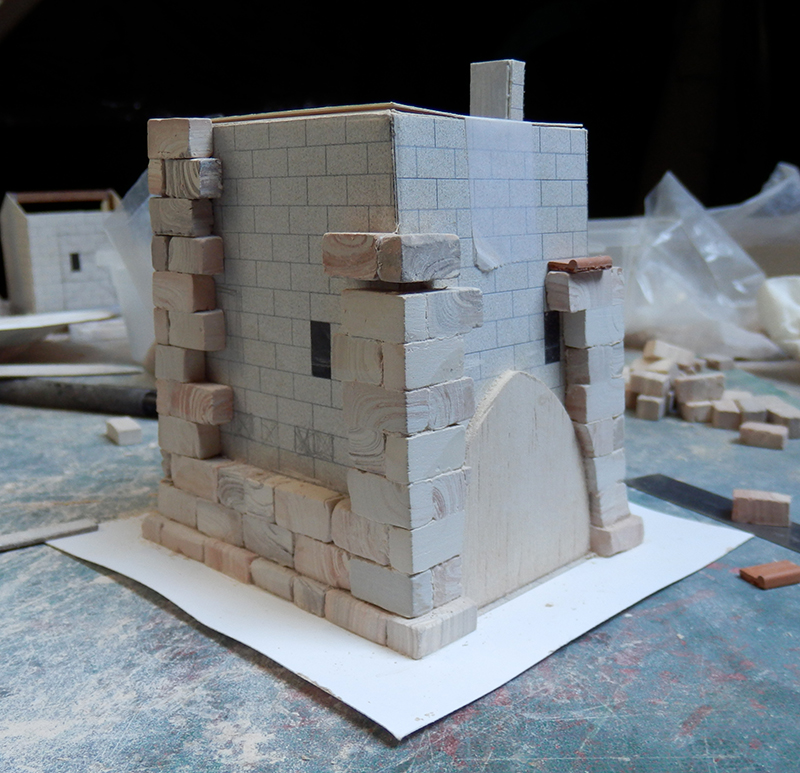
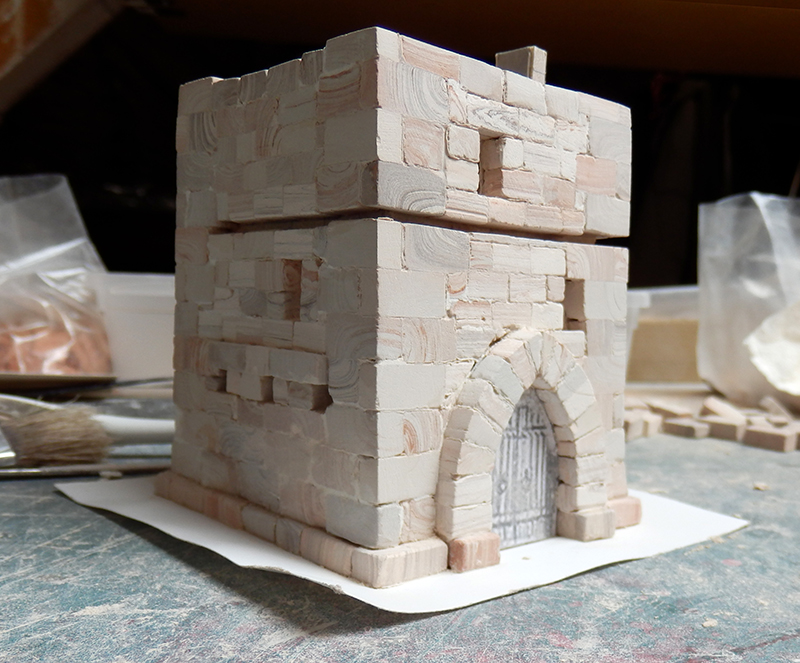
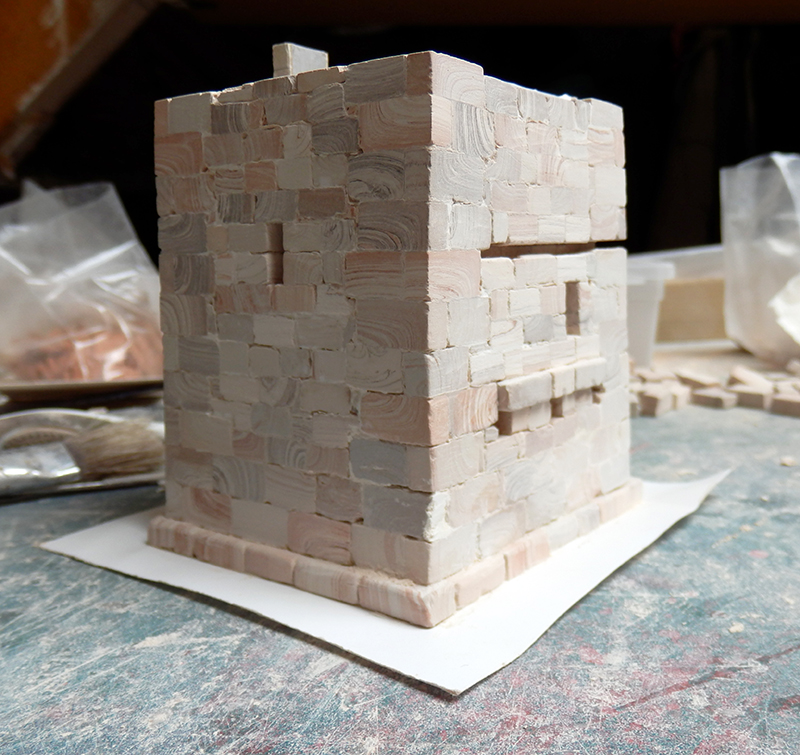
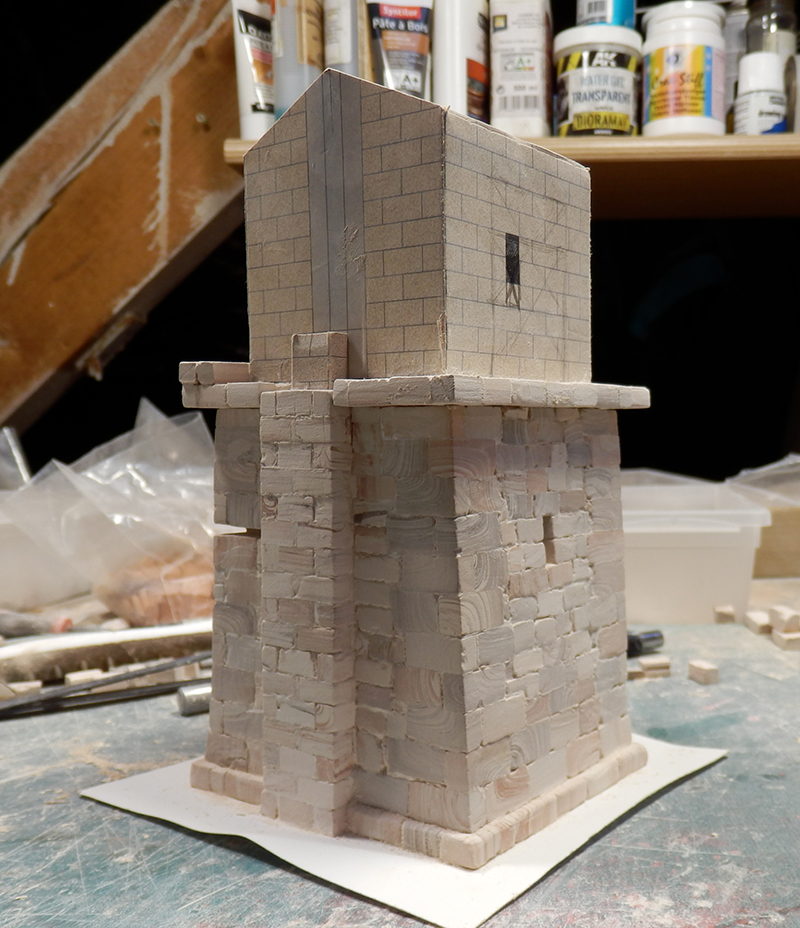
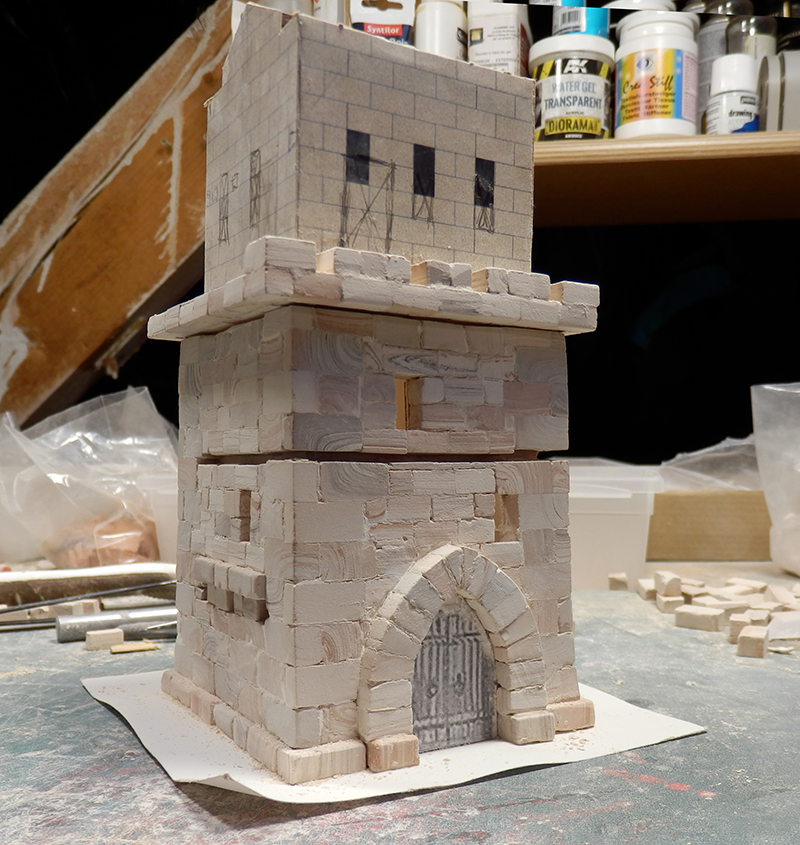
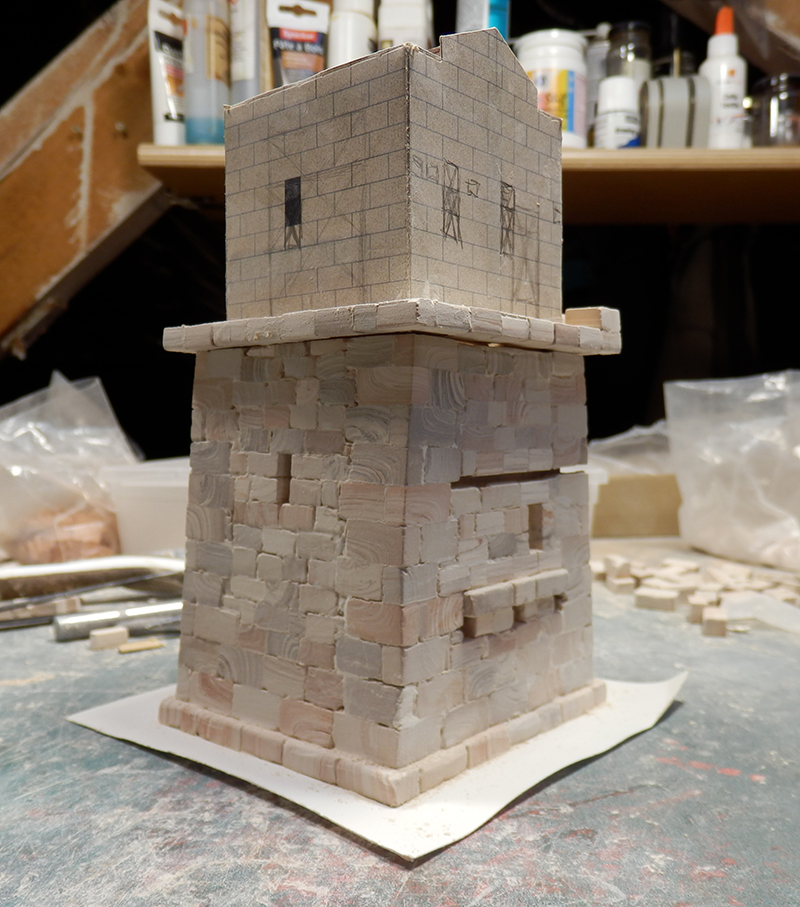
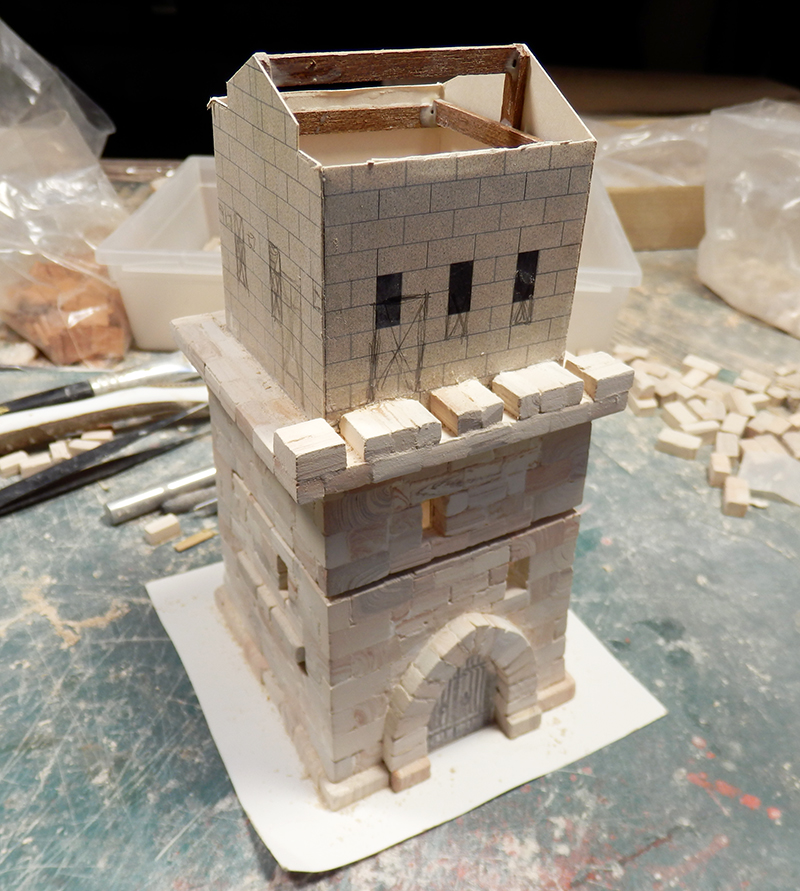
Chaque construction a été faite en grande partie en scratch personnel ! Je ne respecte ni les bases en carton que je modifie, ni le plan général du village de l'éditeur (trop simpliste et incohérent pour une bastide du 14è). Les matériaux sont en partie enrichis par d'autres achetés en plus (briques, colonnes, reliefs de façades, boiseries, etc...), certains bâtiments n'existent tout simplement pas dans le plan de base (le cloître complet, le colombier, la porte ouest avec ses mâchicoulis, toutes les maisons de rue).
Je crée la base carton à partir de morceaux de photos de plans de maison posté sur un forum par exemple ! Pour le colombier du cloître, un carton bristol blanc et la création complète de la structure.
Et je n'ai pas fini dans la création... Mais toujours avec le respect des constructions d'époque. 
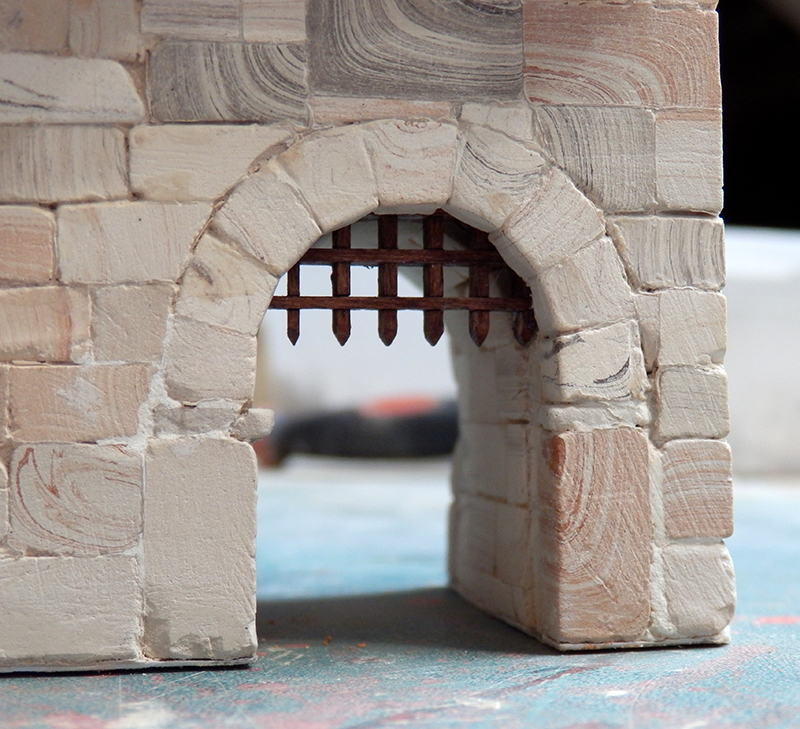
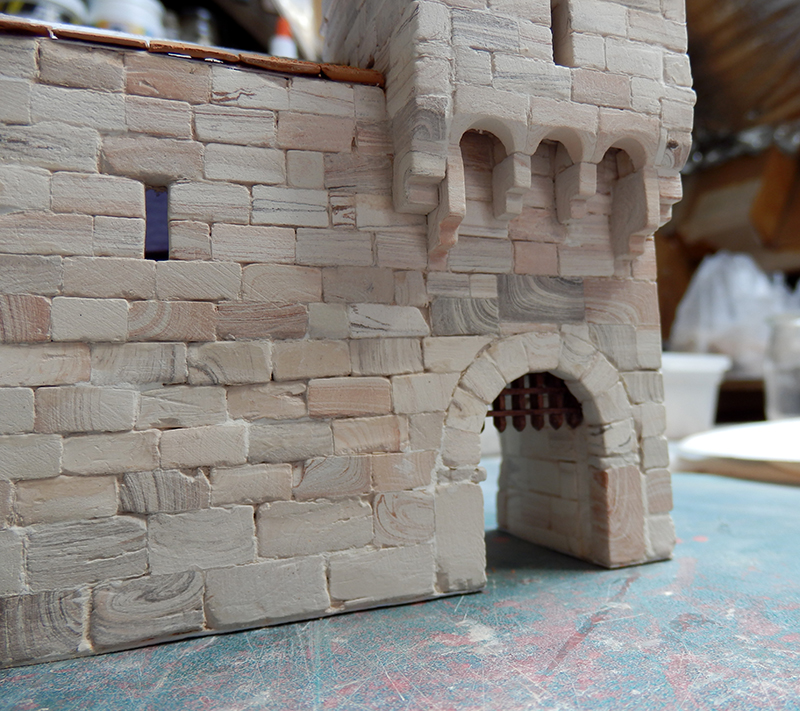
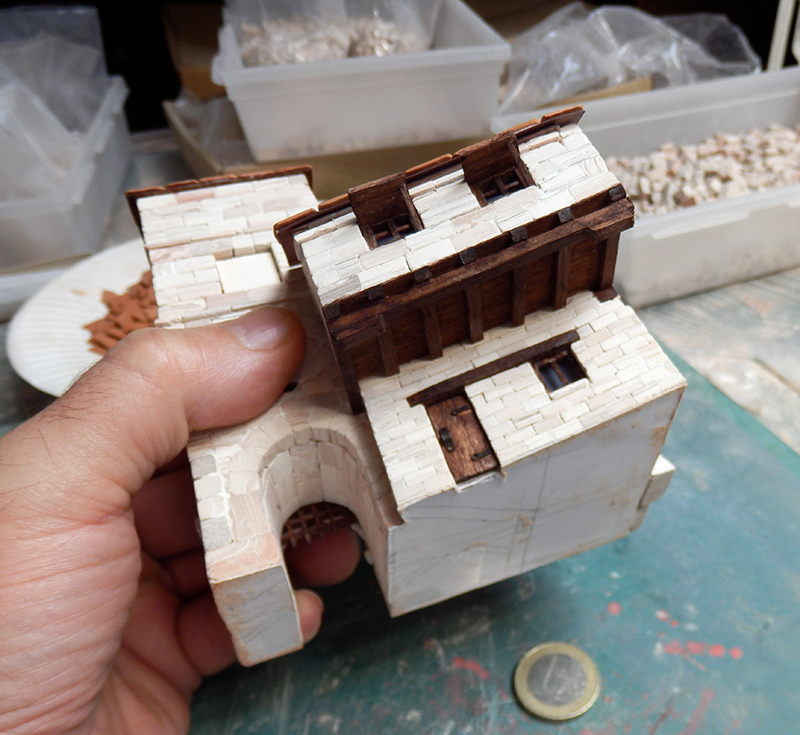
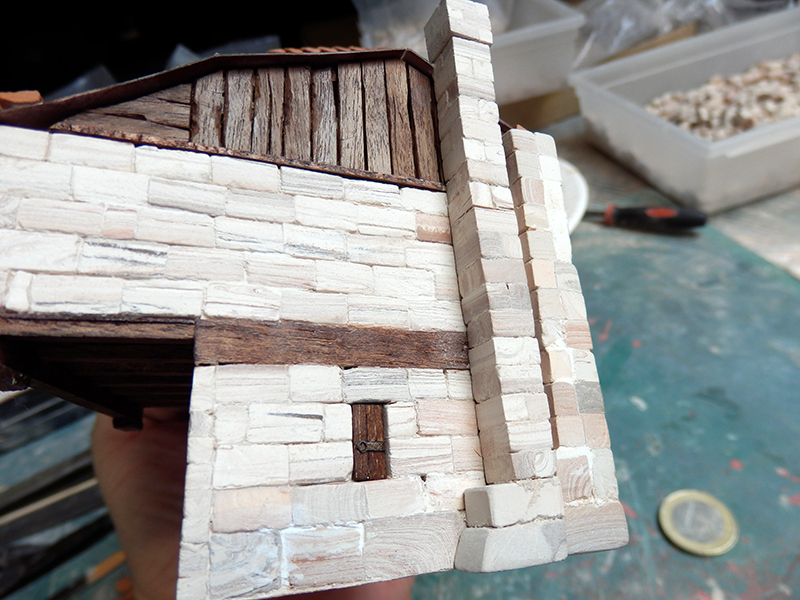
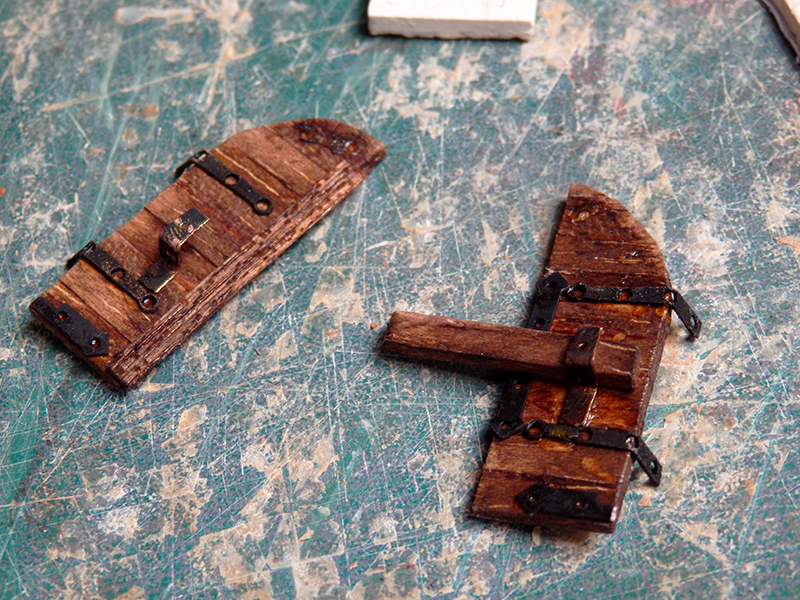
Donc, pour te répondre précisement, bien sûr, les portes et fenêtres sont toutes créées à partir de mon stock.
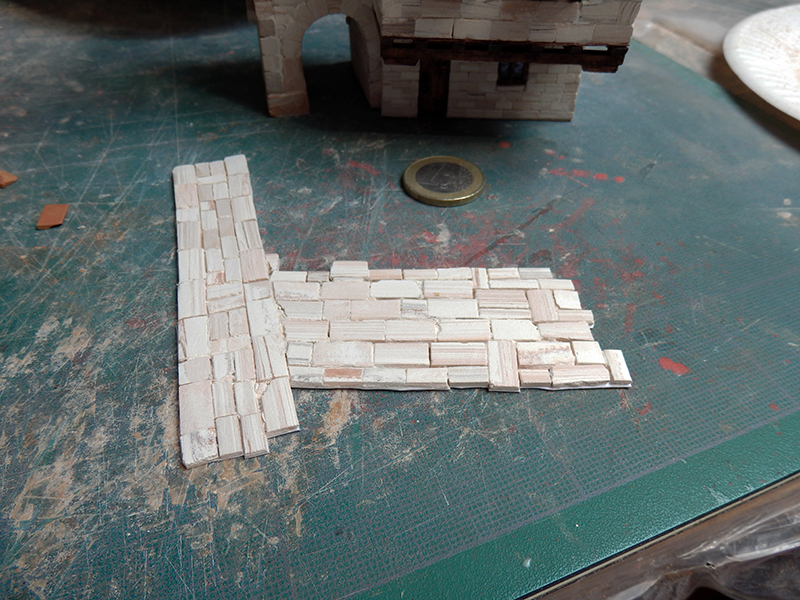
Les bâtiments sont vieillis à l'eau sale en premier !
J'utilise aussi avec les produits AK Interactive de weathering sur les pierres, bois, mousses, moisissures. Mais aussi des crayons aquarellables, de l'encre de Chine dilluée, etc...
Bref, ce qui m'amuse, c'est surtout de ne pas respecter un simple guide de montage, comme sur toutes mes maquettes ! ")
Thank you!
I'm already a long way from the kit from 20 years ago...
Each construction has been made mostly in personal scratch ! I respect neither the cardboard bases that I modify, nor the general plan of the publisher's village (too simplistic and incoherent for a 14th century bastide). The materials are partly enriched by others bought in addition (bricks, columns, facade reliefs, woodwork, etc...), some buildings simply do not exist in the basic plan (the complete cloister, the dovecote, the west door with its machicolations, all the street houses).
I create the cardboard base from pieces of photos of house plans posted on a forum for example! For the dovecote of the cloister, a white bristol board and the complete creation of the structure.
And I didn't finish the creation... But always with the respect of the period constructions.
So, to answer your question accurately, of course, the doors and windows are all created from my stock.
The buildings are aged with dirty water first!
I also use AK Interactive weathering products on stone, wood, moss, mould. But also watercolor pencils, diluted India ink, etc...
In short, what amuses me is above all not to respect a simple assembly guide, as on all my models .


")