Montanes by OcCre 1:70

Another mid week update. This rigging business is pretty fun.

I'm still waiting for the brass strips from Model Expo so I'm keeping busy with the standing rigging on the foremast. Very satisfying to say the least. Once the masts go up and rigging starts the nature of the boat really changes!! Had a neighbor come over yesterday, the last time she saw the model I had just planking and had a few items completed on the deck. She almost passed out in amazement. That was fun.

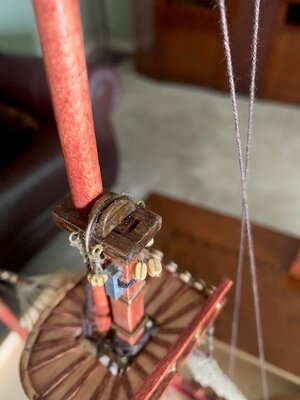
Couple pics below. Note, I need to find a better back drop as the pics get muddled with all of the furniture. I guess that is expected when you are building a model on the TV room coffee table. LOL

Scott

Rigging - using twezzers to weight line while tying the deadeyes.jpgRigging Foremast Pic 3.jpgRigging Foremast Pic 4.jpg
 
Weekly Update. Continued working on the foremast standing rigging and got myself a contraption!!

Still have not received the brass strips from Model Expo so I am stuck working on the foremast. Plenty to do but even so I'd like to start working on the other two masts.

I've been working on the ladders a lot, it took a while to the sequence down pat. The bottom section of the starboard side is a bit messy but about half way up i managed to get things working ok. I just eyeballed the spacing and leveling and it looks pretty good. That mesh bit that goes in front of the platform was fun to put together and it looks pretty cool.

The big accomplishment was finding a new contraption to put the boat on. A lazy Susan!! This little dude is great. I suggest this become standard equipment for people building these modules. The ability to flip the boat around without having to mess about with the stands etc is great.

A few pics below.

Foremast Rigging pic 5.jpgRope ladders pic2.jpgWorking on Rope ladders pic1.jpgLaxy Susan.jpg
 
If you don't mind me suggesting. Try running your rigging line quickly through a candle flame before attaching the line to the model.
It removes all the rigging fuzz. Great job by the way. :)
 
Weekly Update. Continued working on the foremast standing rigging and got myself a contraption!!

Still have not received the brass strips from Model Expo so I am stuck working on the foremast. Plenty to do but even so I'd like to start working on the other two masts.

I've been working on the ladders a lot, it took a while to the sequence down pat. The bottom section of the starboard side is a bit messy but about half way up i managed to get things working ok. I just eyeballed the spacing and leveling and it looks pretty good. That mesh bit that goes in front of the platform was fun to put together and it looks pretty cool.

The big accomplishment was finding a new contraption to put the boat on. A lazy Susan!! This little dude is great. I suggest this become standard equipment for people building these modules. The ability to flip the boat around without having to mess about with the stands etc is great.

A few pics below.

View attachment 246187View attachment 246188View attachment 246189View attachment 246190
or bee vox. even white carpenter glue can do it. A mix of diluted Glue with a little black colour can help here too, apart from when dry, the riggen lines are enforced and more rigid.
 
I use bees wax on my lines. I just twist the rope as I pull it across the bees wax. Then I twist it between my fingers to work the wax in. Be warned, once waxed, when you tie knots, they won’t come undone, you have to cut them…lol. But all fuzz will be gone, and they pull through blocks just fine, often without the need for a needle. ;)
 
Dean, you you think the beeswax clogs up the texture of the rigging line ? It also attracts dust.
Just my thoughts .;)
No…here is better picture in focus…;)
2780ED60-240F-4527-914B-4ADC6A335467.jpeg
Most rope will collect dust if not in a case, however they claim waxed rope doesn’t? I guess dust is less likely to stick to a waxed surface, similar to a car. :)
 
Last edited:
You are doing right. The 1TH through - forward -is alone. All the rest comes in par, so are absolutely correct. the 1Tn forward was many times seized, as the mail lower sail came in contact with the shroud. the rest is only on top and above the deadeyes.. the attached fig is the best way the align correct the distance between the deadeyes -completely parallel. it is two pieces of wire twisted or by heat set together. you will only have to measure the distance correctly. I did one par for each one and mast- added the shroud around the deadeyes- be sure that the strange is egual. I started with the 1Th one, to set to have the right angel (sleight forward, the from behind. Always on both sides at the time. so you will have to run around the ship a few times, that is why I warned not to insert the bowsprit at this moment (to avoid an accident with my Beer Belly). there are other methods, but I was happy with mine
you can let these util stay until you will make the food ropes-remember 1/3 thick of the shrouds
going through your pic better, I see you have aligned the deadeyes very well and correct- bravo sailor
great progress and work, looks beautiful
 
Thanks for the advice folks.

Here is my plan. I will use a candle flame and wand it over what I have already done to burn off the fuzz. (obviously I'll practice and test this first) Then going forward I'll use candle wax. If the candle wax doesn't work well I will then try the bees wax approach.

Also, I finally finally finally got the brass strips from Model Expo. These strips are actually far superior to the ones that OcCre sent. They are a tad thicker and very shiny. I like them.

Mastmast Brass Strips.jpg
 
OK. It's going to be a couple weeks yet before I start this. I had already planned on not gluing the upper part of the masts. Looking forward to the challenge.

Oh Oh. Does anyone know where I can order more eye rings. Nails with a loop on top. Not sure what they are called. I can see that I will be way way short.

Thanks
When I run out of kit supplied eyebolts, I make some using round-nosed needle nose pliers and wire.
 
Hello everyone, time for my weekly update.

But, before I get started. El Capi, I hope you don't abandon me. When I talked about posting a build I meant Sutty, not you. I am getting ready to start the rigging (very intimating) and was very much looking forward to your guidance.

Here is my report.

I have completed my second milestone, finished the boat part of the boat :).!!! (warts and all) The first milestone was completing the planking. Next big milestone is the bowsprit, making the masts and the lower part of the standing rigging. Each mast has three sections. I'll build them all but I won't glue them together. Otherwise the standing rigging becomes much much harder.

Seems the week was mostly dedicated to the life boat. It came out..... ok. The benches ended up too low, I guess the Montanes sailors had really short legs. LOL

I did a test with both satin finish and a semi gloss finish. At first the semi gloss was very very glossy (when wet). After it dried it was certainly shiny but not overly so. It also really brought out the color of the various woods. My wife and I discussed the various looks and decided to go with the semi gloss. The test section was the top aft deck. There is a pic below.

I have a couple things to fix and work on but they are not overly important. I am ready to move onto the next phase.

Below are some pics.

View attachment 241108View attachment 241109View attachment 241110View attachment 241112View attachment 241114View attachment 241115
Looking great!
 
OK. It's going to be a couple weeks yet before I start this. I had already planned on not gluing the upper part of the masts. Looking forward to the challenge.

Oh Oh. Does anyone know where I can order more eye rings. Nails with a loop on top. Not sure what they are called. I can see that I will be way way short.

Thanks
One of the many sources for eyebolts\rings - is Cornwallmodels.

 
Weekly Update. - Masts Masts Masts

My entire last week seemed consumed by the Mainmast and the Mizzenmast. The brass strips I got from Model Expo are vastly superior then the strips that came in the kit. Even though the new strips are a fraction thicker the material is easier to work with.

For whatever reason these two mast just took forever, and I have a long way to go yet! I did not slack off either. Oh well. Still need to glue on some of the pullies, and some 1x1 strips here and there. I hope to get this done this evening, then I can start on the blocks.

Speaking of blocks. One of the things I do not like is using CA glue to lock the knots on all of this rigging. Dean (from above) mentioned that with a waxed line you cannot untie the knots. Really ?? If that is indeed the case then when tying on the blocks I can avoid CA glue. I will be testing this out this week for sure and I'll post my results. Not using CA glue would be huge for me as the fumes kill me.

Those decorative sapelli thingys on the top of the masts are a pain in the rump. But the end result looks pretty good.

A few pics below.

Scott

Aug 1 Mast Pic 1.jpgAug 1 Mast Pic 2.jpgAug 1 Mast Pic 3.jpgAug 1 Mast Pic 4.jpgAug 1 Mast PIc 5.jpg
 

Attachments

  • Aug 1 Mast Pic 6 Formast.jpg
    Aug 1 Mast Pic 6 Formast.jpg
    59 KB · Views: 6
Weekly Update. - Masts Masts Masts

My entire last week seemed consumed by the Mainmast and the Mizzenmast. The brass strips I got from Model Expo are vastly superior then the strips that came in the kit. Even though the new strips are a fraction thicker the material is easier to work with.

For whatever reason these two mast just took forever, and I have a long way to go yet! I did not slack off either. Oh well. Still need to glue on some of the pullies, and some 1x1 strips here and there. I hope to get this done this evening, then I can start on the blocks.

Speaking of blocks. One of the things I do not like is using CA glue to lock the knots on all of this rigging. Dean (from above) mentioned that with a waxed line you cannot untie the knots. Really ?? If that is indeed the case then when tying on the blocks I can avoid CA glue. I will be testing this out this week for sure and I'll post my results. Not using CA glue would be huge for me as the fumes kill me.

Those decorative sapelli thingys on the top of the masts are a pain in the rump. But the end result looks pretty good.

A few pics below.

Scott

View attachment 247845View attachment 247846View attachment 247847View attachment 247848View attachment 247849
It looks not that bad, in fact good. I only hope that you have not glued the upper pars of vthe mast to the lower ones, as this will give you heavy problems when adding the shrouds fist and the forestay
 
Weekly update. Main Mast in progress.

Hello all,

These two masts (main and mizzen) have taken me forever. I finally finally got the main mast fully completed, and have all of the blocks in place. The blocks took up a ton of time. I was playing around with different techniques rather than just twist and glue. Grabbed a candle from the kitchen and ran all of the lines through, the wax indeed makes the knots super tight and indeed impossible to untie. So now I was able to use much less CA glue. Although,,,,, with wax has a tendency to flake off and make a sort of a dust. Doing my best to keep this to a minimum.

Next was to glue the mast in place. I spent a ton of time making sure they were plumb. The angle of the picture makes them look a little off but believe me they are vertical.

I have just a single (pair) shroud left which I will handle this evening. Rather than starting the ladder lines I think I will do the upper shrouds and the mizzen mast first.

The model is coming along, each week I manage to get a bit more done. Just gotta keep going and not let up. Looking at the instructions, there are a few standing rigging lines that have me thrown for a loop. If I cannot figure it out I'll seek some help.

With these masts in place we have a new problem, watching the TV. LOL.

oh oh. Tying the shroud to the deadeye. I found it much easier to tie half hitches rather than going round and round.

Hope everyone enjoyed the Olympics. Gotta love Alison Felix.

Have a nice day. Some pics below.

Scott


IMG_1204.jpgIMG_1207.jpgIMG_1212.jpgIMG_1213.jpgIMG_1215.jpgIMG_1216.jpgIMG_1217.jpgIMG_1218.jpg
 
To me, it looks good, but by now, I suppose that you have learned only to do the Lower shroud first-BEFORE adding - the following mast. As I j have mentioned - do NOT take it badly - use your head and common sense and less the instruction Book.
 
To me, it looks good, but by now, I suppose that you have learned only to do the Lower shroud first-BEFORE adding - the following mast. As I j have mentioned - do NOT take it badly - use your head and common sense and less the instruction Book.
One thing I forgot. Yes, I know all about the Fuss- mostly cotton-THere are on the market some Fishing lines, but never tried it. I with the Standing Rigging overcome it, by adding white glue on my fingers, and then let it run -always sane direction- to give it the black look I added some black Color. It worked good for me, and preserved will the Riggen Treat- but only the Standing Rigging. For the Running Riggin, it is too stiff. My Norske Love survived with this 30 Years.
 
Hello all. Weekly update. Finished the Mizzen Mast and focusing on Standing Rigging.

I am slowly learning, the hard way, to do a better job of looking forward in the instructions. I tend to just do what's next in the instructions. What got me this time was how OcCre posted the standing rigging. The picture labeled "A" was the shrouds and ladders, Page "B" was the inside running rigging, and Page "C" was outside running rigging (primarily back stays). So being me I started on the shrouds (page A). Half way through this I realized I may have made a sequence mistake. I should have started on page "B" first because now it's hard to get to.

This definitely goes against the advise of El Capi and a few others where he is pushing getting the lower shrouds in first then gluing on the upper sections of the masts. Which I did on the foremast. This certainly makes it easier to place the shrouds but man does it ever make it more challenging getting the center standing rigging in place.

The instructions are also a big challenge. I managed to figure out lower triatic's between the foremast and mainmast but the top one was throwing me for a loop. Below is the instructions and my interpretations of them.

I am looking at item 401. It looks to me like it anchors on the platform with an eyebolt. But on the instructions for the platform there is no mention of this. Next was to have a look at the picture and see what was there. Had to use a magnifying glass (LOL). In the mess of lines in the picture I spotted the blocks to support my theory. So I drilled a hole and put it together.

Foremast Platform instructions.jpgAnalyzing Instructions Pic 4.jpgFore Mast Platform Instructions Pic 3.jpgRigging Detail Pic 7  What I did.jpg

Meanwhile in between all of this I knocked out the remaining work on the Foremast. Saturday morning outside watching golfers go by I tied on all of the blocks. It took almost 4 hours to do this! One of my nooby mistakes was to sand the lower mast a tad too much. So when I put it into its hole it had a little bit of play (ARG!!), I lost my plumb. At the very top I could move it forward 5mm too much and back 5mm to much. I chose to glue it in forward and used two back stays to it pull back to plumb. Then I was careful with the mainmast foremast triatic to not pull it back forward too much. It worked out and everything seems pretty plumb.

My objective this week is to finish remaining standing rigging and to tie all of the ladders. May not finish but I'll give it a try. Below are a few pictures of the standing rigging and a pic of the boat itself.

I'm thinking that at my current pace I might have the first yard placed by Sept 1. The running rigging instructions look taunting for sure.

Have a nice week everyone.

Mizzen Mast Pic 1.jpgMizzen Yard Holder Pic 2.jpgMore Rigging Detail Pic 8.jpgRigging Detail pic 6.jpgRigging Detail Pic 8.jpgBoat Pic Progress Aug 16 Pic 9.jpg
 
Back
Top