Perhaps you could ask @Ptèr he is at the moment working on a beautifull Xebec, also on this forum bye the wayAlbeit, at the moment I'm searching for Xebec data
-

Win a Free Custom Engraved Brass Coin!!!
As a way to introduce our brass coins to the community, we will raffle off a free coin during the month of August. Follow link ABOVE for instructions for entering.
-

PRE-ORDER SHIPS IN SCALE TODAY!
The beloved Ships in Scale Magazine is back and charting a new course for 2026!
Discover new skills, new techniques, and new inspirations in every issue.
NOTE THAT OUR FIRST ISSUE WILL BE JAN/FEB 2026
You are using an out of date browser. It may not display this or other websites correctly.
You should upgrade or use an alternative browser.
You should upgrade or use an alternative browser.
Nikitin San Bartolome 1584 A.D. (Kit #35)
- Thread starter Pathfinder65
- Start date
- Watchers 85
Jan, just downloaded the link you gave us, that is a very nice document to study.
Thank you for that.
Thank you for that.
Peter, I found the document to be a great window for that time in history. Frank48 also forwarded to me several documents on cannon design and construction in the late 1500 to early 1600’s. Fascinating stuff.Jan, just downloaded the link you gave us, that is a very nice document to study.
Thank you for that.
Jan
I am going for a serious look tonight Jan, but i am glad that this did answer your questions about you canons
Good evening. Yes I have been following Peters work with his Jabeque Cazador- it is outstanding. Cheers GrantPerhaps you could ask @Ptèr he is at the moment working on a beautifull Xebec, also on this forum bye the way
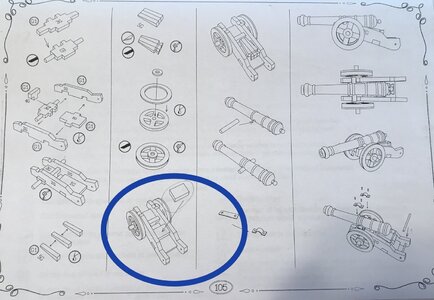
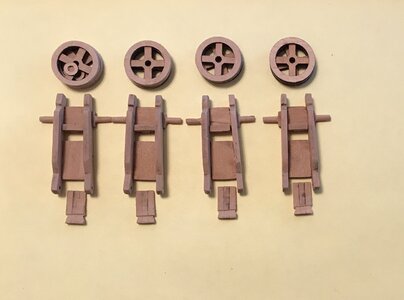
A minor update. After watching Pavel's Video #29 Ships cannon ( Video #29) I managed to complete most of the assemblies. They now wait for the paint shop to open. A note to those who haven't gotten to this step. The part circled on the plan is not in the kit and needs to be created from one of the 4mm flats.
Jan


Jan
I think I have Tennis elbow from sanding off the char on all those little pieces.That is beautiful work, Jan. The gun carriages look very realistic and at the same time substantial - not like the flimsy items often presented as gun carriages by the kit manufacturers.
Now I have to do a bit of research and learn some new skills.
#1) How to blacken the Brass cannons and carriage straps.
#2) How to use an airbrush.
Jan
Time for a little bit of an update. The weather pattern has changed and I have had to spend some time moving snow. The last two storms left wet heavy almost impossible to snow-blow snow. In between storms I am making slow progress on the Galleon.
First on the agenda is the pile of kindling that I have amassed.
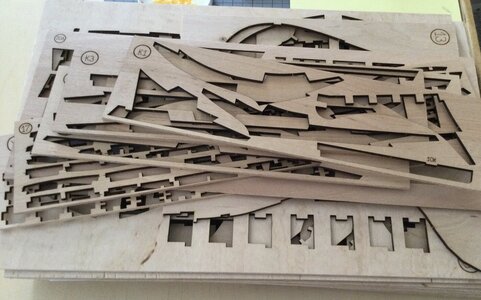
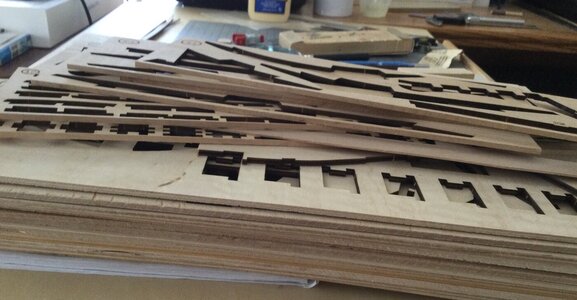
Small wonder that the three kit boxes that make up the kit weigh over 14kg. If the building jig, display stand and small boat kits are added I think that adds another 3 to 4kg to the total weight of the kit.
Yesterday afternoon I was adding the last gun port lining. Yup, I fumbled and bumbled and actually managed to break something.
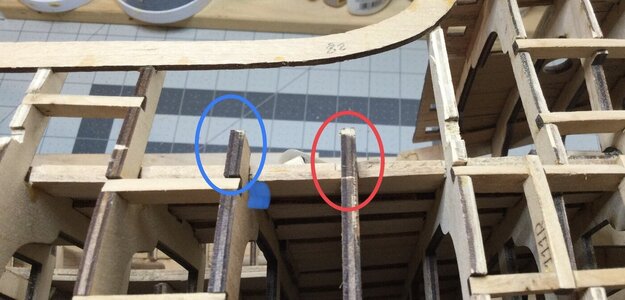
The red circled opening is intentional but the blue circled one is not. “It’s Mr. Clumsy at work “. A little to much pressure while filing out the gap for the slots of gunport beam.
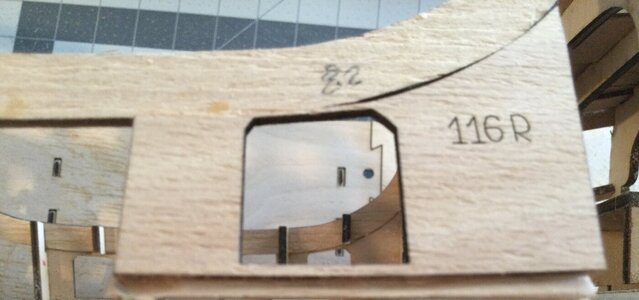
The required ”DO- OVER” in progress.
First on the agenda is the pile of kindling that I have amassed.


Small wonder that the three kit boxes that make up the kit weigh over 14kg. If the building jig, display stand and small boat kits are added I think that adds another 3 to 4kg to the total weight of the kit.
Yesterday afternoon I was adding the last gun port lining. Yup, I fumbled and bumbled and actually managed to break something.

The red circled opening is intentional but the blue circled one is not. “It’s Mr. Clumsy at work “. A little to much pressure while filing out the gap for the slots of gunport beam.

The required ”DO- OVER” in progress.
Last edited:
Just waiting for my kit to arrive - your detailed build log is really helpful. Appreciate all the work and information!
It's great to have you follow my humble efforts. It's a slow process. a lot of fitting, sanding, fitting and sanding. If you can do it Pavel has thirty plus videos on You-Tube. They are worth watching over and over just to see how he works on the Galleon. The plans are excellent but they do not show a lot of the build steps he uses.Just waiting for my kit to arrive - your detailed build log is really helpful. Appreciate all the work and information!
Jan
I've already watched those videos, and yes they seem very helpful. I plan to follow your advice and watch them again as the build begins.
Good morning Jan. I have noticed in your magnificent build process a couple of “snaps”. Is the kit frame wood a tad brittle? Clearly a delicate approach is required when putting this frame structure together. PS that kindle pile would make awesome fire lighters for a braaiTime for a little bit of an update. The weather pattern has changed and I have had to spend some time moving snow. The last two storms left wet heavy almost impossible to snow-blow snow. In between storms I am making slow progress on the Galleon.
First on the agenda is the pile of kindling that I have amassed.
View attachment 352955
View attachment 352956
Small wonder that the three kit boxes that make up the kit weigh over 14kg. If the building jig, display stand and small boat kits are added I think that adds another 3 to 4kg to the total weight of the kit.
Yesterday afternoon I was adding the last gun port lining. Yup, I fumbled and bumbled and actually managed to break something.
View attachment 352957
The red circled opening is intentional but the blue circled one is not. “It’s Mr. Clumsy at work “. A little to much pressure while filing out the gap for the slots of gunport beam.
View attachment 352982
The required ”DO- OVER” in progress.
 . Cheers Grant
I think the weak pieces that have “snapped” ( A good excuse for my clumsy fingers) are small voids in the plywood frames. The ply is 4mm thick and for the most part has withstood my attempts to destroy it. Actually I’m having a great time with this kit. I’m almost at the point of having to start the fairing of the hull. I was hoping by now to have the decks and various bulkheads painted but now I’m looking forward to laying of the first plank.Good morning Jan. I have noticed in your magnificent build process a couple of “snaps”. Is the kit frame wood a tad brittle? Clearly a delicate approach is required when putting this frame structure together. PS that kindle pile would make awesome fire lighters for a braai. Cheers Grant
In the meantime it’s clear the driveway of snow, wait two days and clear the driveway of snow, wait two days and ….. Do you see a storm pattern??? With the past three events we have about 25 inches in total.
I have to confess that I’ve also added a few miles to the odometer on my Polaris snowmobile. It’s been a toss up, a few hours in the shipyard or a nice long ride on the snow.
Like they say Jan, you’ve got to strike while the iron’s hot. Or in your case ride while the snow is high.In the meantime it’s clear the driveway of snow, wait two days and clear the driveway of snow, wait two days and ….. Do you see a storm pattern??? With the past three events we have about 25 inches in total.
I have to confess that I’ve also added a few miles to the odometer on my Polaris snowmobile. It’s been a toss up, a few hours in the shipyard or a nice long ride on the snow.
I’m amazed at the number of components in that model. I don’t think I could keep track of them all.
OBTW, it’s going to hit 85 degrees down here today.
Wow 85. We won't see that until maybe May or early June. The forecast tonight is freezing rain, sleet and 6-8 inches of snow. I'll be busy outside again tomorrow.OBTW, it’s going to hit 85 degrees down here today.
Enjoy the warm weather.
Good morning Jan. Playing in the snow on a snowmobile must be super fun. I have never done it but must be a bit like riding an offroad bike in the snow. No snow here tho.....I think the weak pieces that have “snapped” ( A good excuse for my clumsy fingers) are small voids in the plywood frames. The ply is 4mm thick and for the most part has withstood my attempts to destroy it. Actually I’m having a great time with this kit. I’m almost at the point of having to start the fairing of the hull. I was hoping by now to have the decks and various bulkheads painted but now I’m looking forward to laying of the first plank.
In the meantime it’s clear the driveway of snow, wait two days and clear the driveway of snow, wait two days and ….. Do you see a storm pattern??? With the past three events we have about 25 inches in total.
I have to confess that I’ve also added a few miles to the odometer on my Polaris snowmobile. It’s been a toss up, a few hours in the shipyard or a nice long ride on the snow.
Indeed it is a lot of fun. We are fortunate that we live in a rural area and have the availability of many snowmobile trails provided by the local snowmobile clubs.Good morning Jan. Playing in the snow on a snowmobile must be super fun. I have never done it but must be a bit like riding an offroad bike in the snow.
Time for a small update. Even with the winter event interruptions I managed to get some time to bumble in the shipyard.
All the bits and pieces for the gunport frames have been beveled, dry fitted and glued in place. The upper deck gunport “housings/enclosures” have been sanded into shape and are dry fitted but not glued.
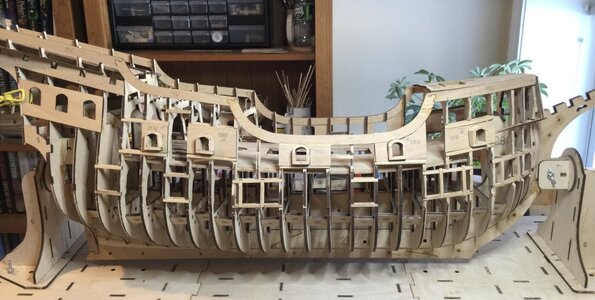
The lower gunport “housings/enclosures” are next on the agenda, another wee bit of sanding, fitting, sanding, etc.
BTW. A interesting point, items 41R and 41L were discussed in one of the other San Bartolome build logs. Pavel provided a picture as to where they would be placed.
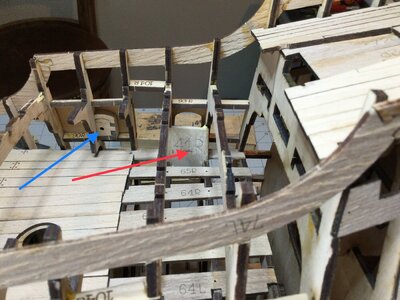
The red arrow points to the part in question (41R). It becomes the backstop for the gunport “housing” since there is no frame in that area to do that. You can see the gunport “housing“ to left snugs right into a depression in the frame (blue arrow).
All the bits and pieces for the gunport frames have been beveled, dry fitted and glued in place. The upper deck gunport “housings/enclosures” have been sanded into shape and are dry fitted but not glued.

The lower gunport “housings/enclosures” are next on the agenda, another wee bit of sanding, fitting, sanding, etc.
BTW. A interesting point, items 41R and 41L were discussed in one of the other San Bartolome build logs. Pavel provided a picture as to where they would be placed.

The red arrow points to the part in question (41R). It becomes the backstop for the gunport “housing” since there is no frame in that area to do that. You can see the gunport “housing“ to left snugs right into a depression in the frame (blue arrow).
- Joined
- Jan 9, 2020
- Messages
- 10,566
- Points
- 938

Good progress, Jan, Visually the gunports make a big difference to the overall appearance of the ship!Time for a small update. Even with the winter event interruptions I managed to get some time to bumble in the shipyard.
All the bits and pieces for the gunport frames have been beveled, dry fitted and glued in place. The upper deck gunport “housings/enclosures” have been sanded into shape and are dry fitted but not glued.
View attachment 353838
The lower gunport “housings/enclosures” are next on the agenda, another wee bit of sanding, fitting, sanding, etc.
BTW. A interesting point, items 41R and 41L were discussed in one of the other San Bartolome build logs. Pavel provided a picture as to where they would be placed.
View attachment 353840
The red arrow points to the part in question (41R). It becomes the backstop for the gunport “housing” since there is no frame in that area to do that. You can see the gunport “housing“ to left snugs right into a depression in the frame (blue arrow).


