Nikitin San Bartolome 1584 A.D. (Kit #35)

A day late and belated as is everything with me these days, but nevertheless ... A very happy birthday, Jan! I know that you would have been spoilt and also know that you would have made the most of the day, so well done. Your progress in the shipyard is continuing nicely and I am looking forward to see hat you come up with next.
 
A day late and belated as is everything with me these days, but nevertheless ... A very happy birthday, Jan! I know that you would have been spoilt and also know that you would have made the most of the day, so well done. Your progress in the shipyard is continuing nicely and I am looking forward to see hat you come up with next.
Thank you Heinrich, indeed I am very spoiled and I enjoy every minute. The Jan Galleon is a challenge, i’ve been the better part of two sessions trying to start the stern counter. I’ll post that effort later.

Good morning Jan. Happy Birthday for yesterday. Another one down and I hope it was a good one. Cheers Grant
Thank you Grant. Yup, another Birthday milestone. At this stage of the game I look at all Birthdays as an anniversary of my 21st Birthday. So this is actually the 60th, makes me feel a lot younger :rolleyes:
 
More bits and pieces ready to paint and glue in place.

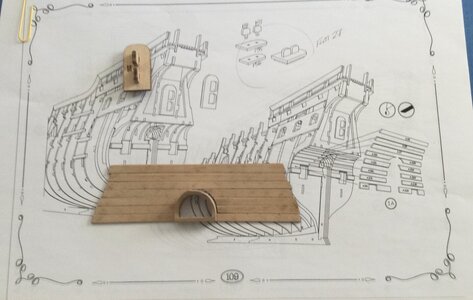
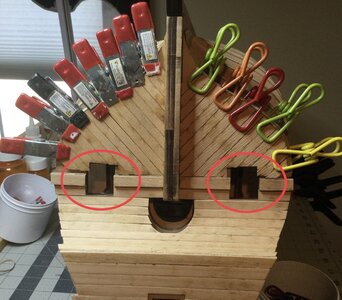
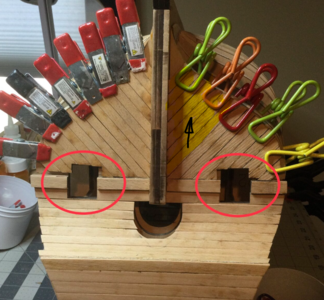
Latrine Lining

View attachment 364546

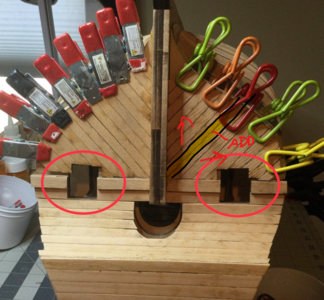
The red circle is a build step. The Latrine Bulkhead has to be recessed into the back portion of this support beam.

View attachment 364553

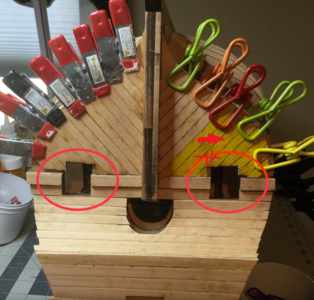
The dry fit. There are a couple of later build steps before any final gluing.
Happy B Day jan. I am celebrating my 41st anniversary today so cake for me to LOL. Don't forget to file a gap along the edge of the latrine deck in the big square under beams. The 1st wale board, when installing planking, extends all the way to the tip of the latrine deck and you have to allow room for this to fit along the edge of the latrine deck. Plank #25 I think. I bought a new laser machine so have had to shelf my build for the last little while to develop new business but starting to get the itch to get back to building. Great progress so far!
 
Happy B Day jan. I am celebrating my 41st anniversary today so cake for me to LOL. Don't forget to file a gap along the edge of the latrine deck in the big square under beams. The 1st wale board, when installing planking, extends all the way to the tip of the latrine deck and you have to allow room for this to fit along the edge of the latrine deck. Plank #25 I think. I bought a new laser machine so have had to shelf my build for the last little while to develop new business but starting to get the itch to get back to building. Great progress so far!
Happy Birthday anniversary of #21. Enjoy your day. The new laser machine sounds interesting,

Good to know about the latrine deck. I'm still a couple weeks away from planking the hull. I did file a grove in the beam that holds the Latrine Bulkhead, that part was little bit of nip and tuck until I got the fit right.
 
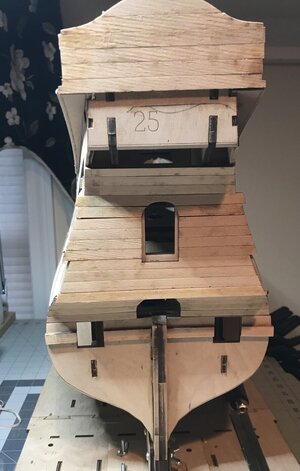
The build continues. Todays effort centered around the Stern Counter.

D10CDD5D-472E-48DF-8529-77699511793A.jpeg
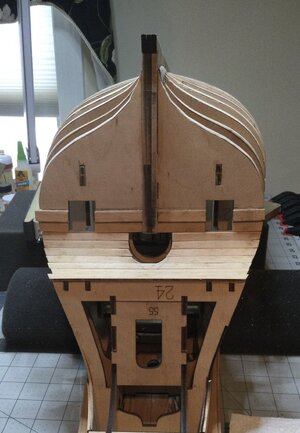
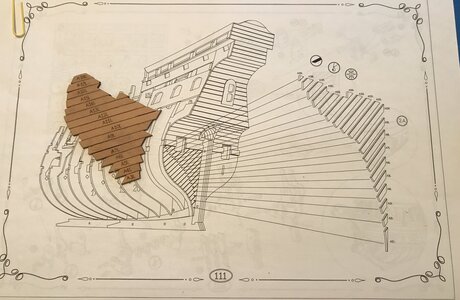
The planks laid out for gluing after sanding and beveling.The interesting part was how to hold the hull while trying to fit and glue the planks in place.

My solution was to take the hull out of the build jig and turn it upside down on foam blocks.

898F6C6A-8B96-40E0-8D9D-51923E6A0335.jpeg

The next crisis was how to clamp the planks to get a good fit and while the glue set. My solution was to drill holes slightly smaller than my push pins into the ribs that the planks will cover, Then it was add glue, align and place the plank, pin it in place, wait twenty to thirty minutes and repeat.

So upside down, right is now left and I think Ive got this part mastered.
 
Last edited:
New from the shipyard.

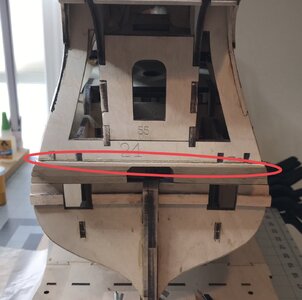
I managed to plank the “Counter” and then turned hull right side up and put it back into the building jig so I could start planking upwards.

First on the agenda was to sand flush the overhang
E58AB963-B809-4E02-B8FF-19557E01A851.jpeg

The next head scratcher was how get the first plank level and even with the last plank of the “Counter”.

AD0EB124-5A86-4D64-ABAD-9EDF0FCCB0DE.jpeg

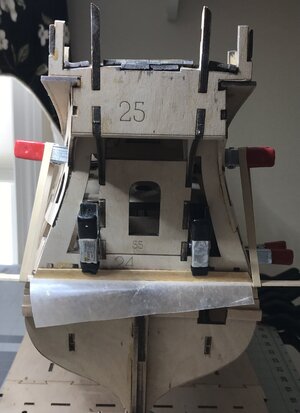
Right or wrong my “Novice Builder” solution. The first plank supported on a long strip of 1/2” wide plank even with the overhang and glued in place. The wax paper kept every thing neat.

My progress to so far.

32A66EFB-BB7D-4C79-9319-A51624493C74.jpeg

A wee bit more to do.

Jan
 
Last edited:
The next step came to a screeching halt.

The work required.

IMG_3803.jpeg

I cleaned the Laser char off the pieces for the left side and slightly beveled them.

The next step was a dry fit on the left side.

IMG_2924.jpeg

Then there was the "RO-OH" moment. Just to check I punched out the pieces for the right side and clamped them in place. Yup same result. A wee bit of error there.

So now the Jan boatyard Superintendent needs to consult with the Naval Architect. What have I done incorrectly?
 
The next step came to a screeching halt.

The work required.

View attachment 366989

I cleaned the Laser char off the pieces for the left side and slightly beveled them.

The next step was a dry fit on the left side.

View attachment 366990

Then there was the "RO-OH" moment. Just to check I punched out the pieces for the right side and clamped them in place. Yup same result. A wee bit of error there.

So now the Jan boatyard Superintendent needs to consult with the Naval Architect. What have I done incorrectly?
I can’t understand why the boards with the cutout for the cannon port did not match for you .... There can be only one way out: boards 10,11,12,13 must be made independently from the remnants of any plate of the set with a thickness of 2.5 mm. But they need to be made wider by 1 mm. more than what you have. Then the whole package will move outward. This must be done on both sides.
 
Jan,
This is how I would fix this issue...
1680478149652.png

FIRST, move all highlighted boards to the edge of the opening....as shown above

Second, move all highlighted boards upward, as shown below...
1680479885553.png

And finally, add one new board in the corner between the first set of boards and the second set of boards.
Hope that makes sense. ;)
1680480456483.png
 
Last edited:
I can’t understand why the boards with the cutout for the cannon port did not match for you .... There can be only one way out: boards 10,11,12,13 must be made independently from the remnants of any plate of the set with a thickness of 2.5 mm. But they need to be made wider by 1 mm. more than what you have. Then the whole package will move outward. This must be done on both sides.
Pavel thank you for your reply. BUT, I have to think about that solution. My skills at measuring and cutting precisely are in the range of 0 to 1.
 
Jan,
This is how I would fix this issue...
View attachment 367020

FIRST, move all highlighted boards to the edge of the opening....as shown above

Second, move all highlighted boards upward, as shown below...
View attachment 367034

And finally, add one new board in the corner between the first set of boards and the second set of boards.
Hope that makes sense. ;)
View attachment 367035
Yup, I understand what you are showing as a possible solution. I will give that a try. Probably will be more than one try and a massive donation to the "Bad Word" jar.:rolleyes::rolleyes:
 
New from the shipyard.

I managed to plank the “Counter” and then turned hull right side up and put it back into the building jig so I could start planking upwards.

First on the agenda was to sand flush the overhang
View attachment 366506

The next head scratcher was how get the first plank level and even with the last plank of the “Counter”.

View attachment 366507

Right or wrong my “Novice Builder” solution. The first plank supported on a long strip of 1/2” wide plank even with the overhang and glued in place. The wax paper kept every thing neat.

My progress to so far.

View attachment 366508

A wee bit more to do.

Jan
Good morning Jan. That is a hectic stern build. It makes me wonder how , even with ballast and keel weight these ships did not just capsize when launched.

I like Deans (@Dean62 ) fix. I am happy to find another modeler who also has measuring issues ;)….I share your challenge when attempting precision measuring. Drives me insaneROTF. Good luck and have the swear jar ready.
Cheers Grant
 
I like Deans (@Dean62 ) fix. I am happy to find another modeler who also has measuring issues ;)….I share your challenge when attempting precision measuring. Drives me insaneROTF. Good luck and have the swear jar ready.
Cheers Grant
Yep, measuring, wether in inches or millimeters is not my “forte”. That coupled with fumbling fingers and bifocals usually makes for interesting results. The “ Bad Word” jar is ever present and just waiting for a donation.
 
Back
Top