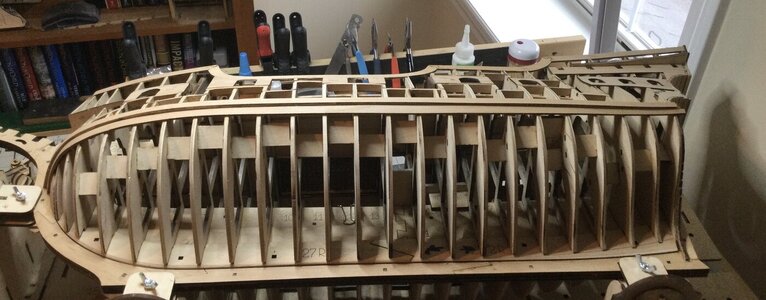
Nikitin San Bartolome 1584 A.D. (Kit #35)

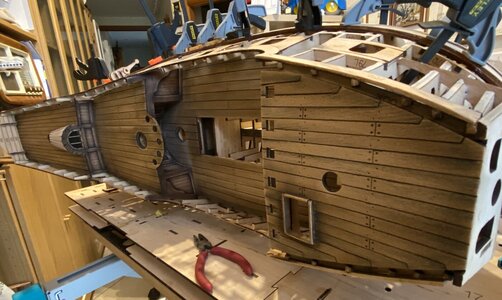
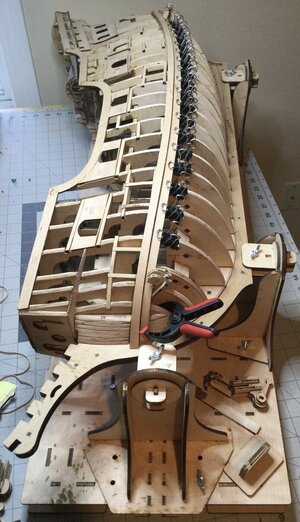
Todays efforts in the shipyard. The Main Wale completed and starting planking towards the keel.
F36E1A7B-ABD8-49CE-8BD5-875A056ADDE5.jpeg


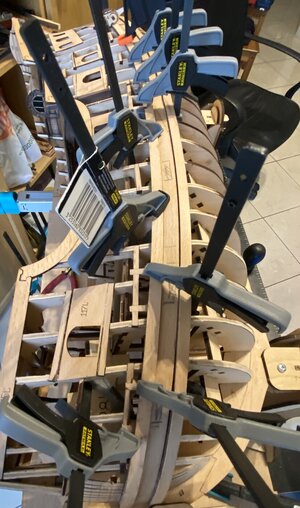
I find that the bow section of the planks need to worked carefully between wetting and bending. To much force and they start to separate/splinter on the edges. So it’s been thirty minutes of HOT water soak, a few minutes with my Kolderstok bending iron and then clamp the plank in place until dry. Gluing an almost three foot long plank is a bit different than working with smaller scales. I glue about a quarter of the plank at a time, clamp the plank securely in the glued area and also clamp the unglued section to make sure the plank is butted up against it’s neighbor..
:DMakes the hull look like a Porcupine :D

Jan
 
Todays efforts in the shipyard. The Main Wale completed and starting planking towards the keel.

View attachment 369523


I find that the bow section of the planks need to worked carefully between wetting and bending. To much force and they start to separate/splinter on the edges. So it’s been thirty minutes of HOT water soak, a few minutes with my Kolderstok bending iron and then clamp the plank in place until dry. Gluing an almost three foot long plank is a bit different than working with smaller scales. I glue about a quarter of the plank at a time, clamp the plank securely in the glued area and also clamp the unglued section to make sure the plank is butted up against it’s neighbor..
:DMakes the hull look like a Porcupine :D

Jan
Good morning Jan. Looks spot on. The more clamps the merrier is my moto. Cheers Grant
 
Hard to get a good picture, but the planking does look good with out the clips. Lots of funny angles and curves to contend with.

2682B1B9-85E4-4591-8A87-5025D7FEDB48.jpeg


I plan to plank a couple more rows above and below the wale and then do the same for the Starboard side. I don’t think there will be any warping/stress on the hull structure by fully planking only one side but just to be one the safe side :oops:

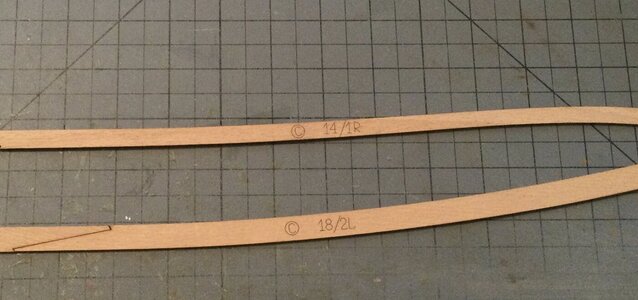
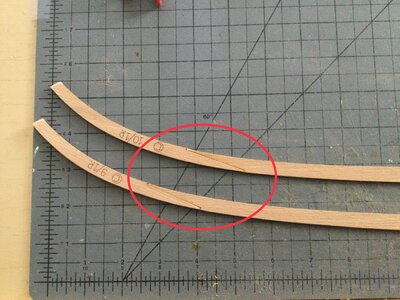
All the planks are numbered and designated right or left side. BUT one needs to pay attention to the plans.
Planks labeled “L” are mounted on the Port side and those labeled “R” are mounted on the Starboard side.

5D015E17-64AD-41D1-943B-3BC2CD386E42.jpeg

Those laser etched numbers would be hard to sand out otherwise. ”Just saying”

Jan
 
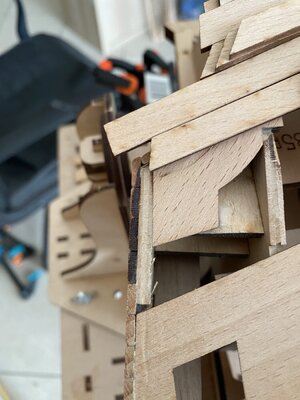
The board is already glued. Even removing the strip, now glued, the problem is that the 21L/R strip is just as short, having measured them, the 23L/R and 24L/R are also short
 
The board is already glued. Even removing the strip, now glued, the problem is that the 21L/R strip is just as short, having measured them, the 23L/R and 24L/R are also short
What kind of glue? Glue can be loosened with the appropriate solvent. Once you remove the short piece, you could try using a scarf joint to splice in extra length. Or a whole new strip.
 
The board is already glued. Even removing the strip, now glued, the problem is that the 21L/R strip is just as short, having measured them, the 23L/R and 24L/R are also short
Not having completed that part, but I would suppose that some of the fancy “bling” might cover up that area.

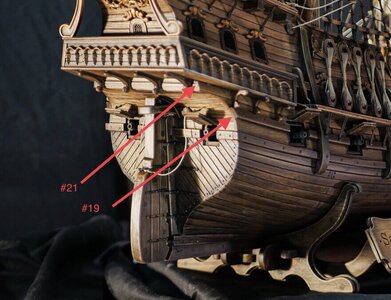
574B8979-9D6B-43DB-89F2-825B406EC700.jpeg


A photo from Pavel’s build. Plank #19 is next wale, counting up plank #21 is just under the balcony. So technically it should extend even with the stern counter.

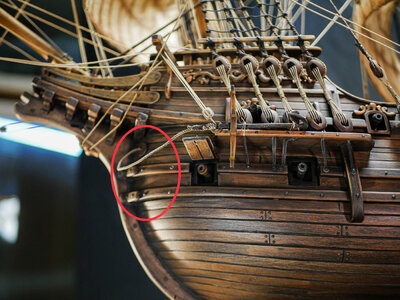
Adding a piece at the bow to get the proper length is a possibility since some of the bits and pieces added in that area will camouflage the joint.

160611AD-3A43-489C-A82B-24B620FFA487.jpeg
Not a suggestion, just brainstorming a fix.

Jan
 
Not having completed that part, but I would suppose that some of the fancy “bling” might cover up that area.

View attachment 369758


A photo from Pavel’s build. Plank #19 is next wale, counting up plank #21 is just under the balcony. So technically it should extend even with the stern counter.

Adding a piece at the bow to get the proper length is a possibility since some of the bits and pieces added in that area will camouflage the joint.

View attachment 369760
Not a suggestion, just brainstorming a fix.

Jan
In fact, luckily that part will be covered. Adding a piece to the bow to get the correct length could also be a possible solution
 
My dearest Jan. You really seem to be enjoying building this kit and the result of that is clear for all to see. You are making good progress with the planking. Take your time and all will be well,
 
My dearest Jan. You really seem to be enjoying building this kit and the result of that is clear for all to see. You are making good progress with the planking. Take your time and all will be well,
Heinrich my friend, good to have you looking at my effort. I’ve missed our exchanges.

My method of bending and placing the planks takes a wee bit of time. Fortunately I only have to contend with getting a proper bend at the bow, the “K” iron works great for that. So far there has been no need to taper any planks as they are preformed to fit.

I laughed at myself yesterday. All the planks placed so far come in two pieces and have a scarf joint in middle. The planks are almost three feet long. The next series of planks get progressively shorter and are in three pieces. One very short and two longer. I’ve been using PVA glue to glue the scarf joints, then soaking the bow part of the planks in very hot water for thirty minutes and carefully bending them with the “K” iron. I put the glued plank in hot water, covering about the first ten inches, set my timer for thirty minutes and proceeded to glue up the next plank. HAH, when I went to retrieve the soaking plank — there were two pieces, one short (the bow section) and one very long. HOW MANY TIMES HAS SOMEONE ON SOS RECOMMENDED HOT WATER TO DISSOLVE PVA ? :rolleyes::rolleyes:


8771B3DE-66DE-45AB-876D-FC1E51C4C57D.jpeg


So the “Novice Bumbler” has noted in his “Do-Over” log — Don’t do that again.

How goes the new position? I imagine you have been quite busy. Are you still able to spend time paddling?
 
Last edited:
Hi Jan. Yes, now you know about glue and hot water! ROTF Yep, I am still very busy, but I have actually managed to go paddling last week to get a little bit of physical exercise.
 
Heinrich my friend, good to have you looking at my effort. I’ve missed our exchanges.

My method of bending and placing the planks takes a wee bit of time. Fortunately I only have to contend with getting a proper bend at the bow, the “K” iron works great for that. So far there has been no need to taper any planks as they are preformed to fit.

I laughed at myself yesterday. All the planks placed so far come in two pieces and have a scarf joint in middle. The planks are almost three feet long. The next series of planks get progressively shorter and are in three pieces. One very short and two longer. I’ve been using PVA glue to glue the scarf joints, then soaking the bow part of the planks in very hot water for thirty minutes and carefully bending them with the “K” iron. I put the glued plank in hot water, covering about the first ten inches, set my timer for thirty minutes and proceeded to glue up the next plank. HAH, when I went to retrieve the soaking plank — there were two pieces, one short (the bow section) and one very long. HOW MANY TIMES HAS SOMEONE ON SOS RECOMMENDED HOT WATER TO DISSOLVE PVA ? :rolleyes::rolleyes:


View attachment 370072


So the “Novice Bumbler” has noted in his “Do-Over” log — Don’t do that again.

How goes the new position? I imagine you have been quite busy. Are you still able to spend time paddling?
Good morning Jan. Been there done that. Took me like 3 attempts to realize…… ROTF .Now we know. Cheers Grant
 
Back
Top