-

Win a Free Custom Engraved Brass Coin!!!
As a way to introduce our brass coins to the community, we will raffle off a free coin during the month of August. Follow link ABOVE for instructions for entering.
-

PRE-ORDER SHIPS IN SCALE TODAY!
The beloved Ships in Scale Magazine is back and charting a new course for 2026!
Discover new skills, new techniques, and new inspirations in every issue.
NOTE THAT OUR FIRST ISSUE WILL BE JAN/FEB 2026
You are using an out of date browser. It may not display this or other websites correctly.
You should upgrade or use an alternative browser.
You should upgrade or use an alternative browser.
Nikitin San Bartolome 1584 A.D. (Kit #35)
- Thread starter Pathfinder65
- Start date
- Watchers 85
Wow, time flies. Its time once again to thank all of you who have taken time to stop by and check out my rambling, sometimes confusing and bumbling build log of this great Galleon. I'd love to type individual thanks but my Apple keyboard and I have a love/hate relationship (mostly hate). I spend more time backspacing to correct my bumbling fingers keystrokes than I do getting my message typed. (Hah, old dog new tricks??? Nope, that's not me). When he kids say, "Geez, POPS, you have to get current", I just smile, nod my head, and .....
Jan
Jan
That looks great, nice progress. What do you use for glue?? I had a wee bit of trouble with planks 2, 3 and 4. The scarf joint separated when I bent the wet plank. I used Titebond II to glue those joints and the combination of wetting and heat was a problem.
Jan
- Joined
- Nov 30, 2022
- Messages
- 132
- Points
- 113

I use water-repellent Pattex glue. To fold the strips, I built a template of the same curvature as the bow wheel, made up of two pieces between which I tighten the previously wet strip. Then I take it off when it's dry and place itThat looks great, nice progress. What do you use for glue?? I had a wee bit of trouble with planks 2, 3 and 4. The scarf joint separated when I bent the wet plank. I used Titebond II to glue those joints and the combination of wetting and heat was a problem.
Jan
I've switched to Titebond III for the scarf joints. It's waterproof. I heat bend the plank/strake , wet the area to be bent and apply heat starting at the the furthest wet point in and work my my way forward to the tip. Takes about five minutes or so to get the right bend.I use water-repellent Pattex glue. To fold the strips, I built a template of the same curvature as the bow wheel, made up of two pieces between which I tighten the previously wet strip. Then I take it off when it's dry and place it
Good morning Jan. Yep we do that with our kids. My daughter always tells me I’m technologically hindered and I just tell her I employ people to to that for me and just smile and nod….Wow, time flies. Its time once again to thank all of you who have taken time to stop by and check out my rambling, sometimes confusing and bumbling build log of this great Galleon. I'd love to type individual thanks but my Apple keyboard and I have a love/hate relationship (mostly hate). I spend more time backspacing to correct my bumbling fingers keystrokes than I do getting my message typed. (Hah, old dog new tricks??? Nope, that's not me). When he kids say, "Geez, POPS, you have to get current", I just smile, nod my head, and .....
Jan
 . Cheers Grant
Good morning. Your galleon looks awesome. I was wondering. Do you have a build log? It would be wonderful to see another modeler building this intriguing kit. Cheers Grant
- Joined
- Nov 30, 2022
- Messages
- 132
- Points
- 113

Hi, no, I'm sorry, I took advantage of the log of Jan to publish some photos of my model under construction. I take this opportunity to apologize ti Jan if I invaded his wallGood morning. Your galleon looks awesome. I was wondering. Do you have a build log? It would be wonderful to see another modeler building this intriguing kit. Cheers Grant
Good morning. I’m sure Jan had no issues. Your build looks so cool it would be nice to see a build log. Sorry Jan for Hi jacking your logHi, no, I'm sorry, I took advantage of the log of Jan to publish some photos of my model under construction. I take this opportunity to apologize ti Jan if I invaded his wall
- Joined
- Nov 30, 2022
- Messages
- 132
- Points
- 113

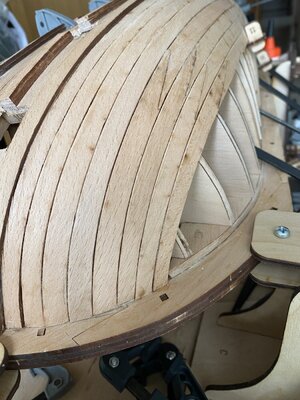
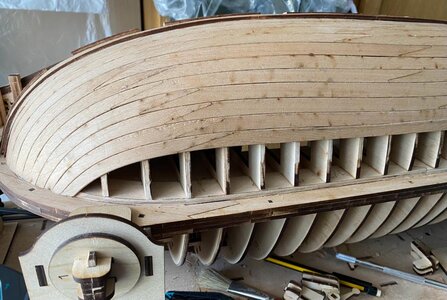
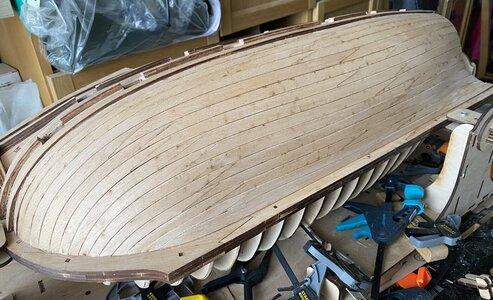
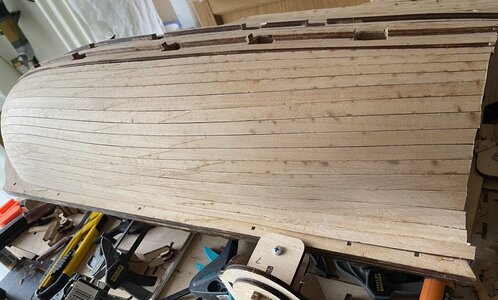
Hi Jan, if I may ask you something. I have to place the strip n. 5 but I saw that in the center there is still some space with respect to the upper one (n.6). How did you do it? Have you encountered the same problem?I managed to plank down to the keel. BUT plank #1 needs some serious work to finish closing in the hull. The space for that plank is a bit smaller than anticipated.
The circled area has been a wee bit of a problem. Several of the scarf joints separated when I was attaching the planks to the frames. The process of wetting and bending caused the PVA glue on the scarf joints to “ weaken”. I’ve been using Titebond II throughout the build but now need to find another type of glue for those joints.
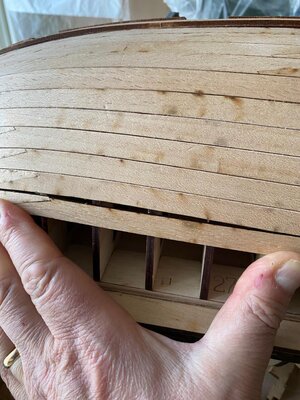
No apologies necessary. I think it’s great that you are willing to share your work.Hi, no, I'm sorry, I took advantage of the log of Jan to publish some photos of my model under construction. I take this opportunity to apologize ti Jan if I invaded his wall
I’m enjoying your build pictures and our discussions on build problems. So feel free to continue posting.
Jan
Last edited:
Hi Jan, if I may ask you something. I have to place the strip n. 5 but I saw that in the center there is still some space with respect to the upper one (n.6). How did you do it? Have you encountered the same problem?
View attachment 372938
Hi. If you look back at post #570 you can see the odd looking scarf joint at the bow that is plank #5. That joint separated when I bent the plank. I wound up bending the short piece (5/R1) to shape, gluing it in place and then gluing the longer piece (5/R2) on to the frames and matching in to the scarf joint. I used the big 6” clamps to snug that part of the plank into place while glue cured.
Jan
Excellent. That fit looks good. I’ll be interested in your fit of plank #1 (the garboard plank). I’ve not taken the time to fiddle with that one.
Jan
Learn as you go, or “don’t make that mistake again”.
A little mechanical protection while using an excel saw to cut out the gunport.
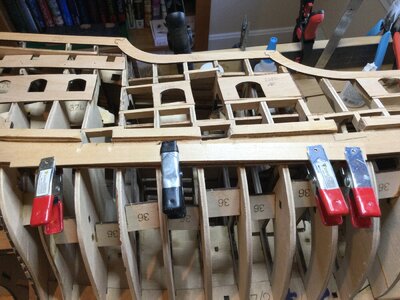
A piece of material left over from other builds laid on top of the Main Wale to protect it from saw marks. ( Probably should have done this on the Port side ). Yup learn as you go!
Jan
A little mechanical protection while using an excel saw to cut out the gunport.

A piece of material left over from other builds laid on top of the Main Wale to protect it from saw marks. ( Probably should have done this on the Port side ). Yup learn as you go!
Jan
The build slowly progresses.
Hard to believe that there are nine planks in the picture. The two wales are three planks laminated.
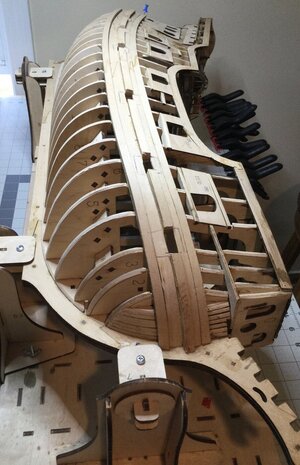
Now the rest of the story. The build part you don‘t see in the videos.
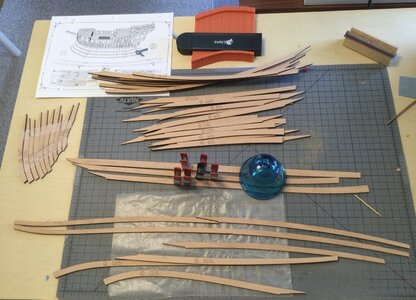
Some planks are in two pieces others are in three. I’ve taken quite a bit of time to sand off the char. After they are assembled the heat bending process starts.
Jan
Hard to believe that there are nine planks in the picture. The two wales are three planks laminated.

Now the rest of the story. The build part you don‘t see in the videos.

Some planks are in two pieces others are in three. I’ve taken quite a bit of time to sand off the char. After they are assembled the heat bending process starts.
Jan
Looking very good - and it seems, that the planking elements are fitting well
- Joined
- Nov 30, 2022
- Messages
- 132
- Points
- 113

ThanksLooking very good - and it seems, that the planking elements are fitting well

