Nikitin San Bartolome 1584 A.D. (Kit #35)

Hej, jeg købte San Bartolome #13 men jeg mangler nogle tegninger, jeg modtog kun 1 sæt der viser monteringen af skroget, ingen tegninger af planke og rigning, hvad med dig der købte dette sæt, fik du alle tegningerne
“Hi, I bought San Bartolome #13 but I am missing some drawings, I only received 1 set showing the mounting of the hull, no drawings of plank and rigging, what about you who bought this set, did you get all the drawings.”

We are all in the same situation. Denis and Pavel are working on the second set of instructions and will provide them when available.
 
This part will be needed when working on the second part of the instructions, the main thing is not to lose it.

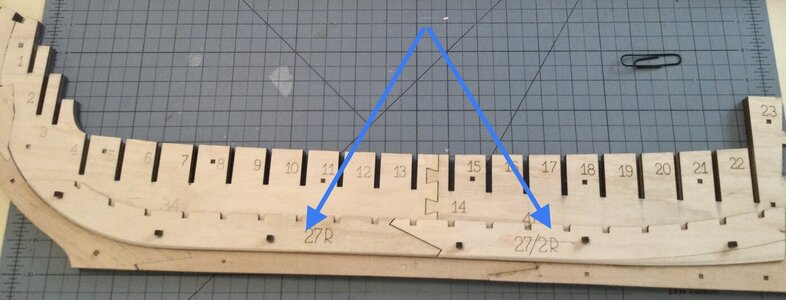
@Pavel Nikitin, While waiting for glue to set on my other build I started to add the bottom pieces to the keel (blue arrows)

View attachment 337947

BUT on the same page of the build instructions is this item (#10K).

View attachment 337948

I can not find where it should go.

I can not find where it should go.

This part will be needed when working on the second part of the instructions, the main thing is not to lose it.
 
This part will be needed when working on the second part of the instructions, the main thing is not to lose it.
Thank you for the quick reply. The part is back in the kit box for safe keeping. Your instructions are great and coupled with your videos the Galleon is easy to work on. BTW there are two pages 18/20 but no page 19 in my build instructions. Not a problem I'm on to fairing frames 1-3.
 
Thank you for the quick reply. The part is back in the kit box for safe keeping. Your instructions are great and coupled with your videos the Galleon is easy to work on. BTW there are two pages 18/20 but no page 19 in my build instructions. Not a problem I'm on to fairing frames 1-3.
The part #10K is the back of the keel/stern, its for mounting the rudder. I just got an email saying my paint kit was being sent and that second set of instructions almost ready. Instructions will either be mailed or available in PDF ( either download or emailed ) I told them to just send me PDF. I can print any pages I may need. I just checked my instruction and didn't have page 19 either but I don't think anything vital missing
 
The part #10K is the back of the keel/stern, its for mounting the rudder. I just got an email saying my paint kit was being sent and that second set of instructions almost ready. Instructions will either be mailed or available in PDF ( either download or emailed ) I told them to just send me PDF. I can print any pages I may need. I just checked my instruction and didn't have page 19 either but I don't think anything vital missing
Thanks for the update. Glad to see your paint is on the way. I tucked part #10K back into kit box #1, it ought to be safe there. I wouldn't mind downloading the second section of instructions. Download or PDF is OK by me. Worked a bit on the frames today to make sure they all fit flush to the Keel. I've not started any of the "fairing"or filing of all the little slots in the first five frames or the last four. I'm trying to decide if I'm brave enough to use my Dremel tool with a sanding disk to shape all those frame edges.
 
Last edited:
Thanks for the update. Glad to see your paint is on the way. I tucked part #10K back into kit box #1, it ought to be safe there. I wouldn't mind downloading the second section of instructions. Download or PDF is OK by me. Worked a bit on the frames today to make sure they all fit flush to the Keel. I've not started any of the "fairing"or filing of all the little slots in the first five frames or the last four. I'm trying to decide if I'm brave enough to use my Dremel tool with a sanding disk to shape all those frame edges.
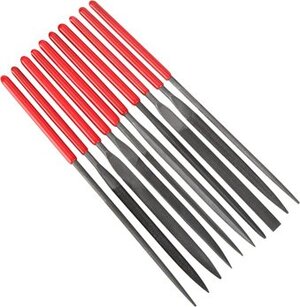
I use my bench grinder to get the edges down about 75% and then wait until the whole bulkhead frame is assembled to finish shape with palm sander. For the little slots you will definitely need some mini files. cheap at amazon
mini files.jpg
 
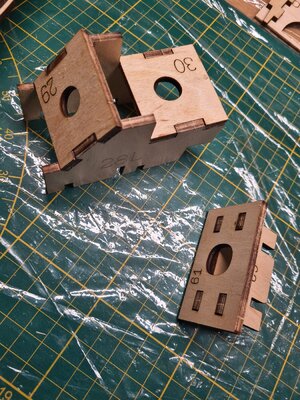
I had a little time during the week between Fall chores to work in the shipyard. There is quite a bit of preparation required for each frame. The edges need to be filed (faired) and quite a few slots need to be filed out. I added a small sanding drum to my mini Dremel tool and after a bit of practice on scrap wood I tackled the filing (fairing) of the first tree frames. That was definitely an outdoor job. Lots of sawdust.

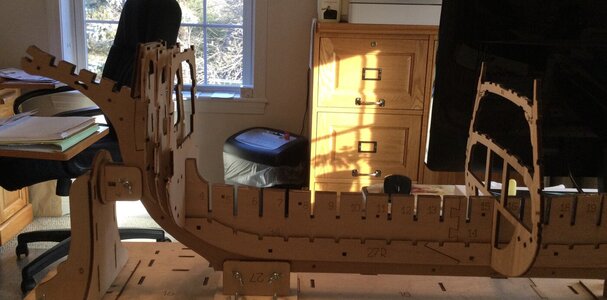
The first three frames assembled and dry flitted in place.

A09D322C-79BA-4BE0-A35C-881C84881B19.jpeg

I think it’s important to note that the instructions indicate these are not to be glued in place yet. The other frame in the picture is #15. That frame requires some assembly. Most of the frames require a bit of filing (fairing), all are clearly marked as to how much.

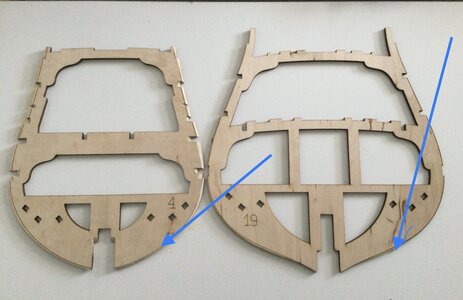
What is interesting in the instructions is the placement of the frames. Frames #1 to #15 the ID number of the frames face toward the bow, frames #16 to #22 the ID numbers face toward the stern. Easy to miss that part.

F61C4B72-8A4F-498C-ACFF-BABB34DBBF61.jpeg

The scored lines on the frames for fairing. I‘m not an expert on this stuff but it seems to me if all 22 frames faced toward the bow and had been pre-faired, there would have to be a “re-do” at the stern after assembly. I could be wrong?

Ah, watching the news/weather report. Remnants of Florida Hurricane will be here tomorrow. LOTS of rain. :DShipyard time for sure:D
 
Back
Top