Nikitin San Bartolome 1584 A.D. (Kit #35)

You are most welcome Jan. We sent Nicole up to you guys to share some of our liquid sunshine.
Thank you very much. All sources of moisture are greatly appreciated. The last couple of years have not had significant rain to end our drought condition. Rain in the last couple of months has somewhat alleviated that.

There appears to be significant damage to the coastal area that the Hurricane passed through. Hopefully none of it affected you.
 
View attachment 339950

I'm not really happy with the instructions.
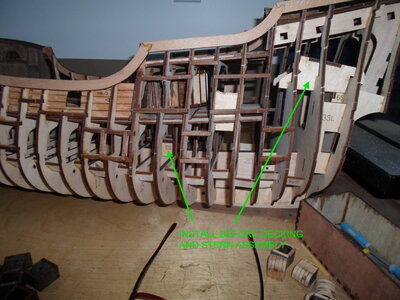
where do these 2 parts belong exactly?

View attachment 339950

I'm not really happy with the instructions.
where do these 2 parts belong exactly?
I was a little disappointed with this Bartolome ship set. I hope in the future Pavel will remove the obvious instructions and wood. Deficiencies in the instructions. Also, I'm really looking forward to the walnut and cherry wood setas.
 
View attachment 339950

I'm not really happy with the instructions.
where do these 2 parts belong exactly?
These are mast base supports and go inside the hull ( page 76 ) shows the forward mount being installed after the main deck planks are down. The mid ship ( part 19 ) assembly goes between bulk head 15 & 16 ( lines up with mast hole in deck ) and the rear mount goes in between 21 & 23. Be sure to plan ahead and install these last 2 parts before getting to far into deck assembly.
mast base.jpg
 
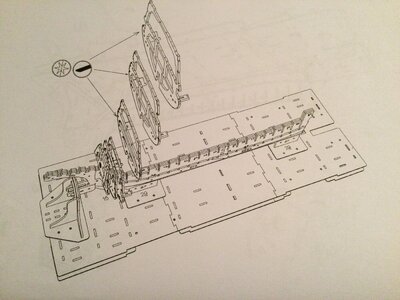
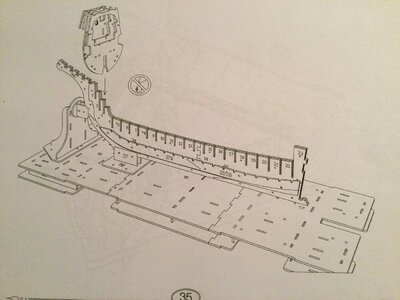
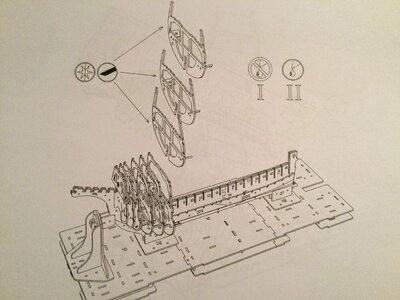
A quick note on the confusion with the instructions. Pavel provides a booklet of isometric drawings for building instructions. He also has a YouTube channel that provides 33 to 34 videos that help explain the build process.

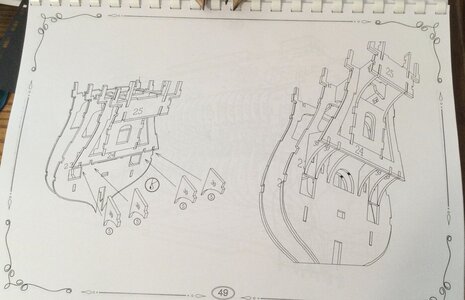
The start of the frame placement as shown in the instruction booklet. Note the glue and no glue symbols. file the edges symbol, etc.

B1C79C6E-C330-4FED-B129-7F416F3A0460.jpeg

C6EB61F7-BAB0-46BB-9B96-918F8C22F76D.jpeg


77A5FE7A-06EA-448E-98AB-68E2325900B4.jpeg

These instructions coupled the YouTube video.

Video #7

Ships of Pavel Nikitin San Bartolome More associated videos.

The video shows a dry fit of all the frames, then continues to show the frames being permanently mounted. During that process those odd mast bases are added.


Geez I hope this makes sense. Look at the instruction, watch the appropriate video and repeat to get an idea of how to proceed.
 
Last edited:
That sounds far too complicated for an English teacher to understand - I'll stick to the Dutch ships. ROTF
That’s funny. It’s a lot of “ Do Overs” the process that Pavel uses is very logical. As I’ve noted before, he places all the frames on the “Assembled Keel” structure for fit and accuracy. Then he removes the frames and preps them (fairs, files slots) and dry fits them again but with spacers inserted between the frames. Once he is satisfied with the fit he removed all the frames and then replaces and glues them starting at the bow. If you can access the video ( I know Google is problematic for you ) the process is great to watch.

Complicated ”no”, time consuming “yes”.
Google is not the only thing that is problematic now. PayPal has also been discontinued. Businesses can still receive payments, but in my private capacity I cannot use PayPal anymore to pay for anything. Since that has been the only way I could pay for any model-related items (including models, of course), it has put paid to that. In practice it means that I can only buy Chinese-manufactured kits now.
 
Google is not the only thing that is problematic now. PayPal has also been discontinued. Businesses can still receive payments, but in my private capacity I cannot use PayPal anymore to pay for anything. Since that has been the only way I could pay for any model-related items (including models, of course), it has put paid to that. In practice it means that I can only buy Chinese-manufactured kits now.
:eek::eek:All I can say is “WOW”. PayPal is my constant go to.:eek::eek:
 
Google is not the only thing that is problematic now. PayPal has also been discontinued. Businesses can still receive payments, but in my private capacity I cannot use PayPal anymore to pay for anything. Since that has been the only way I could pay for any model-related items (including models, of course), it has put paid to that. In practice it means that I can only buy Chinese-manufactured kits now.
You can use Wise to pay for merchandise,you just need the bank informations
 
OK I TOTALLY AGREE WITH JIM ABOUT PAVEL/DENIS, HAD A LOT OF EMAILS RECENTLY TRYING TO GET THE OSBURGH2 KIT A LOT MY FAULT DIFFERENT TOPIC, THEY CAN ONLY COMUNICATE DURING CERTAIN HOURS IN ORDER TO CONSERVE ENERGY, REMARKABLE COUNTRY AND PEOPLE. TO BE ABLE TO CONTINUE TO OPERATE UNDER THESE CONDITIONS, TO ALL MY UKRANIAN FRIENDS BRAVO, CONGRJULATION ON THE GREAT VICTORY OF KERSHON, THE MIRACLE BY GOD AND HIS SON JESUES CHRIST CONTINUES PRESS ON. GOD BLESS STAY SAFE ALL DON
 
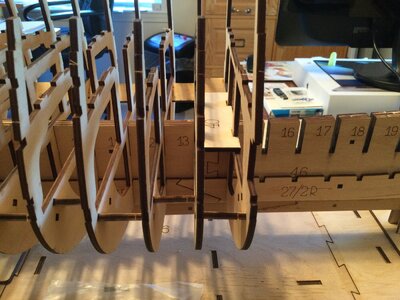
The second dry fit of parts but this time with the spacers between the frames and also the mast modules. Still no glue.IMG_2696.jpeg

Part #40 fits between frames 13 and fourteen. The part needs a little work to readily slide into the slots on frame fourteen.

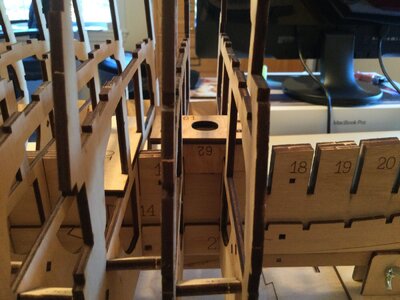
IMG_2697.jpeg

Assembly sixtyone/sixtytwo fits between frames fourteen and fifteen.

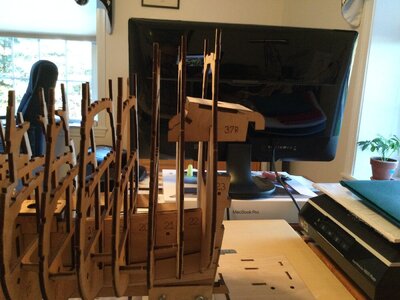
IMG_2698.jpeg

Assembly six/thirty seven fits into slots on frames twenty one and twenty two. Interesting to note that spacers number 36 fit only between frames four and twenty one. The spacer between frame twenty two and twenty three is part number 36/2.


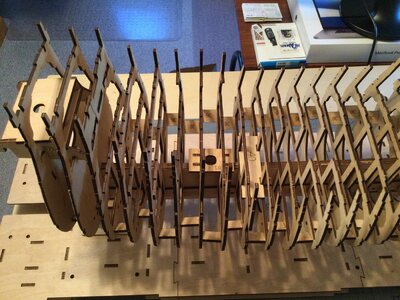
IMG_2699.jpeg

A top down view of the dry fit showing all the assemblies in place.

Next step is to take it all apart and start the final glue and placement of the frames one through twenty two.

I hope this answers some of the questions posed earlier. It looks like a lot of duplicate work but is really careful steps to make sure that everything fits as designed.
 
Oh Boy. A major “Do Over”. I had a major build session yesterday, looked at the plans, watched the video, and started the frame placing and glueing process.

Looked at the instructions for assembling the Stern Frames #22 and #23.

7AFBE22A-9F8E-4543-9D3C-42ADF810657D.jpeg

Yessir I can do that. I found all the appropriate parts and started the process.

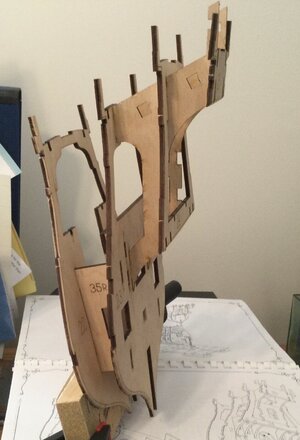
CA10BBFF-9B39-439D-8846-7C7495A05C30.jpeg

The assembly faired, sanded and all glued up ready to mount on the keel.

AND THEN THE “OOPS” MOMENT.

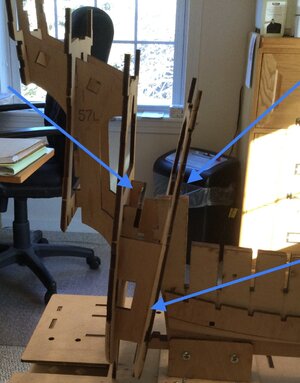
4F4EBD99-F033-4C60-BD2A-75A0793FA852.jpeg

No way will the assembly slide into the last two slots. I had completely forgotten the end of the video that shows frame #22 glued in first then frame #23 and the rest of the assembled parts. :eek::rolleyes::eek:

I‘ve made a big donation to the “Bad Word“ jar and after my morning coffee will start the “Re Do” process.
 
That is not serious my friend. Some hot water, a brush and off you go!
 
Back
Top