@dockattner, yup I had all the information on how to do that step and still got it wrong.
-

Win a Free Custom Engraved Brass Coin!!!
As a way to introduce our brass coins to the community, we will raffle off a free coin during the month of August. Follow link ABOVE for instructions for entering.
-

PRE-ORDER SHIPS IN SCALE TODAY!
The beloved Ships in Scale Magazine is back and charting a new course for 2026!
Discover new skills, new techniques, and new inspirations in every issue.
NOTE THAT OUR FIRST ISSUE WILL BE JAN/FEB 2026
You are using an out of date browser. It may not display this or other websites correctly.
You should upgrade or use an alternative browser.
You should upgrade or use an alternative browser.
Nikitin San Bartolome 1584 A.D. (Kit #35)
- Thread starter Pathfinder65
- Start date
- Watchers 85
Yup. I guess it comes down to “measure three times and cut once”. I should have really paid more attention, after all I have the fitted the frames three times and never paid attention to the frame fit at the stern. It wasn’t the lack of building instructions all the information is available.That is not serious my friend. Some hot water, a brush and off you go!
sounds like something my wife says about me...@dockattner, yup I had all the information on how to do that step and still got it wrong.
Good evening Jan…you not alone here- I promise. Cheers Grant@dockattner, yup I had all the information on how to do that step and still got it wrong.
The ”Re-Do” was a success. Lots of hot water to break the glue bonds, then let the parts dry.
A note for the “San Bartolome” builders. Frame 23 needs a bit of work to properly fit onto the keel.
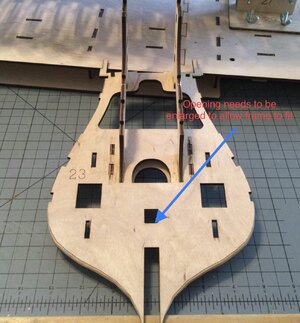
The arrow points to the “guide” hole that aligns the frame with the keel. That opening needs to have the bottom cut out another 1-2 mm to line up correctly. The build plan doesn’t show that but the build video does.
Assembly made up of frames 22 & 23 and other parts mounted and fixed in place.
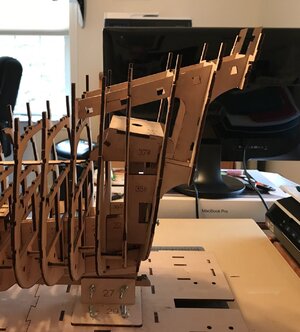
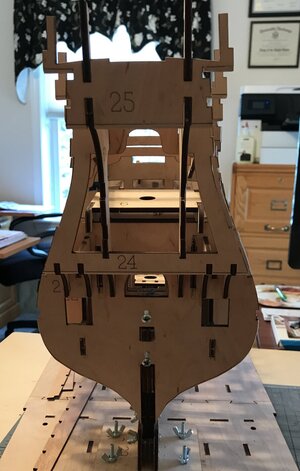
I’ve found the best way to proceed is to study the instructions, watch the appropriate video, dry fit the parts and repeat that process before any glue touches wood.
A note for the “San Bartolome” builders. Frame 23 needs a bit of work to properly fit onto the keel.

The arrow points to the “guide” hole that aligns the frame with the keel. That opening needs to have the bottom cut out another 1-2 mm to line up correctly. The build plan doesn’t show that but the build video does.
Assembly made up of frames 22 & 23 and other parts mounted and fixed in place.


I’ve found the best way to proceed is to study the instructions, watch the appropriate video, dry fit the parts and repeat that process before any glue touches wood.
Good morning Jan. Awesome post. Even the frames are aesthetically appealing.Clearly not an easy build (I see you seem to gravitate that way- WB and allThe ”Re-Do” was a success. Lots of hot water to break the glue bonds, then let the parts dry.
A note for the “San Bartolome” builders. Frame 23 needs a bit of work to properly fit onto the keel.
View attachment 340834
The arrow points to the “guide” hole that aligns the frame with the keel. That opening needs to have the bottom cut out another 1-2 mm to line up correctly. The build plan doesn’t show that but the build video does.
Assembly made up of frames 22 & 23 and other parts mounted and fixed in place.
View attachment 340835
View attachment 340836
I’ve found the best way to proceed is to study the instructions, watch the appropriate video, dry fit the parts and repeat that process before any glue touches wood.
Indeed that seems to be the way it is. This build is quite the challenge, it looks simple on paper and in the various videos, but there is a wee bitGood morning Jan. Awesome post. Even the frames are aesthetically appealing.Clearly not an easy build (I see you seem to gravitate that way- WB and all). Cheers Grant
A bit more progress. Once again it’s look at the plans, watch the video and try to figure it all out.
The part in question #126
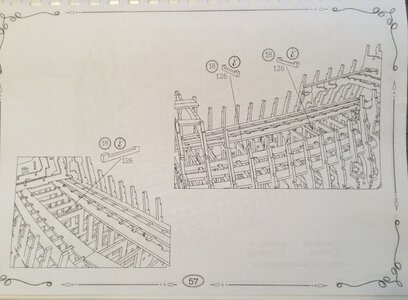
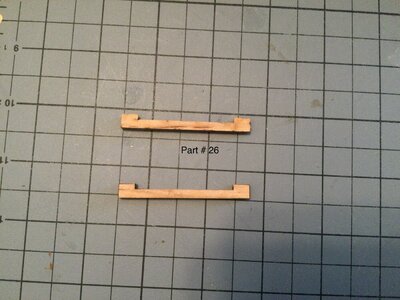
It’s hard to see in all the information but these two pieces could be the cause of a problem later in the build.
To figure out how to install them I jumped ahead and assembled this.
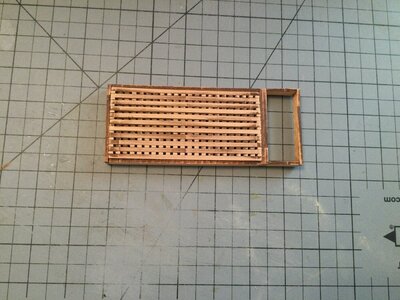
The grating has to fit into this space.
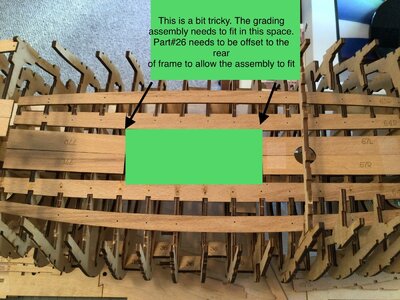
For the grating to fit down into the opening and onto the frames, parts #26 have be glued off center to rear of the frames they sit on.
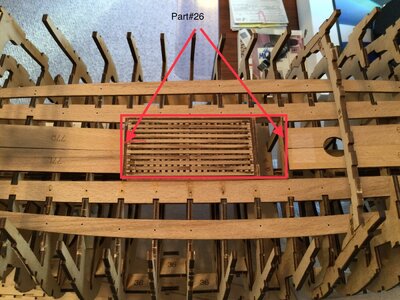
I hope this makes sense?
BTW, I almost missed gluing this part (41) in place on both sides,
Edit: Part #26 mentioned above should be Part #126
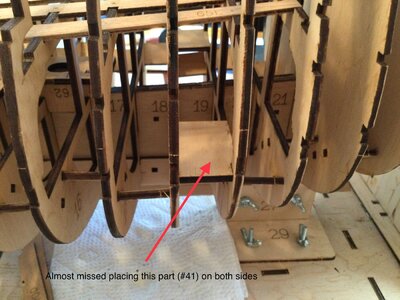
Yup, lower right of the build page.
The part in question #126


It’s hard to see in all the information but these two pieces could be the cause of a problem later in the build.
To figure out how to install them I jumped ahead and assembled this.

The grating has to fit into this space.

For the grating to fit down into the opening and onto the frames, parts #26 have be glued off center to rear of the frames they sit on.

I hope this makes sense?
BTW, I almost missed gluing this part (41) in place on both sides,
Edit: Part #26 mentioned above should be Part #126

Yup, lower right of the build page.
Last edited:
- Joined
- Jan 9, 2020
- Messages
- 10,566
- Points
- 938

Very complicated indeed. Jan, check your grating. I do not know if it is fully assembled, but what you have shown there, does not look right. It almost looks as if the longitudinal spars sit on top of the cross-length ones.
Good point on the grading.Very complicated indeed. Jan, check your grating. I do not know if it is fully assembled, but what you have shown there, does not look right. It almost looks as if the longitudinal spars sit on top of the cross-length ones.
The instructions on page 83, I wasn't sure on the assembly since it looked odd to me. BUT.....
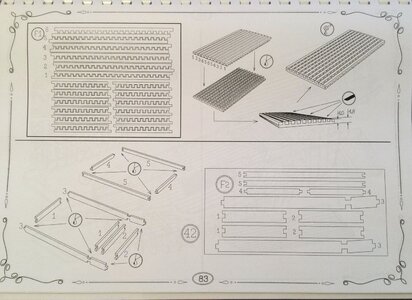
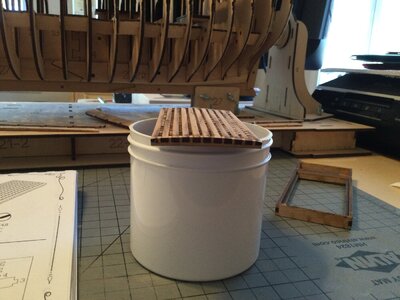
The assembly.
The top down view doesn't show the convex curve of the actual assembly. It also looks much better when all the "char" is sanded off.Thank you for that clarification, Jan. You have assembled the grating correctly. It just looks strange directly from the top.
Good morning Jan. This is a complex construction- so many parts just to create the frame. Gratings looks good. Cheers GrantGood point on the grading.
The instructions on page 83, I wasn't sure on the assembly since it looked odd to me. BUT.....
View attachment 341609
View attachment 341610
The assembly.
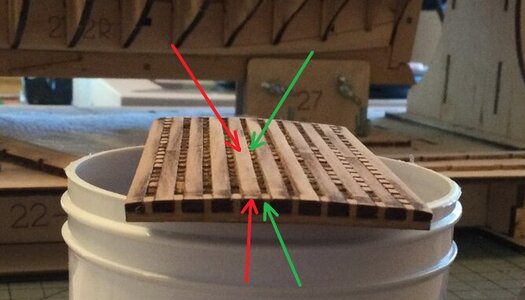
Thanks Uwe. I'll have to work on that.Yes - the top of the grating should be sanded down, that the red and the green areas have the same top level - like in the front
so the complete top of the grating should be sanded
View attachment 341967
Final glue up of part #126. (noted in post #110 above, miss labeled by me as part #26)
I considered a few methods of how to place this part on the frames so it was slightly offset ie. towards the bow and stern. I finally settled on drilling two holes in the center of the part, adding a couple of push pins with long pins and using those as a guide against the frame. Glue was added to the bottom of the parts and the slot in the appropriate frames. After allowing the glue to get tacky, the part was set in place.
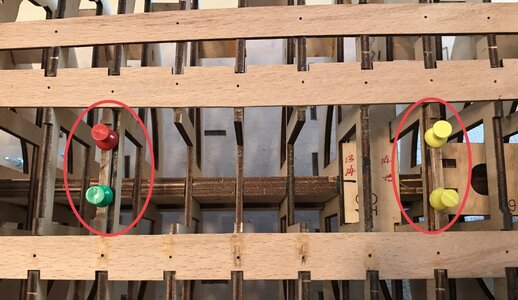
The photo shows the part sitting on the rear half of the frame. A minor step for most of you but a small victory for me.
I considered a few methods of how to place this part on the frames so it was slightly offset ie. towards the bow and stern. I finally settled on drilling two holes in the center of the part, adding a couple of push pins with long pins and using those as a guide against the frame. Glue was added to the bottom of the parts and the slot in the appropriate frames. After allowing the glue to get tacky, the part was set in place.

The photo shows the part sitting on the rear half of the frame. A minor step for most of you but a small victory for me.
Good point on the grading.
The instructions on page 83, I wasn't sure on the assembly since it looked odd to me. BUT.....
View attachment 341609
View attachment 341610
The assembly.
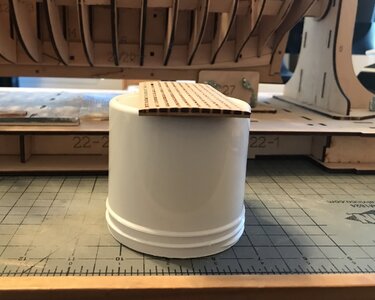
@Uwek. Think I almost have it sanded to it's final shape. Going set it aside for now and work on it again before the final installation on the deck.
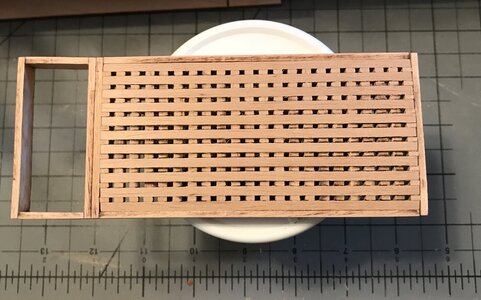
I can commiserate with Heinrich, I now know what his aches felt like after his "OAK" sanding, I spent most of the day sanding the grading by hand. OFF to do something else
Last edited:
The next step in the build. Pavel Youtube San Bartolome Video #12. Looked simple enough but then all his videos make the build look easy.
San Bartome Video #12
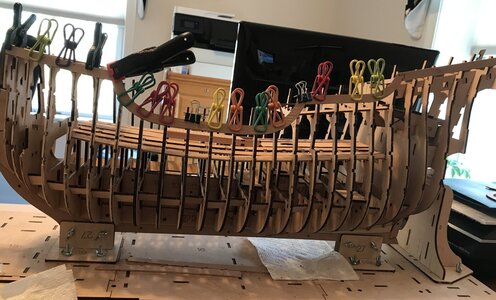
I spent most of the morning dry fitting, adjusting the fit and dry fitting until the final fit was glued. Only four parts to glue, lots of clamps to hold them in place and a major donation to the "Bad Word" jar. That's it for today, the Admiral has filled the house with wonderful aromas, ie. Oatmeal Bread, Cherry and Pumpkin pies and other Thanksgiving goodies. So I'm off to beg for samples
Happy Thanksgiving to all of you, enjoy the day.
San Bartome Video #12

I spent most of the morning dry fitting, adjusting the fit and dry fitting until the final fit was glued. Only four parts to glue, lots of clamps to hold them in place and a major donation to the "Bad Word" jar. That's it for today, the Admiral has filled the house with wonderful aromas, ie. Oatmeal Bread, Cherry and Pumpkin pies and other Thanksgiving goodies. So I'm off to beg for samples
Happy Thanksgiving to all of you, enjoy the day.
Last edited:

