Thank you! Yes, I purchased this kit a few months ago.You are doing a grand job on this and I will continue to watch for inspiration. I have a Norske Love kit I bought 25 years ago at an auction but have put off building it partly because some parts are missing (like the decks) and partly because much of it is not laser cut, just marked in outline on the wood and so has to be cut by hand. A lot of work! I assume you kit is more recent?
-

Win a Free Custom Engraved Brass Coin!!!
As a way to introduce our brass coins to the community, we will raffle off a free coin during the month of August. Follow link ABOVE for instructions for entering.
-

PRE-ORDER SHIPS IN SCALE TODAY!
The beloved Ships in Scale Magazine is back and charting a new course for 2026!
Discover new skills, new techniques, and new inspirations in every issue.
NOTE THAT OUR FIRST ISSUE WILL BE JAN/FEB 2026
You are using an out of date browser. It may not display this or other websites correctly.
You should upgrade or use an alternative browser.
You should upgrade or use an alternative browser.
NORSKE LOVE - Billing Boats 1:75 scale
- Thread starter Dean62
- Start date
- Watchers 74
-
- Tags
- billing boats norske lowe
Thank you Johan. This is a Danish-Norwegian ship, I believe they used the block panel style walls.Hey Dean,
Yeah, slightly darker or keep it as it is. Depends on what you want to present; a more weather-worn look, or a more pristine presentation.
From the Modelbrouwers.nl webpage I copied two pictures of one of the decks of the Batavia, slightly wet ánd about 25 years old:View attachment 264064View attachment 264065
What's also shown are two ways the panels were build, one panel with butt joints (first picture) and one with overlapping joints (second picture). How the walls were build on the NL, I wouldn't know, but may be there are some resources around giving an incling on what the Norwegians did...
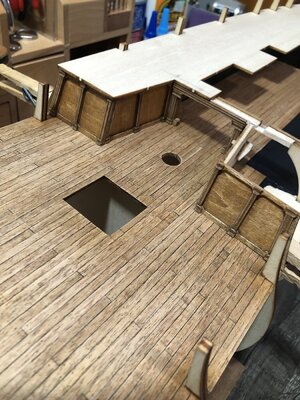
After looking at the deck, I knew I wasn’t done. So I added stain, and then when dry, used steel wool. The nice thing about this process is that I put clear on first to prevent the stain from penetrating too deep in the wood. That way the stain stays in the wood grain and nail holes, but gets mostly removed on top with the steel wool, to lighten the color. This also gives it a nice natural worn look.
I also painted black around the unplanked areas at the stern. That way if by chance you can get at the right angle to view past the planked area, then it will just look like a shadow verse being unplanked.
And finally, the nails are subtle, because I want them visible at close distance, but not so much from far away. Just like a real ship.
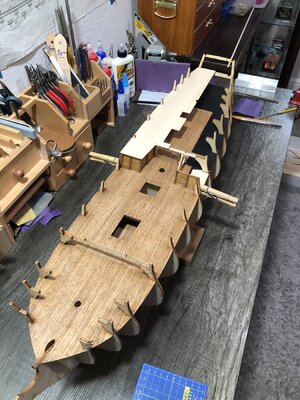
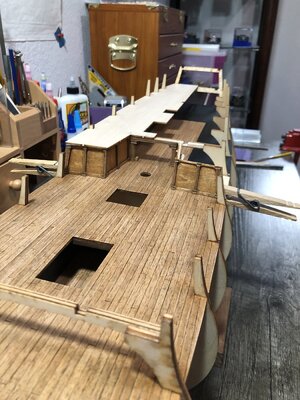
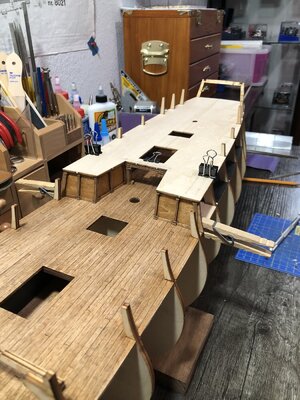
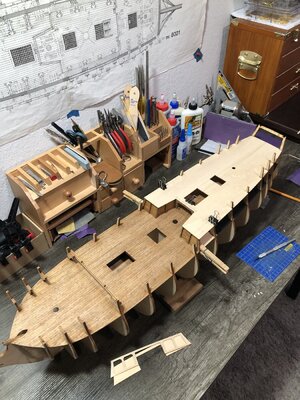
Next I will make this wall towards the bow…
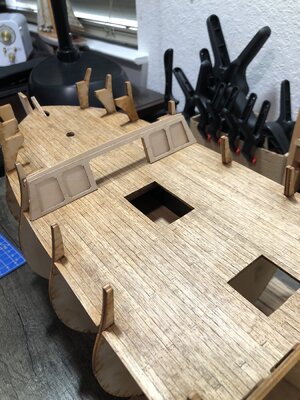
I also painted black around the unplanked areas at the stern. That way if by chance you can get at the right angle to view past the planked area, then it will just look like a shadow verse being unplanked.
And finally, the nails are subtle, because I want them visible at close distance, but not so much from far away. Just like a real ship.


Next I will make this wall towards the bow…

- Joined
- Sep 3, 2021
- Messages
- 5,197
- Points
- 738

Looking good. Just a tad more grayish and slightly darker would be my choice, but still, you're the man in charge, so you decide.After looking at the deck, I knew I wasn’t done. So I added stain, and then when dry, used steel wool. The nice thing about this process is that I put clear on first to prevent the stain from penetrating too deep in the wood. That way the stain stays in the wood grain and nail holes, but gets mostly removed on top with the steel wool, to lighten the color. This also gives it a nice natural worn look.
I also painted black around the unplanked areas at the stern. That way if by chance you can get at the right angle to view past the planked area, then it will just look like a shadow verse being unplanked.
And finally, the nails are subtle, because I want them visible at close distance, but not so much from far away. Just like a real ship.
View attachment 264115View attachment 264116View attachment 264117
Next I will make this wall towards the bow…
View attachment 264118
Problem is… too get more grey, you have to remove more stain. The more stain you remove, the lighter it gets…lol. So darker and more grey is not really an option. Other thing is a photo rarely represents the actual color seen in person. It looks really good in person. Also pics are taken in bright light. I need to take an outdoor natural light picture. Then I will post.Looking good. Just a tad more grayish and slightly darker would be my choice, but still, you're the man in charge, so you decide.
Ps - a final note, surrounding walls factor into shade. On the BN deck, I was worried it might be too dark. But with white bulwarks it was perfect. In this case if it looks a little light, with the dark walls, it will most likely be ok.
Last edited:
I like the brownish tones of the deck the way you have it. There is enough variation in color to make it look lightly used without appearing beat up and greyed out by the sun and salt... Once you go in the direction of aged you have to go all in - and that has never been the 'theme' of your work thus far. But as our colleague rightly offered: you're the captain!
Thank you for your input Paul! That is the look I was after. I am leaving it alone at this point. Besides, whatever recipe I use as far as steps go, I have to be able to duplicate on two more levels of decks!I like the brownish tones of the deck the way you have it. There is enough variation in color to make it look lightly used without appearing beat up and greyed out by the sun and salt... Once you go in the direction of aged you have to go all in - and that has never been the 'theme' of your work thus far. But as our colleague rightly offered: you're the captain!
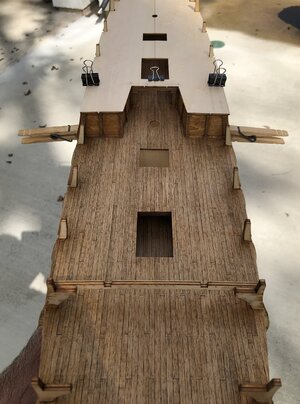
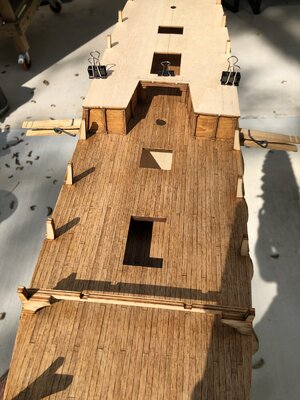
I took a few pictures outside to show how lighting effects the color.
In the shade verses sun…
Just wanted to say, that the nailing of the deck is looking very good
Good decision - and a very good execution
Good decision - and a very good execution
Thank you Uwek, I appreciate that! I was worried it might be too subtle, but I think it looks more natural.Just wanted to say, that the nailing of the deck is looking very good
Good decision - and a very good execution
Kurt Konrath
Kurt Konrath
Looking great as always, and as far as decks go the old saying applies, "you nailed it right on"
Thank you Kurt!Looking great as always, and as far as decks go the old saying applies, "you nailed it right on"
Last edited:
The weathered deck, the fade out of the nails, both really well done Dean. At first I thought there might be a disconnect between the deck and the wall panels as they pertain to weathering but now I see a beautiful harmony especially in natural light. I say well done so far.
Thank you Daniel! It helps to get opinions, because we tend to second guess ourselves given choices…lol.The weathered deck, the fade out of the nails, both really well done Dean. At first I thought there might be a disconnect between the deck and the wall panels as they pertain to weathering but now I see a beautiful harmony especially in natural light. I say well done so far.
I just have to do it 3 more times! Why do we build large ships?
- Joined
- Sep 3, 2021
- Messages
- 5,197
- Points
- 738

That's one real good looking deck!Thank you for your input Paul! That is the look I was after. I am leaving it alone at this point. Besides, whatever recipe I use as far as steps go, I have to be able to duplicate on two more levels of decks!
I took a few pictures outside to show how lighting effects the color.
In the shade verses sun…View attachment 264128View attachment 264127
I also appreciate the "floor nails", very subtle, yet there.
- Joined
- Sep 3, 2021
- Messages
- 5,197
- Points
- 738

Morning Dean,
Maybe I missed something between all the replies, but I wonder about your final decision on how to represent the nails in the deck planks. A few while ago there was a topic on how to represent the nails, but I guess I missed the final verdict.
Johan
Maybe I missed something between all the replies, but I wonder about your final decision on how to represent the nails in the deck planks. A few while ago there was a topic on how to represent the nails, but I guess I missed the final verdict.
Johan
- Joined
- Sep 3, 2021
- Messages
- 5,197
- Points
- 738

Don't know how it's for you, but for me the little boy is bloody close to the surface...Because really deep down the little boy is still alive in all of us.
Thank you Johan! I guess I have looked at it so much, I have to get away from it for a day or two and then look at it, as if for the first time.That's one real good looking deck!
I also appreciate the "floor nails", very subtle, yet there.

