MY FATHER WAS A CARPENTER TOO, AND HE HAD SUCH A POT.iT SMELLED LIKE HELL BUT IT FUNCIONED.My father used to have a glue pot which contained I think a solid brown mass of glue which looked almost see through. This was heated up and used - it smelt abit. Not sure what it was though. Seem to remember some glue was made from horse's hooves!!. Technology has move on since then however issue of vapour from drying glue still has not been solved. Tried to use other glues on hull but nothing has the instant grab of superglue
-

Win a Free Custom Engraved Brass Coin!!!
As a way to introduce our brass coins to the community, we will raffle off a free coin during the month of August. Follow link ABOVE for instructions for entering.
-

PRE-ORDER SHIPS IN SCALE TODAY!
The beloved Ships in Scale Magazine is back and charting a new course for 2026!
Discover new skills, new techniques, and new inspirations in every issue.
NOTE THAT OUR FIRST ISSUE WILL BE JAN/FEB 2026
You are using an out of date browser. It may not display this or other websites correctly.
You should upgrade or use an alternative browser.
You should upgrade or use an alternative browser.
Please don't overlook Bugler's book!The book by Longridge, "The Anatomy of Nelson's Ship", is the best source of information about the "VICTORY".
Thank you for sharing this video. It is quite good -with some minor mistakes - generally coming over YouTube. If you follow the instructions here -with some minor changes- there is no need for a 2Nd planking. In my time of building, I had used 2Nd planking a few times. Over 30 build over about 50 years or a little more.This works for second planking also.
tack saa mycket- el capi
- Joined
- Sep 27, 2022
- Messages
- 25
- Points
- 48

It may have been a set up used by Cobblers to glue shoes. There was an old fashion cobbler in our town, he recently passed, and he had a large pot of glue as well.My father used to have a glue pot which contained I think a solid brown mass of glue which looked almost see through. This was heated up and used - it smelt abit. Not sure what it was though. Seem to remember some glue was made from horse's hooves!!. Technology has move on since then however issue of vapour from drying glue still has not been solved. Tried to use other glues on hull but nothing has the instant grab of superglue
Been busy over the Christmas period. Put the Wales on - yes they are not truly accurate however after alot of head scratching they seem right(ish)
The instructions said to use 2 no 4x2 mm strips for the top and middle wale (Caldercraft use 3 no Walnut strips 1x3.5mm). This immediately made me wonder if the Occre ones were too big - yes there is a difference in scale. My reading of the Alan McGowan Victory book talks about Wales being 10 inches thick and made up of 4 strakes each 15 inch wide and 10 inch deep
Instructions call for the use of 2 no 2x4mm strips for the top and middle wale. First I tried 2 no strips for the middle Wale but it did not seem right in proportion of distance between gun ports so I put a third one on. Middle one looks right with only two strips. As you can see I had a bit of a problem getting them in the correct position, in some places its a bit too high. I then used my miniature plane to reduce the thickness of them to around 1.5mm
Visually it seems to work even though they are not really correct if you scale up the originals........ So moving on
As you can see the bow and stern where the Wales curve round is still 'work in progress' - more sanding plus filling to get any gaps between strips filled in and the strips to meet correctly - still it will be hidden once the all covering paint is applied. Clever use of painting the black bands against the yellow hull will make the problems I encountered fitting the Wales visually go away - I hope!!
Started to cut away above the gun ports to make room for the pre-cast pieces of metal to go above the gun port (photo to follow in the next posting)
It beginning to come to life. Next job making hinges for the gun ports
Happy new year to everyone - I will make 2024 a Occre Victory modeling year with the aim of completion before 2025!!
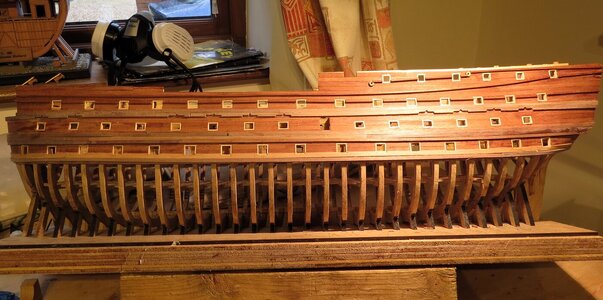
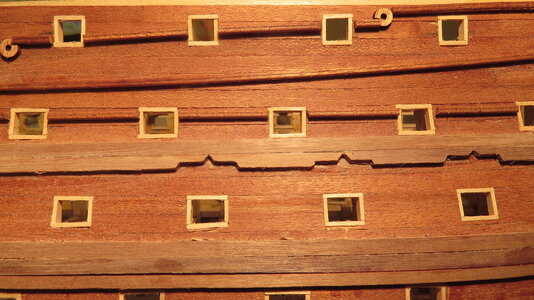
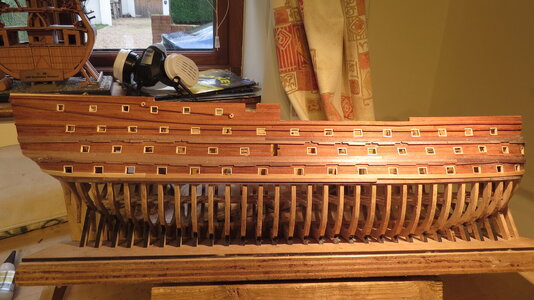
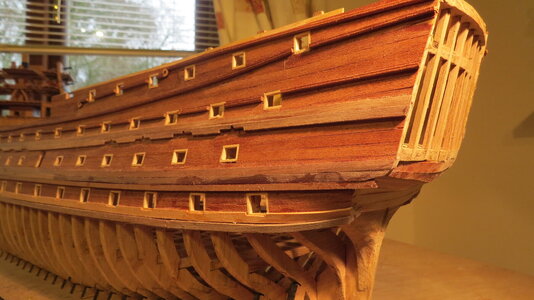


It looks like some of the bulkheads will or are disturbing the gunports. They may not be fished yet, or the images are not that clear. -elcapiBeen busy over the Christmas period. Put the Wales on - yes they are not truly accurate however after alot of head scratching they seem right(ish)
The instructions said to use 2 no 4x2 mm strips for the top and middle wale (Caldercraft use 3 no Walnut strips 1x3.5mm). This immediately made me wonder if the Occre ones were too big - yes there is a difference in scale. My reading of the Alan McGowan Victory book talks about Wales being 10 inches thick and made up of 4 strakes each 15 inch wide and 10 inch deep
Instructions call for the use of 2 no 2x4mm strips for the top and middle wale. First I tried 2 no strips for the middle Wale but it did not seem right in proportion of distance between gun ports so I put a third one on. Middle one looks right with only two strips. As you can see I had a bit of a problem getting them in the correct position, in some places its a bit too high. I then used my miniature plane to reduce the thickness of them to around 1.5mm
Visually it seems to work even though they are not really correct if you scale up the originals........ So moving on
As you can see the bow and stern where the Wales curve round is still 'work in progress' - more sanding plus filling to get any gaps between strips filled in and the strips to meet correctly - still it will be hidden once the all covering paint is applied. Clever use of painting the black bands against the yellow hull will make the problems I encountered fitting the Wales visually go away - I hope!!
Started to cut away above the gun ports to make room for the pre-cast pieces of metal to go above the gun port (photo to follow in the next posting)
It beginning to come to life. Next job making hinges for the gun ports
Happy new year to everyone - I will make 2024 a Occre Victory modeling year with the aim of completion before 2025!!
View attachment 418476
View attachment 418477
View attachment 418478
View attachment 418479
View attachment 418480
very good progress - you are a fast builder -> Bravo
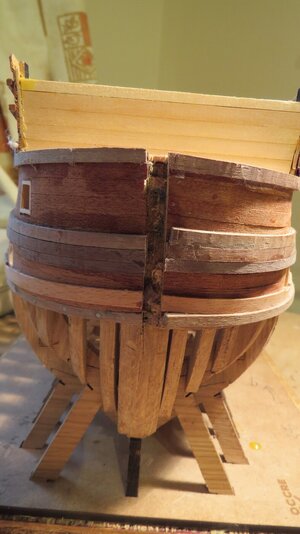
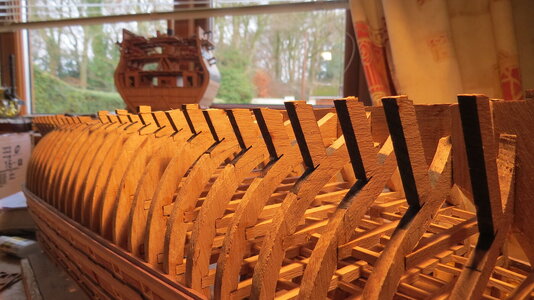
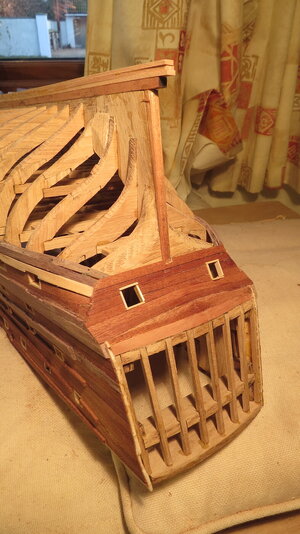
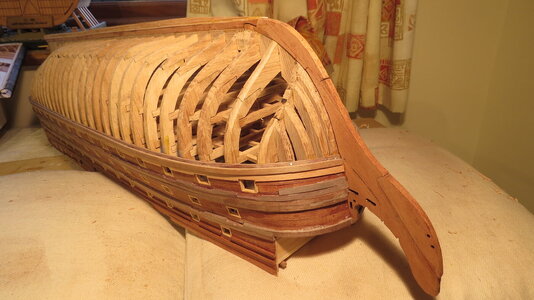
Big step forward - took the model off the base. Removed all the 'feet' from the ribs which held it in position in the jig and sanded down the hull. Tidied up the bow and stern by more sanding plus a second planking using 1/2 mm thick strips hid all alot of the areas where the 1st planking fell short of perfection! - as you know it rather tricky with first planking making sure it fits around the curves of the stern. Yes I know some people on here make it look easy but I always find it difficult
Built up the keel and fitted the stem post to the bow. Built up the top areas of the hull - placed extra strip of 2x2 inside the top of the bulkheads to place some more strips inside and out
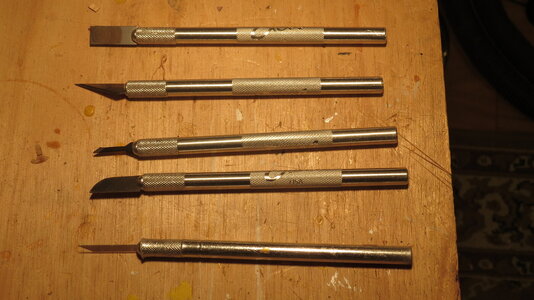
Bought myself a Christmas present of some more modelling knives - previously I only had two and was forever changing blades - now with five on the go at once it isn't half easy just to pick up another shaped blade to do some intricate cutting - I bought a small chisel blade which is perfect for cutting out shapes in the whales


Looked through some of the excellent comments I have not replied to
Not come across Bugler's book - will have to look it up
"It looks like some of the bulkheads will or are disturbing the gunports. They may not be fished yet, or the images are not that clear. -elcapi"
not sure what is meant by 'fished' the bulkheads - some of the gun ports do cut through a bulkhead so yes there I presume this means the hull is weaker - perhaps fishing means strengthening??. Excuse my ignorance......... Mind you this forum is the place to learn!
Someone has also said I was a fast builder - I tend to work on it for about 4 hours per day in about 4 different sessions. The Caldercraft Victory took me about a year - perhaps 1250-1500 hours in total. Trouble with the hobby is is rather absorbing - each stage is different , one never get stuck doing the same task day after day (however got 32 gun carriages to make for the lower gun deck - a few days of repetition coming up!!)
Anyway on with the build:-
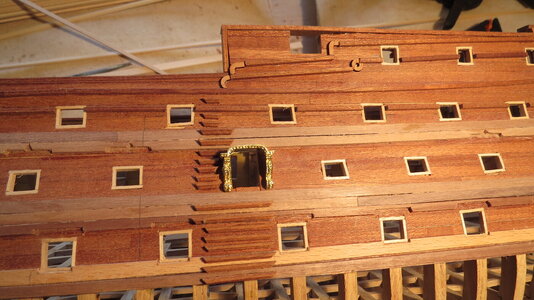
Fitted several shaped strips of 2x2mm mahogany which decorate the hull together with the steps for the entry ports
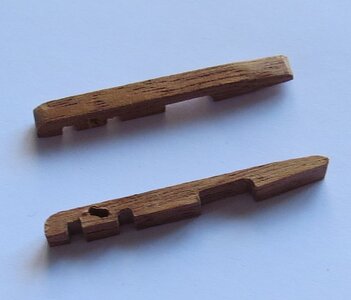
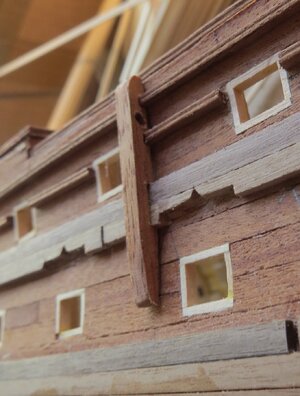
Mad a piece of what I assume is a timber feature which protects the hull (must learn the nautical terms). I quite enjoyable carving this out of a piece of 4x4mm mahogany
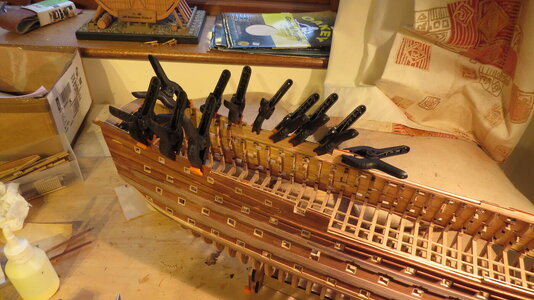
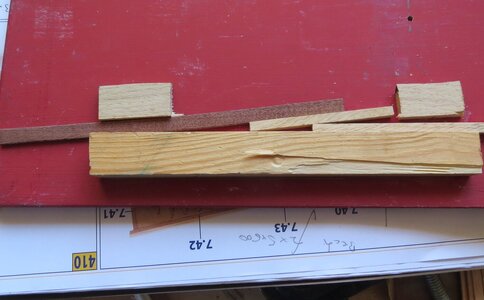
Had to work out how to fit the 8x2mm Mahogany rail which fits along the length the bulkhead. The central parts of the hull are straight so it was a simple matter of glueing on the timber strips and weighing it down with books overnight. The bow and the stern bulkheads are slightly curved so after a bit of head scratching made a jig as per the photo - the timber strip was soaked in water overnight, put in the jig which gave it a bit of a bend and left it to dry for 24 hours. Result a perfectly curved piece of timber which miraculously fitted a treat.
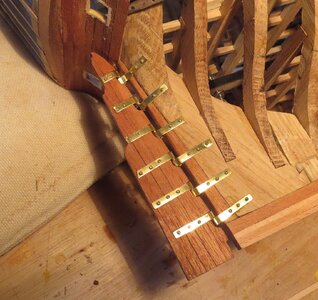
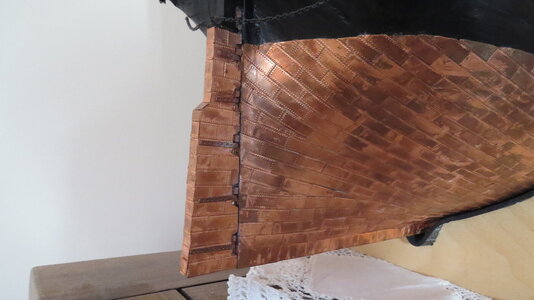
Quite pleased with the way the rudder came out - This time the Occre version is certainly better than the Caldercraft one. Occree suggested using cut down nails to make the hinge pins - thought the nails would not be big enough so used some 1mm dia rod I had left over from a previous build
At this point I have to say Occre have not really thought too hard about the sequence of building (or is it me?) - if I followed the instructions I would be fitting chainplates, quarterdeck barricade assembly, cat heads etc which could be easily broken - so started to put in the 1st deck planking for the cannons
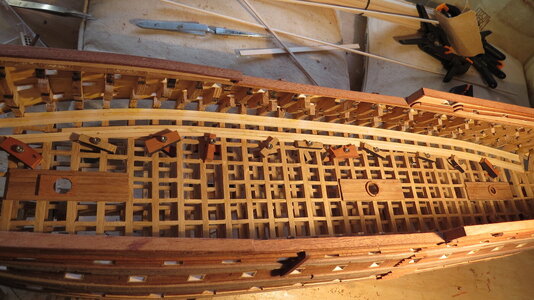
Next job rest of the decks/cannons inside the hull


Last edited:
To paint or not to paint; that is the question.................
Its at the stage where I have to make the decision - "Should I paint it or do as Occre suggest and use varnish".
If I did it would be the same colours as the Caldercraft version I made 10 years ago (my first model)
When I started I though I would paint it as it would cover any defects/gaps etc. However over the last few months as the hull took shape I realised it looks quite good with the natural wood finish - especially with the natural mahogany colours.
One compromise could be to pick out in red the gun ports as they rather let the side down in their white colouration - the rest could be varnish. Metalwork features above the gun ports would be picked out in black together with the guns.
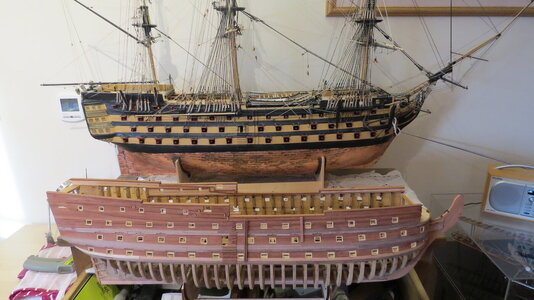
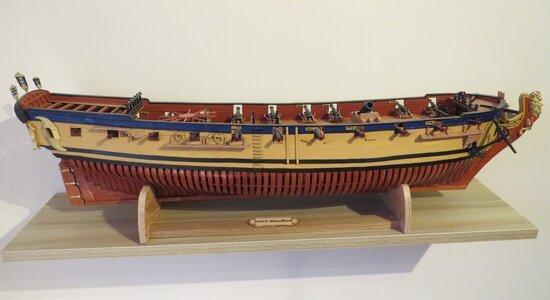
Took photo of both Victories together plus the Blandford I made two years ago - the Blandford colours are almost the same as the Occre Victory would use - looking at the Blandford with the wood finish on the lower ribs contracting with the painted upper hull - its almost too much of a contrast and does not look right
Any ideas welcome


It is really hard to say
Usually I like the appearance of natural wood, but f.e. I personally do not like Mahagony so much...... but is really a subjective taste
Usually I like the appearance of natural wood, but f.e. I personally do not like Mahagony so much...... but is really a subjective taste
I would paint it. It will result in the business of the ship. Just see the difference above- A colour between Yellow and ochre- el capiTo paint or not to paint; that is the question.................
Its at the stage where I have to make the decision - "Should I paint it or do as Occre suggest and use varnish".
If I did it would be the same colours as the Caldercraft version I made 10 years ago (my first model)
When I started I though I would paint it as it would cover any defects/gaps etc. However over the last few months as the hull took shape I realised it looks quite good with the natural wood finish - especially with the natural mahogany colours.
One compromise could be to pick out in red the gun ports as they rather let the side down in their white colouration - the rest could be varnish. Metalwork features above the gun ports would be picked out in black together with the guns.
Took photo of both Victories together plus the Blandford I made two years ago - the Blandford colours are almost the same as the Occre Victory would use - looking at the Blandford with the wood finish on the lower ribs contracting with the painted upper hull - its almost too much of a contrast and does not look right
Any ideas welcome
View attachment 423360
View attachment 423361
Silly question, but how do you use this jig. ?Decided not to do any fake nailing/bolting of the hull - Keep it simple
Fitted the first 18 frames and started to create the lower deck. As always having problems getting the infill pieces between the deck beams exactly straight. Made a jig to help (see last photo). Got to cut some 700 pieces of 15mm long 3x3 timbers to create the infill pieces/stats! (first minor bug bear - why not cut these for us??.). After a while I almost can tell by eye if I have to sand a bit off the infill piece to make it fit - amazing variation in width between the beams - have to work to a fraction of a mm to make them fit.
As you can see its beginning to take shape
View attachment 405603
View attachment 405604
View attachment 405605
No such thing as a silly question - any query is usefulSilly question, but how do you use this jig. ?
Re use of jig to fit decking timbers
Made it with a central slot so it fitted snugly against the keel
Glue in place about 3 ribs onto the keel
Then fitted deck beams in place.
Put the jig in between the last two ribs - the top of the gig is in line with the deck beams
Then you can see where the 2x2 filler pieces go – glue filler piece
Hopes this helps
Many thanks, just bought this and watching your build with interest. Looking really good.
Thanks to Uwek and El Capi for replies re painting
As Uwek says "Usually I like the appearance of natural wood, but f.e. I personally do not like Mahagony so much...... but is really a subjective taste"
Took these comments on board and decided to start painting with the gun ports - painting the white maple with red does make them blend in better with the natural mahogony better . As you can see the Wales are an odd colour - whatever I do I must either paint or stain them because they just stand out too much. Still undecided as to how much to paint but there is no rush
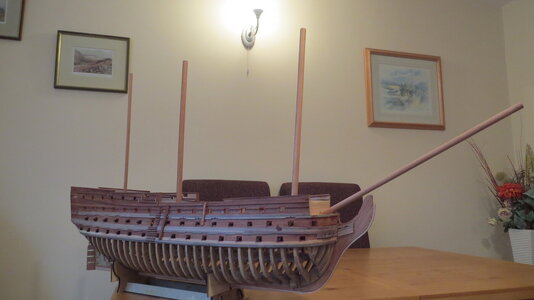
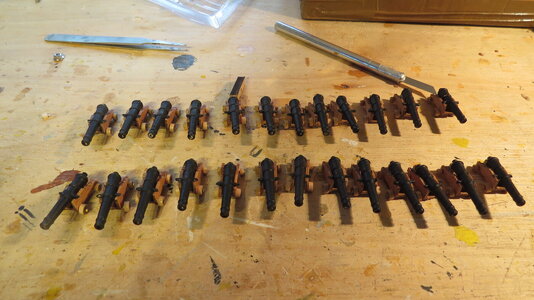
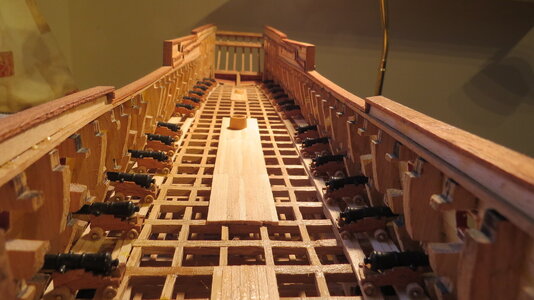
Guns are now in the lower and middle deck - photo of 25no 32 pounders - if they all went of at once its a broadside of 1/2 ton - which would do rather alot of damage!!. Total weight of guns on the lower deck in the real ship were some 84 tons. As you can see I have only mounted the guns in the gun carriages. As they will not be seen I thought there was no point in making ropes and blocks etc for them. Yes I know ideally I should have done this but having spend hours in painting the inside of a model of the Lancaster Bomber only for my painstaking work never to be seen again once the metal fuselage went on made me not want to do this sort of hidden works again. Expect others will treat every guns the same whether its on deck for all to see or hidden from view
Note Caldercraft only supply guns for the lower and middle deck. Occre supply guns carriages for all 104 guns
The model progresses - lower and middle decks are in place all ready for the first trial of the masts - not bad progress since I started back in November, expect rate of building will slow once the spring arrives and I can get out more. At the moment tend to work on the model 3-4 hours per day other activities permitting.
Will be interested to hear how other people like neilm are getting on with their models


Sorry, but I woud go for a blenf of yellow and ocre.Thanks to Uwek and El Capi for replies re painting
As Uwek says "Usually I like the appearance of natural wood, but f.e. I personally do not like Mahagony so much...... but is really a subjective taste"
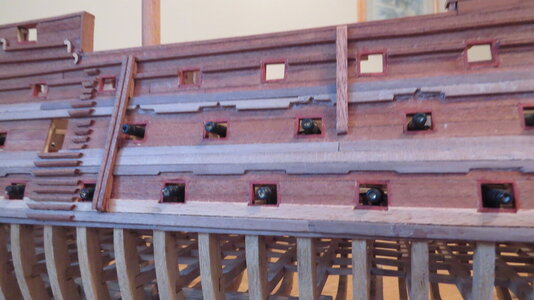
Took these comments on board and decided to start painting with the gun ports - painting the white maple with red does make them blend in better with the natural mahogony better . As you can see the Wales are an odd colour - whatever I do I must either paint or stain them because they just stand out too much. Still undecided as to how much to paint but there is no rush
Guns are now in the lower and middle deck - photo of 25no 32 pounders - if they all went of at once its a broadside of 1/2 ton - which would do rather alot of damage!!. Total weight of guns on the lower deck in the real ship were some 84 tons. As you can see I have only mounted the guns in the gun carriages. As they will not be seen I thought there was no point in making ropes and blocks etc for them. Yes I know ideally I should have done this but having spend hours in painting the inside of a model of the Lancaster Bomber only for my painstaking work never to be seen again once the metal fuselage went on made me not want to do this sort of hidden works again. Expect others will treat every guns the same whether its on deck for all to see or hidden from view
Note Caldercraft only supply guns for the lower and middle deck. Occre supply guns carriages for all 104 guns
The model progresses - lower and middle decks are in place all ready for the first trial of the masts - not bad progress since I started back in November, expect rate of building will slow once the spring arrives and I can get out more. At the moment tend to work on the model 3-4 hours per day other activities permitting.
Will be interested to hear how other people like neilm are getting on with their models
View attachment 425785
View attachment 425786
View attachment 425787
View attachment 425788
Just finished the gunports on one side, 56 more to go. Mindful of your problem with the position of the gunports I followed the same procedure (with a hole and a gun), looks ok. Plan is to stick with the Occre manual, one layer of planks, no paint. But just in case, have ordered 0,6 mm mahogany strips for an eventual second planking. Removed all the nails and did some preliminary sanding.Thanks to Uwek and El Capi for replies re painting
As Uwek says "Usually I like the appearance of natural wood, but f.e. I personally do not like Mahagony so much...... but is really a subjective taste"
Took these comments on board and decided to start painting with the gun ports - painting the white maple with red does make them blend in better with the natural mahogony better . As you can see the Wales are an odd colour - whatever I do I must either paint or stain them because they just stand out too much. Still undecided as to how much to paint but there is no rush
Guns are now in the lower and middle deck - photo of 25no 32 pounders - if they all went of at once its a broadside of 1/2 ton - which would do rather alot of damage!!. Total weight of guns on the lower deck in the real ship were some 84 tons. As you can see I have only mounted the guns in the gun carriages. As they will not be seen I thought there was no point in making ropes and blocks etc for them. Yes I know ideally I should have done this but having spend hours in painting the inside of a model of the Lancaster Bomber only for my painstaking work never to be seen again once the metal fuselage went on made me not want to do this sort of hidden works again. Expect others will treat every guns the same whether its on deck for all to see or hidden from view
Note Caldercraft only supply guns for the lower and middle deck. Occre supply guns carriages for all 104 guns
The model progresses - lower and middle decks are in place all ready for the first trial of the masts - not bad progress since I started back in November, expect rate of building will slow once the spring arrives and I can get out more. At the moment tend to work on the model 3-4 hours per day other activities permitting.
Will be interested to hear how other people like neilm are getting on with their models
View attachment 425785
View attachment 425786
View attachment 425787
View attachment 425788
All in all it’s a slow process, but haven’t had this much fun in ship modeling since my first Airfix Bismarck when i was 10.
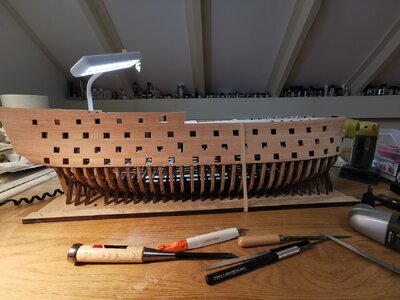
Would be great, if you would also show us your work on your Victory in a separate building logJust finished the gunports on one side, 56 more to go. Mindful of your problem with the position of the gunports I followed the same procedure (with a hole and a gun), looks ok. Plan is to stick with the Occre manual, one layer of planks, no paint. But just in case, have ordered 0,6 mm mahogany strips for an eventual second planking. Removed all the nails and did some preliminary sanding.
All in all it’s a slow process, but haven’t had this much fun in ship modeling since my first Airfix Bismarck when i was 10.
View attachment 426251


