-

Win a Free Custom Engraved Brass Coin!!!
As a way to introduce our brass coins to the community, we will raffle off a free coin during the month of August. Follow link ABOVE for instructions for entering.
-

PRE-ORDER SHIPS IN SCALE TODAY!
The beloved Ships in Scale Magazine is back and charting a new course for 2026!
Discover new skills, new techniques, and new inspirations in every issue.
NOTE THAT OUR FIRST ISSUE WILL BE JAN/FEB 2026
You are using an out of date browser. It may not display this or other websites correctly.
You should upgrade or use an alternative browser.
You should upgrade or use an alternative browser.
Pavel Nikitin Oseberg #3 kit #61
- Thread starter Pathfinder65
- Start date
- Watchers 32
- Joined
- Sep 10, 2024
- Messages
- 1,025
- Points
- 393

@RussF
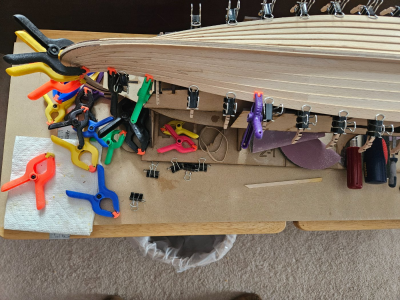
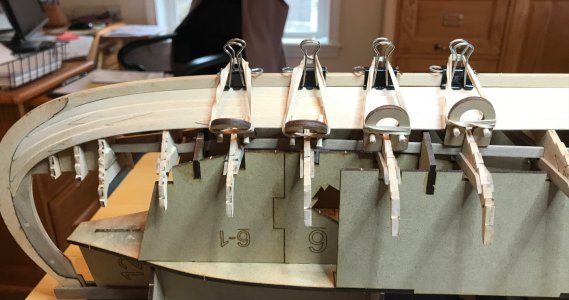
I managed to use Pavel's "clamps", but not the way he intended
View attachment 512121
Those four spots were one of those "PIA" things. The binder clips were fine holdingt the strake in place, but there was just enough "spring" to lift the back edge away from the frame. So there was an AL-FI moment.
Jan
Yup, I know what you mean. That's what I used the spring clamps for.

- Joined
- Sep 8, 2024
- Messages
- 203
- Points
- 88

I followed Pavel’s build, and was intrigued by his clamps. A very similar device is used for 1:1 scale practice. Several along the strake, with the opening like a fork with a wedge to hold the clinker joint in place. Modern glue could be enough, or rivets and roves of course.
Also, for glues, there is a long open time Titebonc you can use, or even hide glue if you want something infinitely reversible in case you decide to disassemble and start over.
J
Also, for glues, there is a long open time Titebonc you can use, or even hide glue if you want something infinitely reversible in case you decide to disassemble and start over.
J
Good evening Jan. What we come up with to make these models…… without our AL-FI moments we would all be more insane than we already are.@RussF
I managed to use Pavel's "clamps", but not the way he intended
View attachment 512121
Those four spots were one of those "PIA" things. The binder clips were fine holdingt the strake in place, but there was just enough "spring" to lift the back edge away from the frame. So there was an AL-FI moment.
Jan
 Cheers Grant
Yessir, I have to agree with you. I think that method will be repeated a few times as the build continues.Good evening Jan. What we come up with to make these models…… without our AL-FI moments we would all be more insane than we already are.Cheers Grant
Jan
AL-FI is a @Peter Voogt term/expression from when he was working on his Bluenose build. I'm sure he will chime in and explain the concept. In short it's going way beyond thinking outside the box while trying to solve a pesky problem. His Bluenose and Robert E Lee build logs are fascinating to follow.AL-FI ???
Jan
- Joined
- Sep 10, 2024
- Messages
- 1,025
- Points
- 393

Looks great Jan!I'm up to plank #4, on one side and wondering how far you planked both sides before starting to work on the deck pieces. I can't tell where Pavel stopped planking before working on the decks.
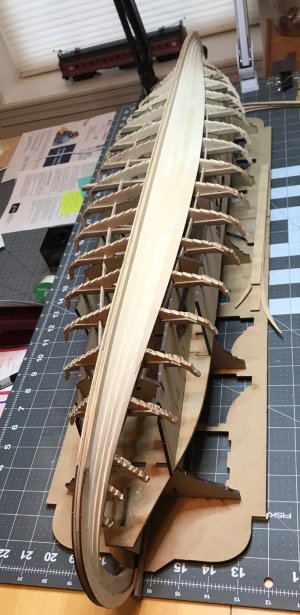
I alternated sides with each strake. That way I could let one side dry while I worked on the other. On good days, I could get 2 or 3 rows on each side. Pavel and I (following his video lead) stopped after installing strake 9, before adding the meginhufr (strake 10). Working on the deck boards now (just got all the treenail holes drilled). The deck boards (with the little sliver extensions attached to the ends) are just slightly wider than the beam, which is good, because you can then accurately trim/sand them to get a good fit to the strakes.
Her it is, but it’s also Dean’s @Dean62AL-FI is a @Peter Voogt term/expression from when he was working on his Bluenose build. I'm sure he will chime in and explain the concept. In short it's going way beyond thinking outside the box while trying to solve a pesky problem. His Bluenose and Robert E Lee build logs are fascinating to follow.
Jan
AL = Artistic License
FI = Free Interpretation
To be used when there is no original documentation. Then AL-LF is looking over your shoulder and says it alright.
Regards, Peter
Her it is, but it’s also Dean’s @Dean62
AL = Artistic License
FI = Free Interpretation
To be used when there is no original documentation. Then AL-LF is looking over your shoulder and says it alright.
Regards, Peter


Excellent, I've got one side to strake #4, now working on the opposite side to get to strake #4, then I'll copy your method and alternate sides to get to strake #9.Looks great Jan!
I alternated sides with each strake. That way I could let one side dry while I worked on the other. On good days, I could get 2 or 3 rows on each side. Pavel and I (following his video lead) stopped after installing strake 9, before adding the meginhufr (strake 10). Working on the deck boards now (just got all the treenail holes drilled). The deck boards (with the little sliver extensions attached to the ends) are just slightly wider than the beam, which is good, because you can then accurately trim/sand them to get a good fit to the strakes.
BTW, how many holes did you drill in the deck boards???
Jan
Looking very cool Jan. Nice!@RussF
View attachment 512218
View attachment 512219
I'm up to plank #4, on one side and wondering how far you planked both sides before starting to work on the deck pieces. I can't tell where Pavel stopped planking before working on the decks.
Jan
- Joined
- Sep 10, 2024
- Messages
- 1,025
- Points
- 393

I drilled 4 ea 0.8mm holes in each board for treenails (except some boards near the outer ends of each room only had 2 or 3). I used the engraved rings as a guide, but I stayed toward the center (widthwise) of the board, but still within the ring (hope that's clear). I plan on putting the double bead profile along each long edge, and I wanted to make sure my treenails were far enough away from that edge so as not to run into the profile. I'm going to have to fabricate a holder for my scratch stock 'cause that's a lot of boards! (Why do we do these things to our selves?) My fingers would easily start cramping while profiling the strakes. My boards will be installed with the engraving down. I have never liked the look of simulated treenails by laser engraving them.BTW, how many holes did you drill in the deck boards???
Not all boards have been drilled. I showed on my log the rooms in which the boards were not fastened down on the real Oseberg. I'm following that pattern.
Hi Jan,
I started at the keel and worked my way up, beveling both up and in. It's a good starting place, but you will find as you start adding strakes that these notches will need to be trimmed. I don't think they will every fit perfectly. The fit to the strakes amidships is much better than toward the stems. I pretty much gave up on trying to make them fit perfectly, as long as you have some surface to glue to. They will be covered anyway.
Looking good Jan!
That's weird, both of you got your kits at least a week or two before me. My serial # is 57, maybe he's counting backwards.Yes, I have 2 flats each of ribs/bases, staves and bands and 1 flat of tops. The instructions, however, leave a little something to be desired. Sort of, "Here are the parts, here is what you make from them - you figure it out!"I think he was getting tired of drawing by the time he got to this point.
View attachment 507216
BTW Jan, I ordered and received my kit before you, yet my serial # is 68 and yours is 61. Not fair!I guess they're not sent out in order.
- Joined
- Sep 10, 2024
- Messages
- 1,025
- Points
- 393

He probably stacked them up in the order that he packaged them, then drew from the top of the stack as he shipped them out. Some lucky person is going to get #1 pretty soon!That's weird, both of you got your kits at least a week or two before me. My serial # is 57, maybe he's counting backwards.


