Thank you!Those are incredible. WOW.
Jan
-

Win a Free Custom Engraved Brass Coin!!!
As a way to introduce our brass coins to the community, we will raffle off a free coin during the month of August. Follow link ABOVE for instructions for entering.
-

PRE-ORDER SHIPS IN SCALE TODAY!
The beloved Ships in Scale Magazine is back and charting a new course for 2026!
Discover new skills, new techniques, and new inspirations in every issue.
NOTE THAT OUR FIRST ISSUE WILL BE JAN/FEB 2026
You are using an out of date browser. It may not display this or other websites correctly.
You should upgrade or use an alternative browser.
You should upgrade or use an alternative browser.
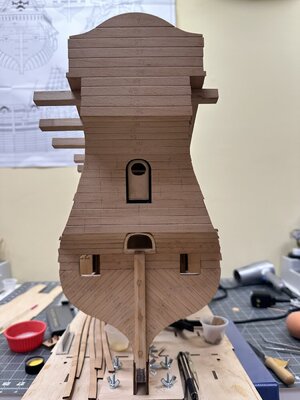
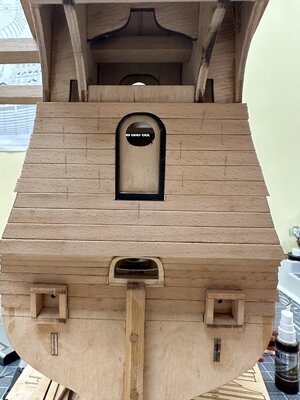
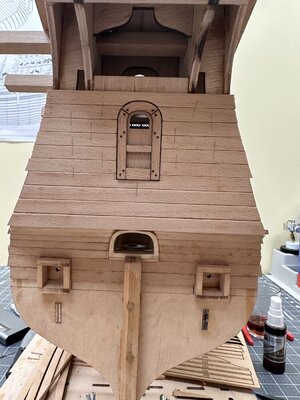
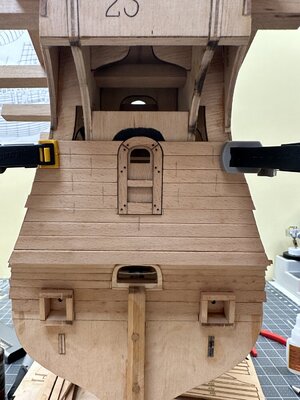
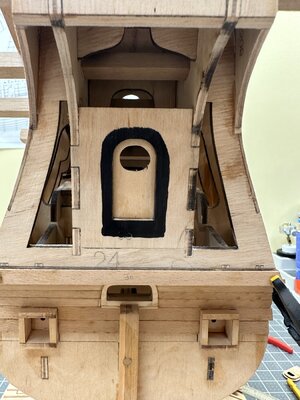
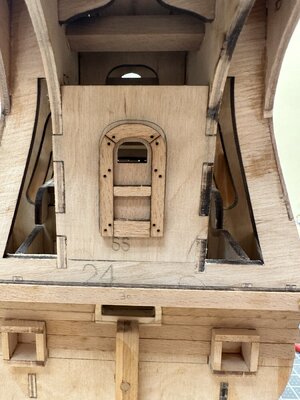
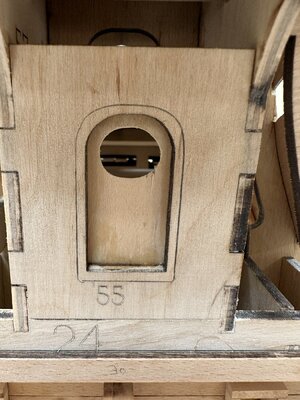
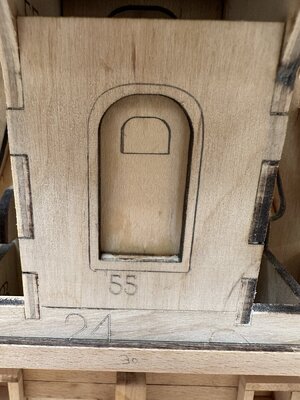
Got the stern planked today. A lot of lay out involved to get everything to line up correctly. I used double sided tape. This let me take on off the planks as many times as needed to adjust. Once I was happy with layout I struck a line for one plank glued and let dry. Easy sailing from there. I also thought it would be easier to use the door instead of the plug. Just snuck a piece of veneer to hold it in place. Now just need to trim the overhanging planks. A job for tomorrow.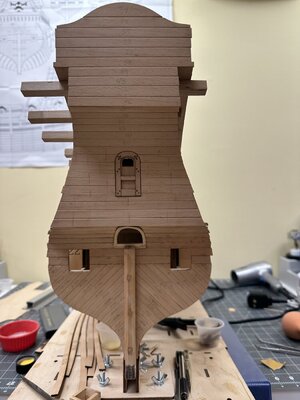


- Joined
- Apr 20, 2020
- Messages
- 6,241
- Points
- 738

great progress, the stern looks wonderfulGot the stern planked today. A lot of lay out involved to get everything to line up correctly. I used double sided tape. This let me take on off the planks as many times as needed to adjust. Once I was happy with layout I struck a line for one plank glued and let dry. Easy sailing from there. I also thought it would be easier to use the door instead of the plug. Just snuck a piece of veneer to hold it in place. Now just need to trim the overhanging planks. A job for tomorrow.View attachment 390491View attachment 390490View attachment 390489View attachment 390488View attachment 390487View attachment 390486View attachment 390485View attachment 390484View attachment 390483
Thank you!great progress, the stern looks wonderful
very good and accurate preparation of your stern planking etc. - the stern will look very good at the end
Are these small pencil marks on the planking the location for a treenailing?
Are these small pencil marks on the planking the location for a treenailing?
Nicely done.
Not for treenails…. Since I had laid everything out with double sided tape and removed the planks to glue it keeps the planks lined up laterally and keeps spacing around the door consistent. And when gluing I use a combination of super glue and wood glue. I put a dot of super glue on the center and ends of the plank wood glue on the rest. The super glue acts like a clamp. And since there is not much time to adjust, just use the pencil lines. Sorry for the long winded answer. And hope I answered it clearly.very good and accurate preparation of your stern planking etc. - the stern will look very good at the end
Are these small pencil marks on the planking the location for a treenailing?
Thank youNicely done.
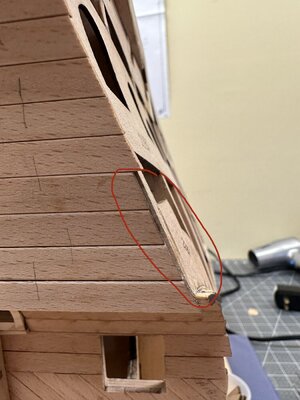
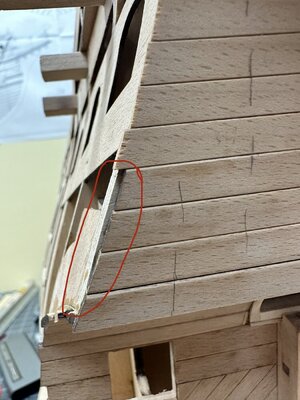
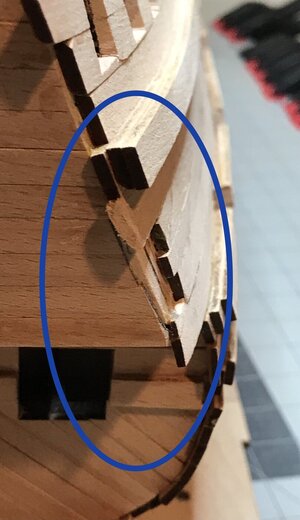
Me personally I would fair the hulls side a little bit - otherwise you will see everytime a visible and noticable gap in this area
Thanks for the input.I agree with Uwek. It takes some heavy duty fairing in that area to get rid of the “overlap”.
My outcome.
View attachment 390779
Jan
Thanks for the input.Me personally I would fair the hulls side a little bit - otherwise you will see everytime a visible and noticable gap in this area
Hi Jag, first of all thank you for sharing your build, it’s going great!!! I am in love with this ship kit. If you don’t mind me asking… what are you using to color the wood, it looks amazing!!! Have a great week endGot some bench time in and started dyeing with Pavel’s dye kit. I think it’s a little too dark so I will sand a little more and lay some oak dye down. Hopefully it lighten up the color a bit.View attachment 382621View attachment 382620View attachment 382623View attachment 382624View attachment 382629View attachment 382630View attachment 382631View attachment 382632View attachment 382633View attachment 382634View attachment 382635View attachment 382636View attachment 382637
View attachment 382622
View attachment 382625
View attachment 382626
View attachment 382627
View attachment 382628
What a great setup!! Thank you for sharingI also had the week off from work and set upper a proper shipyard. I even have the far left side of the desks to work on two models at once. The far end has all my tools. Even added plenty of lighting above. Hopefully don’t blow circuit. Should be ok though they are led. Waited many years for it. 12 to be exact, my son is finally old enough not to want Legos anymore so he took the Lego section of the basement and turned it into a shipyard on one side for myself and my wife has her hobby section on the opposite side, we even put a TV on the wall. You can see all my sons Legos and bins in the back and that’s not even half of them. Some of them have already gone into storage. I may never leave the space lol. View attachment 386380View attachment 386381View attachment 386382View attachment 386383View attachment 386384
That look awesomeGot the cannons done! I am happy with how they came out.View attachment 389269View attachment 389268View attachment 389267View attachment 389266
I am using Pavel Nikitin’s dye set. I am first coloring with the patina. Once that was done I sanded with 320 sanding sponge. I then colored it with the walnut and sanded again. On the edges and high traffic areas I sanded down to bare wood and used the oak stain. I then played back and forth with all the colors used previously to get the desired look. Once this was done, I used the danish oil supplied in the dye kit.Hi Jag, first of all thank you for sharing your build, it’s going great!!! I am in love with this ship kit. If you don’t mind me asking… what are you using to color the wood, it looks amazing!!! Have a great week end
Any other questions please let me know I’ll be more than moreAny other questions please let me know I’ll be more than happy to answer them and thanks for watching my thread. I am currently working on the whales and will post once they’re all laid out.
Thank you so much for your generous answer mate, l really appreciate it!!! I will be following you posts with great joy. Have a great week endI am using Pavel Nikitin’s dye set. I am first coloring with the patina. Once that was done I sanded with 320 sanding sponge. I then colored it with the walnut and sanded again. On the edges and high traffic areas I sanded down to bare wood and used the oak stain. I then played back and forth with all the colors used previously to get the desired look. Once this was done, I used the danish oil supplied in the dye kit.
Any other questions please let me know I’ll be more than moreAny other questions please let me know I’ll be more than happy to answer them and thanks for watching my thread. I am currently working on the whales and will post once they’re all laid out.
No problem.Thank you so much for your generous answer mate, l really appreciate it!!! I will be following you posts with great joy. Have a great week end
Good evening everyone. Just bouncing around on the kit. So I decided to start gluing up the bowsprit. And based on how the four parts that are glued it looks like it should be oval. I can not find any cross section in the plans to verify my observation of the glued up parts. 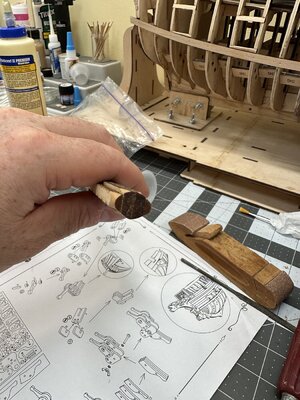 Can anyone verify this? Thanks for the input in advance.
 Can anyone verify this? Thanks for the input in advance.

