POF La Palme (L'Amarante) Corvette 1744 1:36 (Ancre Monograph) by Tobias

Witaj
Wiem Tobiaszu ze masz płytkę jubilerską przez którą przeciągasz drut mosiężny na kółek 0,4 używasz drutu 0,5. Pytam bo przy następnym modelu będzie mi potrzebny. Pozdrawiam Mirek


I know Tobias that you have a jeweler's plate through which you pull brass wire for 0.4 circles you use 0.5 wire. I ask because on my next model I will need it. Greetings Mirek
 
Last edited by a moderator:
Welcome from the "Square Nails by Tobias is the real deal" studio!!!
Jim @Jimsk would say now, reminds me a bit of Tim Tailer from the series "listen who's hammering". ROTF

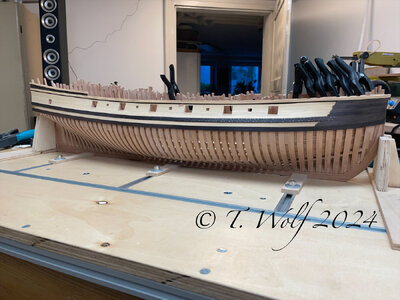
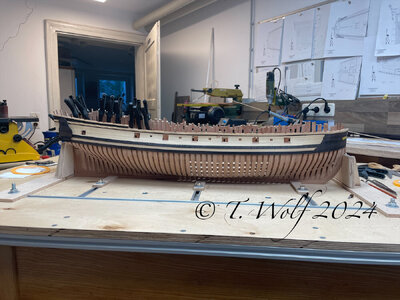
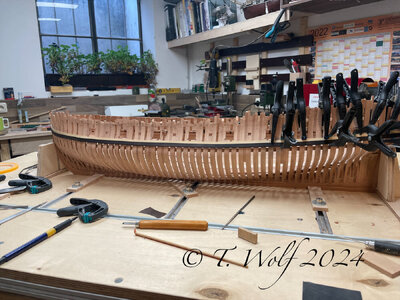
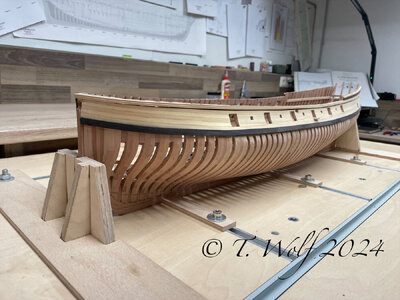
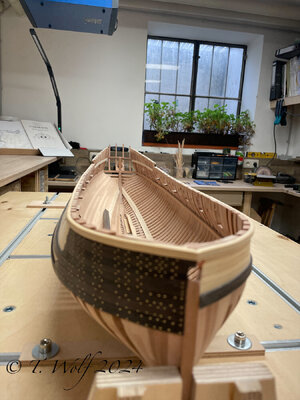
Well, after an intensive 2 days I've almost finished the side of the gunwale, in the bow area the dark reinforcements still have to be attached and also nailed in place, just like the second whale. At the stern I have not nailed the area where the bottle will later go.

View attachment 418398

View attachment 418399

View attachment 418400

View attachment 418401

View attachment 418402
Immaculate. Was there a trick to orienting the flat sides perfectly to North, South, East and West? That little detail adds so much.

Oh, and I ordered the drawplate today from the site you linked. I should have it by next Christmas. I would have bought the one Jim linked on AliExpress, but the smallest hole diameter was 0.55mm and I'm fairly certain I will need something smaller, even though I'm not sure I would be able to tell if it was square or round at those diameters.

Thanks again Tobias.
 
Tobias, I have just discovered your build log and spent the last two days reading, taking notes and placing items in my Amazon cart.
With your incredible documentation, I will be able to increase my next build quality ten-fold.
Also, my workshop and "shipyard drydock" base, will be greatly improved by observing the meticulous attention to detail, clamping, alignment and jigs you have developed.

Thank you and Happy New Year!!
 
@Peter Voogt @Jimsky @dockattner
@Mirek @Hoss6262 @BradNSW @Steef66
Thank you very much for your comment and all the likes you received.

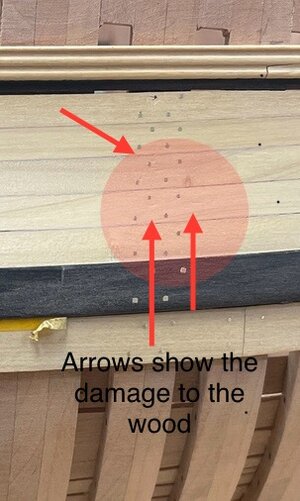
Ken @Hoss6262 now to the alignment of the nails, I did the first two rows using the old method, cut a piece of wire and carefully tapped it in with a hammer. The problems with this method are :
The wire always twists
The wire becomes bent
The slipping causes damage to the wood
eZy Watermark_06-12-2023_10-53-45-3260PM.jpeg

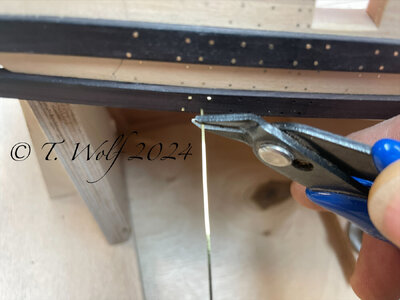
I then tried pressing the wire nails into the wood with pliers, which worked really well. The one or other nail doesn't sit perfectly but it's not very noticeable. As soon as the nail was firm enough in the wood, I pinched it off and put the next one in and so on. In total, almost 10 meters of wire were used.

@BradNSW
Thank you for liking my blog and taking the trouble to read through everything. I'm happy if I can help you with my description. Since I haven't been in the business too long, there are probably many ways to do it better or differently. It is my way that I describe, I often have to rethink it and get tips and advice from experienced model builders. Happy New Year to you too.
 
@Peter Voogt @Jimsky @dockattner
@Mirek @Hoss6262 @BradNSW @Steef66
Thank you very much for your comment and all the likes you received.

Ken @Hoss6262 now to the alignment of the nails, I did the first two rows using the old method, cut a piece of wire and carefully tapped it in with a hammer. The problems with this method are :
The wire always twists
The wire becomes bent
The slipping causes damage to the wood
View attachment 418646

I then tried pressing the wire nails into the wood with pliers, which worked really well. The one or other nail doesn't sit perfectly but it's not very noticeable. As soon as the nail was firm enough in the wood, I pinched it off and put the next one in and so on. In total, almost 10 meters of wire were used.

@BradNSW
Thank you for liking my blog and taking the trouble to read through everything. I'm happy if I can help you with my description. Since I haven't been in the business too long, there are probably many ways to do it better or differently. It is my way that I describe, I often have to rethink it and get tips and advice from experienced model builders. Happy New Year to you too.
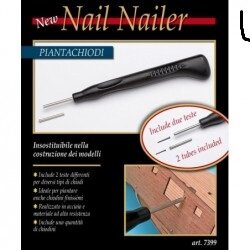
Hi Tobia , for nailing there is a little tool " nail tip" Frank

nuovo-piantachiodi.jpg
 
Hi Tobia , for nailing there is a little tool " nail tip" Frank

View attachment 418663
Hi Frank,
Jim has already answered the question. I already have this device and it has already served me well, but unfortunately it is unsuitable for this work. I always prepare a piece of wire about 5-7 cm long and then work my way forward. I try to take a series of pictures.
 
@Frank48 @GrantTyler @kuba91nt @Jimsky
Thanks for your input, interest and comment, always much appreciated.

Here is another picture of how I insert the wire with the pliers, I think that should make it clear.

eZy Watermark_06-01-2024_11-25-12-3400AM.jpeg

Next I attached the lower whales, put the decorative wood in the bow area and continued with drilling holes and inserting nails. I shaped the pear or bottle at the stern and fixed it in its future position with adhesive tape. At the same time, I started gluing the planks on the port side.

eZy Watermark_06-01-2024_11-09-24-9180AM.jpeg

eZy Watermark_06-01-2024_01-40-43-3980PM.jpeg

eZy Watermark_06-01-2024_01-41-24-6490PM.jpeg
 
@Frank48 @GrantTyler @kuba91nt @Jimsky
Thanks for your input, interest and comment, always much appreciated.

Here is another picture of how I insert the wire with the pliers, I think that should make it clear.

View attachment 419092

Next I attached the lower whales, put the decorative wood in the bow area and continued with drilling holes and inserting nails. I shaped the pear or bottle at the stern and fixed it in its future position with adhesive tape. At the same time, I started gluing the planks on the port side.

View attachment 419093

View attachment 419094

View attachment 419095
You let her shine with beautiful lines more and more, Tobias.
Regards, Peter
 
A very good work with these square nails - I think I have to try this on my next project - looking much better and more accurate than my usually used square shoe nails

 
@dockattner @Mirek @Peter Voogt @Herman @Uwek @Jimsky
Thanks for your comment and to all who left a like.

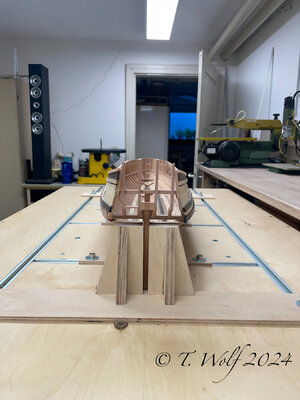
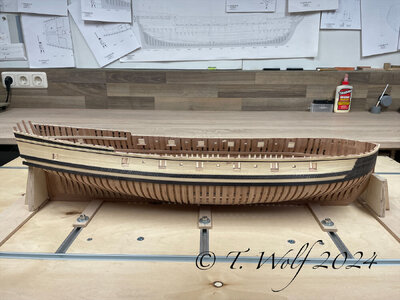
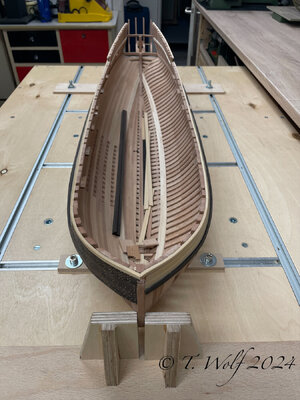
Hello everyone, we are approaching La Palm's 2nd birthday in just under a month. That means I still have a few days to complete the next stage of construction. The plan is to finish the port side and some more work on the interior before we go back to the harbor yacht.

eZy Watermark_14-01-2024_09-17-21-2660AM.jpeg

eZy Watermark_14-01-2024_09-18-12-3510AM.jpeg

eZy Watermark_14-01-2024_09-19-01-2410AM.jpeg

eZy Watermark_14-01-2024_09-20-06-6300AM.jpeg

eZy Watermark_14-01-2024_09-21-14-9910AM.jpeg
 
Back
Top