-

Win a Free Custom Engraved Brass Coin!!!
As a way to introduce our brass coins to the community, we will raffle off a free coin during the month of August. Follow link ABOVE for instructions for entering.
-

PRE-ORDER SHIPS IN SCALE TODAY!
The beloved Ships in Scale Magazine is back and charting a new course for 2026!
Discover new skills, new techniques, and new inspirations in every issue.
NOTE THAT OUR FIRST ISSUE WILL BE JAN/FEB 2026
You are using an out of date browser. It may not display this or other websites correctly.
You should upgrade or use an alternative browser.
You should upgrade or use an alternative browser.
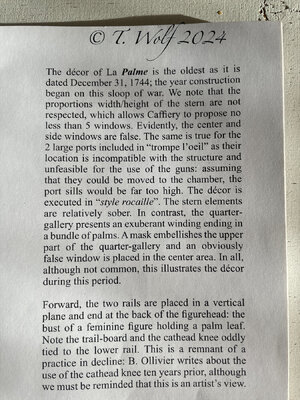
POF La Palme (L'Amarante) Corvette 1744 1:36 (Ancre Monograph) by Tobias
Wonderfull work Tobias,
Your square nails do really look stunning.
Looking forward to you new false window stern, using black glass for these?
Good morning Martin, thank you for your interest.
The rear section will be a challenge in many areas. Here are two pictures, one of my Le Coureur and one of Ricci's Amarante.
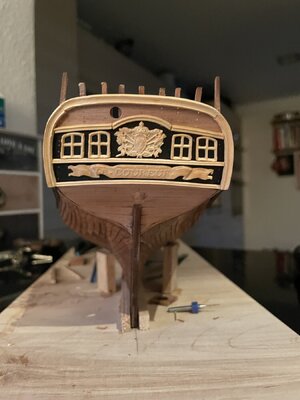
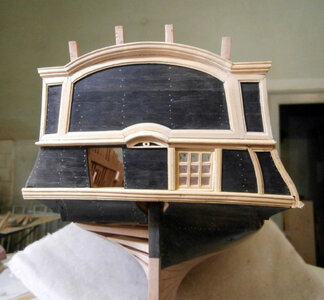
Image source: @Giampy65
As the area on L' Amarante only has two windows, I think the combination with the black is very nice. With La Palme, the question now is, do I make it black as well? It might not look good with all the windows, and how do I design it, as the real windows are flush with the floorboards. But the fake windows are placed on top of the floorboards. Questions upon questions, there will have to be a lot of trial and error. I would be very happy to receive suggestions and ideas.
Very nice Tobias.
……a serious understatement from Paul…Very nice Tobias.
Good afternoon Tobias. Jokes aside your work is among those who set the standard in this hobby. BTW Paul you are there too..

 Cheers Grant
You can create the window frames with vineer on the boards to create not too much difference.Good morning Martin, thank you for your interest.
The rear section will be a challenge in many areas. Here are two pictures, one of my Le Coureur and one of Ricci's Amarante.
View attachment 425549
View attachment 425548
Image source: @Giampy65
As the area on L' Amarante only has two windows, I think the combination with the black is very nice. With La Palme, the question now is, do I make it black as well? It might not look good with all the windows, and how do I design it, as the real windows are flush with the floorboards. But the fake windows are placed on top of the floorboards. Questions upon questions, there will have to be a lot of trial and error. I would be very happy to receive suggestions and ideas.
But were the frames actually present or was it done by trompe l ouil?
Hello colleagues,
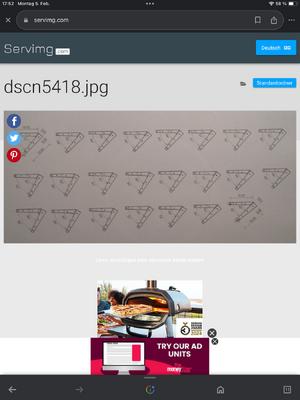
thank you very much for your interest and feedback. There is a bit of mass production going on, there are 46 iron angles on the program for the beams of the three tween decks. I already have 3. . In the French forum Daniel11 was kind enough to draw a plan of each angle to use for photo-etching. Unfortunately I don't have the necessary know-how, so I saw each individual angle out of a 1mm thick sheet of brass. Here is Daniel11's contribution including translation.
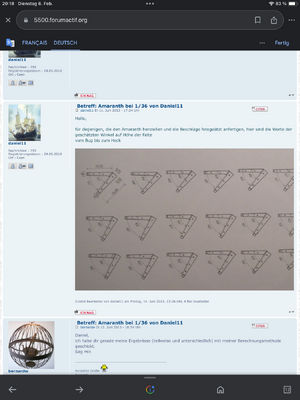
Hello,
for those who make the amaranth and make the fittings photo-etched, here are the values of the estimated angles at the level of the fold
from bow to stern
Step by step how I make my angles.
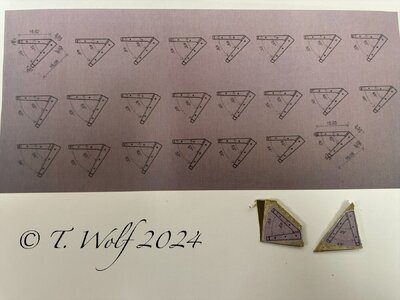
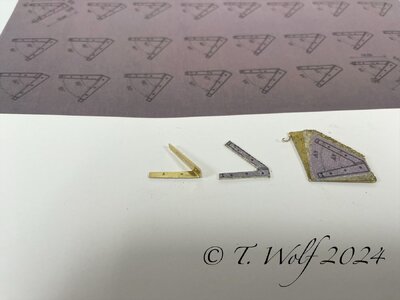
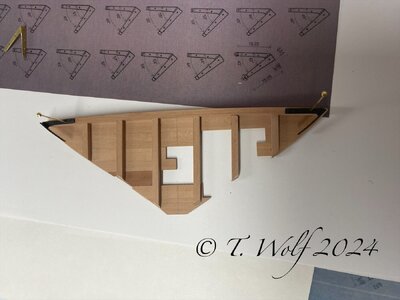
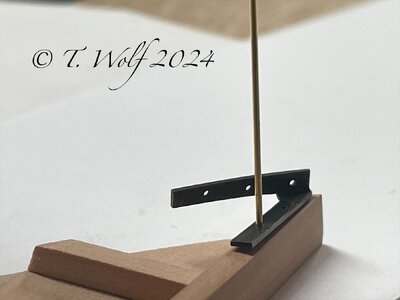
thank you very much for your interest and feedback. There is a bit of mass production going on, there are 46 iron angles on the program for the beams of the three tween decks. I already have 3.

Hello,
for those who make the amaranth and make the fittings photo-etched, here are the values of the estimated angles at the level of the fold
from bow to stern

Step by step how I make my angles.


Nothing wrong with your old-fashioned craftsmanship, Tobias. This example of yours looks beautiful.Hello colleagues,
thank you very much for your interest and feedback. There is a bit of mass production going on, there are 46 iron angles on the program for the beams of the three tween decks. I already have 3.. In the French forum Daniel11 was kind enough to draw a plan of each angle to use for photo-etching. Unfortunately I don't have the necessary know-how, so I saw each individual angle out of a 1mm thick sheet of brass. Here is Daniel11's contribution including translation.
View attachment 426141
Hello,
for those who make the amaranth and make the fittings photo-etched, here are the values of the estimated angles at the level of the fold
from bow to stern
View attachment 426142
Step by step how I make my angles.
View attachment 426143
View attachment 426144
View attachment 426145
View attachment 426146
It’s nice of Daniel to share the file with measured items.
Regard, Peter
That's incredible! Are you bending the brass to change the plane of the pieces? I assume so...
Is it necessary to thin the brass in the place it will be bent? How do you preserve the perfect angle?
Is it necessary to thin the brass in the place it will be bent? How do you preserve the perfect angle?
Hello Paul,That's incredible! Are you bending the brass to change the plane of the pieces? I assume so...
Is it necessary to thin the brass in the place it will be bent? How do you preserve the perfect angle?
the red line is the folding edge here it is bent by 90 degrees in the vise. You have to bend the leg with the three holes along the side of the ship a little, just slightly so that it sits snugly. In the bend, something has to be corrected depending on the position. Daniel's information is approximate.
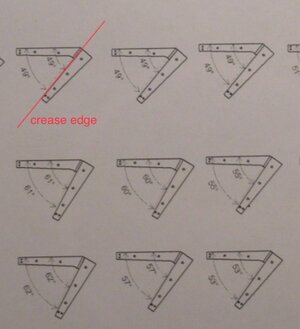
Working with photoetched parts requires some habits, but making parts from scratch requires skills. It is perfectly made, mon ami! Great outcome and well-deserved 'love'.
This is a great build log Tobias, with excellent photography.
WOW WoW wOw - triple WOW
especially the close up of the blackened is showing the high quality of your work
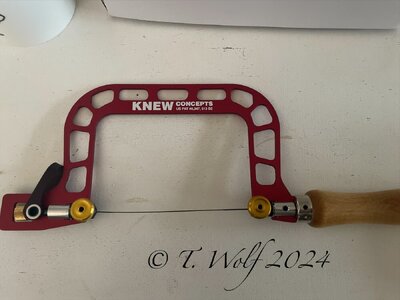
Once more good, that you work here in 1:36 ...... great result - Do you cut out with the scroll saw?
especially the close up of the blackened is showing the high quality of your work
Once more good, that you work here in 1:36 ...... great result - Do you cut out with the scroll saw?
……. a serious understatement from Paul and Grant……a serious understatement from Paul…. Very very nice Tobias
.
Cheers Grant
And a lot more “WOWs” thrown in.
Good evening dear model building colleagues, thank you for your kind words @Heinrich @RogerD @Uwek @Bryian @Jimsky @dockattner .
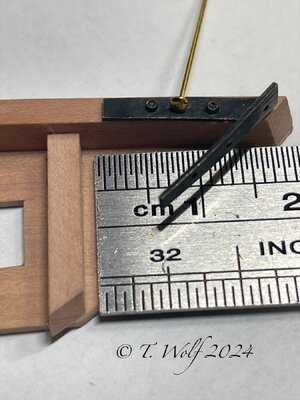
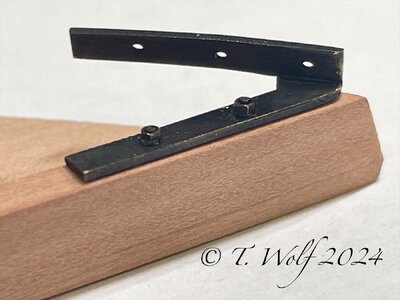
In the plans you can only guess whether the iron brackets are attached with rivet bolts or screws. I decided to equip it with screws, using brass nuts with size M0.6 i.e. tiny, mega tiny.
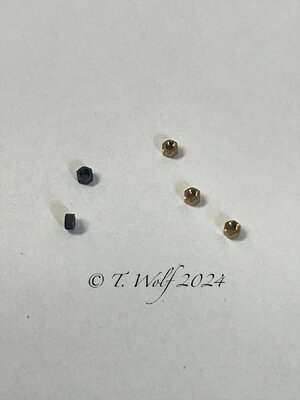
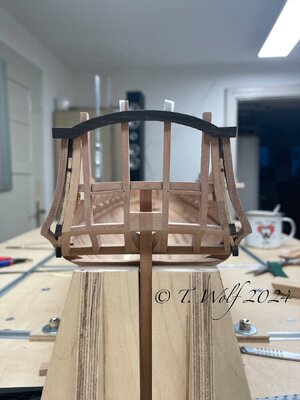
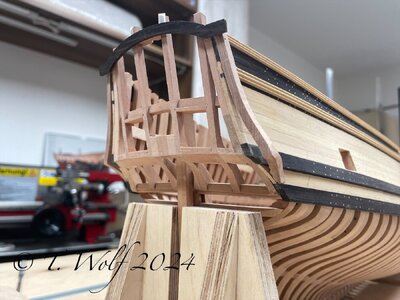
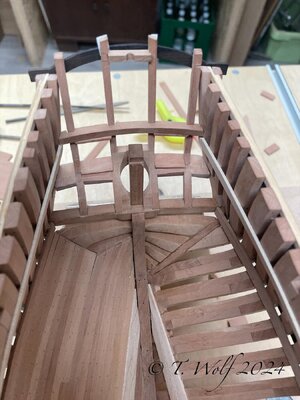
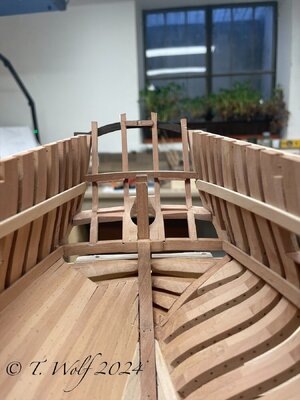
The bulkhead has now been installed.
In the plans you can only guess whether the iron brackets are attached with rivet bolts or screws. I decided to equip it with screws, using brass nuts with size M0.6 i.e. tiny, mega tiny.


The bulkhead has now been installed.


