Most impressive Shota, I’m enjoying following along with your build.
-

Win a Free Custom Engraved Brass Coin!!!
As a way to introduce our brass coins to the community, we will raffle off a free coin during the month of August. Follow link ABOVE for instructions for entering.
-

PRE-ORDER SHIPS IN SCALE TODAY!
The beloved Ships in Scale Magazine is back and charting a new course for 2026!
Discover new skills, new techniques, and new inspirations in every issue.
NOTE THAT OUR FIRST ISSUE WILL BE JAN/FEB 2026
You are using an out of date browser. It may not display this or other websites correctly.
You should upgrade or use an alternative browser.
You should upgrade or use an alternative browser.
POF L'Amarante Corvette de 12 canons 1744 1:36 (Ancre Monograph- Gérard Delacroix) By Shota
- Joined
- Apr 20, 2020
- Messages
- 6,242
- Points
- 738

Roger my dear friendMost impressive Shota, I’m enjoying following along with your build.
Thank you very much for the warm and kind words!
The pleasure and honor is all mine
Hello Shota, very nice progress. I hope that blackening your nails works out well for you.
- Joined
- Apr 20, 2020
- Messages
- 6,242
- Points
- 738

Tobias my dear friendHello Shota, very nice progress. I hope that blackening your nails works out well for you.
thanks for your support and guidance, I believe that it will work out
A big step, preparing all those parts, Shota. It’s looking very nice.Hello dear friends,
today after about two weeks I finished preparing and installing The filling parts between the frames, which are sometimes at the top of the space between the frames and some in the center.
View attachment 454081View attachment 454082View attachment 454083View attachment 454084View attachment 454085View attachment 454086View attachment 454087View attachment 454088
Tomorrow I will return to try to blacken the nail heads according to Tobias' instructions, and later I will equip the frames with the filler pieces and the key.
The construction process is progressing lazily, as I have free time to work on the ship once every two days and that too only for two or three hours.
Regards Shota
Regards, Peter
- Joined
- Oct 23, 2018
- Messages
- 886
- Points
- 403

Really really nice progress Shota
- Joined
- Apr 20, 2020
- Messages
- 6,242
- Points
- 738

Christian, my dear friendReally really nice progress Shota
thank you very much for your kind words
- Joined
- Apr 20, 2020
- Messages
- 6,242
- Points
- 738

Mirek, mój drogi przyjacieluWitaj
Wszystko wygląda bardzo ładnie Shoto ,fajnie że miałeś okazję spotkać się z kolegami i wymienić się doświadczeniami. Pozdrawiam Mirek
Dziękuję bardzo za miłe słowa i komplementy.
Rzeczywiście ma pan rację, spotkanie z kolegami z mojego kraju jest dla nas wszystkich ważnym i przyjemnym wydarzeniem
Mirek, my dear friend
Thank you very much for the kind words and compliments. Indeed, you are right. The meeting with the colleagues from my country is an important and enjoyable event for all of us
- Joined
- Sep 3, 2021
- Messages
- 5,191
- Points
- 738

A very nice touch, those square bolt heads. My experiences with blackening brass or copper parts have been very inconsistent. I hope to see satisfactory results from your experiments.Hello dear friends
I am happy to update that today I finished the work of installing the square nails in all 51 frames. This is a total of about 1400 nails.
I can't take a picture well enough to allow you to be impressed by the beautiful result.
View attachment 451627View attachment 451628View attachment 451629View attachment 451630
In the last few days I tested my ability to brown the nail heads using the ballistol.
This liquid was bought with the help of our amazing friend Tobias, who sent the ballistol from Germany. Unfortunately, I am unable to reach a satisfactory result.
Don't worry, I don't give up so quickly, and I'm happy to receive any guidance (Tobias is also here to teach and guide me).I'm attaching a photos of the experiment process.
View attachment 451634View attachment 451635View attachment 451637View attachment 451638View attachment 451639View attachment 451640View attachment 451641View attachment 451642View attachment 451643
I'm Happy to inform you that tomorrow the group of friends from my country of ship model builders will gather at my house and this is a celebration for us, in these complex days.
regards Shota
Enjoy the gathering of your fellow modelers!
- Joined
- Apr 20, 2020
- Messages
- 6,242
- Points
- 738

Johan, my dear friendA very nice touch, those square bolt heads. My experiences with blackening brass or copper parts have been very inconsistent. I hope to see satisfactory results from your experiments.
Enjoy the gathering of your fellow modelers!
thank you very much for your kind words and encouragement
my fellow modelers, they are generous people and good friends and it is a pleasure and honor to meet them and consider them a friend
- Joined
- Apr 20, 2020
- Messages
- 6,242
- Points
- 738

good evening dear friends
Today I started the process of working on the filler pieces between the frames. Those parts were marked according to the following drawing.
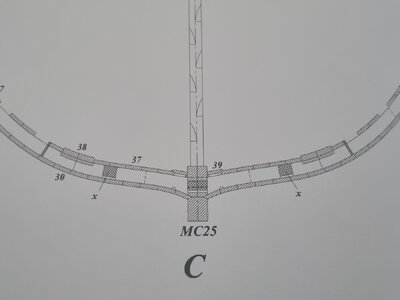
You can see the position of the spanners from the plan with the cross-sections. The distance to the keel is always the same from front to back (thanks to Tabias who helped in understanding the issue).
In the next step I marked with a pencil the positions of the pieces in 27 frames.
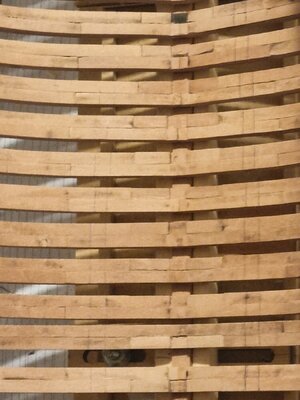
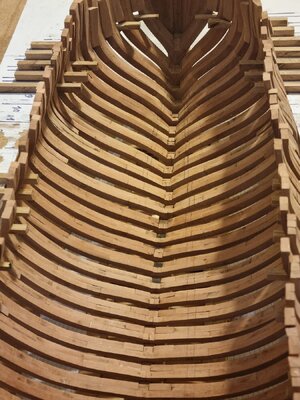
After that I started sawing the pear wood panel which was 4.5 mm thick
(I used the jig that members of the forum created for the proxxon thicknes it's great)
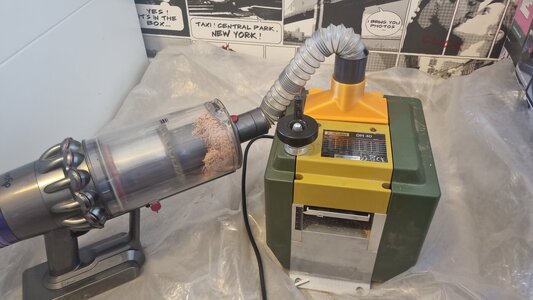
unfortunately at this point I had a major malfunction. My saw was from the USA with a voltage of 110 watts and with us it is 220 connected to the electrical outlet without the converter (forgot).
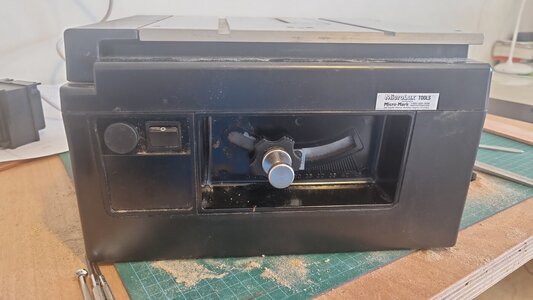
I burned a fuse, capacitor or the internal electrical panel.
Happily, my friends volunteered to check the problem and help as best they could.
I have a tiny table saw for backup, in quality and performance that for now allows me to move forward with the process.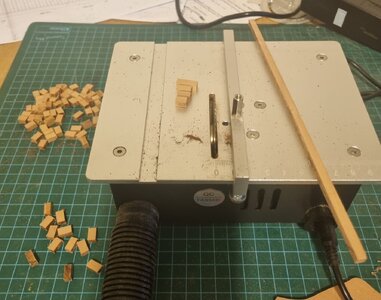
I created the pieces and placed them between the frames, and this is the intermediate result.
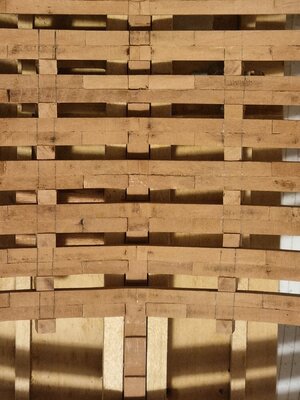
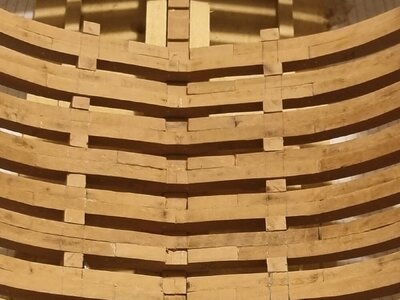
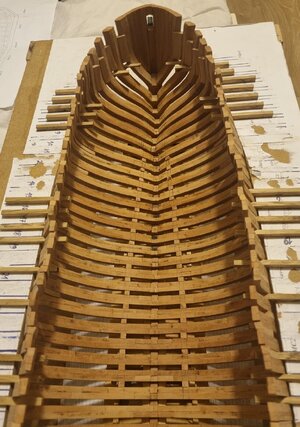
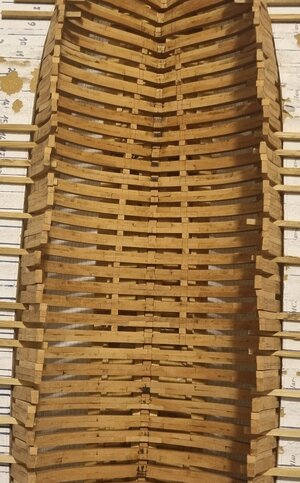
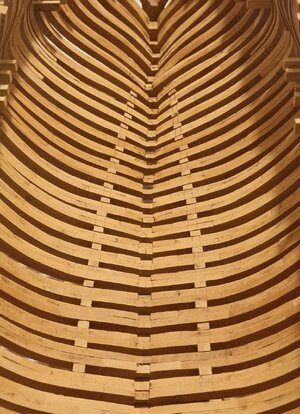
In the coming days I will continue the process of installing the pieces (including those along the keel and between it and the keelson) and the blackening experiments.
After all this I will start preparing the keelson parts and the preparations for the most important and sensitive stage of gluing/fixing the frames and the keelson to the keel and actually creating the hull of the ship.
I'm a little excited to see it on the horizon, a critical mile stone for me
 .
.
Good night everyone
Today I started the process of working on the filler pieces between the frames. Those parts were marked according to the following drawing.

You can see the position of the spanners from the plan with the cross-sections. The distance to the keel is always the same from front to back (thanks to Tabias who helped in understanding the issue).
In the next step I marked with a pencil the positions of the pieces in 27 frames.


After that I started sawing the pear wood panel which was 4.5 mm thick
(I used the jig that members of the forum created for the proxxon thicknes it's great)

unfortunately at this point I had a major malfunction. My saw was from the USA with a voltage of 110 watts and with us it is 220 connected to the electrical outlet without the converter (forgot).

I burned a fuse, capacitor or the internal electrical panel.
Happily, my friends volunteered to check the problem and help as best they could.
I have a tiny table saw for backup, in quality and performance that for now allows me to move forward with the process.

I created the pieces and placed them between the frames, and this is the intermediate result.


In the coming days I will continue the process of installing the pieces (including those along the keel and between it and the keelson) and the blackening experiments.
After all this I will start preparing the keelson parts and the preparations for the most important and sensitive stage of gluing/fixing the frames and the keelson to the keel and actually creating the hull of the ship.
I'm a little excited to see it on the horizon, a critical mile stone for me
Good night everyone
Very good work my friend - looking very good
- Joined
- Apr 20, 2020
- Messages
- 6,242
- Points
- 738

thank you very much my dear friend for your kind words and compliment.Very good work my friend - looking very good
- Joined
- Apr 20, 2020
- Messages
- 6,242
- Points
- 738

thank you very my friend for the kind words and support, I hope to that is only the fuseNice work with the spacer. Sorry for the table saw. But mostly when you give a machine 220 when it is made for 110, it is just the fuse that burns. Hope it will work soon.
- Joined
- Apr 20, 2020
- Messages
- 6,242
- Points
- 738

Dear OlivieWell done Shota! And thank you for referencing @Tobias for his expertise and help. I too did not realize that the spacers retained the same distance to the keel. Always picking up little nuggets of knowledge for you and others…
Thank you very much for the kind words and support, sharing knowledge and mutual support is important value for all of us in the forum
- Joined
- Apr 20, 2020
- Messages
- 6,242
- Points
- 738

Hello dear friends
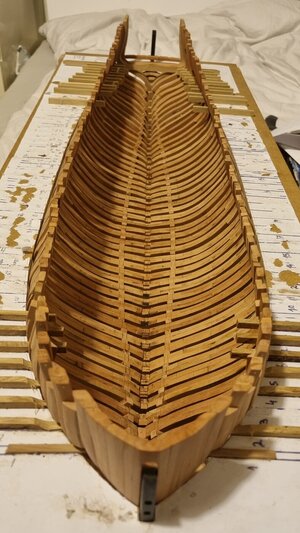
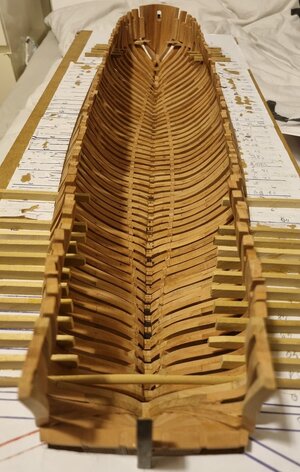
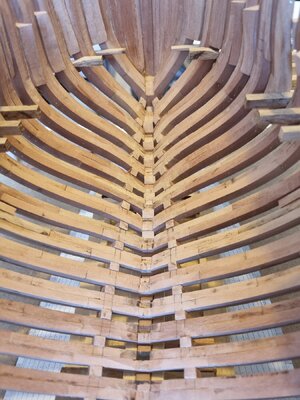
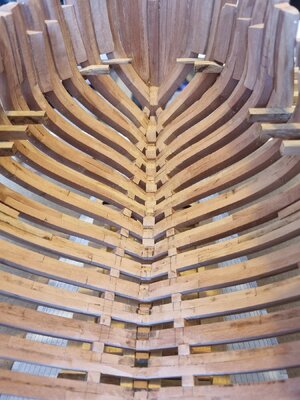
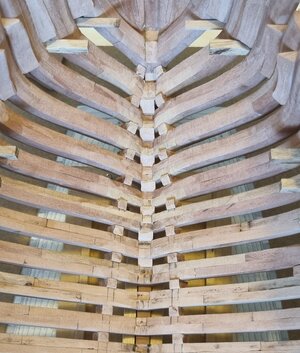
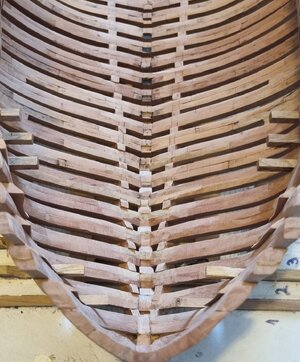
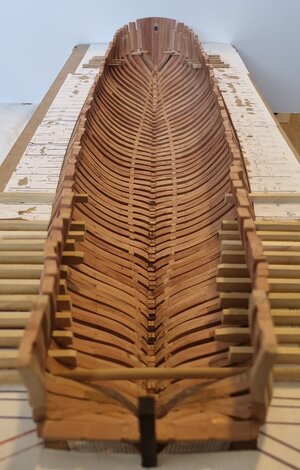
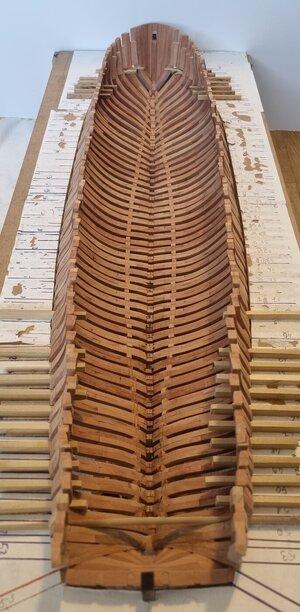
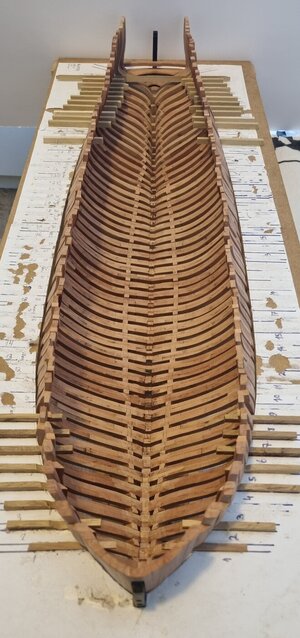
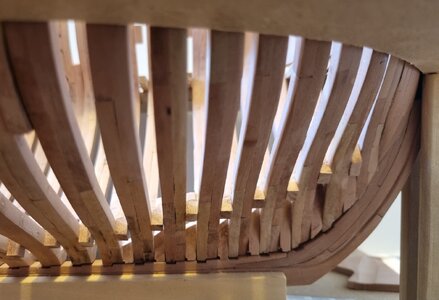
In the last day I finished installing the filler pieces between the frames.
Today I started placing the key pieces that are also between the frames but along the keel. I have currently placed about eight in the bow area.
I Would like to emphasize that everything here is without gluing but dry placement. What is interesting is that as I install the different parts, I feel how they together support and strengthen the structure of the ship's hull. With the frames and the keel, as if it were a construction workshop in reality.
The quality of the photos is not high and also the different parts have not been Sanded to the required point and therefore we do not see the beauty of the tone of the pear tree and the structure that takes shape.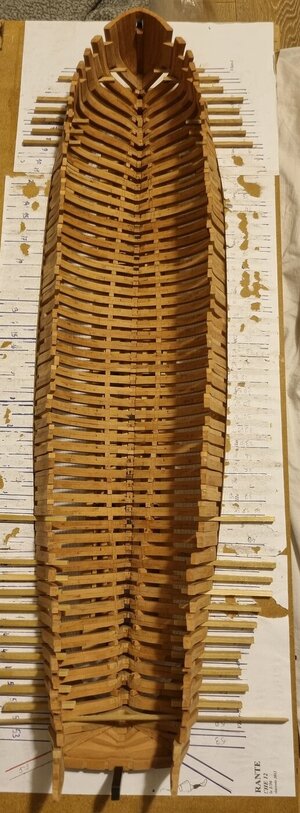
I wish all of us a pleasant and enjoyable weekend and that we know peace, tranquility and peace
In the last day I finished installing the filler pieces between the frames.
Today I started placing the key pieces that are also between the frames but along the keel. I have currently placed about eight in the bow area.
I Would like to emphasize that everything here is without gluing but dry placement. What is interesting is that as I install the different parts, I feel how they together support and strengthen the structure of the ship's hull. With the frames and the keel, as if it were a construction workshop in reality.
The quality of the photos is not high and also the different parts have not been Sanded to the required point and therefore we do not see the beauty of the tone of the pear tree and the structure that takes shape.


I wish all of us a pleasant and enjoyable weekend and that we know peace, tranquility and peace


