You show wonderful patience here Shota. Placing all the filler pieces while resisting the urge to start gluing things into place is something I would not have been able to do! I'm confident your patience will pay dividends.
-

Win a Free Custom Engraved Brass Coin!!!
As a way to introduce our brass coins to the community, we will raffle off a free coin during the month of August. Follow link ABOVE for instructions for entering.
-

PRE-ORDER SHIPS IN SCALE TODAY!
The beloved Ships in Scale Magazine is back and charting a new course for 2026!
Discover new skills, new techniques, and new inspirations in every issue.
NOTE THAT OUR FIRST ISSUE WILL BE JAN/FEB 2026
You are using an out of date browser. It may not display this or other websites correctly.
You should upgrade or use an alternative browser.
You should upgrade or use an alternative browser.
POF L'Amarante Corvette de 12 canons 1744 1:36 (Ancre Monograph- Gérard Delacroix) By Shota
- Joined
- Apr 20, 2020
- Messages
- 6,242
- Points
- 738

Thank you very much my dear friend for the words of support and compliments. Yes, this urge is familiar to all of us and it's challenging for me to deal with it too.You show wonderful patience here Shota. Placing all the filler pieces while resisting the urge to start gluing things into place is something I would not have been able to do! I'm confident your patience will pay dividends.
Delaying gratification is a natural human challenge
I understand that the gluing would be best done only after all the pieces of the "puzzle" are ready and when there is a complete match between them.
- Joined
- Apr 20, 2020
- Messages
- 6,242
- Points
- 738

good morning dear friends
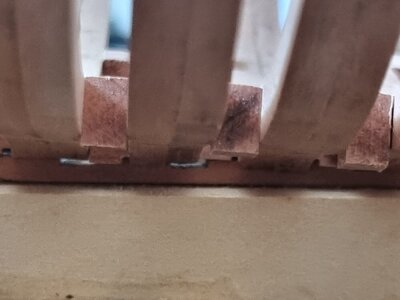
This morning I finished installing the two types of pieces I've been working on for the last few days.
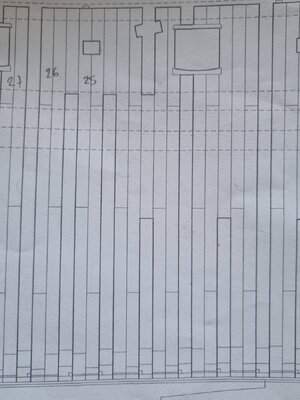
Since I sanded the ones along the keel to the correct height of the frames, I marked them with numbers like the frames.
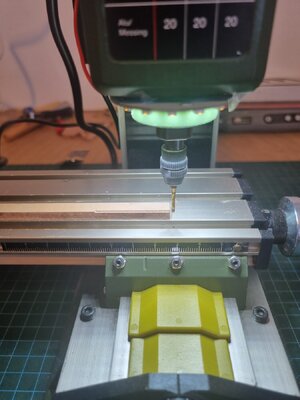
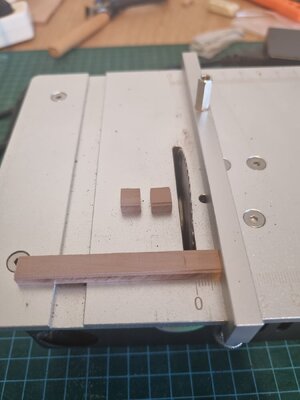
By the way, I made the filling pieces this time in a Mass production process with the mf70 grinder and the saw as you will see in the picture.
Attention in frames 24-25 the direction of the groove in the piece is opposite as shown in the drawing.
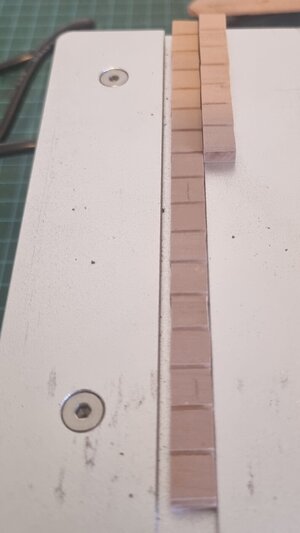
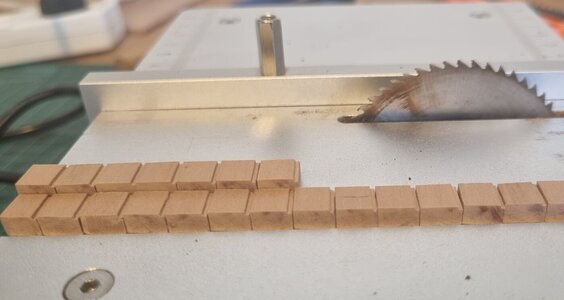
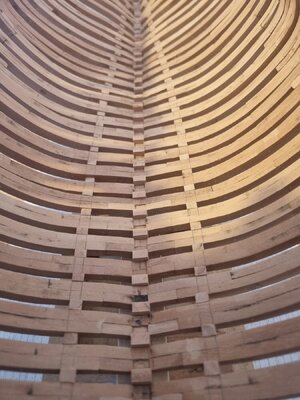
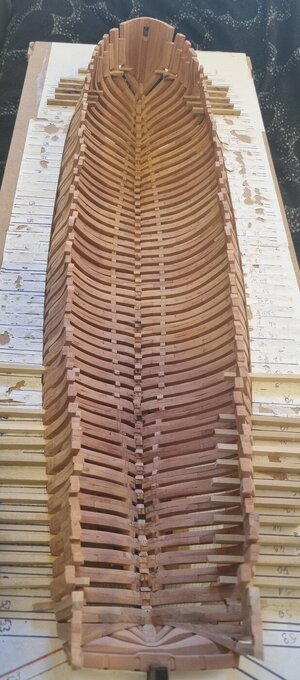
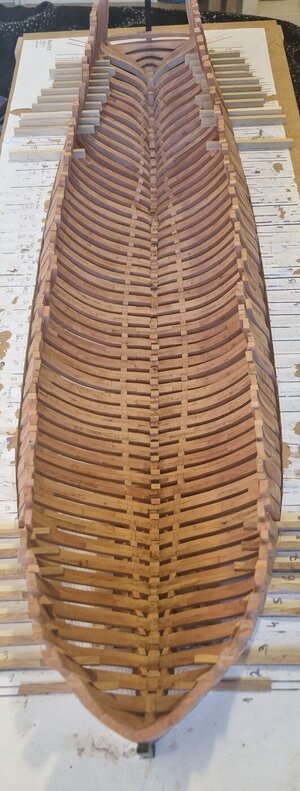
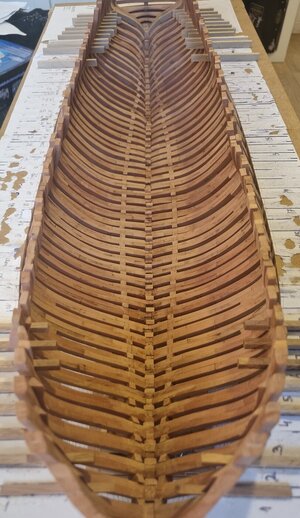
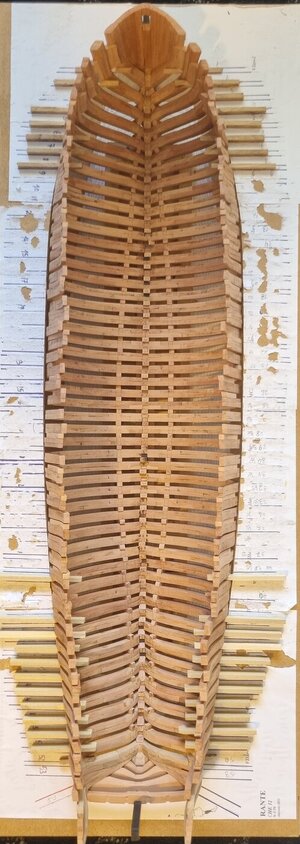
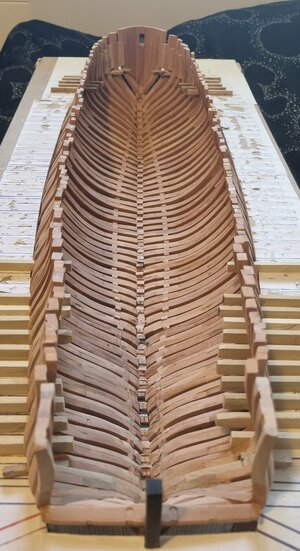
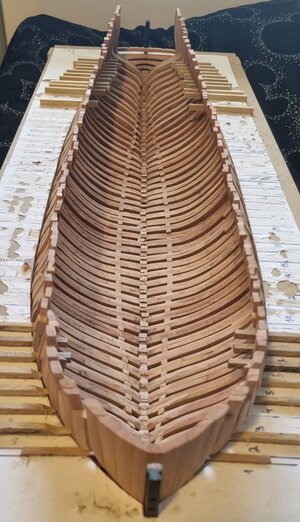
Later this week I will start making the keelson and try to blacken the nail heads.
Thank you all very much for the likes and encouragement
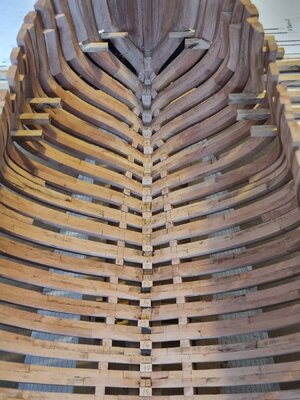
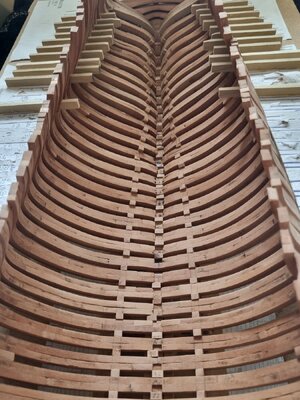
This morning I finished installing the two types of pieces I've been working on for the last few days.
Since I sanded the ones along the keel to the correct height of the frames, I marked them with numbers like the frames.
By the way, I made the filling pieces this time in a Mass production process with the mf70 grinder and the saw as you will see in the picture.
Attention in frames 24-25 the direction of the groove in the piece is opposite as shown in the drawing.


Later this week I will start making the keelson and try to blacken the nail heads.
Thank you all very much for the likes and encouragement


Last edited:
- Joined
- Apr 20, 2020
- Messages
- 6,242
- Points
- 738

good evening dear friends
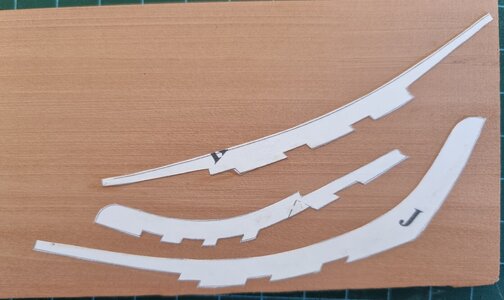
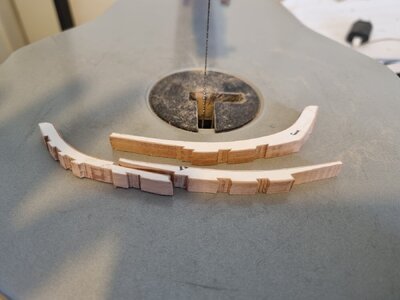
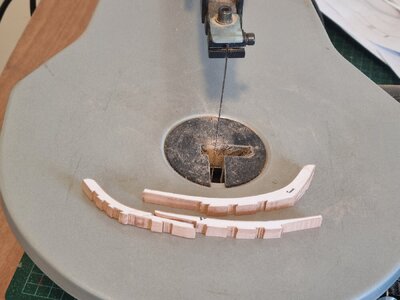
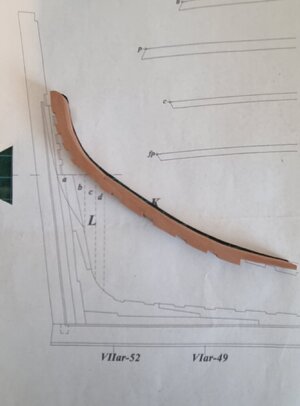
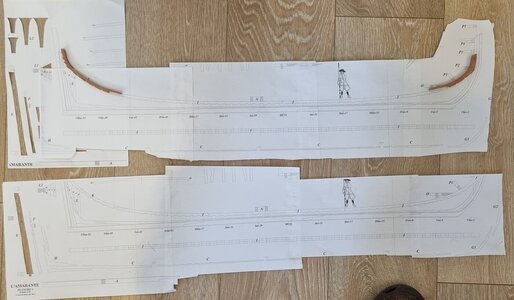
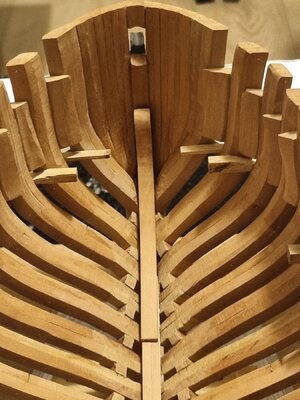
In the last two days I focused on preparing the keelson.
The keelson consists of two types of parts:
The first type: three parts 7 mm wide, the first of them in the bow and the remaining two in the stern.
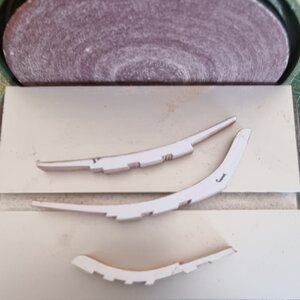
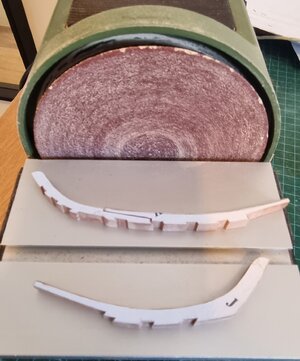
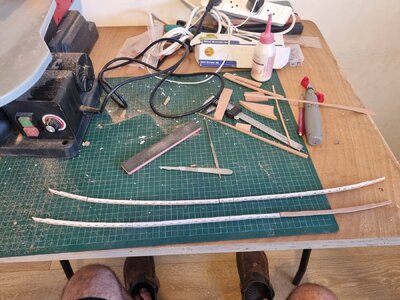
The second type: 6 parts (3.5 mm wide), divided into two trio whose shape does not overlap.
The first trio can be seen in the drawing marked with a dashed line and the second trio with a continuous line.
I thank to our good friend Tobias here again for the help in understanding.
I will detail the work process so that the next in line can use the explanations.
First I glued the three extreme pieces on a 7mm board, sawed and sanded and it came out nicely.
In the next step I made two drawing boards showing the keelson in its entirety.
From each drawing board I cut the 3 different pieces for a 3.5 mm thick board. Later I glued the pages to the wood, sawed, sanded and glued the 6 pieces in a way that created the central part of the keelson.
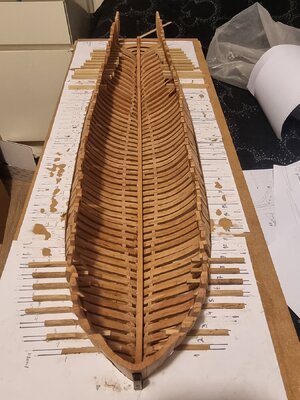
Happily, I dry-assembled all the pieces on the frames in the keel , a complete and beautiful match was created.
I will devote the next few days to sanding and final adjustments of all the parts I have produced in the last few months.
After that, I will dismantle the entire structure created in preparation for the permanent gluing of all the parts into the hull of the ship structure.
Enjoy the pictures and good night everyone
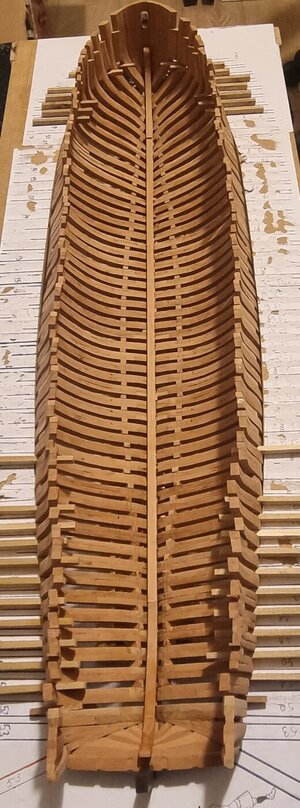
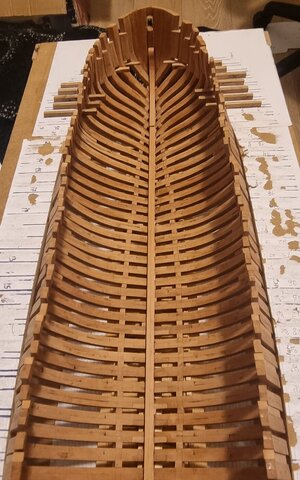
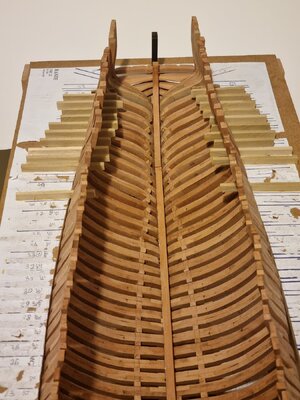
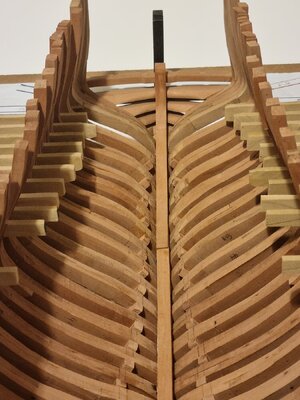


Last edited:
Great work Shota. I love the way you “pay it forward”, Tobias knowledge and guidance to you then you provide knowledge and guidance for the next person in line.
Good morning Shota. Thank you for posting a comprehensive log. This will help me one day in a few years from now when I decide to build a scratch ship. Your patience is paying dividends and little by little she is taking shape. Awesome work. Cheers Grantgood evening dear friends
In the last two days I focused on preparing the keelson.
The keelson consists of two types of parts:
The first type: three parts 7 mm wide, the first of them in the bow and the remaining two in the stern.
The second type: 6 parts (3.5 mm wide), divided into two trio whose shape does not overlap.
The first trio can be seen in the drawing marked with a dashed line and the second trio with a continuous line.
I thank to our good friend Tobias here again for the help in understanding.
I will detail the work process so that the next in line can use the explanations.
First I glued the three extreme pieces on a 7mm board, sawed and sanded and it came out nicely.
In the next step I made two drawing boards showing the keelson in its entirety.
From each drawing board I cut the 3 different pieces for a 3.5 mm thick board. Later I glued the pages to the wood, sawed, sanded and glued the 6 pieces in a way that created the central part of the keelson.
Happily, I dry-assembled all the pieces on the frames in the keel , a complete and beautiful match was created.
I will devote the next few days to sanding and final adjustments of all the parts I have produced in the last few months.
After that, I will dismantle the entire structure created in preparation for the permanent gluing of all the parts into the hull of the ship structure.
Enjoy the pictures and good night everyone
View attachment 455356View attachment 455357View attachment 455358View attachment 455359View attachment 455360View attachment 455361View attachment 455362View attachment 455363View attachment 455364View attachment 455365View attachment 455366View attachment 455367View attachment 455368View attachment 455369
View attachment 455370
Very good progress and quality progress in addition - Bravo
Oh, wow Shota, I had really fallen behind in your build log however am now caught up. Your attention to detail is producing a magnificent ship's hull. All the frames are coming together nicely! It was great seeing you and your friends get together for a little fellowship and pictures of your trip to Japan.
Very nice work with all those notches, Shota. With the keelson in a straight line.good evening dear friends
In the last two days I focused on preparing the keelson.
The keelson consists of two types of parts:
The first type: three parts 7 mm wide, the first of them in the bow and the remaining two in the stern.
The second type: 6 parts (3.5 mm wide), divided into two trio whose shape does not overlap.
The first trio can be seen in the drawing marked with a dashed line and the second trio with a continuous line.
I thank to our good friend Tobias here again for the help in understanding.
I will detail the work process so that the next in line can use the explanations.
First I glued the three extreme pieces on a 7mm board, sawed and sanded and it came out nicely.
In the next step I made two drawing boards showing the keelson in its entirety.
From each drawing board I cut the 3 different pieces for a 3.5 mm thick board. Later I glued the pages to the wood, sawed, sanded and glued the 6 pieces in a way that created the central part of the keelson.
Happily, I dry-assembled all the pieces on the frames in the keel , a complete and beautiful match was created.
I will devote the next few days to sanding and final adjustments of all the parts I have produced in the last few months.
After that, I will dismantle the entire structure created in preparation for the permanent gluing of all the parts into the hull of the ship structure.
Enjoy the pictures and good night everyone
View attachment 455356View attachment 455357View attachment 455358View attachment 455359View attachment 455360View attachment 455361View attachment 455362View attachment 455363View attachment 455364View attachment 455365View attachment 455366View attachment 455367View attachment 455368View attachment 455369
View attachment 455370
Regards, Peter
- Joined
- Apr 20, 2020
- Messages
- 6,242
- Points
- 738

Thank you very much, dear friend, for the words of support and praise, I would love for the documentation of my work to be used by those who come in line. Dear Tobias, very helpful in the processGreat work Shota. I love the way you “pay it forward”, Tobias knowledge and guidance to you then you provide knowledge and guidance for the next person in line.
- Joined
- Apr 20, 2020
- Messages
- 6,242
- Points
- 738

thank you very much my dear friend Mirek for your kind wordsWitaj
Bardzo dużo precyzyjnej pracy Shoto super . Pozdrawiam Mirek
- Joined
- Apr 20, 2020
- Messages
- 6,242
- Points
- 738

Thank you very much, dear friend Grant, for the words of support & compliments,Good morning Shota. Thank you for posting a comprehensive log. This will help me one day in a few years from now when I decide to build a scratch ship. Your patience is paying dividends and little by little she is taking shape. Awesome work. Cheers Grant
I would love for the documentation of my work to be used by those who come in line
- Joined
- Apr 20, 2020
- Messages
- 6,242
- Points
- 738

my dear friend UweVery good progress and quality progress in addition - Bravo
thank you very much for your kind words and compliments, it's means alot
- Joined
- Apr 20, 2020
- Messages
- 6,242
- Points
- 738

my dear friend DanielOh, wow Shota, I had really fallen behind in your build log however am now caught up. Your attention to detail is producing a magnificent ship's hull. All the frames are coming together nicely! It was great seeing you and your friends get together for a little fellowship and pictures of your trip to Japan.
welcome back
- Joined
- Apr 20, 2020
- Messages
- 6,242
- Points
- 738

my dear friend PeterVery nice work with all those notches, Shota. With the keelson in a straight line.
Regards, Peter
thank you very much for your kind words and compliments
- Joined
- Apr 20, 2020
- Messages
- 6,242
- Points
- 738

good evening dear friends
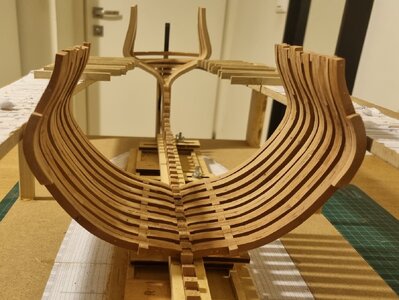
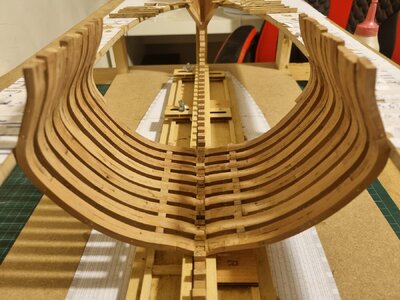
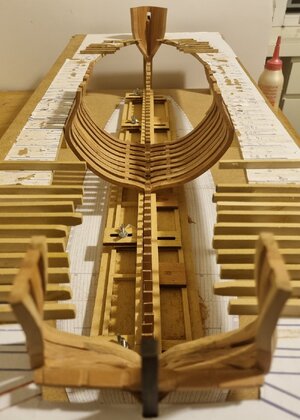
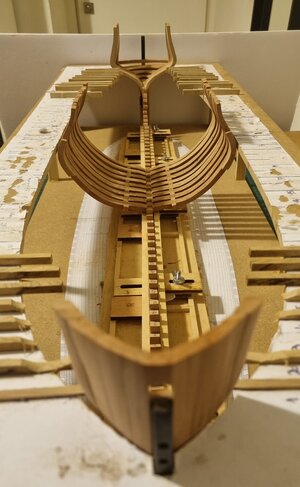
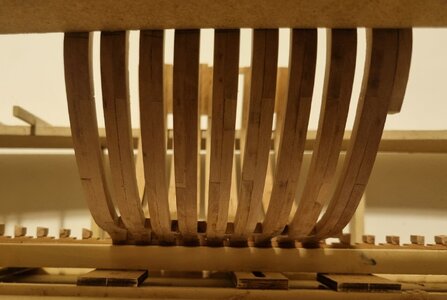
After two days of sanding the frames at various points this evening I reached the long awaited stage.
After 8 months of construction and preparations, I started the process of permanently gluing the frames.
The gluing started with the central frames 24-31, when in each frame I checked its angle and balance.
I believe the process will take a few more days, Until then enjoy life


Looks great Shota, always a rewarding moment when the first frames are in place.
Now it’s for real m, Shota. Enjoy thus stage.good evening dear friends
After two days of sanding the frames at various points this evening I reached the long awaited stage.
After 8 months of construction and preparations, I started the process of permanently gluing the frames.
The gluing started with the central frames 24-31, when in each frame I checked its angle and balance.
I believe the process will take a few more days, Until then enjoy life
View attachment 455808
View attachment 455809
View attachment 455810
View attachment 455811
View attachment 455812
Regards, Peter


