
-

SUBSCRIBE TO SHIPS IN SCALE TODAY!
The beloved Ships in Scale Magazine is back and charting a new course for 2026!
Discover new skills, new techniques, and new inspirations in every issue.
NOTE THAT OUR NEXT ISSUE WILL BE July/August 2026 -

Win a Free Custom Engraved Brass Coin!!!
As a way to introduce our brass coins to the community, we will raffle off a free coin during the month of August. Follow link ABOVE for instructions for entering.
You are using an out of date browser. It may not display this or other websites correctly.
You should upgrade or use an alternative browser.
You should upgrade or use an alternative browser.
Rattlesnake 1/48 - Harold M Hahn
- Thread starter Norway
- Start date
- Watchers 51
-
- Tags
- harold hahn rattlesnake
- Joined
- Dec 3, 2018
- Messages
- 2,450
- Points
- 538

Jig plate finished.
I made jig in two parts to keep it completely flat, the lower plate should be so that the frames get the same depth in the jig.
.jpg")
.jpg")
I also adjusted the opening in the lower plate to get maximum access to the hull from the bottom of the jig.
.jpg")
.jpg")
Before screwing the plates together, I measured all the notches in the upper plate with a board that has the same dimensions as the frames.

.jpg")
The next step is to create new templates for creating the materials for the frames, the ones in the picture are not exactly accurate, they were created just to create the test frames I have created earlier.
.jpg")
Greeting-
..
I made jig in two parts to keep it completely flat, the lower plate should be so that the frames get the same depth in the jig.
I also adjusted the opening in the lower plate to get maximum access to the hull from the bottom of the jig.
Before screwing the plates together, I measured all the notches in the upper plate with a board that has the same dimensions as the frames.
The next step is to create new templates for creating the materials for the frames, the ones in the picture are not exactly accurate, they were created just to create the test frames I have created earlier.
Greeting-
..
Attachments
Good progress, Knut!
Excellent preparation work Knut.Do you propose to make a Checking jig for the frames?This consists of a board with a backstop which represents the top tips of the frames and a short length of wood mocking up the keel.The frames are dropped into this jig flat one by one to make sure your completed frames are consistent in height and symmetrical about centreline for when they go into the main jig.This will ensure all your notches for the keel will line up arrow straight in the main jig.
Kind Regards
Nigel
Kind Regards
Nigel
- Joined
- Dec 3, 2018
- Messages
- 2,450
- Points
- 538
Nigel, I'm going to use methods that other modelers here at the forum use, there are several builders who build by the Hahn technique.
I will make some additions to my jig where I can mount the entire keel so that it comes fully centered and at an angle.
Then I will have the opportunity to check that the frames come in properly with the keel.
Fortunately for me, there are several good building logs here at SOS, where I can find a lot of good information.
If you have a good explanation for what you say, I really appreciate it, preferably pictures if you have someone to show.
All information is good information,
Thank you for your attention.
..
Knut
If your keel has a fall to it in relation to the baseboard it will not work.The idea is that every frames height is checked keel notch to frame tops to ensure every one is identical.It was in a book I read,but which one,I can't remember.
Kind Regards
Nigel
If your keel has a fall to it in relation to the baseboard it will not work.The idea is that every frames height is checked keel notch to frame tops to ensure every one is identical.It was in a book I read,but which one,I can't remember.
Kind Regards
Nigel
- Joined
- Dec 3, 2018
- Messages
- 2,450
- Points
- 538
Thanks Nigel, I have this piece of advice in mind as I come to this stage, BDW, I've got some pictures on PM of Janos showing
build the jig from his Rattlesnake model, I'll try to do as he did, and with good advice and tips from good helpers here at SOS.
.
build the jig from his Rattlesnake model, I'll try to do as he did, and with good advice and tips from good helpers here at SOS.
.
Canoe21
Lawrence
Hello Knut
I believe what Nigel is asking you about is a jig to ensure that all the frames are of the same height, This is best demonstrated in an article by Dave Stevens in the MSB Journal. I will attach this page, hope this helps, a very important step in your build, ENJOY.
Regards Lawrence
I believe what Nigel is asking you about is a jig to ensure that all the frames are of the same height, This is best demonstrated in an article by Dave Stevens in the MSB Journal. I will attach this page, hope this helps, a very important step in your build, ENJOY.
Regards Lawrence
Attachments
- Joined
- Dec 3, 2018
- Messages
- 2,450
- Points
- 538
Thanks Lawrence, it was something I intended, I also want to build the supports front and back as you have made your jig.
I am attaching a few pictures I borrowed from your log, I hope it is okay.
.JPG")
.JPG")
.JPG")
Your log is very well explained with pictures that explain most, thanks.
Greeting-
..
I am attaching a few pictures I borrowed from your log, I hope it is okay.
Your log is very well explained with pictures that explain most, thanks.
Greeting-
..
Thanks Lawrence
Basically yes the same theory,The illustration in the book included a square peg representing the keel.
Kind Regards
Nigel
Basically yes the same theory,The illustration in the book included a square peg representing the keel.
Kind Regards
Nigel
- Joined
- Dec 3, 2018
- Messages
- 2,450
- Points
- 538
Thanks for the help and good information on this topic, I feel much safer now on how to set up frames and keels, in
the jig, an important thing, at least, is to check that everything is positioned properly, and that all parts are aligned and angled correctly in the building jig.
the jig, an important thing, at least, is to check that everything is positioned properly, and that all parts are aligned and angled correctly in the building jig.
- Joined
- Dec 3, 2018
- Messages
- 2,450
- Points
- 538
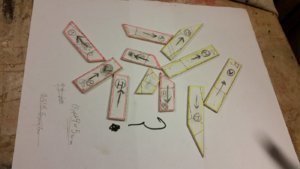
New templates.
Made from plain birch and they are a little thicker than the double frames.
.jpg")
.jpg")
.jpg")
.jpg")
.jpg")
I worked late at night and did not finish, here are the last patterns to be cut and glued.
.jpg")
Finally, the parts should be cut and adjusted with the grinder.
Then mass production can begin.
Greeting-
.
Made from plain birch and they are a little thicker than the double frames.
I worked late at night and did not finish, here are the last patterns to be cut and glued.
Finally, the parts should be cut and adjusted with the grinder.
Then mass production can begin.
Greeting-
.
Canoe21
Lawrence
Hello Knut
Golly but you are moving along at a great speed. Yes there are a lot of Hull framing pieces, I taped my pattern to the bottom of a piece of glass , used this as a guide, glued up all the pices for that side of the frame and sandwiched it between glass with weights and left it for a couple of hours. It is a long slow process, but it insures that each side of the frames are correct, ENJOY.
Regards Lawrence
- Joined
- Dec 3, 2018
- Messages
- 2,450
- Points
- 538
Thanks for the encouragement Lawrence, yes, I know it's going to take a long time, the materials I've already customized for the frames I doubt is enough , but fortunately I have produced enough raw materials to make more, the opportunity to try and fail is there too.
The advantage of making the materials yourself is that you are left with a good amount of materials you can use, luckily not having to order expensive materials from suppliers, but it is a lot and heavy work before you can use it.
.jpg")
A little to take off.
.jpg")
..
The advantage of making the materials yourself is that you are left with a good amount of materials you can use, luckily not having to order expensive materials from suppliers, but it is a lot and heavy work before you can use it.
A little to take off.
..
Canoe21
Lawrence
Hello Knut, Yes it is a lot of extra work in cutting and planning your own building supplies. You are fouling much the same rout as I have. But have no worry it will all come together, ENJOY.
Regards Lawrence
Regards Lawrence


- Joined
- Jul 27, 2019
- Messages
- 22
- Points
- 48

Really enjoying ur build and log Knut. Your effort in regards to timber is huge and I'm sure the rewards at the end will be self satisfying I'm sure
Peter
Peter

Canoe21
Lawrence
Hello Knut, is it not possible for you to find a little corner inside the warm house to start gluing up your hull frames, would be much more comfortable and enjoyable, also much better for your glue to set, just a thought from Cold Country Canada, ENJOY.Now the templates are finished cut and sanded.
Production of parts for the frames can now start.
View attachment 118089View attachment 118090View attachment 118091View attachment 118092
Winter is well on its way and it's starting to get really cold working in my garage, now thermo clothes need to be found.
.
Regards Lawrence