Santisima Trinidad - Occre Build Log [COMPLETED BUILD]

Re: OcCre Santisima Trinidad Build Log

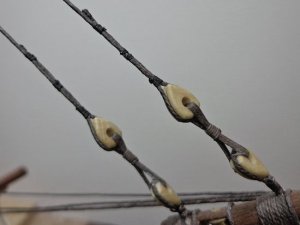
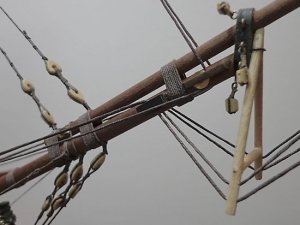
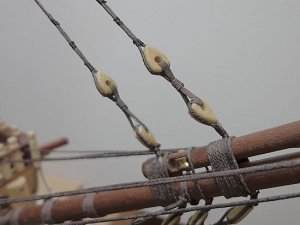
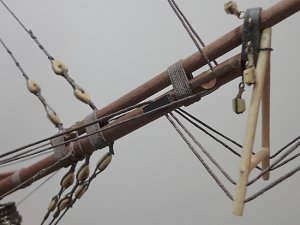
<t>Welcome back Donnie. And you show us some nice pics of a beautiful ship. The rigging looks really fabulous.</t>
 
Re: OcCre Santisima Trinidad Build Log

<t>Beautiful picture, like usual the riging is perfect. Maybe You fave a problem with time, but this is normal with Your dedication.<br/>
<br/>
Barba</t>
 
Re: OcCre Santisima Trinidad Build Log

<t>Catching up on your build after some 'life interruptions'. Very nice shroud and ratline work. I remember when you first started your build log that you had some doubts about the build. You should have none now. This is one fine looking ship. You should be proud of your work. Well done.</t>
 
Re: OcCre Santisima Trinidad Build Log

<t>I really do appreciate all the nice compliments. I had today off - took advantage of it and started my Gammoning and Bowsprit Rigging.</t>
 

Attachments

  • gammoning01.jpg
    gammoning01.jpg
    108.3 KB · Views: 100
  • gammoning02.jpg
    gammoning02.jpg
    70.3 KB · Views: 100
  • gammoning03.jpg
    gammoning03.jpg
    94.9 KB · Views: 101
  • gammoning05.jpg
    gammoning05.jpg
    86.5 KB · Views: 101
  • gammoning04.jpg
    gammoning04.jpg
    87.8 KB · Views: 104
  • gammoning06.jpg
    gammoning06.jpg
    92.2 KB · Views: 103
Re: OcCre Santisima Trinidad Build Log

<t>thanks Guys ! I appreciate the words. Gary - You know in the back of my mind, I have been thinking about the next build - but I might have to precede that with either a pill or something. Maybe I will just build a canoe !!!! Ok, at any rate - I am on a roll here - Soooo glad to get those shrouds and ratlines out of the way. So, here are some more pics !</t>
 

Attachments

  • bowspritrigging01.jpg
    bowspritrigging01.jpg
    95.4 KB · Views: 124
  • bowspritrigging02.jpg
    bowspritrigging02.jpg
    95.5 KB · Views: 121
  • bowspritrigging03.jpg
    bowspritrigging03.jpg
    92.3 KB · Views: 126
  • bowspritrigging05.jpg
    bowspritrigging05.jpg
    84 KB · Views: 129
  • bowspritrigging04.jpg
    bowspritrigging04.jpg
    92.7 KB · Views: 129
  • bowspritrigging06.jpg
    bowspritrigging06.jpg
    96.2 KB · Views: 126
Re: OcCre Santisima Trinidad Build Log

<t>Yes, you are on a roll. Nice work. I am sure you calculated you line sizes using Historic Ship Models by Wolfram Zu Mondfeld. I guess you read what I wrote on my ship about deadeye sizes. Rigging is an art in itself and you have to search every source you can get your hands on to find out any particularities for your particular ship. Even though there was a lot of standardization, some countries adopted things at different times and some even had their own style on some items.</t>
 
Re: OcCre Santisima Trinidad Build Log

<t>Hi Gary - I have that book and I refer to it a lot.</t>
 
Re: OcCre Santisima Trinidad Build Log

<t>Hi Donnie<br/>
Absolutely beautiful work on your rigging, it looks very clean.<br/>
Børge</t>
 
Re: OcCre Santisima Trinidad Build Log

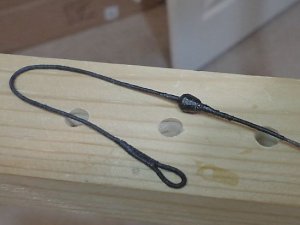
<t>EDIT: I am also humbled that this attempt is now being done away with (canned) as they say. Even though it looked fairly decent, it came out a little too big. Then as I tried to reduce its size by cutting it down some (even with the thread on there), I just decided to let it go. I had to cut it down by 50%. Then I cheated and painted the mouse black !!! No one expect you all will even know. I am humbled - thanks again. Well, I decided to go ahead and try my hand at making a mouse. Man this is a tiny thing. But, actually, it did not take as long as it looks and really not that bad to do. I am glad that I do not have a lot of these. This mouse will slip onto the mast end of the served Forestay and Fore preventer stay. More images to come when I get to that part. Yes, the mouse is weaved - some weaving not the best, but after it was done - I can't even find the problems.</t>
 

Attachments

  • mouse01.jpg
    mouse01.jpg
    44.2 KB · Views: 101
  • mouse02.jpg
    mouse02.jpg
    43.5 KB · Views: 102
  • mouse03.jpg
    mouse03.jpg
    34.8 KB · Views: 100
  • mouse04.jpg
    mouse04.jpg
    41 KB · Views: 98
Re: OcCre Santisima Trinidad Build Log

<t>Hi Gary,<br/>
I had some 1/4" dowel and I cut off about 1 inches long so that I could hold the piece while I carved it. I then took the 1 inch long piece and put it in a drill press and drill a 2.4mm hole all the way through. Then, I scored a line about 1/2 inch from one end. Then I used an xacto and carved the shape. It was quite tedious. I used cross stitch thread with plenty of wax on the line so to eliminate as much fuzzy as I could.When I finished it, I took a black sharpie and filled in some areas that was not quite covered with line. I can't say that I enjoyed it, but it wasn't that bad. Now I have to made another one. <br/>
ps. The final shape was not 1/4 inches in diameter, it was somewhat less around 3/16 inches.</t>
 
Re: OcCre Santisima Trinidad Build Log

<t>Thanks for sharing. It will make the model stand out. What ever we do to enhance the model makes it appear more real. Even the untrained eye will subconciously pick up. Great work.</t>
 
Re: OcCre Santisima Trinidad Build Log

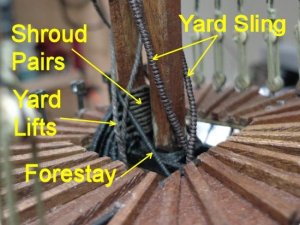
<t>Redid the mouse. Just a plain shaped wood. No thread. To small to make a difference. At any rate, I have my Forestays done.</t>
 

Attachments

  • forestay01.jpg
    forestay01.jpg
    31.6 KB · Views: 137
  • forestay02.jpg
    forestay02.jpg
    44.2 KB · Views: 140
  • forestay03.jpg
    forestay03.jpg
    40.8 KB · Views: 136
  • forestay04.jpg
    forestay04.jpg
    54.6 KB · Views: 135
  • forestay05.jpg
    forestay05.jpg
    58.9 KB · Views: 137
  • forestay06.jpg
    forestay06.jpg
    26.9 KB · Views: 139
  • forestay07.jpg
    forestay07.jpg
    41.5 KB · Views: 139
  • forestay09.jpg
    forestay09.jpg
    40.4 KB · Views: 135
  • forestay08.jpg
    forestay08.jpg
    89.7 KB · Views: 137
Re: OcCre Santisima Trinidad Build Log

<t>There is always so much detail to look at, so you are right. Very few will even know that it is there, let alone what function it serves. Tight rigging is what will catch the eye.</t>
 
Re: OcCre Santisima Trinidad Build Log

<t>Well, I am stuck again. But this time, not stuck as burnout. I am confused and stuck about the Main and Preventer Stay. The part that I am confused about (and I have done some research - not much out there), is this: At the Bowsprit, my Main Stay is going to wrap around the lower part of the Bowsprit. As a matter of fact, the Main and Preventer Stay will wrap right near the Gammoning. The Main Stay wraps right at the fore Gammon and the Preventer right at the aft Gammon. The confusion is "how" do the Stay(s) attach to the Bowsprit (gammon). I included the most laughable - horrible graphic - I hope it makes sense. The red are the siezings. Of what I can tell from the photos of the OcCre manual, they are using Method A. Are there other ways to do this? I really appreciate any advise on this one. <br/>
Thanks</t>
 
Re: OcCre Santisima Trinidad Build Log

<t>There is two methods I know about. One was a block of wood on both sides of the bowsprit that was shaped like 1/2 of the backing link for deadeyes with a hole in the middle through which the line was run. In your picture, I believe the other method would be used.<br/>
The second method consisted of a wedge shaped block of wood similiar to a quoin. The large end would be next to the backstay being rigged. There was usually one on top of the mast and one on each side. It was also common to use this to keep the gammoning in place and probably would be correct to do so on your model. The only difference was the three for the gammoning had one in the center and the others were at about a 45 degree angle (I believe). In the one I am working on, they suggest a piece of 2 by 3 mm wood be used and the back end is tapered at 30 degrees until flat. The forward part of the wedge is flat for a short stretch before the taper begins.</t>
 
Re: OcCre Santisima Trinidad Build Log

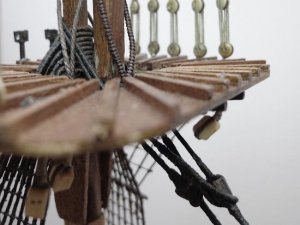
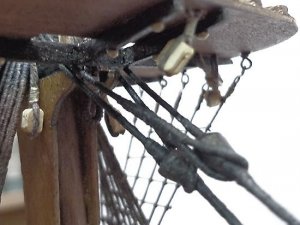
<t>Here is the latest. All of which might not be in organized order. Some of this is starting to run together. I decided that I wanted a slightly thicker seizing on the Forestay of the Top end. In this procedure, I decided to use gift wrap tissue paper of which I have found in the past to be easy to work with and readily available. <br/>
This is not too scientific. I simply cut a strip about 18 inches long and rolled the paper at an angle. The images below should be explanatory. Since the tissue is white, I then had some brown Folk Art water based paint and diluted it and spread this solution onto the completed rolled of while tissue and then let it set to dry for about an hour.<br/>
The final revealed a rather robust durable strand - that by the way, I wanted to really simulate the leather sometimes used in the seizings. I then prepared one strand of Black Cross stitch thread and ran this through the beeswax (as always). Loading the spare cardboard tube with the line allows for easier and faster application of the wrapping. From beginning to end (including dry time) it took about 2 hours to build this one end. I realize that this method might invite a lot of debate, and raise some eyebrows, but in the end, I have a nice rigged end that is very durable. The tissue adds just enough thickness to where it is not bulky.</t>
 

Attachments

  • forestay10.jpg
    forestay10.jpg
    99.6 KB · Views: 110
  • forestay11.jpg
    forestay11.jpg
    97.9 KB · Views: 107
  • forestay13.jpg
    forestay13.jpg
    86.4 KB · Views: 110
  • forestay12.jpg
    forestay12.jpg
    72.7 KB · Views: 110
  • forestay14.jpg
    forestay14.jpg
    95.9 KB · Views: 109
  • forestay15.jpg
    forestay15.jpg
    83.5 KB · Views: 106
Re: OcCre Santisima Trinidad Build Log

<t>I finally have one Main Stay rigged from the Main Mast Tops to the Bowsprit. Now on to the next one. This was the only photo as my camera battery had to be recharged.</t>
 

Attachments

  • forestay16.jpg
    forestay16.jpg
    99.2 KB · Views: 121
Back
Top