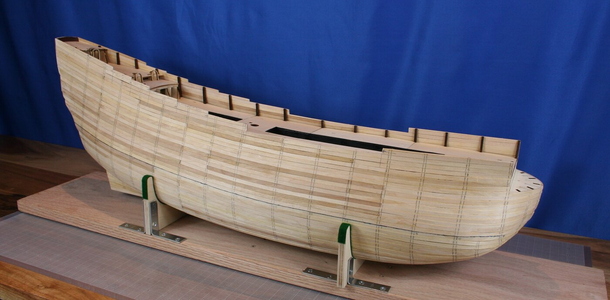
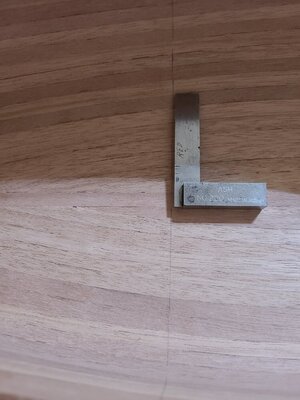
That looks so cool! Well done! I was expecting much more glue squeezing out. Maybe a scraper instead of sandpaper to start?
-

Win a Free Custom Engraved Brass Coin!!!
As a way to introduce our brass coins to the community, we will raffle off a free coin during the month of August. Follow link ABOVE for instructions for entering.
-

PRE-ORDER SHIPS IN SCALE TODAY!
The beloved Ships in Scale Magazine is back and charting a new course for 2026!
Discover new skills, new techniques, and new inspirations in every issue.
NOTE THAT OUR FIRST ISSUE WILL BE JAN/FEB 2026
You are using an out of date browser. It may not display this or other websites correctly.
You should upgrade or use an alternative browser.
You should upgrade or use an alternative browser.
I had considered that, but I don't want to try a straight edged scraper on the interior and I don't have a curved scraper. I may try a scraper on the exterior when I progress to that point. Thank you for the suggestion!!That looks so cool! Well done! I was expecting much more glue squeezing out. Maybe a scraper instead of sandpaper to start?
I also tried using various rifflers but didn't care for the results. What I found to work is using some flush cut wire cutters to cut off the protrusions then sanding. I have to be sure to cut the glue, not pull it off as it takes some wood with it leaving a small divot.
I tried various items as sanding blocks but the best thing I found was one fingertip and a light touch checking often. It will take some time but I'm not in a race
Doc I just realized I made it to 100 POSTS. Congrats on you 100 PAGES!!That looks so cool! Well done! I was expecting much more glue squeezing out. Maybe a scraper instead of sandpaper to start?
Glenn
Hope I start rigging mine before 100 pages 
Thank you Hammer for the kind words.Its looking great, I cant wait to see it finished.
Thank you Heinrich. I'm happy with the results myself. Very few small points where light shows through when held up to a lamp. Only a few small gaps in the planking that I'll fill with glue and sanding dust when I get to that point on the exterior.That is a beautiful hull Glenn - very good planking job.
Glenn
Very nice planking closure on the stem. This wood will be magnificent with the final finish if a natural one is desired. RichThank you both for the kind words and encouragement.
That pic was taken this morning, the next plank will be the Whiskey Plank. Here are a few pics taken earlier at the beginning of this past weekend.
View attachment 283554

Thank you everyone for all of the views and likes. Keep the comments coming.
Glenn
Good morning Glenn. This site should have an applause emoji for beautiful work...this deserve some.Finished planking. Used razor flushcut saw to remove from strongback. Came off easily, the packing tape worked great as there were places the squeezeout should have glued the two together.
View attachment 284467
There is a lot of glue squeezeout to be cleaned.
View attachment 284468
I will sand the interior smooth and add the frames prior to sanding the exterior. The hull feels surprisingly solid. I see a lot of mohagony sanding dust in my near future...
Thanks for looking,
Glenn
Thank you Rich. I agree this wood has potential! I like simple finishes like Danish Oil. Fortunately the kit came with extra wood so I'll be able to try several finishes, including some Spar Varnish I have stashed away. I don't want a gloss but that's easily taken care of with steel wool.Very nice planking closure on the stem. This wood will be magnificent with the final finish if a natural one is desired. Rich
Glenn
Thank you Grant, much appreciated!Good morning Glenn. This site should have an applause emoji for beautiful work...this deserve some.
Sanded the interior to 150#.
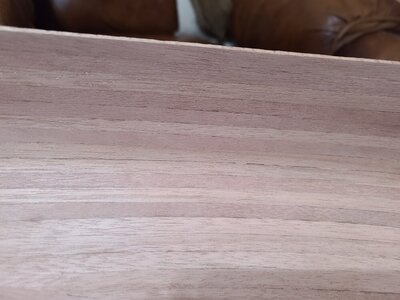
I'm still surprised at how strong this hull is. As you can imagine I worked with it quite a bit beginning with 80# paper to do the initial leveling and glue squeezeout removal. Next I went to 120#. Then I sprayed it with water to raise the grain prior to final sanding. Wetting it also made apparent any glue I missed so the was cleaned up at this time.
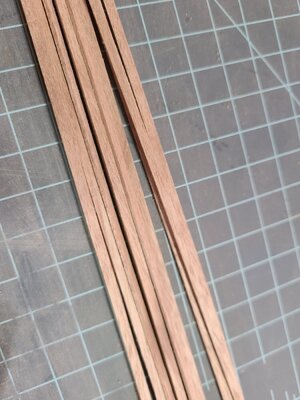
Next will be to add the frames. I didn't measure but I'm guessing the stock provided is approximately 1mm x 3mm by about 18 inches, 27 pieces. The millwork was good but they come unwanted and are fuzzy. I sanded these with 150#.
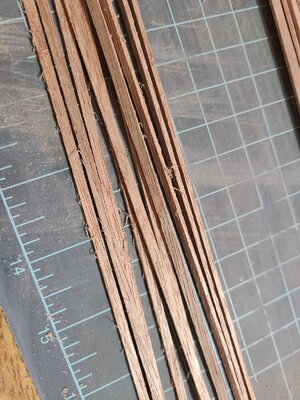
I collected a couple of these piles on sanding dust so I have plenty if I should need it now or for future builds.
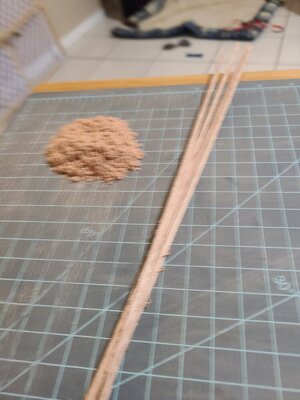
(Apologies for the blurred pic.)
Next will be cut to length, bend and install the frames.
Glenn

I'm still surprised at how strong this hull is. As you can imagine I worked with it quite a bit beginning with 80# paper to do the initial leveling and glue squeezeout removal. Next I went to 120#. Then I sprayed it with water to raise the grain prior to final sanding. Wetting it also made apparent any glue I missed so the was cleaned up at this time.
Next will be to add the frames. I didn't measure but I'm guessing the stock provided is approximately 1mm x 3mm by about 18 inches, 27 pieces. The millwork was good but they come unwanted and are fuzzy. I sanded these with 150#.


I collected a couple of these piles on sanding dust so I have plenty if I should need it now or for future builds.

(Apologies for the blurred pic.)
Next will be cut to length, bend and install the frames.
Glenn
Beautiful result to your interior sanding.
Good sanding work on the hull and pieces. RichBeautiful result to your interior sanding.
First frame sets are cut. The stock is 1.5mm X 3.2mm X 18 1/2". From this I cut 1 X 7" and 2 X 5 1/2". Next I use my heated iron as before to bend them 90°. I vary the bend radius because it varies on the boat. Next I shape them dry and cold to fit the boat. Hindsight I should have used heat on a few as I cracked/broke them by being a bit aggressive with the bend I was trying to induce.
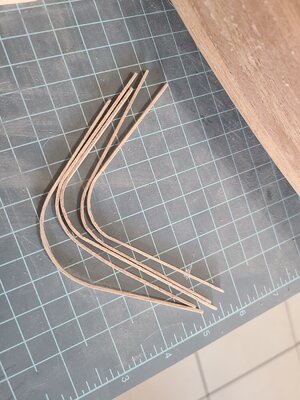
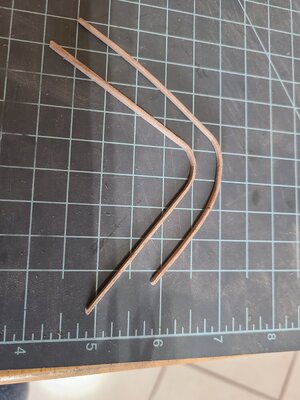
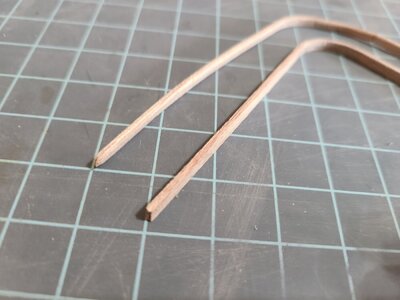
Once the frame was fit I shaped the end that would be in the bottom of the boat. I would also sand the edges of the frames to round off the corners so they are as they would be after years of use. I'm not weathering the boat but wanted to include this small detail. Here are some frames before and after final shaping and sanding. I broke this frame and won't use it but it's a good enough example for a photo.
Next it is time to glue the frame half in place. I start by placing it carefully in place, no glue yet. I would carefully mark the end on the bottom of the boat and place two clamps on the side of the boat next to the frame to help locate it.
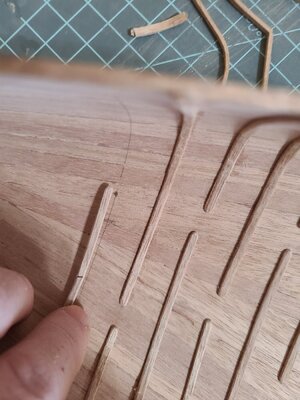
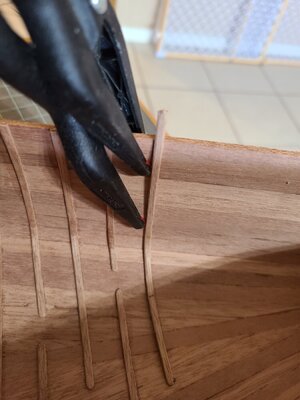
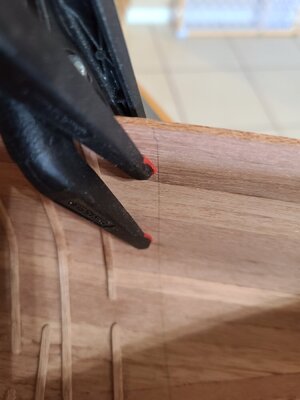
And finally I add glue and put the frame half in place. I clamp where I can and hold in place the rest by hand until the PVA grabs, about 5-10 minutes in our dry climate.
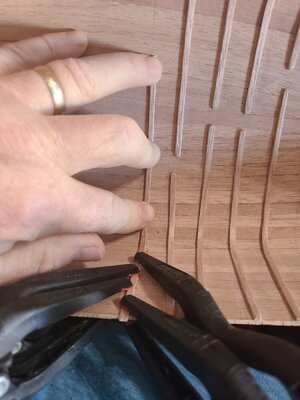
First four sets of frames in place. Also the next two sets, one fore and one aft, are marked. Time must be taken to insure frames are perpendicular to both the keel and the wales.
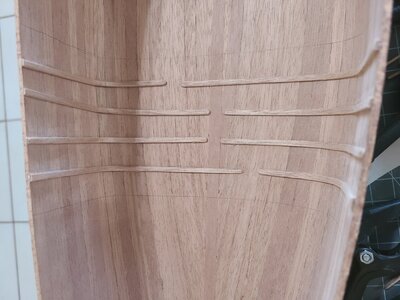
The middle two frame sets will have the mast mounted on the keel between the Frames. The rest of the frames have the gaps staggered alternating port & starboard.
Glenn

Once the frame was fit I shaped the end that would be in the bottom of the boat. I would also sand the edges of the frames to round off the corners so they are as they would be after years of use. I'm not weathering the boat but wanted to include this small detail. Here are some frames before and after final shaping and sanding. I broke this frame and won't use it but it's a good enough example for a photo.


Next it is time to glue the frame half in place. I start by placing it carefully in place, no glue yet. I would carefully mark the end on the bottom of the boat and place two clamps on the side of the boat next to the frame to help locate it.


And finally I add glue and put the frame half in place. I clamp where I can and hold in place the rest by hand until the PVA grabs, about 5-10 minutes in our dry climate.

First four sets of frames in place. Also the next two sets, one fore and one aft, are marked. Time must be taken to insure frames are perpendicular to both the keel and the wales.

The middle two frame sets will have the mast mounted on the keel between the Frames. The rest of the frames have the gaps staggered alternating port & starboard.
Glenn
Good morning Glenn. Looking great- 5min per frame adds up to a lot of holding time- admire your fortitude. That is fine craftsmanship - I love the Finnish of your planking thus far. Going to be a great build

Managed to work on it several hours a day the past 4 days (had some days off work). My fingertips are numb from holding these frames in place LOL. Am nearly finished framing, will have some pics when done.Good morning Glenn. Looking great- 5min per frame adds up to a lot of holding time- admire your fortitude. That is fine craftsmanship - I love the Finnish of your planking thus far. Going to be a great build
Thank you for the kind words Grant.


