Soleil Royal- Re-engineering Artesania Latina's New Kit by NMBROOK

I fully appreciate the seriousness of CA-sensitivity, but I’d be lying if I said I didn’t miss this build. In any case, I am glad you are able to catch-up on other projects, and I will happily await your return to this one.

All the best,

Marc
 
Thanks Marc

Work will resume soon. I cannot tolerate more than a few hours at a time fitting photoetch using magnifiers, so my Akagi is a slow burn

Sneezing frequency is reducing so clearly it is the prolonged use of CA over the Xmas holidays that brought it on

Kind Regards

Nigel
 
Thanks Marc

Work will resume soon. I cannot tolerate more than a few hours at a time fitting photoetch using magnifiers, so my Akagi is a slow burn

Sneezing frequency is reducing so clearly it is the prolonged use of CA over the Xmas holidays that brought it on

Kind Regards

Nigel
Filed under "for what it's worth" I am seriously allergic to CA but have been able to use this product with greatly attenuated symptoms/reactions: Loctite 403

Several comments: it only comes in medium viscosity - and it is considerably more expensive than 'over the counter' CA's. I was able to purchase it on the US host for Amazon.
Thanks Paul

I may well have to give this product a go, at least for the jobs I use medium CA for ;)

Kind Regards

Nigel
 
Further progress has been made on the stem.I have repaired the break and covered these sections in veneer.The first two rail supports are in and clad in veneer.I have placed the first section of grated deck ( construction still ongoing) so you get the idea how this all goes together

Kind Regards

Nigel

View attachment 348849View attachment 348851View attachment 348852View attachment 348853
Good morning Nigel. I can just admire! A question. Im not a fan of veneer as it does not show the plank defintion/pattern. I see on your wales you have acheived this and is there a technique you use or is just the colour? Cheers Grant
 
Good morning Nigel. I can just admire! A question. Im not a fan of veneer as it does not show the plank defintion/pattern. I see on your wales you have acheived this and is there a technique you use or is just the colour? Cheers Grant

Sorry Grant I thought I had replied to this, can't have pressed "post":rolleyes:

The Wales are proud by 0.5mm.The edges of the other planks have tiny bevels sanded on using 400 grit wet and dry glued to a lolly stick;)

Kind Regards

Nigel
 
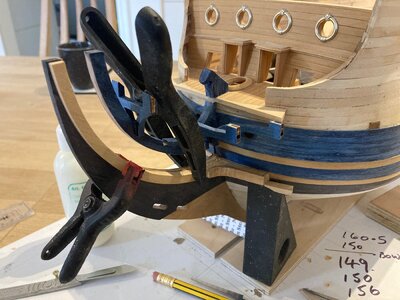
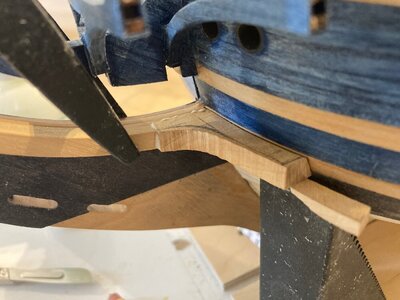
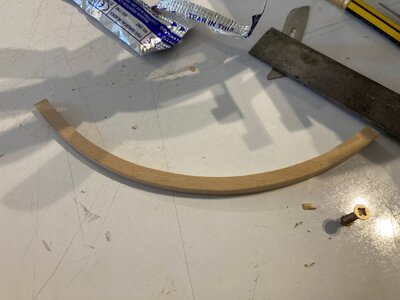
Ok back to the build, I am making up the bow timbers that go top and bottom of the trailboard.These are each made up of two pieces of boxwood and set up on the ship to ensure everything aligns.

The face that butts up to the bow has a little green left on to allow for final adjustment.Once these timbers are assembled and the glue fully cure, the final profile will be shaped.

Kind Regards

Nigel

IMG_0876.jpgIMG_0877.jpgIMG_0878.jpg
 
Ok back to the build, I am making up the bow timbers that go top and bottom of the trailboard.These are each made up of two pieces of boxwood and set up on the ship to ensure everything aligns.

The face that butts up to the bow has a little green left on to allow for final adjustment.Once these timbers are assembled and the glue fully cure, the final profile will be shaped.

Kind Regards

Nigel

View attachment 355486View attachment 355487View attachment 355488
VERY WELL DONE "MATE". IT IS IN FACT ONE IF THE MORE DIFFICULT PART OF BUILDING THE HULL. THE SCALE MAY HAVE HELPED YOU. CONGRATULATION.have taken copy -elcapi
 
Thanks Guys

Tobias, still freezing the shop so working on the kitchen table and still sneezing so can't be CA, really should go to the docs:rolleyes:

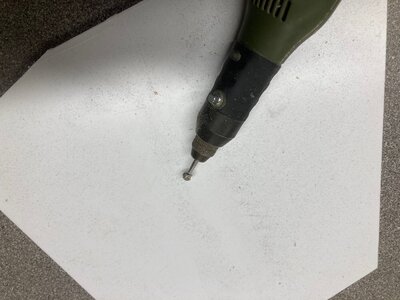
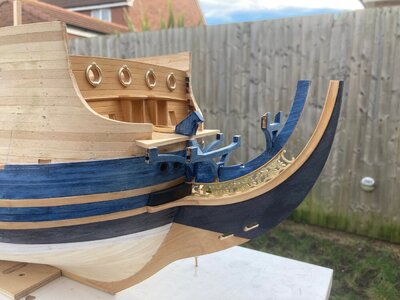
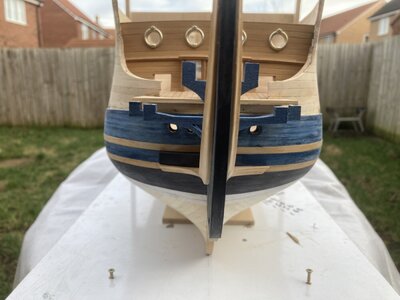
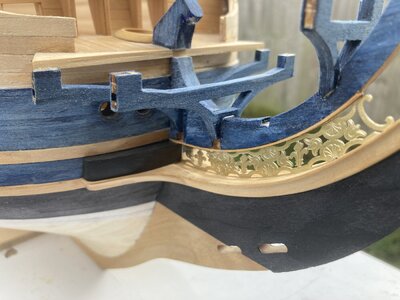
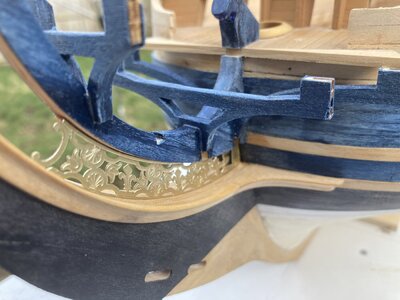
Work continues, lower timbers shaped and fitted.These were carved using a 4mm Burr due to the transition in profile.The kit photo etch trailboard is in and starting to work upwards.One of the several Ebony bolster pieces is in place.

Kind Regards

Nigel

IMG_0883.jpgIMG_0882.jpgIMG_0879.jpgIMG_0880.jpgIMG_0881.jpg
 
Thankyou Daniel, I always wanted to build this ship in the colours depicted by Berain and many refute the vessel was actually painted this colour, but to me, I just love the look and it does have some historical pedigree, even if it is dubious.

Paul, as you know the original intention was to paint the blue, then I thought about the issues of masking and not loosing plank definition,then it was pretty much " yeah I am going to cover it in Blue Veneer"ROTFROTFROTFROTFROTFROTF

Kind Regards

Nigel
 
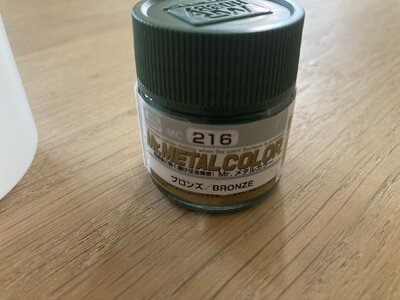
Now I was going to include this in my weekend update but the parcel did not land on Friday as notified and came today.

I have spent a lot of time considering many options for painting the cannons to get a Verdigris look. There are some how to's on YouTube but the best are a 6 stage process!
I want something fairly quick and straightforward as obviously I need to do this over 100 times.I discovered this in my travels which on paper fits the bill.
I am a great fan of Mr Color paints anyway so I thought it was worth a go.
Fine metallic particles are suspended in a binder. In this instance the binder is green! The theory being is that once this paint is cured, it is buffed to reveal the metal particles and leave green verdigris in the recesses.
Main thing I have found on the net is that you must use rapid thinners.Self levelling thinners will allow the metal particles to sink in the paint layer as it dries.
I will update once I have done some tests

Kind Regards

Nigel

IMG_0884.jpgIMG_0885.jpg
 
That is some very delicate profiling you did on those bow timbers. I imagine it was quite challenging. All is looking exceptionally good, Nigel. Glad to see you back at it!

Thanks Marc, it took me about 3 hours a side to add the profile, carefully working along the length, gradually building up the radius. As I tapered the pieces in thickness, you can't scrape the profile as the depth of radius increases as you get closer to the bow.
I did actually buy the Artesania scraper to profile the timber and the boxwood just laughed at it.The stainless etched scraper would not touch it! Hence the choice to go all out and refine the design so it is more in keeping with French design of the period and carve it.

Kind Regards

Nigel
 
When I look at that trailbord, for example, it always strikes me how strange it is that AL would take such care to get details like this so perfectly right, yet completely ignore the architecture of the ship. Well, almost completely ignore - as you have demonstrated, the bulkhead shapes are really pretty good.
 
Last edited:
When I look at that trailbord, for example, it always strikes me how strange it is that AL would take such care to get details like this so perfectly right, yet completely ignore the architecture of the ship. Well, almost completely ignore - as you have demonstrated, the bulkhead shapes are really pretty good.

I agree Marc.You have stated the basic synopsis of my build plan.Try to retain what Artesania got right (and spent most of their development budget on) and replace what they didn't. Somewhere in all this is a "silk purse" that I am trying to findROTF
 
Back
Top