Soleil Royal- Re-engineering Artesania Latina's New Kit by NMBROOK

????
Isn't that exactly what Nigel is doing? What am I missing?
I don't think Nigel made major changes to the fullness or height of the hull. he did take 2mm off the bulkhead edges to make allowance for thicker planking, but I didn't see other changes. As for adjusting the overall hull shape, Nigel's past that point. He's working on a complete redesign of the internal decks, however.
 
I don't think Nigel made major changes to the fullness or height of the hull. he did take 2mm off the bulkhead edges to make allowance for thicker planking, but I didn't see other changes. As for adjusting the overall hull shape, Nigel's past that point. He's working on a complete redesign of the internal decks, however.
I had it in my head that he made the ship longer and that would have changed up the height and width ratios. I'll crawl back under my rock... :rolleyes:.
 
He lengthened the keel by at least 5”, so that he could properly lay out the guns, and cut correctly sized port openings. He is establishing correct deck sheer, and wale sheer that will culminate in an elegant top sheer. The height of the stern is pretty well determined by the stern and quarter decorations, but those are the things the kit gets right. Nigel also did a little tweaking of the bulkhead forms at both the bow and stern in order to create a more fair and credible run of the hull. What he is doing is really something that only the most highly skilled builders could pull-off. I am riveted, not because the kit is great, but because he will completely transform it into something quite remarkable, and something which will even improve upon the magnificent work of Michel Saunier.
 
He lengthened the keel by at least 5”, so that he could properly lay out the guns, and cut correctly sized port openings. He is establishing correct deck sheer, and wale sheer that will culminate in an elegant top sheer. The height of the stern is pretty well determined by the stern and quarter decorations, but those are the things the kit gets right. Nigel also did a little tweaking of the bulkhead forms at both the bow and stern in order to create a more fair and credible run of the hull. What he is doing is really something that only the most highly skilled builders could pull-off. I am riveted, not because the kit is great, but because he will completely transform it into something quite remarkable, and something which will even improve upon the magnificent work of Michel Saunier.
Lengthening the keel was a great move. It's be a great change to the hull. If it's messed up, Nigel will fix it. Thumbsup
 
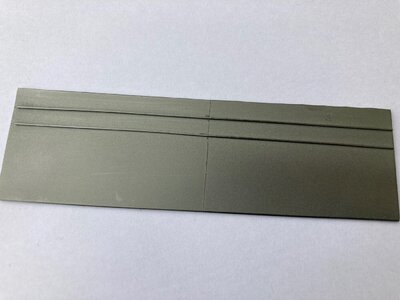
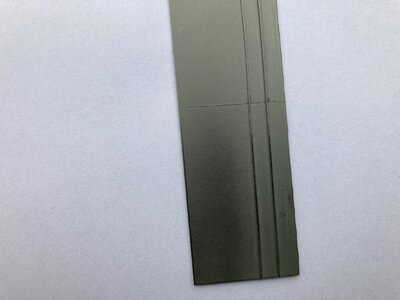
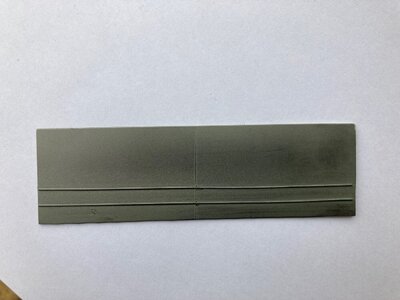
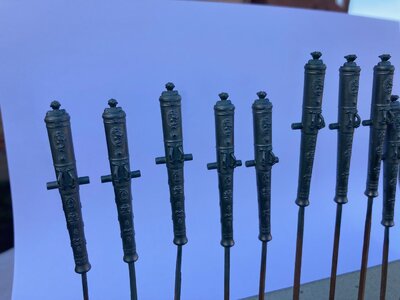
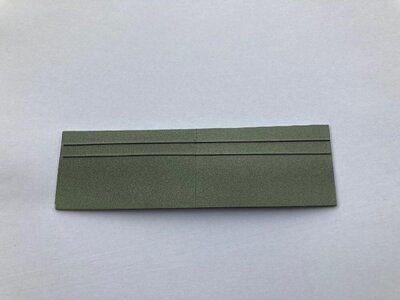
Today I have conducted a trial of the Bronze paint.I took a piece of 1mm Styrene sheet and glued a couple of 0.5mm square styrene strips to it just to mimic raised detail, although obviously far more pronounced than that of my cannons.

One half of the sheet was sprayed gloss black using Tamiya Laquer paint, the other left unfinished.

I then applied the Bronze thinned 30% using Mr Color Rapid thinners.The first picture shows the result.

After 7 or 8 minutes I polished the finish using Cotton buds.

All pics were taken outside but it is a very gloomy day!

Conclusion - The pictures in no way convey how well this looks despite me taking shots from different angles to try and capture how the lights hit it.There is no difference to the result using a gloss black base meaning I can apply directly to the 3D print so not obscuring the fine detail.
The finish is a scale reproduction of Patinated weathered bronze that actually looks more realistic than the real Patinated Bronze of M Frolich's L'Ambiteux.

Big win for me, especially as the paint is no more expensive than normal Mr Colour paint.

Kind Regards

Nigel

IMG_0904.jpgIMG_0905.jpgIMG_0906.jpgIMG_0907.jpg
 
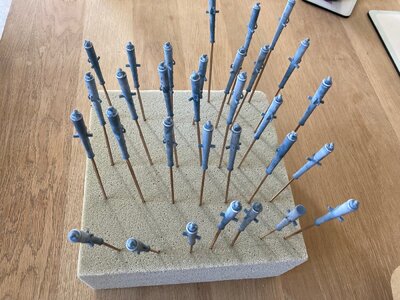
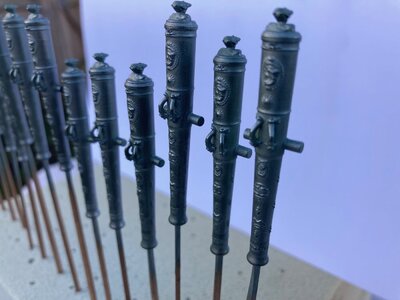
I have glued the cascabels on the 36lb pound cannons,filled the seam of this joint and drilled the muzzle out to 2.5mm which corresponds to the bore at 1/65 scale.

I have painted and polished what cannons I could as I have run out of paint.I only ordered one jar as I didn't know if it would be successful. I will order some more so I can complete this batch next weekend.

Brighter day today but still struggling to get a true likeness, the I phone won't pick up the green hue, it just makes them look black.Should be easier to photograph once they are mounted on the ship.

Kind Regards

Nigel

IMG_0908.jpgIMG_0909.jpgIMG_0910.jpg
 
Man, Skutnik really does a fantastic job of modeling these. I don’t think there is a better alternative, in any material, on the market. Scale and detail are second to none.

That last pic, Nigel, gives some semblance of the effect. I think this will be an excellent presentation of the ver-de-gis.
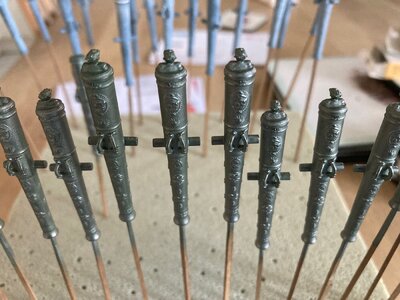
 
Man, Skutnik really does a fantastic job of modeling these. I don’t think there is a better alternative, in any material, on the market. Scale and detail are second to none.

That last pic, Nigel, gives some semblance of the effect. I think this will be an excellent presentation of the ver-de-gis.

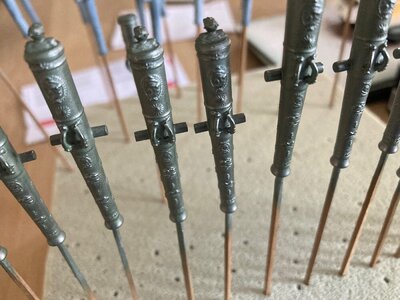
Couldn't agree more Marc.

Here are two better pics I managed to get when the light was just right;) I am really pleased with the result, I did not want any "dayglow green" anywhere, but also did not want shinny natural bronze

IMG_0911.jpgIMG_0912.jpg
 
I have now made a start processing my 3D printed 36lb carriages. Kris (SZKutnik) made a great job of these and all I have to do is some clean up, drill various holes and refine the joint line between upper and lower sides. This is printed but is lost when the 3D printing layers are sanded smooth.

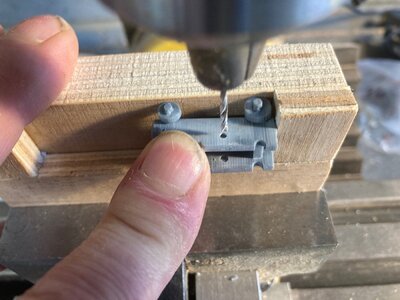
First job to take is the plethora of holes to add. Given there are 30 of these, some simple mass production fixture is required to ensure consistency and negate the need for marking then all out.

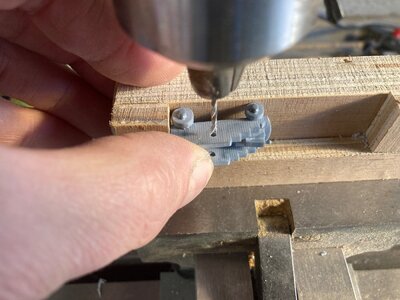
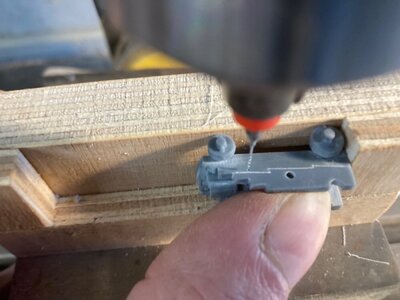
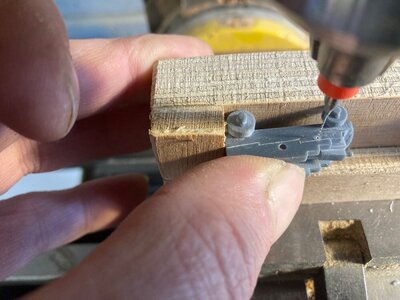
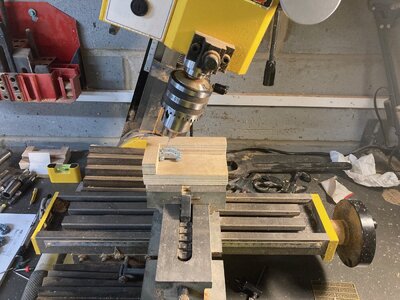
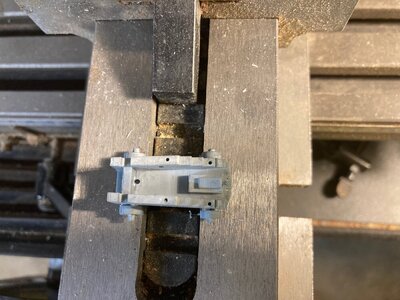
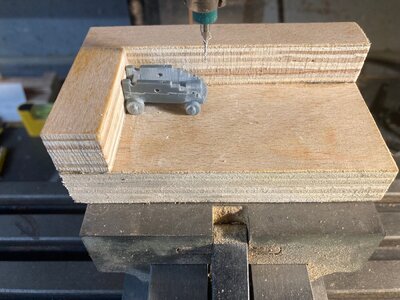
I fabricated a simple jig out of scrap Plywood that fitted in my mill vice.This will in fact be of use to do all the carriages of the various sizes.It is simply a case of holding the carriage to one end to drill the hole then reversing and holding the carriage to the other side to drill the same hole on the opposite side.One thing to note is that both axles are the same overall length so the holes run perpendicular to the carriages centreline.

The important thing is that all the carriages have the same hole drilled before moving the mill table to a different hole position. The holes for the breaching rope is drilled right through, I used the depth stop to drill the 0.35mm holes part the way through that will take etched Caldercraft eyelets for the gun tackle.

I hope the pics help explain this better. Next task is to fabricate another simple jig to drill the holes in the carriage from the top

Kind Regards

Nigel

IMG_0913.jpgIMG_0914.jpgIMG_0916.jpgIMG_0917.jpgIMG_0918.jpg
 
Nigel,
Yikes -- 3D printing I'm starting to read about that tech, too often. I'm now on the verge of realizing that I'm becoming a knuckle dragging neanderthal,
as it comes to my attempts (figuratively so far) of joining the 21st century in this hobby.

On my mental list of "to does" Your carriages would be a good starting point - easy shapes etc.....Glad that you have decided to keep moving forward with electronic assistants for this great model ship building passion.

Hi John

It first started with the cannons.I wanted something that was all the correct sizes for the poundages and of historically correct design which is almost unique to this vessel. I looked at Alexey Banarov's cannons, which don't get me wrong are beautiful, issue is they are 1/72 and also extremely expensive.

Kris was able to oblige by 3D printing these in resin at the correct scale. I also thought about the carriages, given the majority are below decks, I did think it would be a lot of time and boxwood for something that is fairly hard to see.I could have made them all out of wood from individual parts but I would rather devote that time to more visible parts of the build. I do hope though that the final appearance using some clever painting will make them look almost the same had I made them from Boxwood.The total price for all these parts is comparable to off the shelf generic Cannons and carriages from Cornwall Model boats so it was a no brainer.

Kind Regards

Nigel
 
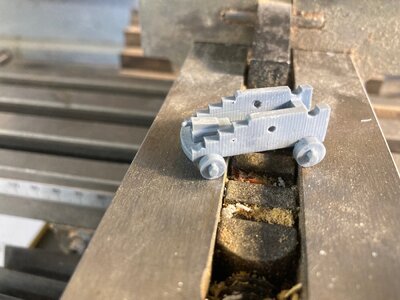
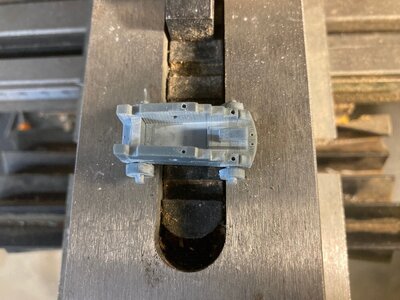
For the next set of holes I assembled another simple universal jig.This is simply a case of holding the carriage against the stops and drilling the holes, one position for all carriages like before before moving the table to the next position.

There are two holes right through at the rear of the carriage to take a rope loop that is used to sling the rear tackled from. There are four blind holes to insert brass dummy bolts in that would hold the sides together.

Finally after tilting my mill to 20 degrees, I drilled a 1mm hole to take a brass pin that will dowel the carriage in place to the deck.I will use one carriage as a drill template to drill the deck to take this pin.In this position it will be invisible from all angles unless you are 2mm tall and much more secure than trying to glue to wheels to the deck.

Kind Regards

Nigel

IMG_0919.jpgIMG_0920.jpgIMG_0921.jpgIMG_0922.jpg
 
Awesome! So, with these resin printings, is it necessary to sand away the print artifacts (lines), or do they not have a surface texture? Will you bother with cap-squares, or just do something simplified with paper or card?

The lines do have some texture and a light rub with a sponge sanding stick removes this.
I will add trunnion caps, currently pondering which way to take with making them.
 
Back
Top