Soleil Royal- Re-engineering Artesania Latina's New Kit by NMBROOK

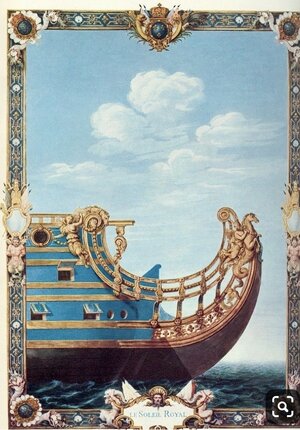
Really nice! It is already apparent what an upgrade your work on this model is to the stock kit. One thing I am wondering is whether you have any plan to model a particular feature of the French beakhead. What I am referring to is the way that the French continue the side hull planking forward of the beakhead bulkhead, in a diminishing arc that mirrors the dropping line of the top headrail, until it fairs into the beakhead short deck. I’m afraid I don’t have sharable pictures of this, but you can see how the blue of the planking and the sheer of the wales continues behind the headrails:

4471BC59-BFBD-47B9-9521-DB7F532B98DF.jpeg

I considered adding this feature to the Heller modification, but I waffled on it for too long because I couldn’t decide whether or not to do away with the head roundhouses.
 
Thanks everyone, and BTW I hate gardening:rolleyes:

That warranted a "love" Marc because we are both obviously on the same page and the answer is a resounding YES.Something half way between the Berain image and Michel's interpretation.The Berain image above may be a little exaggerated in that the hull has to sweep down to form a "mouth" for the gratings so it may not be so high at the front but at the same time I think the top of the arc is a little low on Michel's model.No real right or wrong,just my educated guess.

Another feature I am contemplating is steps around the insides of these arcs.I really need to see how the geometry of everything pans out but these are a common feature of the second marine.This is why the lack of provision/space to fit "ladder rungs" on the bulkhead.

Kind Regards

Nigel
 
Thanks Marc, those little vertical slots for the kit longitudinal braces are almost the same size as boxwood strip I have in the stash,Fitting those supports replaces the strength lost by the slots and stiffens the deck beam at the same time.

Kind Regards

Nigel
 
An update and some more views of my spectacular lawn as the sun is shining ROTFROTFROTF

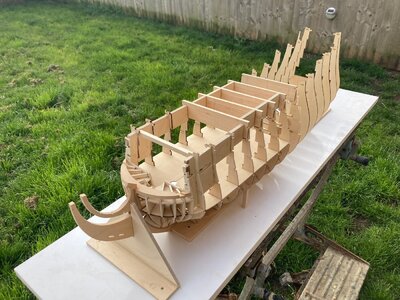
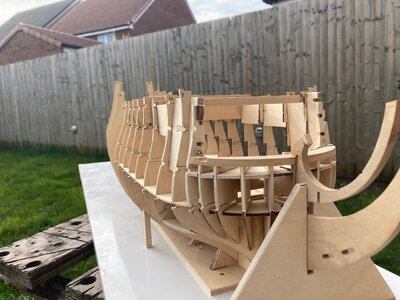
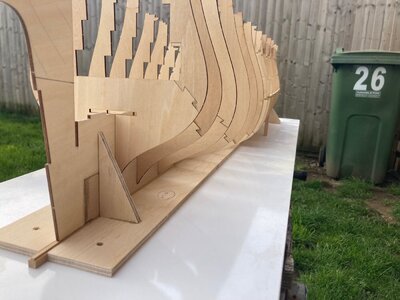
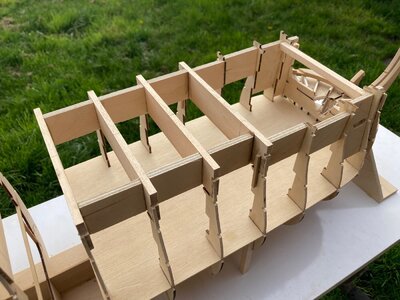
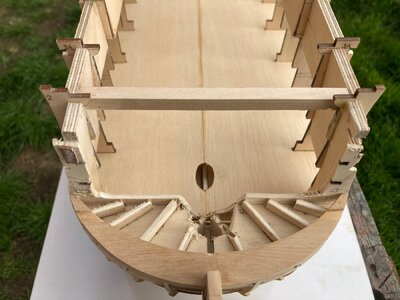
I have progressed almost halfway down the hull modifying the bulkheads to take the lower Gundeck.I have fitted the forward section of this deck in two pieces, split down the middle as it is the only way to get it in.The remainder deck aft of this will be in another two pieces.There will be a small section of the deck at the bow to fit once all the formers are removed after planking.

An oversize cutout has been added to take the bowsprit which will be a larger diameter (12mm at base) than the kit one as it is too small a diameter (10mm).There will be a boxwood trim to fit around the end going through the deck which will be a close fit.

Further carving away off the internal structure has been carried out to allow this bowsprit to be trial fitted and most of the support work behind the beakhead bulkhead has been removed now to make things easier to remove later.Looking at the pics, keep in mind everything above the level of the deck will eventually be off in the trash, it is solely there to provide temporary support to create the shape of the upper hull.

The bulkheads aft of the deck have just been sat in place for the pics.It looks like there will be minimal tweaking to the bulkheads profiles to get fair lines to the hull despite my stretching of their spacings.

Kind Regards

Nigel

IMG_0285.jpgIMG_0286.jpgIMG_0287.jpgIMG_0288.jpgIMG_0289.jpg
 
Thanks Maarten, can you tell I am on holiday this week?:)I was hoping to get the skeleton together this week before going back to work Monday but can't see it, after all I do need to spend some time with my better half:rolleyes:

More progress on the bulkhead, those of a nervous disposition look away....

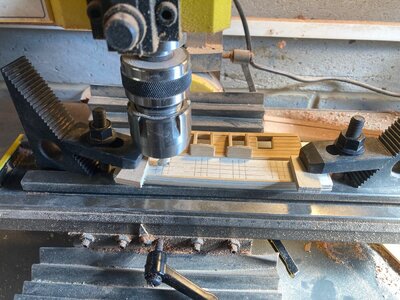
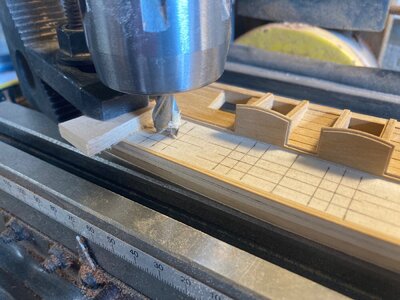
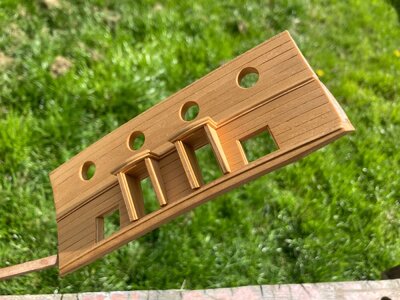
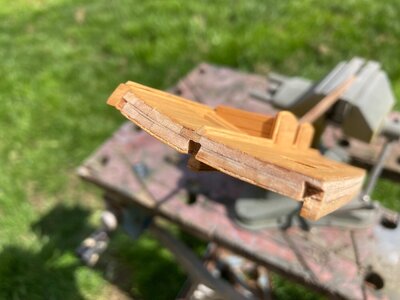
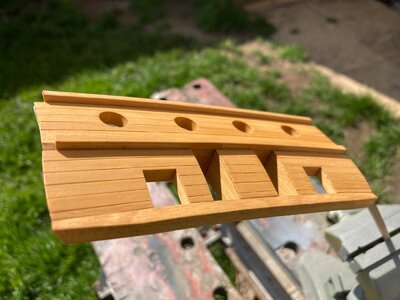
The planked bulkhead was mounted in my large mill and the circular ports were cut using a 10mm end mill after first cutting a piece of scrap ply to act as a backing.These holes are slightly larger than the casting inside diameter.This gives me room for slight adjustment and is a detail I spotted looking at pics pf Mr Saunier's model.I have also cut rebates to take the ends of the deck stringers.

The bulkhead was then given one coat of solvent based Matt Poly by brush. Any moment now my two stage gold paint should land for the ornamentation.I will epoxy these castings on once painted as it is easier to do with the bulkhead off the model.,rather than try and balance the model on end

Kind Regards

Nigel


IMG_0282.jpgIMG_0283.jpgIMG_0290.jpgIMG_0291.jpgIMG_0292.jpg
 
Thankyou very much indeed Uwe.

Just to give everyone a point of reference, this is what the bulkhead looks like out of the box.

And,my paint has just arrived, metal primer, gloss black base and then gold topcoat for use over the black.

Kind Regards

Nigel

IMG_0293.jpgIMG_0294.jpg
 
Now that you have stretched it to dimension, the hull form looks really very good. It makes one wonder why the manufacturer can’t be at least this attentive to the important details, such as how long the ship actually was.

The beakhead looks awesome! Have you decided on a shade of blue for your hull? Might you consider a two shade treatment to bring depth and dimension to the blue?

I’m not sure whether you follow this build, but I really like what Duarte did with his blues:

 
Thanks Marc.The hull shape is strange in that it is working out too well.Almost as if Artesania had the correct section plan and condensed it.

Duarte's build uses painting techniques to maximise a weathered look.You know when you see a paint collection like that,this Guy is going to know his way round an airbrush.His blue looks good with everything else weathered to match.Currently I plan on a plain blue as I do not wish to weather the naked timber.

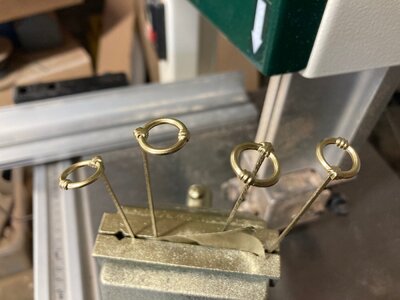
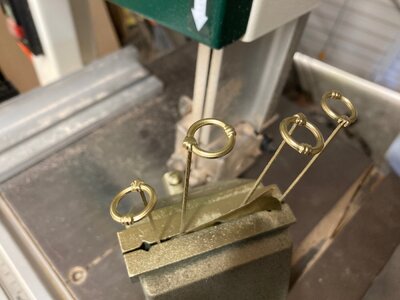
On another note,I am pleased with how my gold came out.I wanted something that did not look like Brass and did not have visible metallic flakes.Watched several tests on Youtube to see which I liked.This is what is best described as Alclad in an aerosol.You have to apply the gloss black first as a base coat then the gold when dry.I used my preferred primer-Mr Hobby metal as it sticks like **** to a blanket.

The painting process was quicker than gluing the castings to the little wood strips for painting.

You will have to believe me when I say that these look far better in person than in a picture

Kind Regards

Nigel

IMG_0295.jpgIMG_0296.jpg
 
I hear you on the blue; it works so well on the plastic model because of the raised faux grain and the engraved panel lines, but I suppose a layer of artist oils, wiped away on real wood, would only successfully embed itself in the actual wood grain.

The gold does look very good!
 
This is impressive work Nigel. Your joinery is top notch, the painted pieces look very clean whilst your version of the front bulkhead makes that of the kit look amateurish. Please note this not a swipe at AL, but it does show how good yours is. Which made me think Nigel - just as I you can buy uprated blocks, ropes and wood, you can market your changes (in the form of a kit package containing CNC machined parts) as the (choose appropriate name) version of the AL Soleil Royale.
 
Thanks Guys

Marc,there are options on a wood build that can be employed.Dimitry Shevelev edge bevels his planking with the sole purpose that the grouves are filled with his home brew Bitumen based ageing solution which is applied to the model after a couple of coats of tung oil.This creates Patina on the boards but adds the caulking inbetween.I don't think the bevelling will look so crisp when covered in 15 coats of Artist Acrylic blue, Dimitry does this on models with a natural wood finish.

Heinrich,interesting thought but this kit ain't cheap so an upgrade kit may make people scoff at the total cost as I would have to farm out the laser cutting.I am intending to go into enough detail that if someone wants to follow my lead, they can.

Kind Regards

Nigel
 
That’s really interesting - I’ve seen at least one of Dimitry’s models, a 74, and it did strike me that he had an interesting patina.

Well, whatever you end up doing, I’m excited to see your revised hull in full-blue and black boot-topping.
 
Thanks Marc.The hull shape is strange in that it is working out too well.Almost as if Artesania had the correct section plan and condensed it.

Duarte's build uses painting techniques to maximise a weathered look.You know when you see a paint collection like that,this Guy is going to know his way round an airbrush.His blue looks good with everything else weathered to match.Currently I plan on a plain blue as I do not wish to weather the naked timber.

On another note,I am pleased with how my gold came out.I wanted something that did not look like Brass and did not have visible metallic flakes.Watched several tests on Youtube to see which I liked.This is what is best described as Alclad in an aerosol.You have to apply the gloss black first as a base coat then the gold when dry.I used my preferred primer-Mr Hobby metal as it sticks like **** to a blanket.

The painting process was quicker than gluing the castings to the little wood strips for painting.

You will have to believe me when I say that these look far better in person than in a picture

Kind Regards

Nigel

View attachment 304598View attachment 304599
I like what you have done with this, I have been looking for a pale gold but haven't been able to find anything I liked, what was the actual paint you used?
 
Back
Top