Soleil Royal- Re-engineering Artesania Latina's New Kit by NMBROOK

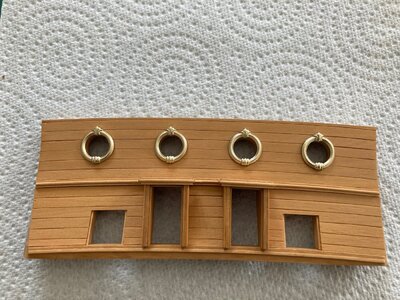
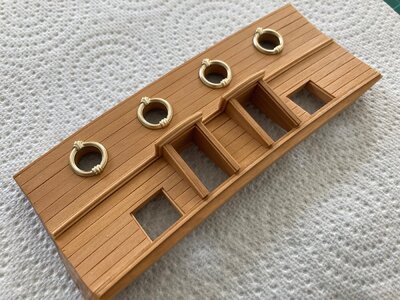
I have installed the Gunport surrounds onto the bulkhead using 30 minute epoxy.I had abraded the back of the castings on coarse glass paper before painting the outside faces.The area around where the surrounds fit was little clean using a 1mm round burr to provide some grip as the area had been varnished.

Funny thing photography,The bulkhead is sat on a green cutting matt, all the colours looked wrong and not true to life when I took the picture.I placed the item on the white kitchen roll and what a difference, the colours are true to reality.Also note to self to clean the dust off the piece, only when I took the pictures and looked at them on the computer screen did I spot the small specs of dust:rolleyes:

The Bulkhead is essentially ready to be fitted to the model, however I must fit the aft sections of deck first.I need the "letterbox" opening I have cut out in the framework to pass these deck pieces through.

Kind Regards

Nigel

IMG_0297.jpgIMG_0298.jpg
 
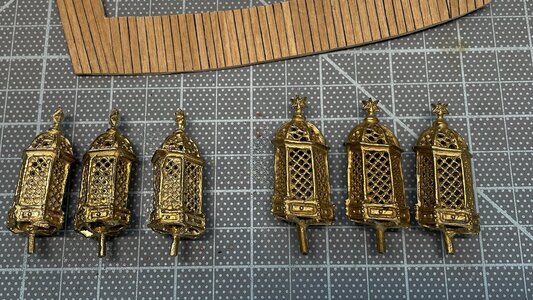
Those castings really do look crisp. Is it true or is it mythology that casting moulds become less well-defined as production runs extend into the years?

Marc,less so with these as they are high pressure die cast, think die cast model cars.The likes of the lost wax castings from Mantua etc very much so.I had advised @oldflyer a good while ago to find a vintage Sergal Sovereign of the Seas kit for his project due to the difference in quality and definition of the castings, aside from the fact that they used to be solid brass rather than plated Pot metal that they are now, the difference is night and day as the pictures in his log shows.

The die cast ornaments in this kit and those of their Vasa are superb but the tooling is big expenditure hence the cost cutting elsewhere in both kits with the materials.I do think the paint choices on AL's marketing model do not do these parts or the photoetch justice, hence my approach of using high shrinkage low dry film thickness lacquer based paints on these parts to preserve the detail.

Kind Regards

Nigel
 
I have installed the Gunport surrounds onto the bulkhead using 30 minute epoxy.I had abraded the back of the castings on coarse glass paper before painting the outside faces.The area around where the surrounds fit was little clean using a 1mm round burr to provide some grip as the area had been varnished.

Funny thing photography,The bulkhead is sat on a green cutting matt, all the colours looked wrong and not true to life when I took the picture.I placed the item on the white kitchen roll and what a difference, the colours are true to reality.Also note to self to clean the dust off the piece, only when I took the pictures and looked at them on the computer screen did I spot the small specs of dust:rolleyes:

The Bulkhead is essentially ready to be fitted to the model, however I must fit the aft sections of deck first.I need the "letterbox" opening I have cut out in the framework to pass these deck pieces through.

Kind Regards

Nigel

View attachment 304685View attachment 304686
Beautiful precision work.
 
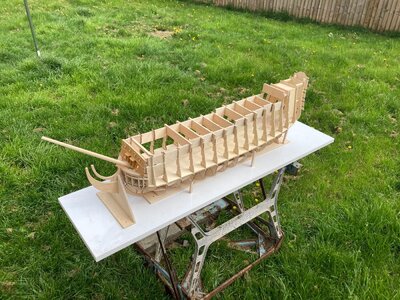
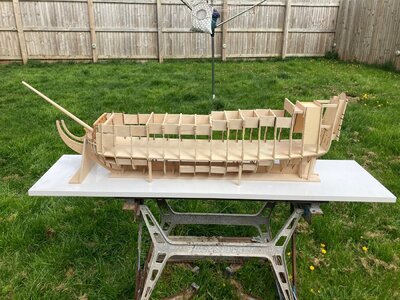
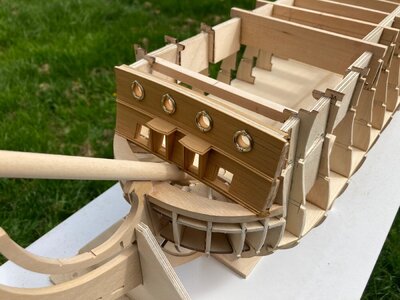
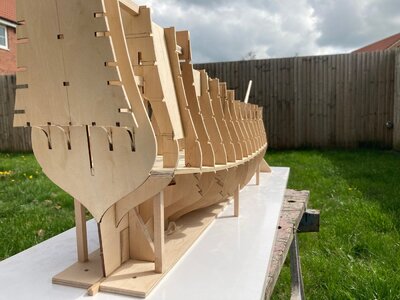
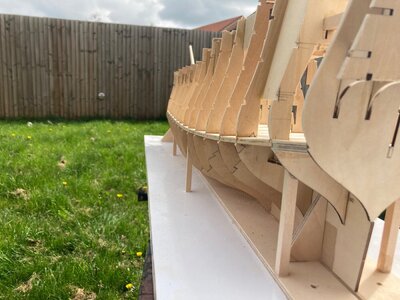
Quite a large update as I have been hard at it for the last 3 days.Skeleton is together, lower gundeck is in and Beakhead bulkhead fitted.One or two spacers to fit in the lower hull, but for the most part, that is the end of "building site joinery" and time for some finesse.

The Bowsprit is just for mockup and is not nor ever will be glued.This is considerably longer than the kit dimensions and I am still unsure if it is still a little too short

Kind Regards

Nigel


IMG_0299.jpgIMG_0300.jpgIMG_0301.jpgIMG_0302.jpgIMG_0303.jpg
 
WOW!! The difference between your hull and the stock kit is absolutely stunning. What you are making looks every bit the part of a first-rate warship. You’re gonna’ give Paul a run for his money in the category of superlative wooden kit-bashesROTF

And, all your lines are nicely faired. Now, if I could just get SOS to send me updates as they happen, then all will be well with the world.
Thanks Marc.Given I took an educated guess that the hull stretch would work,I am more than happy with the outcome.The upper hull is yet to be faired,I have only taken the 2mm off the bulkheads.There are some real "howlers" amongst the bulkheads, the odd one that is way off and stands proud.It would be even worse with bulkheads closer together ! Nothing that my Permagrid tools won't sort out.No wonder the marketing model has Wales that look like the North Sea.

And Yes ,now that I can look at the pictures from a distance rather than stood over the model,I tend to agree with you on the Bowsprit:)

Kind Regards

Nigel
 
Quite a large update as I have been hard at it for the last 3 days.Skeleton is together, lower gundeck is in and Beakhead bulkhead fitted.One or two spacers to fit in the lower hull, but for the most part, that is the end of "building site joinery" and time for some finesse.

The Bowsprit is just for mockup and is not nor ever will be glued.This is considerably longer than the kit dimensions and I am still unsure if it is still a little too short

Kind Regards

Nigel


View attachment 305149View attachment 305150View attachment 305151View attachment 305152View attachment 305153
Hello Nigel. I agree with Marc that the lines of this reconfigured ship look superb. And this post also answered another question I have had: what is the life expectancy of one of those clamping work table things? Answer: INFINITE! You're a proper Brit: don't throw it away if it still works!
 
I have installed the Gunport surrounds onto the bulkhead using 30 minute epoxy.I had abraded the back of the castings on coarse glass paper before painting the outside faces.The area around where the surrounds fit was little clean using a 1mm round burr to provide some grip as the area had been varnished.

Funny thing photography,The bulkhead is sat on a green cutting matt, all the colours looked wrong and not true to life when I took the picture.I placed the item on the white kitchen roll and what a difference, the colours are true to reality.Also note to self to clean the dust off the piece, only when I took the pictures and looked at them on the computer screen did I spot the small specs of dust:rolleyes:

The Bulkhead is essentially ready to be fitted to the model, however I must fit the aft sections of deck first.I need the "letterbox" opening I have cut out in the framework to pass these deck pieces through.

Kind Regards

Nigel


View attachment 304685View attachment 304686
Great observation on photography. Color spill from the surrounding area happens all of the time, but our eyes and brain are able to filter it out. However, we can't do that with a photography and our subject ends up taking on the color reflected from the surrounding area. Even in post-production it is difficult to remove the color spill in a believable manner. It is always best to photograph against a neutral color (white, black, grey) to avoid spill. Also of note, is that photographing against white will fill some shadows, while using a black background will deepen some of the shadows.

BTW, your build is absolutely fascinating. Keep up the great work.
 
Last edited:
Marc,less so with these as they are high pressure die cast, think die cast model cars.The likes of the lost wax castings from Mantua etc very much so.I had advised @oldflyer a good while ago to find a vintage Sergal Sovereign of the Seas kit for his project due to the difference in quality and definition of the castings, aside from the fact that they used to be solid brass rather than plated Pot metal that they are now, the difference is night and day as the pictures in his log shows.

The die cast ornaments in this kit and those of their Vasa are superb but the tooling is big expenditure hence the cost cutting elsewhere in both kits with the materials.I do think the paint choices on AL's marketing model do not do these parts or the photoetch justice, hence my approach of using high shrinkage low dry film thickness lacquer based paints on these parts to preserve the detail.

Kind Regards

Nigel
NIgel, just getting back to my closed yard for the last two months - Wow your work is always such a delight to follow. AND to your point re Sergal's vintage SotSeas - here is a comparison from solid bronze to current pot metal bits. (PS: thanks so much for your suggestion way back when.Okay

IMG_5051.jpeg
 
Have you also modified the profile of the cutwater? The build support obscures the view, but what I can see has a nicer line and proportion than the kit prototype.
 
Have you also modified the profile of the cutwater? The build support obscures the view, but what I can see has a nicer line and proportion than the kit prototype.
No Marc,I simply traced around the kit part onto boxwood and recut.It may appear better as the hull is the correct length now?
 
What I’m reacting to is what appears an awkward transition from the roundness, beneath the trailboard, to the vertical of the cutwater; on the prototype, it’s not a smooth reverse-curve, but more of a hard-angle transition. It looks to me that you faired these shapes better than on the prototype.
 
What I’m reacting to is what appears an awkward transition from the roundness, beneath the trailboard, to the vertical of the cutwater; on the prototype, it’s not a smooth reverse-curve, but more of a hard-angle transition. It looks to me that you faired these shapes better than on the prototype.
Still not quite with you. Do you mean the shape of the stem?
 
Back
Top