Alternatively, you could apply a very thin acrylic wash, which wouldn’t affect the undercoat, and it should remain stable over time.
-

Win a Free Custom Engraved Brass Coin!!!
As a way to introduce our brass coins to the community, we will raffle off a free coin during the month of August. Follow link ABOVE for instructions for entering.
-

PRE-ORDER SHIPS IN SCALE TODAY!
The beloved Ships in Scale Magazine is back and charting a new course for 2026!
Discover new skills, new techniques, and new inspirations in every issue.
NOTE THAT OUR FIRST ISSUE WILL BE JAN/FEB 2026
You are using an out of date browser. It may not display this or other websites correctly.
You should upgrade or use an alternative browser.
You should upgrade or use an alternative browser.
Soleil Royal- Re-engineering Artesania Latina's New Kit by NMBROOK
Thanks Marc
I will have a ponder and do a few experiments, I do like the bling factor and would not want to loose the gold's lustre.I do know the gold is very sensitive and is a clear suspension of micro ground anodised aluminium particles.The paint is in effect translucent, heavily reliant on the gloss black undercoat.Even over application of the gold can loose the lustre.
I will have a ponder and do a few experiments, I do like the bling factor and would not want to loose the gold's lustre.I do know the gold is very sensitive and is a clear suspension of micro ground anodised aluminium particles.The paint is in effect translucent, heavily reliant on the gloss black undercoat.Even over application of the gold can loose the lustre.
That’s right - I had forgotten about the gloss black undercoat. Now, I can see why you are cautious about messing with the topcoat.
Hallo Nigel alias @NMBROOKHi All
I was determined not to buy any more kits as I have enough projects and pastimes to keep me going beyond retirement. However this release changed all that, I simply HAD to build it. Not because it is an amazing model straight out of the box but more a case that I realised the potential of the kit.
The kit supplied decoration has far more than a passing resemblance to the late Michel Saunier's model.His build is shown on MSW and Gerard Delecroix's forum.The quality of the castings is far greater than the one's you get in a current Mantua group model.It also includes some very fine photo etch details for bow and stern.
The biggest issue is that whilst the bow and stern are done well, everything in-between needs a redesign if you want a model that follow's French practice of the period. The gunport spacings are wrong, the deck Sheer is wrong and all the decks are enclosed on their ends, these would have most likely been open.
When the marketing video first appeared it stated 1/65, now the box and catalogue state 1/72?? So which is it? Working from the height between decks, this works out at 1/65.You cannot work from the model's length, the design for some reason has been shortened and the model is far too short for either scale.Given that the original is stated as having a length (gun deck) of 160 French feet, this model is at least 100mm too short.
It is my intention to redesign the kit's false keel to make the model the correct length and space out the kit bulkheads to compensate.The last few bulkheads at bow and stern will remain stock spacing as not to interfere with the kit decor.I am hoping that this "stretch" shall maintain the hull profile and just make the transition of curves a little more gradual.
I have already started to draw out the revised side view of the ship and have enough information established to start on the keel.The picture below shows the kit keel dry assembled on top of my work in progress drawing.In the next post I will show the extended version
Kind Regards
Nigel
View attachment 300503View attachment 300505
we wish you all the BEST and a HAPPY BIRTHDAY

Enjoy your special day
Good morning Nigel.
On this special and beautiful day I too wish you all the best and a very Happy Birthday.
On this special and beautiful day I too wish you all the best and a very Happy Birthday.
Last edited:
Best wishes for a Happy Birthday, Nigel! Enjoy your day, Man!
Wonderful! All the best to you for a glorious birthday!
Happy birthday Nigel!!!


Happy Birthday, bro!! Wishing you all the best and many more years to come! 

- Joined
- Oct 23, 2018
- Messages
- 886
- Points
- 403

Herzlichen Glückwunsch or happy birthday, Nigel
Happy Birthday Nigel! Have a great one!
Thanks Guys!
We went out last weekend. Been at work last night
I leave my current employer in ten days and I am having a two week break before I start my new job so saving the jollies for then
We went out last weekend. Been at work last night
I leave my current employer in ten days and I am having a two week break before I start my new job so saving the jollies for then
A happy belated birthday Nigel. Cheers Grant
Thanks Grant
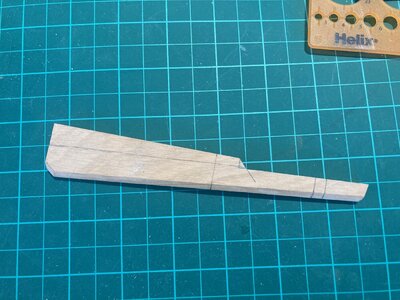
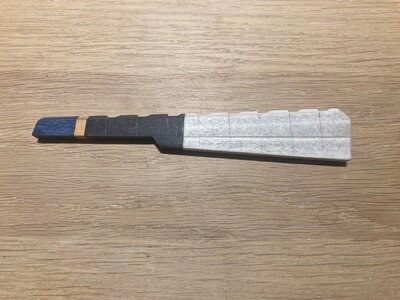
I cut the rudder stock from Boxwood of the same thickness as the keel and then covered it in coloured veneer so the lines follow that of the hull.
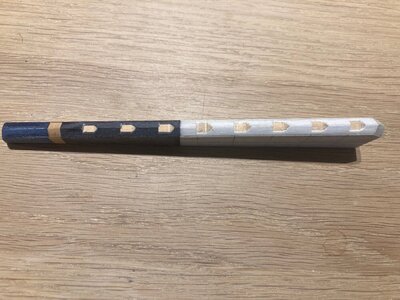
I have milled the reliefs for the hinges, these areas will be painted as they are not only small but they are also very awkward shape to try and veneer.
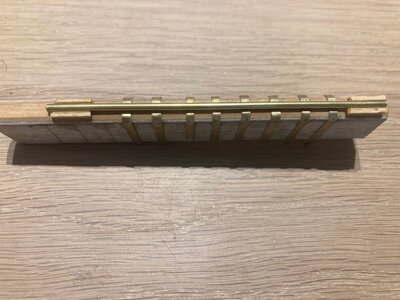
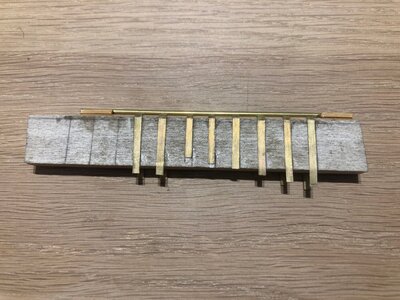
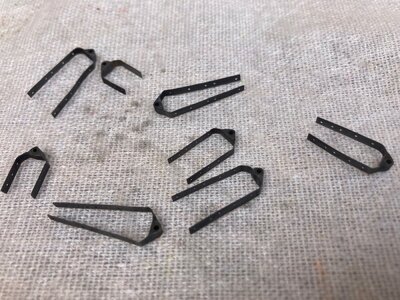
I have started production of the hinges. So far they consist of 0.25mm sheet cut into 2mm wide strips and 2mm brass tube. They are set up in a jig to solder the tube to the jig.The tube will later be sawn through to give me the individual parts.
Kind Regards
Nigel


I would have loved to see you progress farther on your Sovereign of the Seas, since it's been a great guide for my build, but what the heck... Let's see what you can do with this one.
Just found your log and on this last page is some very impressive work. Look forward to reading the log from the start along with keeping up.
You are in for a treat, Will, as this build is wholly unique in its approach and the standard of workmanship is unimpeachable. Apart from the subject, which is near and dear to my heart, the ingenuity and attention to detail are as impressive to me as Dockattner’s Vasa build was.
Thankyou!
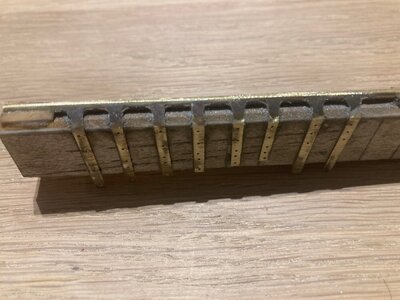
The hinges were soldered together, drilled for the pins, cleaned up and cut to length. These were then chemically blackened.
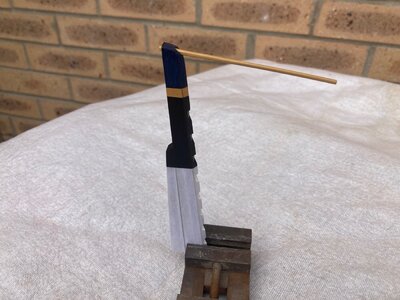
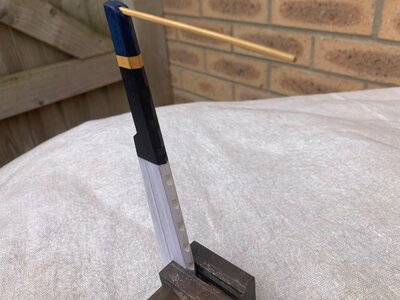
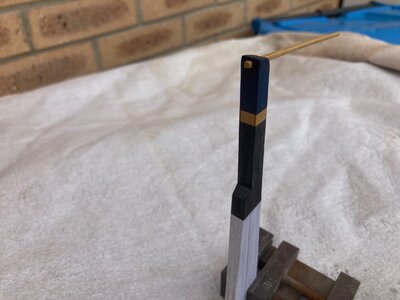
The head of the rudder has been milled and a boxwood tiller arm fitted.The end is drilled to accommodate the iron that takes the whip staff but I may well leave this piece off until the rudder is installed.
The hinge cut outs have been painted and the waterline up has had a coat of Poly which is currently drying.Tomorrow I will mask the white and spray with a mist coat as I did with the hull.
Kind Regards
Nigel


