The level of skill you bring to each task is simply overwhelming! Brilliant modelling Nigel! I wish I would have picked up this hobby when I was younger - all those years trying to master the game of golf...  .
.
-

Win a Free Custom Engraved Brass Coin!!!
As a way to introduce our brass coins to the community, we will raffle off a free coin during the month of August. Follow link ABOVE for instructions for entering.
-

PRE-ORDER SHIPS IN SCALE TODAY!
The beloved Ships in Scale Magazine is back and charting a new course for 2026!
Discover new skills, new techniques, and new inspirations in every issue.
NOTE THAT OUR FIRST ISSUE WILL BE JAN/FEB 2026
You are using an out of date browser. It may not display this or other websites correctly.
You should upgrade or use an alternative browser.
You should upgrade or use an alternative browser.
Soleil Royal- Re-engineering Artesania Latina's New Kit by NMBROOK
Hey, golf was exercise. But now you can sand your arms into shape!The level of skill you bring to each task is simply overwhelming! Brilliant modelling Nigel! I wish I would have picked up this hobby when I was younger - all those years trying to master the game of golf....

Step by Step you'll get there. The attention to detail is very entertaining. Rudder hinge soldering with the wood form how did you keep from burning? Was it resistance soldering used?
Hi WillStep by Step you'll get there. The attention to detail is very entertaining. Rudder hinge soldering with the wood form how did you keep from burning? Was it resistance soldering used?
I soft soldered the hinges, strong enough as they just sit there with no weight. Temperature controlled Iron set at 390 degrees C. In and out before boxwood form has chance to char
Very good result - interesting way, to solder them all together in a row,
but you are showing, that this is the best way to get conformity
but you are showing, that this is the best way to get conformity
Hi UweVery good result - interesting way, to solder them all together in a row,
but you are showing, that this is the best way to get conformity
Yes, not only does it help with consistency, it makes it much easier to hold given that the tubes end up 2mm long.
I have seen this done somewhere else, so can’t claim it was my idea
The level of skill you bring to each task is simply overwhelming! Brilliant modelling Nigel! I wish I would have picked up this hobby when I was younger - all those years trying to master the game of golf....
Thankyou Paul, I would mention I have been doing this most of my life. Had you been doing this as long as I have, I can’t imagine the dizzy heights you would have reached by now.
My late Father was a keen golfer, he tried to get me into it but never got anywhere as it was not a cheap sport to get into as a kid. I had tennis coaching instead.
My dad DID manage to get me into golf and at my best I was pretty good. Not only did it facilitate some wonderful friendships, but the sport allowed me to travel the world as a player (not a professional - but there are all sorts of invitationals and tournaments for accomplished amateurs). I love links style golf in the UK and Ireland and have played all the major Open Championship venues along with about 50 other courses on that side of the pond. Injuries and age caught up with me. Now I drill tiny holes for tiny sticks of wood on tiny ships...and I've never been happier! Sorry for the diversion on your build report...Thankyou Paul, I would mention I have been doing this most of my life. Had you been doing this as long as I have, I can’t imagine the dizzy heights you would have reached by now.
My late Father was a keen golfer, he tried to get me into it but never got anywhere as it was not a cheap sport to get into as a kid. I had tennis coaching instead.
- Joined
- Jan 19, 2021
- Messages
- 37
- Points
- 48

You guys building these beautiful Wooden ships amaze me with your wonderful talent, ive built balsa planes in the past, but the way you guys get the planking on these ships just as an example is amazing. I believe its done by soaking the blanks to make them pliable is that correct? Something i always wanted to build but iam hesitant incase i make a total mess of it.I used a pair of the kit scrolls to make a master. The one with the tip missing was built up with Mr Hobby putty. A silicon mould was taken from these enabling me to cast 8 new scrolls (4 pairs) out of Polyurethane casting resin. Apology for the picture, the camera did not want to focus very well.All the detail is there, just hard to see as they are white.
I have also epoxied the kit castings in place. I toned down the Ultramaine blue and it looks a lot better in reality than it does in the pictures, it is nowhere near as bright in reality. I may paint over the blue with the same wood varnish once the paint has been left for a few days, these should blend further as the varnish has a brown tint.This will also remove the shine from the exposed Epoxy glue
Kind Regards
Nigel
View attachment 389307View attachment 389308View attachment 389309View attachment 389310
- Joined
- Aug 30, 2020
- Messages
- 676
- Points
- 353

Wow, I would say more than pretty good, much like your modelling Paul.My dad DID manage to get me into golf and at my best I was pretty good. Not only did it facilitate some wonderful friendships, but the sport allowed me to travel the world as a player (not a professional - but there are all sorts of invitationals and tournaments for accomplished amateurs). I love links style golf in the UK and Ireland and have played all the major Open Championship venues along with about 50 other courses on that side of the pond. Injuries and age caught up with me. Now I drill tiny holes for tiny sticks of wood on tiny ships...and I've never been happier! Sorry for the diversion on your build report...
You guys building these beautiful Wooden ships amaze me with your wonderful talent, ive built balsa planes in the past, but the way you guys get the planking on these ships just as an example is amazing. I believe its done by soaking the blanks to make them pliable is that correct? Something i always wanted to build but iam hesitant incase i make a total mess of it.
Hi Bren
Thankyou, the initial planking is bent with heat and water on this model.I soaked the planks then created the curves using a plank bending iron.More stubborn planks and tighter bends necessitates repeating both operations.
The final layers on this model are Veneer sheet, 0.7mm thick. These easily follow the curves without any soaking or heating but have had to be shaped from sheet to get the curves at the bow.
I completed all the rudder hardware and installed it on the rudder, everything relies solely on Dry dock models and parts tiny nails. These have no point so holes are drilled and they are carefully bonded in with medium CA.
The assembly was the carefully slid onto/into the model and all the remaining holes drilled and pins fitted.
The last two pictures show how tight the Tiller arm is in the transom hole and how close it comes to the underside of the deck beams.
My aim with this job was to get the rudder as tight as is possible to the stern post and also that the design has the capability to work which was not easy given how tight everything is with the cabin above.The Rudder does turn freely in both directions for the full arc
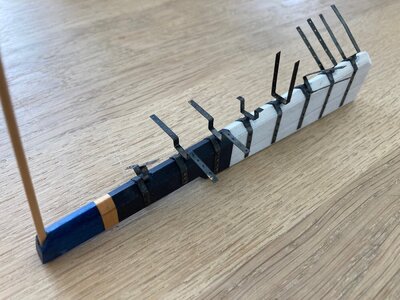
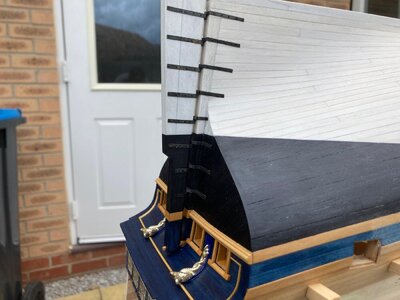
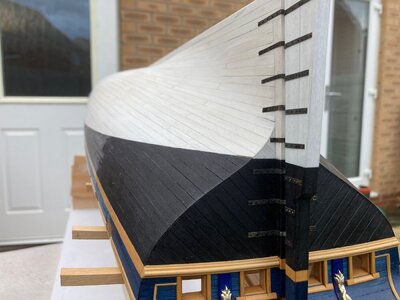
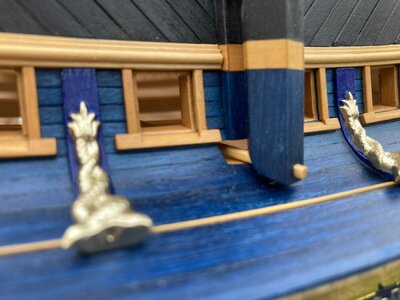
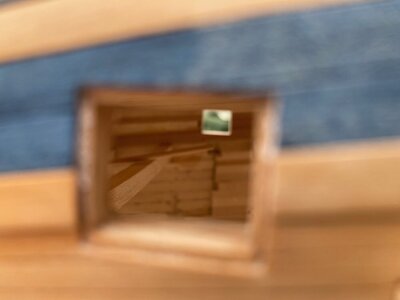


Everything fitts very good - very good work.
One question: will you keep the hinches black, or will you also whiten them in the area of the white stuff, means lower than the waterline?
One question: will you keep the hinches black, or will you also whiten them in the area of the white stuff, means lower than the waterline?
- Joined
- Jan 19, 2021
- Messages
- 37
- Points
- 48

Thank you so much for the information truly amazing model buildingHi Bren
Thankyou, the initial planking is bent with heat and water on this model.I soaked the planks then created the curves using a plank bending iron.More stubborn planks and tighter bends necessitates repeating both operations.
The final layers on this model are Veneer sheet, 0.7mm thick. These easily follow the curves without any soaking or heating but have had to be shaped from sheet to get the curves at the bow.
Thanks UweEverything fitts very good - very good work.
One question: will you keep the hinches black, or will you also whiten them in the area of the white stuff, means lower than the waterline?
That is a very good question and one I am unsure as to the answer
Before I fitted the assembly I was certain I was going to go over them with a thin coat of white, now I am not sure. There is a “ raw forged” looked to them which would be lost under paint.
I will carry on with other jobs while I decide
Great work on the rudder Nigel. Really tight to the stern post and all different colours beautiful in line. A job well done.I completed all the rudder hardware and installed it on the rudder, everything relies solely on Dry dock models and parts tiny nails. These have no point so holes are drilled and they are carefully bonded in with medium CA.
The assembly was the carefully slid onto/into the model and all the remaining holes drilled and pins fitted.
The last two pictures show how tight the Tiller arm is in the transom hole and how close it comes to the underside of the deck beams.
My aim with this job was to get the rudder as tight as is possible to the stern post and also that the design has the capability to work which was not easy given how tight everything is with the cabin above.The Rudder does turn freely in both directions for the full arc
View attachment 390563View attachment 390564View attachment 390565View attachment 390566View attachment 390567
Splendid!
What Marc said...Splendid!
Thanks Guys
Ok,a little? side project, Lanterns and lots of em. Going to have to be careful I don't create a cottage industry here
First pic shows the prototype I made a while back all I need to do is take the design and MASS produce.
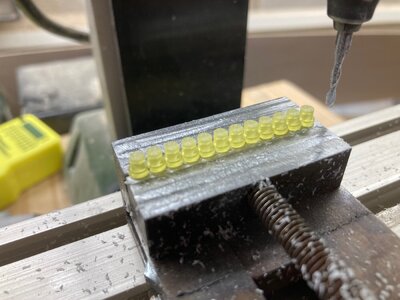
Next pic, reducing the height of the LEDs and squaring the end for the plasticard base. Note gang milling of 12 LEDs at once, Henry Ford would have been proud
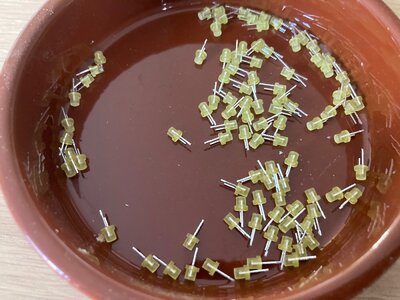
Last pic, 96 LEDs all squared to length, total time 60 mins (including trimming legs)
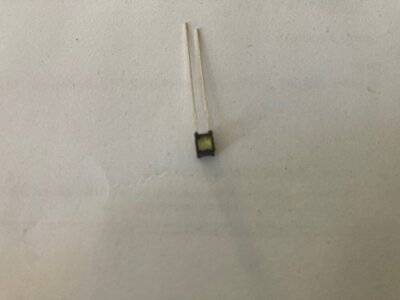
Ok,a little? side project, Lanterns and lots of em. Going to have to be careful I don't create a cottage industry here

First pic shows the prototype I made a while back all I need to do is take the design and MASS produce.
Next pic, reducing the height of the LEDs and squaring the end for the plasticard base. Note gang milling of 12 LEDs at once, Henry Ford would have been proud
Last pic, 96 LEDs all squared to length, total time 60 mins


Hi Nigel, wonderfull work as allways.
96 LED s are you eliminating your interior lighting?
96 LED s are you eliminating your interior lighting?


