-

Win a Free Custom Engraved Brass Coin!!!
As a way to introduce our brass coins to the community, we will raffle off a free coin during the month of August. Follow link ABOVE for instructions for entering.
-

PRE-ORDER SHIPS IN SCALE TODAY!
The beloved Ships in Scale Magazine is back and charting a new course for 2026!
Discover new skills, new techniques, and new inspirations in every issue.
NOTE THAT OUR FIRST ISSUE WILL BE JAN/FEB 2026
You are using an out of date browser. It may not display this or other websites correctly.
You should upgrade or use an alternative browser.
You should upgrade or use an alternative browser.
Soleil Royal- Re-engineering Artesania Latina's New Kit by NMBROOK
Witaj
Soleil wygląda pięknie ,rewelacyjna praca. Pozdrawiam Mirek
Many Thanks Mirek
Kind Regards
Nigel
I really like the window plate. I also think it is a solid upgrade to remake those chase port casings. The castings aren’t bad, but what you are doing will have correct scale.
Last edited:
I really like the window plate. I also think it is a solid upgrade to remake those window casings. The castings aren’t bad, but what you are doing will have correct scale.
Yes Mark the castings are ok but one was deformed, I gently tried to tweak it and guess what? SNAP. The Scrolls are all missing their top point all in one side also. A simple job to add this when I make the mould for resin casting these.
The etched windows are very nice from the box only tweak is panelling below the windows in veneer. This is why this area is bare brass at the moment.This will take away the flatness.
As a side note, I used slaters 1mm clear styrene for the glazing.I found this provided the best optical clarity of all clear mediums short of using real glass. Important as the cabins will be fitted out and illuminated.Expensive though at £8 for an A4 size sheet!
Paul, if he whitewashes the bottom to whiten it, it should be done with the thinnest of washes. You really want some of that grain to be visible to show off all that hard work. Plus, the white lead coating being a bit worn looks realistic for a ship that has seen some use. On my hull, I had to wash some gray over the bright white to bring back some of that grain detail as well as the plank lines, which was a fix.I understand what you are saying, but there is a craftsmanship to what you have accomplished with the veneers that is rare and admirable. Plus, does what you have identified as a joinery issue really go away with painting? How about just a white 'wash' to make the lower hull more uniform in color thus preserving the visual integrity of this magnificent planking?
No need to respond - this is like the guy who works in Shakespeare's garden telling him how to craft a sentence...
- Joined
- Aug 30, 2020
- Messages
- 676
- Points
- 353

Oh this is so good, extraordinary workmanship to a level I can only dream of.Thanks Kurt
Up early this morning, so thought I would get a head start on the stern counter.
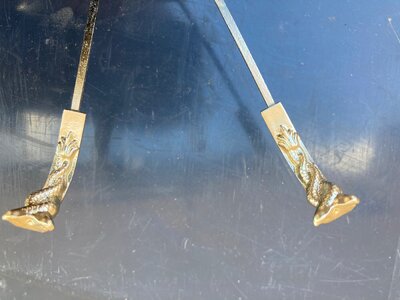
Pictures show the model as is with the counter contoured to reduce the thickness to suit the balcony casting. I planked this area with the blue veneer. One picture shows the Berain artwork and the supplied castings. My plan is to represent the frame design in boxwood and recast the small scrolls in resin which will be painted gold. The snake castings are more than likely going to be remade in modelling clay, a first for me
Kind Regards
Nigel
View attachment 388495View attachment 388496View attachment 388497View attachment 388498View attachment 388499
Thankyou RitchieOh this is so good, extraordinary workmanship to a level I can only dream of.
Kind Regards
Nigel
My supplies have landed to remake the decor for the stern counter. These consist of two part silicon rubber for mould making, two part casting resin and I chose to try FIMO modelling clay.
I looked at epoxy modelling putty but all have a two hour open time, too short for me so opted for FIMO clay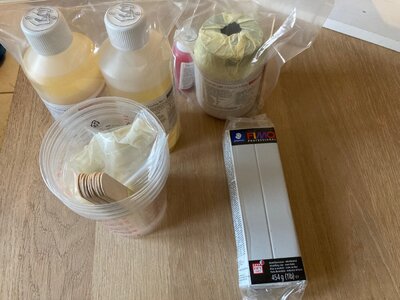
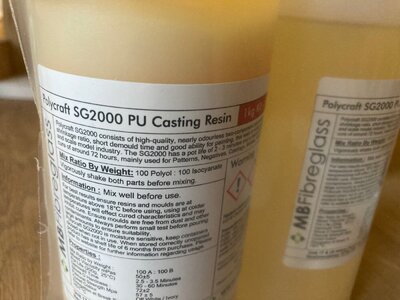
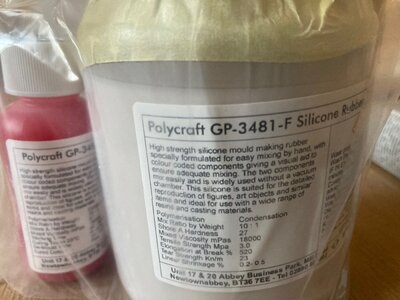
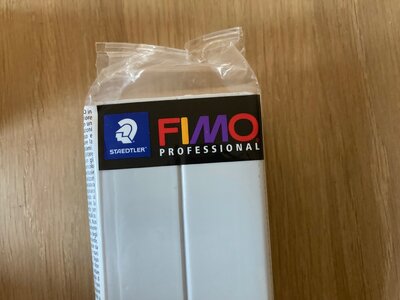 . This cures by baking in an oven at 110 degrees C for 30 mins. This should,I hope give me plenty of time to fashion the two sculptures that sit between each pair of stern chasers.
Kind Regards
Nigel
I looked at epoxy modelling putty but all have a two hour open time, too short for me so opted for FIMO clay


 . This cures by baking in an oven at 110 degrees C for 30 mins. This should,I hope give me plenty of time to fashion the two sculptures that sit between each pair of stern chasers.
Kind Regards
Nigel
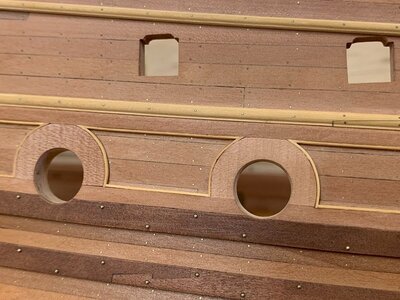
I have added a second layer of blue planking around the sides and rear edge to follow the Berain panelled detail coupled with a chamfered boxwood edging strip. I have now applied matt varnish to this area although there is quite a sheen which does take overnight drying to disappear.
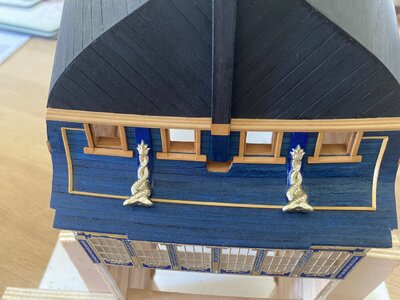
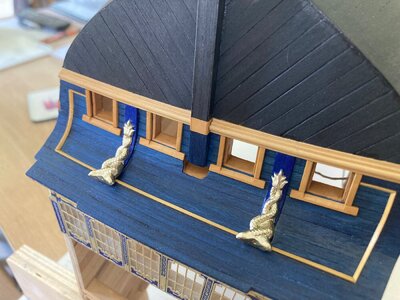
Discussing the carvings with Marc (Hubac's Historian) I have decided to run with the kit parts which seem to be an amalgam of Berain and Tanneron. These have been sprayed gold and the backing board will be painted Ultramarine blue tomorrow, prior to fitting to the model.
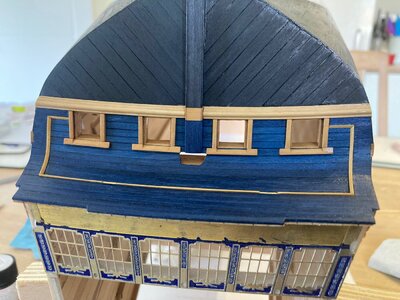
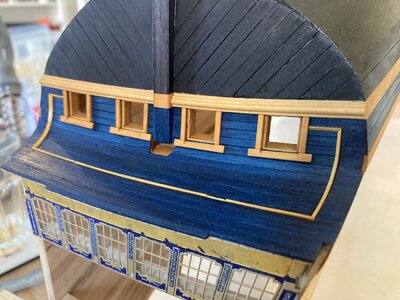
Discussing the carvings with Marc (Hubac's Historian) I have decided to run with the kit parts which seem to be an amalgam of Berain and Tanneron. These have been sprayed gold and the backing board will be painted Ultramarine blue tomorrow, prior to fitting to the model.


OMG! What an improvement both in detail and in color!!I have added a second layer of blue planking around the sides and rear edge to follow the Berain panelled detail coupled with a chamfered boxwood edging strip. I have now applied matt varnish to this area although there is quite a sheen which does take overnight drying to disappear.
Discussing the carvings with Marc (Hubac's Historian) I have decided to run with the kit parts which seem to be an amalgam of Berain and Tanneron. These have been sprayed gold and the backing board will be painted Ultramarine blue tomorrow, prior to fitting to the model.
View attachment 389153View attachment 389154View attachment 389155
Mouldings are exquisite!
Thanks Guys !
Marc, yes, this was planned from the very start, part of the reason for the multi layers of veneer on the upper hull planking .
.
This will allow for two layers of Blue Veneer to create the ledge for the trim This is a small, but prevalent feature I wanted to include to distance my build even further from the standard kit
Kind Regards
Nigel
Marc, yes, this was planned from the very start, part of the reason for the multi layers of veneer on the upper hull planking
This will allow for two layers of Blue Veneer to create the ledge for the trim
Kind Regards
Nigel
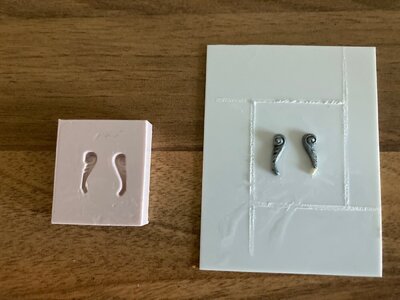
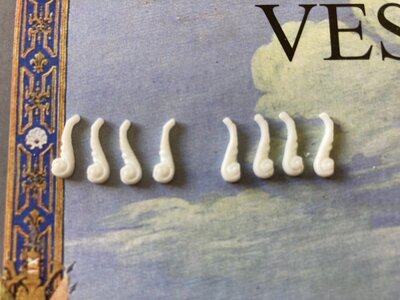
I used a pair of the kit scrolls to make a master. The one with the tip missing was built up with Mr Hobby putty. A silicon mould was taken from these enabling me to cast 8 new scrolls (4 pairs) out of Polyurethane casting resin. Apology for the picture, the camera did not want to focus very well.All the detail is there, just hard to see as they are white.
I have also epoxied the kit castings in place. I toned down the Ultramaine blue and it looks a lot better in reality than it does in the pictures, it is nowhere near as bright in reality. I may paint over the blue with the same wood varnish once the paint has been left for a few days, these should blend further as the varnish has a brown tint.This will also remove the shine from the exposed Epoxy glue
Kind Regards
Nigel


I wonder if that tinted varnish might also highlight the fine detail on the gilt carvings without diminishing the golden luster too much.
Also, I can’t remember whether you discussed this, but I see that you have modeled the round-up of the stern into the lower transom. This is a detail that is so often ignored by kit manufacturers, in favor of a flat transom. Did AL actually include this detail, or did you add it?
There is a radius in the corner above the chasers but I have tweaked the profile so it flares right out to meet the lower edge of the Balcony.The face of the Transom is flat side to side, what you can see in the pictures is the camber of the Boxwood trim and ports, obviously this matches the deck inside.
The fancy two stage Gold comes with a caveat, I cannot overcoat with anything according to the instructions.I agree a wash would add detail but not sure what effect it would have on the longevity of the gold.
The fancy two stage Gold comes with a caveat, I cannot overcoat with anything according to the instructions.I agree a wash would add detail but not sure what effect it would have on the longevity of the gold.
Is the gold lacquer-based?
Yes apparently similar product to Alclad
It might be worth an experiment on the chase port surrounds that you won’t be using, although it’s impossible to say what the effect of time will be on the varnish, over the long haul.


